The Not-So-Quick Strut
After sealing up my recently purchased 182,000-mile 2008 Nissan Armada’s exhaust, dealing with a noisy serpentine belt tensioner pulley, squelching power steering leaks, and replacing a leaking radiator, it was time to deal with the banging in the front end and the ox-cart-like ride, both of which were likely caused by worn-out front struts.
First, a quick class in Suspension 101. Basically, a shock absorber is a simple, easily-replaceable damper held in place by a long bolt that goes through a hole at the bottom. The top can be secured by the same kind of eye-bolt or with a threaded stud that protrudes through a shock tower. The main thing to note is that shocks don’t hold up the weight of the car—there’s always a separate spring nearby that does that.
In contrast, a strut assembly is a suspension component that has a spring with a damper going through the center of it, together which bear the weight of the vehicle. A MacPherson strut is a particular type of strut assembly that’s also part of the steering (turning the steering wheel causes the front struts to rotate, and the wheels are mounted to the bottom of the struts). The MacPherson design is more complicated because the front hubs, wheel bearings, rotors, calipers, steering knuckles, and ball joints are all attached to the strut.
The MacPherson struts in my vintage BMWs have a housing that lasts the life of the car and use an integrated stub axle on the bottom, and when you buy “front struts,” you’re buying cartridges that slide into the housings. On later cars, however, the MacPherson strut housings and cartridges are a single unit to which the other components attach.
Struts always have a spring perch to hold the bottom of the spring. During assembly, the spring is placed in the perch, then a variety of rubber bushings, bump-stops, and metal sleeves and spacers slide over the that extends from the strut cartridge. The very tip of the piston is threaded, and some sort of upper-perch “hat” is slid over it and held in place with a nut. On a MacPherson strut, because the whole assembly needs to rotate for steering, the “hat” has a bearing in it, but in a non-MacPherson strut, it’s just a fixed upper perch. With either design, the problem is that during assembly, a spring compressor is needed to compress the spring while the hat is slid over the threaded tip of the piston and the nut is tightened.
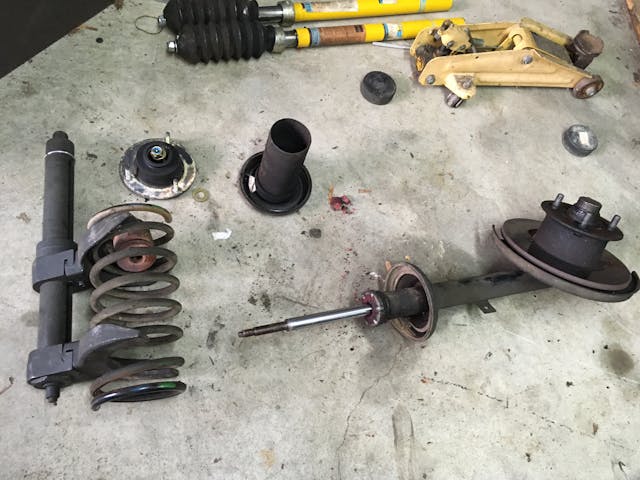
The Armada doesn’t have MacPhersons—it has a double-wishbone front suspension, so the front strut assemblies are each held in by three 14mm nuts at the top and one beefy bolt and nut at the bottom. But still, to replace the struts, the whole assembly needs to be removed on both sides, then the springs have to be compressed to remove the tension on the hats, and then the springs, metal spacers and sleeves, and the rubber bushings have to be removed and and transferred onto the new struts.
Because of the supposed difficulty of compressing springs, and the ubiquitous urban legends about people who have had terrible accidents with springs or hats being launched into their face, many DIY mechanics and even some purported pros are afraid to do it. It’s really not a big deal unless you’re an idiot and try to do it using hose clamps. Just buy or rent a spring compressor.
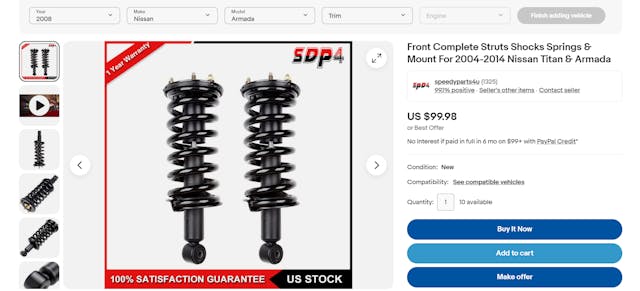
But it’s for these reasons that “quick-struts”—pre-assembled units combining the strut, spring, hat, and all spacers, sleeves, and bushings—have become popular. The appeal is that you remove the old ones, throw them in the recycle bin, and install the new ones without ever having to deal with a spring compressor. A search on eBay shows that a pair of unbranded quick-struts for the Armada can be had for about a hundred bucks shipped. Man, that’s cheap.
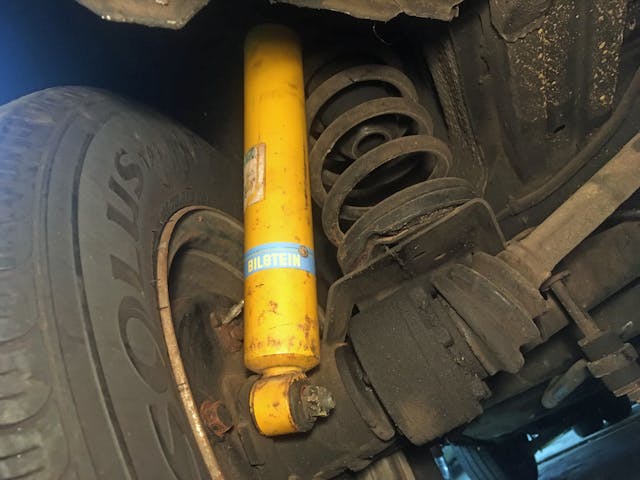
One of the interesting things about becoming interested in a new vehicle is that you get to check out a new user forum and see if it, like the car, fits you. I live mainly in forums for vintage BMWs, but also interact quite a bit with the Lotus Europa and Winnebago Rialta forums, all of which are made of my sort of people—kind, patient, and thrifty but not to the point where the go-to position is installing the cheapest-possible parts in the car. So it was interesting to read that the hive-mind opinion on ClubArmada was not to cheap out and buy quick-struts but instead to purchase a proper set of Bilsteins. The Armada has a common problem with bump-steer, and the Bilsteins reportedly solve it. Inexpensive quick-struts reportedly don’t, and you get what you pay for in terms of performance and longevity. I did find some branded quick-struts on eBay and RockAuto—Monroe, Gabriel, and KYB—but several folks on ClubArmada said that after they installed the KYBs, their Armada was several inches higher in the front and looked like a boat on plane.
Now, I’m firmly in the “real men compress their own springs” camp. I own three different spring compressors, I don’t regard it as in the least unsafe, it’s not a back-breaker, the time it takes to swap the springs over onto the new struts isn’t a big deal, and there was a ringing endorsement of Bilsteins (which I use on all my BMWs when it’s suspension-refresh time) from ClubArmada. Comparing that with the low opinion of low-cost unbranded parts in general and the lack of any consensus opinion vis a vis “buy these quick-struts” on the Armada forum made it an easy choice to buy the Bilsteins.
The next choice was between Bilstein 4600s with a fixed lower perch or the more-expensive adjustable 5100s meant for lifted applications. I had zero interest in lifting the Armada, but I found a set of open-box 5100s on Amazon for a great price, even less than the 4600s. I confirmed with the Armada forum that the lowest setting on the 5100s puts the truck at the same height as the 4600s, and ordered them. I also ordered new upper hats and all the rubber bushings, sleeves, and spacers, as the odds of them being reusable in a 183K New England vehicle were slim. All-in, it was about $300, which felt great.
With parts on the way, I positioned the truck in the garage to begin removing the strut assemblies. As I explained in the article on the exhaust work, there’s no way to fit the Armada completely in the garage and jack up the nose without kicking out not one but two cars. I checked the forecast, found a stretch of several days of 40°+ degree snow-free weather, and pulled the Armada inside and canted to the left so I had clearance against the right-hand garage wall.

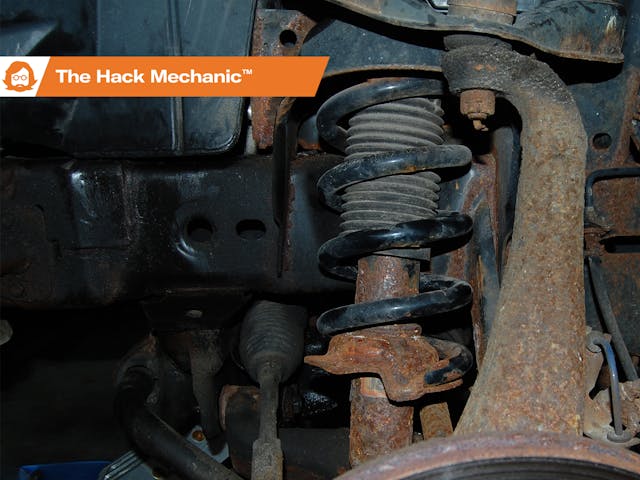
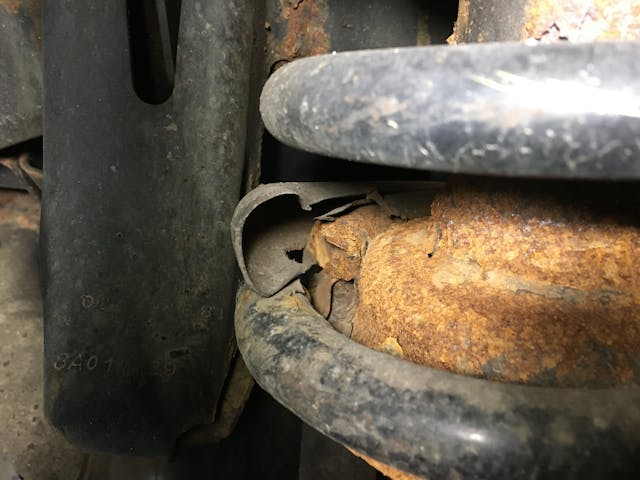
I jacked up the truck, set it on stands, pulled the left front wheel, began eyeballing the scene, and noticed something that stopped me cold.
The spring was broken and the bottom coil was missing.

I reflexively moved to the right side of the truck to check the other spring. It was broken, too. The banging I was hearing wasn’t due to blown struts. It was from the two broken springs. A simple look would’ve told me that before I ordered parts. Idiot! Idiot! Idiot!
The strut assemblies needed to come out regardless, but I was faced with an immediate choice of whether to buy a pair of springs, or return what I’d bought and go the quick-strut route, which was suddenly had some appeal. Had there been a well-reviewed option on the Armada forum, I probably would’ve done it. However, I found a set of Moog springs on Amazon for $88 for the pair, confirmed on ClubArmada that they’re OEM-equivalent and not lifting springs, and put them on order for next-day delivery.
So, on with the repair itself. The non-MacPherson strut configuration with the big nut and bolt at the bottom and the three 14mm nuts at the top made removal look trivial, but I immediately ran into trouble, as one of the top nuts on each side was seized, and despite soaking them in SiliKroil penetrating oil overnight, putting an impact wrench on them rounded off the corners.
In my first book, I have a chapter on “stuckness,” in which I describe a variety of techniques including heating the nut with a MAPP gas torch and applying wax to the threads, really heating the nut with an oxy-acetylene torch, hammering a smaller-sized hex or Torx socket onto the nut, and cutting off or drilling out bolts. But over and above that, over the years I’ve developed a philosophy where I look at fasteners, think “How deep will the doo-doo be if I snap this off or round its head,” and then act accordingly, and didn’t do that here, as I’d never had anything remotely like this happen to a nut that size on a strut stud. After several oxy-acetylene torchings, the nut on one side came off by hammering a smaller socket onto it, and for the other side, I had to use the trick of carefully positioning a chisel on its circumference and smacking it with a hammer to apply a tangential impact force.

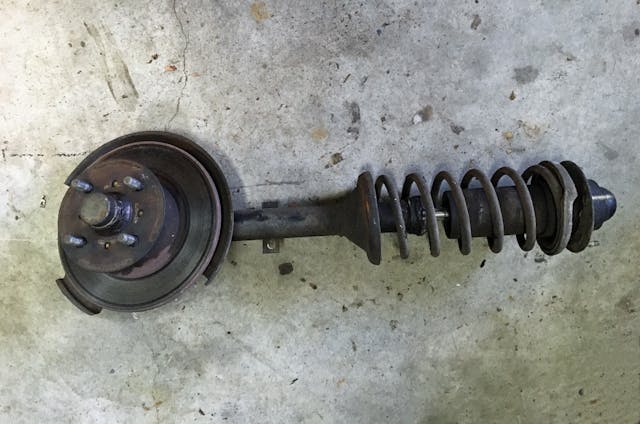
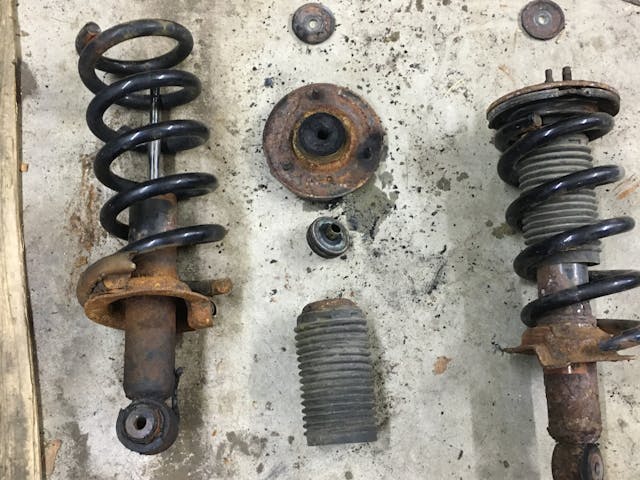
Although I was basically assembling my own not-so-quick struts and didn’t need anything off the old ones, I was curious if the old struts actually were bad, so I disassembled them to check. Because both springs were broken, there was no tension on the hats, so I didn’t need to use a compressor; I could just put the impact wrench on the strut top nut and spin it off. One strut was fine, but the other one was completely blown.
Assembly of the new struts with all-new parts was very satisfying. There were numerous reports on the Armada forum of front-end banging after installation of new Bilsteins due to people misunderstanding the assembly instructions, so I triple-checked the location of all the bushings, sleeves, and washers, and made absolutely certain that I had the adjustable spring perches at their lowest setting.

Installation was a bit challenging. Though there were no stuck fasteners to deal with, the combination of the new stiff springs and the new stiff struts made the strut assemblies difficult to get into position. Even unbolting the sway bar and having one of my kids stand on the lower wishbone, things didn’t want to line up. It took some persuasion with a big lever and smacking the lower bolts with a hammer to get them in place.

With everything buttoned up, I took the Armada for a short drive on a nearby torture-track back road that I use to diagnose rattles, thunks, and clunks. The front-end noise was gone, the truck was blissfully quiet, and it rode and steered great. But when I got back home, parked the truck, and looked at it, there was no ignoring the fact that the space above the front tires was abnormally large, and the nose was high.

I checked the photos I took before the repair, and it definitely wasn’t my imagination.

Now, there’s likely a few things going on. The Armada did have two broken front springs, so it definitely was sitting lower on the nose than it should’ve. Gas-pressurized shocks and struts like Bilsteins do exert an upward force on the body of a vehicle and can make it sit slightly higher than when it’s on fluid-filled shocks and struts. I’m hopeful that it’ll settle down a bit with time and mileage. Of course, the opinion on the Armada forum about both the zero setting of the Bilstein 5100s and the Moog springs being equivalent to stock could simply be wrong. And had I gone with quick-struts, I would’ve likely selected the KYBs, and as folks reported those raised the front, it might have been even worse.
Another possibility involves the truck’s rear suspension. When I was looking at Armadas, friends on social media who do a lot more towing than I do advised me to try to find one with the tow package, as it has a shorter-geared differential, a transmission tow-mode setting, and a pneumatic suspension with air-pressurized shocks that self-levels the rear to deal with the weight of a trailer sitting on the hitch. The one I bought has all that, so imagine my surprise when, now that I own it, I find that most of the talk on the Armada forum about the self-leveling rear suspension is in regards to removing it. I guess that shouldn’t surprise me, as my BMW E39 528i sport wagon had the same dynamic. When I start up the truck, I hear the compressor running to pressurize the rear shocks, but it’s unclear to me whether it’s actually doing anything, so the shocks might be bad or a line might be leaking. I’m going to live with it for a while, then trouble-shoot it to see if anything is wrong. If it’s working, I believe you can adjust the sensor to raise the back a bit.
So we’re now close to the Armada exiting the sort-out phase of our relationship and entering the “let’s do stuff” phase. We’ll see how it goes.
***
Check out the Hagerty Media homepage so you don’t miss a single story, or better yet, bookmark it. To get our best stories delivered right to your inbox, subscribe to our newsletters.

That’s a lot of miles kinda surprised you’re putting the effort into it especially with all your other vehicles I have a Grand Caravan daily driver that needs just about everything but I can’t kill that 3.6 it’s just about to hit 170
I too would suggest a nut splitter when you have that much working room. If that fails (splitting flanged nuts isn’t as straightforward), cutting a side or two off with a cutoff wheel guarantees removal….Finally, break down and splurge on an induction heater. Your gas torches will become obsolete novelties that day.
Rob, I think you made out price wise compared to my daughter’s 09 Tahoe rear shocks and compressor (RPO Z55). The Rockauto price was just over $1000 for Genuine GM shocks and Arnott air compressor. Both shock boots were split and bump stops shredded. She’s happy with a much smoother ride!
Ouch!
Funny that I said almost the exact same thing to myself as I scrolled down the picture of the new struts on the floor before I saw the caption – “Man, aren’t they purty?!”
Put Bilstein shocks on a 1st gen Durango and they improved the ride and handling substantially. Glad I spent the money. On my sister’s ’04 Grand Cherokee (now my daughter’s vehicle), I talked her into KYB Monomax shocks when replacement was needed at all four corners. They’re stiff, but not uncomfortably so. My daughter doesn’t comment about it, as she likely doesn’t know any difference.
When my other sister’s ’03 CR-V needed new front struts, I also avoided quick struts due to many stories on the forum of (1) spring rate mispairing front/rear with oddball ride heights and changes in oversteer/understeer, and (2) low quality top hat bearings that are either noisy or fail quickly. Replaced bearings, bushings and bumpers, but pieced together quality parts.
Thanks for the story Rob. I don’t envy you fellows who live in the rust belt. Even “simple” repairs can be big adventures. I hope the Armada settles to a proper ride height. Headlight aiming may be next on your to-do list…
I had the same broken spring syndrome on the Saturn Ion I bought for my grandson. Both rear springs were fractured about one full coil from the bottom. On one side the broken end had sliced through the ABS sensor wiring which was the reason I was digging in there in the first place. So we had ABS diag code warning of a broken spring.
“Penny wise, Dollar foolish” You should have bought the Toyota. Nissan makes crap! Sorry, but it is true.