The easy repair that got hard: Fixing broken wires inside a harness
Although I have a demonstrated track record of undertaking and completing lengthy challenging projects—swapping the drivetrain and installing fuel injection in the 3.0CSi, retrofitting air conditioning into multiple cars, taking six years to rebuild the engine in the Lotus Europa—I have a particular fondness for simple “quick hit and run” repairs.
I’ve long said that in a world of intractable problems, few things are as satisfying as diagnosing a problem in a car, then fixing it. Clear beginning, clear metric for success, clear end—it really doesn’t get better than that. Routine maintenance like changing the oil doesn’t really qualify for this merit badge of satisfaction, but doing something like replacing the windshield washer pump—taking something that was driving you nuts because it wasn’t working and make it work—certainly does. Sometimes, the more trivial the thing you fix and the less time it takes to do it, the more you enjoy the end product, as that maximizes the effort-to-reward ratio.
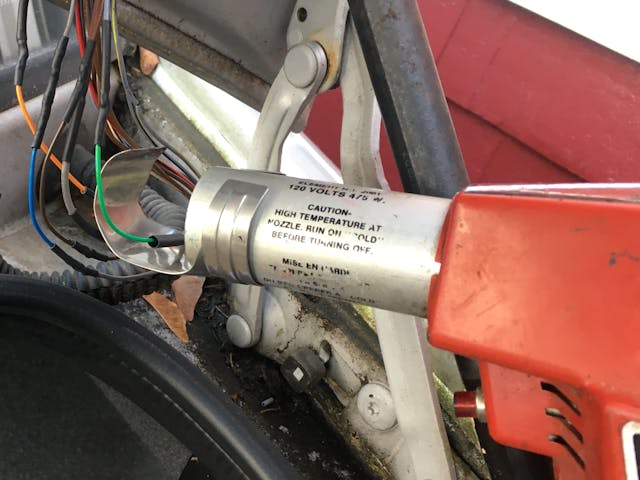
So, with that in mind, I’d been saving an easy repair for the right moment. For the entirety of the nearly eight years I’ve owned my daily-driver 2003 BMW E39 530i stick sport, the trunk lock actuator hasn’t worked. This meant that in order to open the truck, I had to use the key; I could use neither the pop-the-trunk button above my left knee, nor trip the microswitch behind the soft rubber panel on the trunk lid itself. The trunk release on the key? Fugetaboudit. I was reminded of this every time I needed to pick up or drop off someone at the airport—I had to shut the car off, pull the keys out of the ignition, get out of the car, and walk around to the trunk to unlock it so they could get their luggage out. Actually, I was reminded of it every time I started the car, as the failure generated an incorrect “truck open” message on my dashboard.
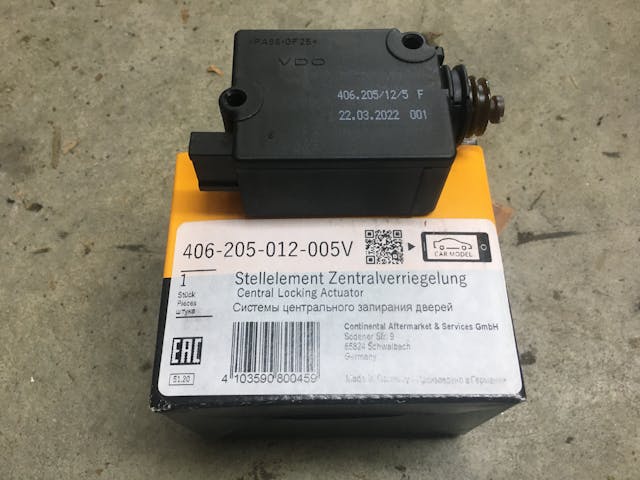
I’ve replaced several door and trunk lock actuators over the years. The ones for the trunk are generally easier, as you don’t need to remove a door panel. Pop off an electrical connector, remove a few screws, disconnect a rod, installation is the reverse of disassembly, yadda, yadda, yadda … maybe 10 minutes, done. And the part is usually reasonably priced—for the E39, an OEM actuator costs $42, with no-brand aftermarket parts under $20. With the calendar rapidly ticking off the fall days, I decided to reward myself by eating this bit of candy. I ordered the $42 VDO actuator.
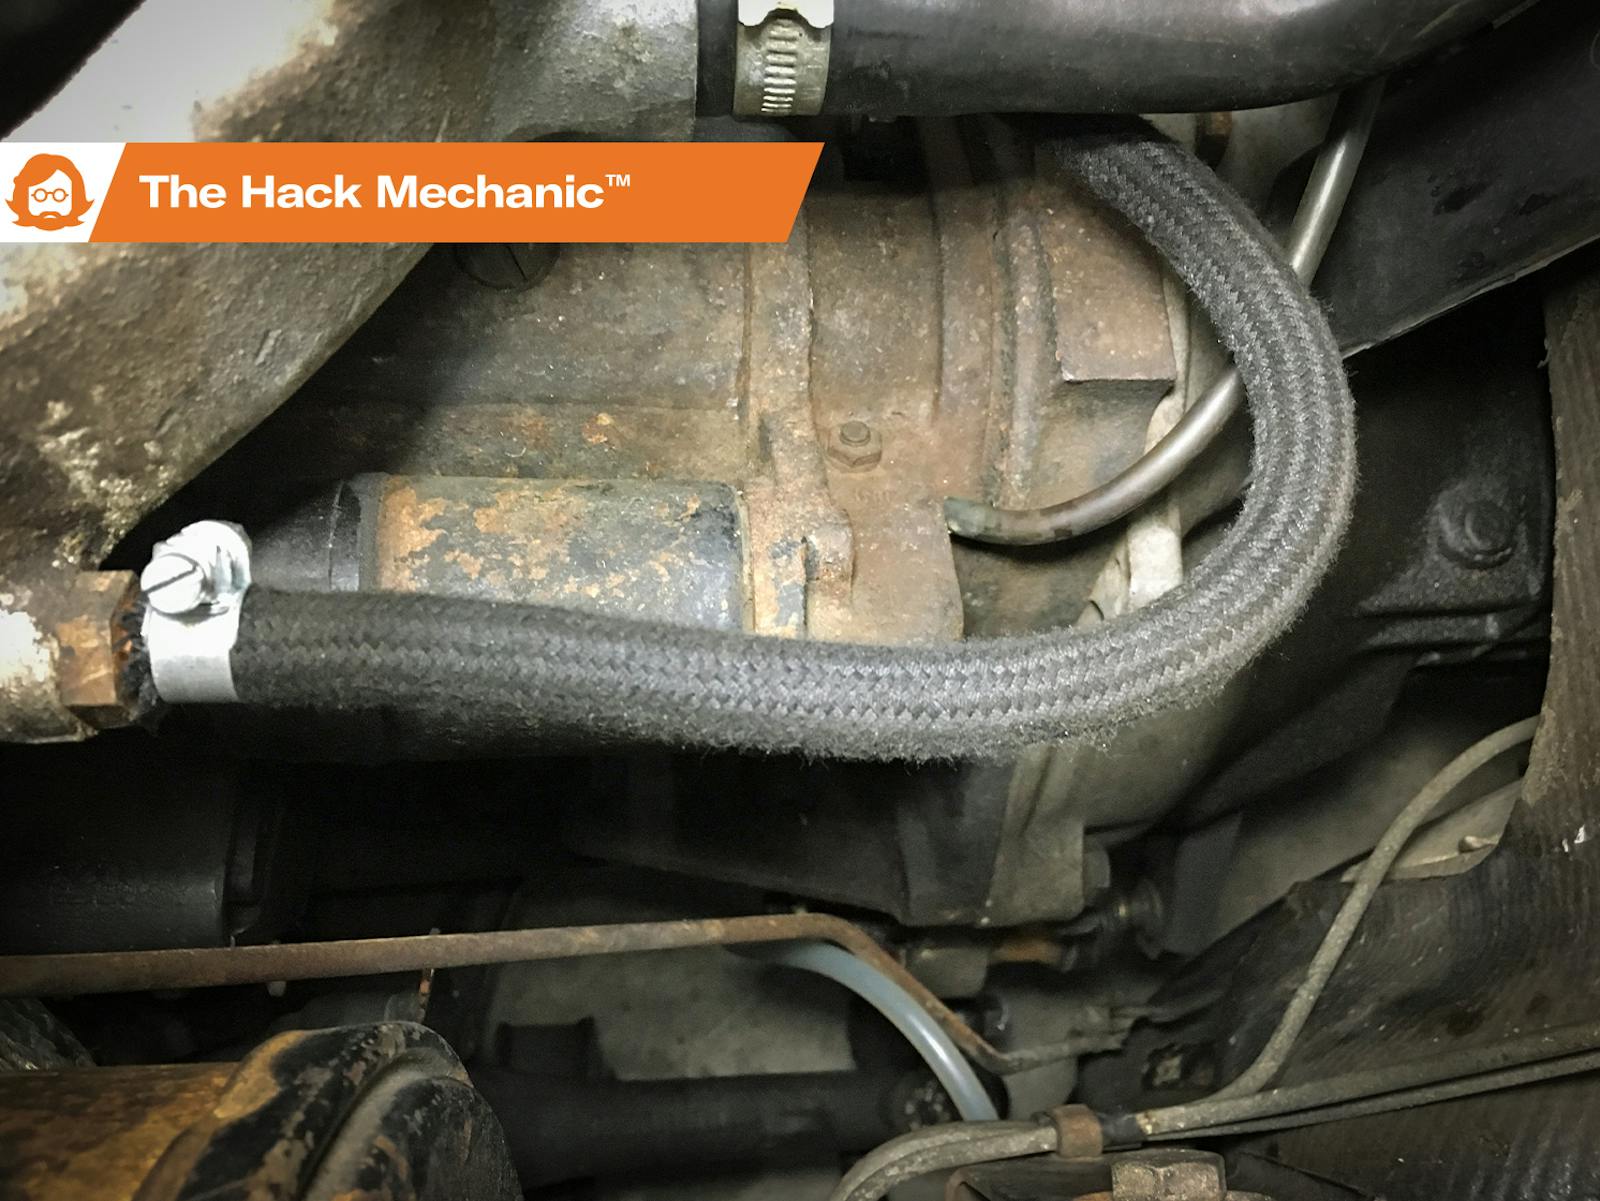
On a 60-degree day in late October, I opened up the trunk and removed the three clips holding on the access panel. On this car, the trunk latch mechanism had to come out before you could unscrew the actuator from it, but that was just three Torx-head fasteners. It took perhaps 20 minutes, not 10, for me to install the new actuator, but hey, I didn’t need to crawl under a car to do it. I was positively giddy in anticipation of the utterly trivial act of remote trunk unlocking.
Ready to savor my easy triumph, I closed the trunk and reached for the rubber-padded microswitch on the underside of the lid.
Nothing.
I went inside the car and pushed the trunk release button under the dash.
Crickets.
Hmmmmn.
I thought that perhaps a fuse had blown. I looked at the fuse card and didn’t see one specifically for the actuator, but I saw three for the central locking system. All were fine. I did some reading and verified that the car doesn’t have a “valet mode” that disables the trunk actuator.
As I poked around inside the trunk with the lid up, the light bulb went on—that is, the one in my head. In a remarkable instance of symmetry, it was triggered by the fact that the light bulb in the trunk did not go on. My mind suddenly shot to the “trunk open” message I’ve seen on the dashboard for eight years. I realized that the actuator not working wasn’t the only issue. The problem was systemic, involving all things on the bendy little wiring harness connecting the trunk lid to the body.
Oh crap. So much for the joy-enabling quick-hit-and-run repair.
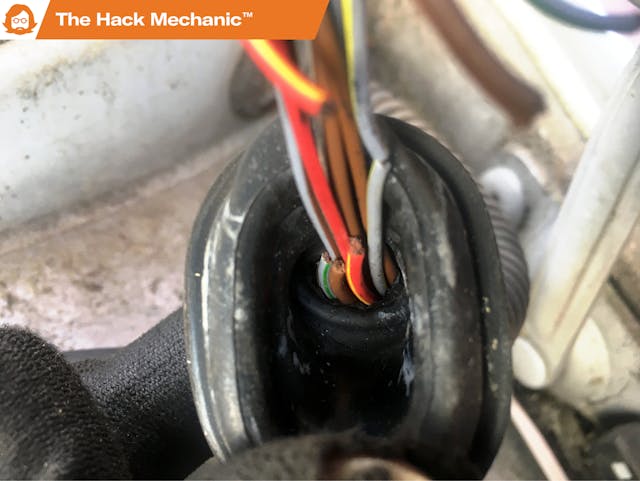
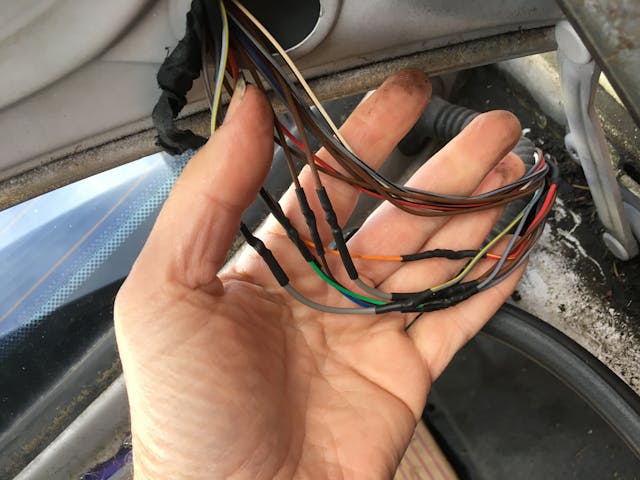
To appreciate how badly I’d gotten this wrong, I need to rewind the tape to a few months ago when I was giving a talk about automotive electrical systems at the Larz Anderson Auto Museum in Brookline, Massachusetts, and discussed the five types of circuit failures. In the talk, I said that while it’s possible for wires to break in the middle, it’s far more likely for an open circuit to be caused by a connector pulling off a component, or by a wire pulling out of the back of a connector. However, in the talk I noted that the exception is in wiring harnesses that experience a lot of flex such as those connecting doors, trunk lids, and hatches. I’d never experienced broken trunk lid wires before, but I dealt with broken wires in the hatch harness in both my BMW E39 and E46 wagons. And now that I realized that the actuator and the trunk light and the latch warning indicator all weren’t working, when I pulled back the rubber boot on the sheath leading to the trunk lid, I wasn’t surprised what I found.
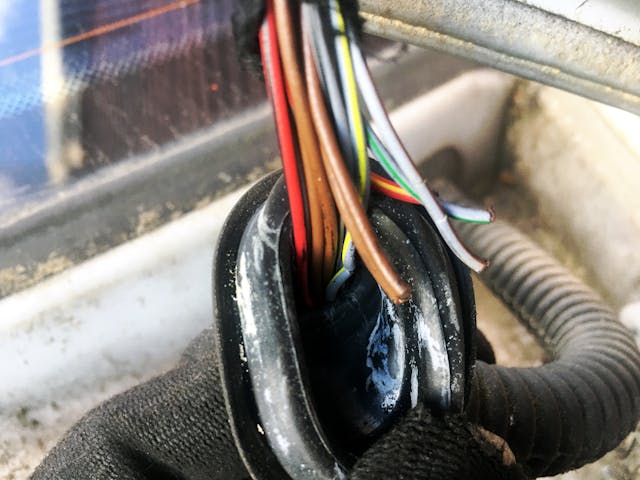
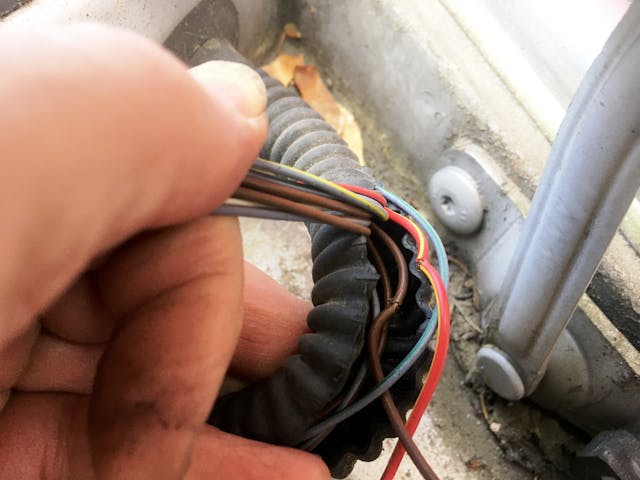
Using a small pair of scissors, I carefully slit open the rubber sheath, revealing the extent of the problem. Five wires were broken up near the top.

But wait! There’s more! To be certain I had fully scoped things out, I looked at the bottom end of the rubber sheath and found one more broken wire and three more whose insulation was cracked 360 degrees around.
When wires are broken at a connector, you simply strip the ends and crimp on new connectors. But when they’re broken in the middle like this, they need to be spliced. That can be done by using crimp-on butt-splice connectors, by using heat-shrink solder-splice connectors, or by soldering the wires manually. I wrote about this in detail in the electrical book I wrote when I worked at Bentley Publishers, but here’s the short version.
The quickest way to repair a broken wire is by crimping a butt-splice connector between the pieces. Strip both ends, insert them into the connector, crimp, done. The advantages are speed, no soldering, and the fact that it preserves the length of the wire since you don’t need to overlap the ends. The disadvantages are the physical size of the connector, their rigidness, and lack of weatherproofing.
Heat-shrink solder-splice connectors (a piece of transparent heat-shrink tubing with an internal solder ring that melts when heat is applied) also work well. Strip both ends of the wire, insert them into the connector with both ends inside the ring of solder, and heat it with a heat gun until the solder melts. The integrated heat-shrink tubing makes the connection weathertight, as well as making it smaller in diameter than a traditional crimp-on butt-splice connector. A disadvantage is that needing to overlap the ends of the wire inside the solder ring shortens the wire slightly.
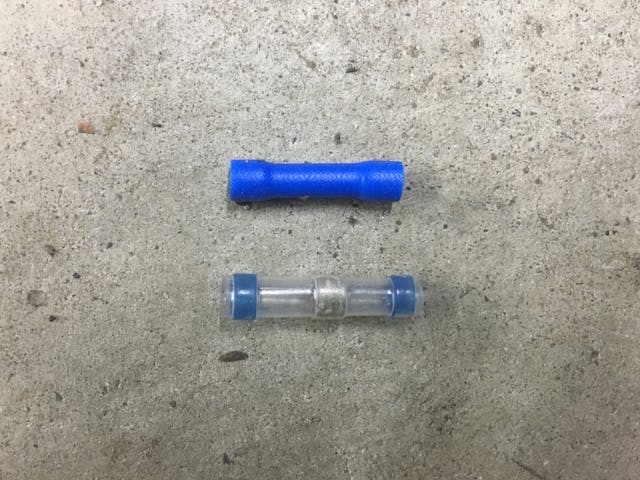
In a case like mine, where multiple wires in a harness are broken, butt-splice connectors like the one pictured above aren’t a great solution due to their physical size and rigidness. At a minimum, they’d need to be spaced out from each other and surrounded with heat-shrink tubing to keep water out. Heat-shrink solder-splice connectors can work, but because they shorten the length of the wire, you’re likely to need to splice in a few extra inches of wire, meaning that you’re making not one but two splice connections on each wire.
When I’ve encountered this situation, I tend to splice in a few extra inches of wire, manually solder each end, and cover the solder joints with heat-shrink tubing. Despite writing an electrical systems book, I don’t do this kind of work often, so you’re welcome to laugh at my soldering skills, but here’s how I do it.
- If you’re splicing in extra wire, identify the gauge (thickness) of the wires you’re repairing, and make sure to use wire of at least the same gauge. In my case, I found that two of the ground wires were actually of a thicker gauge than the rest.
- Cut the requisite number of splice wires all to the same length and strip their ends. It’s up to you whether you use different colors of wire or not.
- Strip one end of the wire being repaired and slide a piece of heat-shrink tubing over it and several inches past it.
- Bend a right-angle hook in the ends of the broken wire and the splice wire, put them together, fold over both hooks, and smooth it down to as small a diameter as possible.
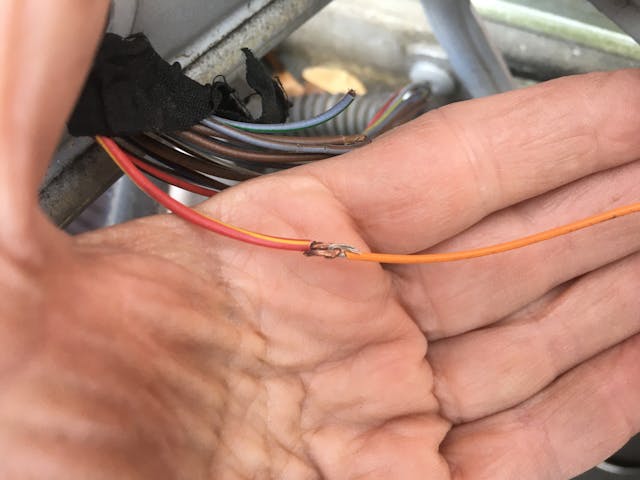
- Heat the little bundle of wire with a soldering iron and touch the solder to the wire until it flows into the strands. As with any soldering, you don’t want to “cold-solder” it so the solder sits on top instead of flowing in.
- Note that, in the case of old wiring with a coating of oxidation or corrosion on it, it may be necessary to use flux on the wires in order to get the solder to melt and flow.
- Note that some people like to “tin” the ends of the wire first with solder, then twist them together, then flow solder into them.

- Once the splice has been soldered and has cooled, slide the heat-shrink tubing down over it, and use a heat gun to shrink it in place.
- Repeat for the other end of the wire, then for any other broken wires.
***
I don’t do work like this often, so I proceeded slowly and broke the work into two sessions. I also ignored advice on BMW forums to cut and splice all the wires (meaning including the ones that aren’t broken) to keep them all the same length. The solder melted easily on the new spliced-in sections, but not on the 20-year-old stripped-off wire ends that I was trying to reattach. Using flux and having it carry the solder into the joints was essential to making good soldered connections.
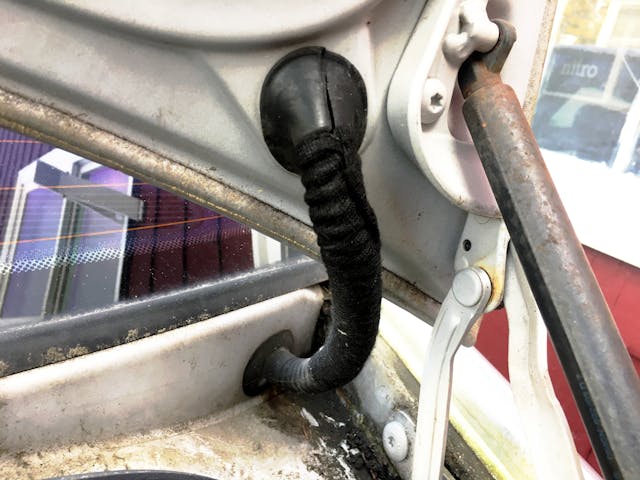
With the wire splicing complete, I gently closed the trunk and curled my hand under the lid to trigger the rubber-padded release button.
Pop!
I then did the same from inside the car.
Pop!
And yes, the trunk light went on.
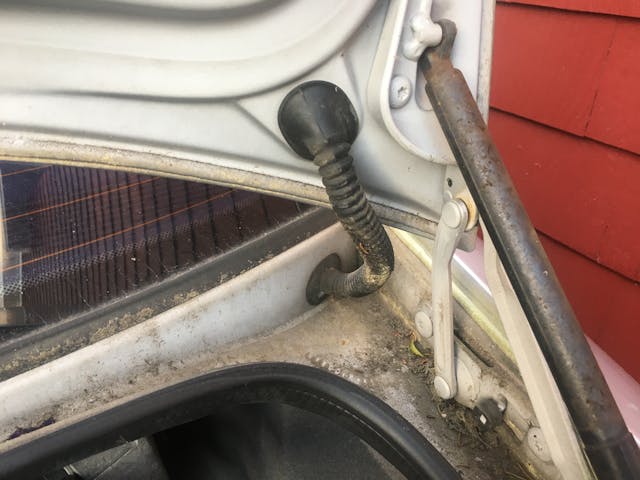
Lastly, I stuffed the wires back inside the now-slit rubber sheath, wrapped it in the stick-to-itself cloth tape that wraps old BMW wiring harnesses, and fit the sheath back in place. I still need to seal up the still-slit rubber boot with some adhesive or tape.
The next time I drove the car, I got the cherry on the sundae of the repair—when I started the car, for the first time in the eight years I’ve owned it, the “trunk open” message didn’t appear.
So it wasn’t the “quick hit-and-run” repair I’d envisioned, but it was still extremely satisfying. The wiring repair cost me two additional repair sessions, but no money.
And yes, I’m as curious as you are if that actuator I replaced was, um, actually bad. Hey, 42 bucks is 42 bucks.
***
Rob’s latest book, The Best Of The Hack Mechanic™: 35 years of hacks, kluges, and assorted automotive mayhem is available on Amazon here. His other seven books are available here on Amazon, or you can order personally-inscribed copies from Rob’s website, www.robsiegel.com.
Check out the Hagerty Media homepage so you don’t miss a single story, or better yet, bookmark it. To get our best stories delivered right to your inbox, subscribe to our newsletters.
Good tutorial, Rob. Although I’d like to think that the bulk of folks reading this would know these basics, I realize that not only is that not the case, but that a “refresher” now and then isn’t all bad. The biggest challenge I’ve faced in similar cases is that sometimes the breaks are where you can’t easily fish enough wire out of the access hole to properly work on the splicing process. [This might have happened in your example if the breaks were just visible down inside the drip channel grommet but without enough slack wire to pull it out for repairing.] That can get much more complex, with extra dissembling needed to access the breaks. After that, your remarks about the relative challenges of getting the solder to run into the strands prove that it’s just about the hardest part of the job. B-T-W, I’m certain that many of us – especially me – could show you our own soldering jobs that would make yours (pictured) look like fine art, so cut yourself some slack. 😁
Appreciate it, thanks.
Later model Ford trucks are notorious for broken wires in the B pillar to door. No room to solder easily, replace with new harness and save the frustration (ask me how I know).
Of course, you could have had a spare key made, which addresses a multitude of possible misadventures.
I won’t leave home without one — in a pants-pocket, which I hopefully am also not leaving home without.
Too, of course, without your penchant for nearly Sisyphusian exploits, we’d be deprived of some of the very best advice and stories.
Keep ’em coming Rob…
Thanks for the 20 minuite lookup of Sisyphusian. Interesting read.
That Sisyphus – he rocks! (and rolls)
Parts stores love me..
It’s embarrassing how many times I’ve bought a part to find a bad wire–or even dead batteries (RV). That one I just did last year. Bought a spendy solenoid that is now a paperweight…
Its 40 years of experience – or one year 40 times! I’m closer to the latter!
Had this pleasure on our e46, except the motivation was “blowing fuses for the license plate light,” so I didn’t think about it that long. The inspection month cometh. I couldn’t bring myself to cut the boot (we live in a rainforest, basically), so I spent another hour to disconnect all the connections to the lights & etc in the trunk lid and pulled the harness into the trunk where there was room to rejoin the wires.
Wow, that’s serious dedication.
Rob, are your BMWs of the same vintage when the Germans were putting bio-degradable wires in their cars. I ask because some of my colleagues have older MBs and some of their wiring harnesses have just dissolved.
I’m aware of this in the Mercedes world. I have not heard of BMWs have that exact wiring failure mode.
In that particular situation with the wires broken at the flex, I would have probably considered running a new set of wires from the source to somewhere convenient in the car… Especially since the insulation appears to have exceeded its service life
For slimmer butt-splices, look for the un-insulated appliance type; those and some shrink tubing work nicely.
And FWIW, my soldering looks almost as bad as my welding.
One nice thing about having a deadline on an article is that there is a good incentive to get some project off the ground or finished. Always enjoy the writing. Keep ’em coming.
I’m just amazed that you didn’t check for voltage at the actuator before buying a replacement.
The Volvo 245 is known for tail-gate wires breaking within the hinge where they flex, even though those particular wires have very fine strands and possibly a more flexible recipe for the copper. My solution has been to splice on an extra foot of like-color wire at the lock or light itself, extending the overall sub-harness length. Then – pull the now longer original wire up past the hinge and make the new connection where it is easy to reach. You now have like-new flexible wire at the critical flex point
Isn’t it comforting to know you have a spare trunk lock actuator on the shelf in the unlikely event you really need one of those.
Now if only Hagerty had a parts for sale page.
I was about to congratulate Rob on having one more “probably good” part to store in his well organized garage!
One point you missed Rob is the importance of using rosin core solder and rosin flux. Plumbing solder and flux will not work.
Good tutorial and good job. I find electrical work like this fun and easy to do.
Excellent article and repair. At least you had good access. I had to do that type of repair for both doors of my 68 Impala convertible. Passenger side wasn’t too bad, the driver’s side… Fuggedaboutit. The amount of wires going in and out was off the chart. I ended up disconnecting all the wires from the switches, and fed the wiring back through the door being careful not to strip any more wires on the sheet metal. Then I slid the boot up onto the harness to expose the section where the wires were broken and made the repair. Don’t ask about how many times I had to undo a connection because I forgot to slip the heat shrink tube on before I did the repair.