Diamonds Are an Amateur Machinist’s Best Friend

After recovering from my failed attempt to ream the new valve guides in my Honda XR250R cylinder heads with a few strong pours and a few days away from the garage, I found myself plopping said chunks of aluminum onto the counter of Thirlby Machine Shop. The man behind the counter told me not only that he didn’t have the tooling for the job, but also that the shop was not interested in buying it. But then we struck a deal.
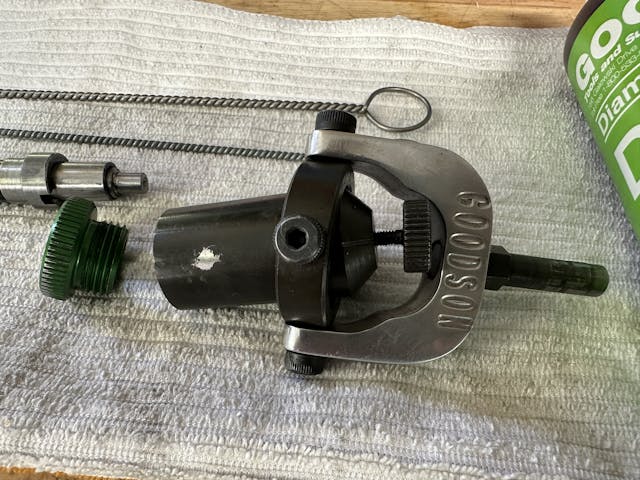
The valve guides in question are made of C63000 bronze and the manufacturer says the best tool for machining them is an adjustable diamond hone. If you ignore the incredible precision required to make the final product, the setup is relatively simple: a diamond abrasive fits into an attachment that can be driven by hand drill. The system is set up in two main parts: the drive head and the mandrel, the latter sized to the valve guides in question. My friendly local machine shop had the $450 drive head from a job a few years ago, but its assortment of mandrels did not include anything small enough for the 5.5mm required by the valve guides in the cylinder head of my Honda. The shop offered to loan me the driver head if I would purchase the $400 mandrel.
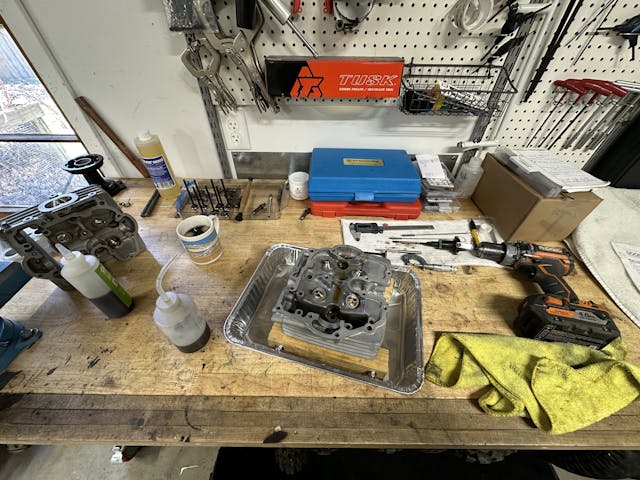
I know a good deal when I hear one. The proper mandrel arrived quickly, and I dove headlong into learning how to use an adjustable hone. The process became a bit intimidating after I read on machining forums that small-diameter mandrels can be delicate and, for a new user, tough starting points. Plus, I would be following the recommendations from the producer of the tooling only loosely: I would not have a pump to circulate the cutting oil, and my workpieces would not be solidly mounted. Knowing I could be lighting $400 on fire on a Saturday morning, I picked up the driver head from the machine shop and prepared my workbench.
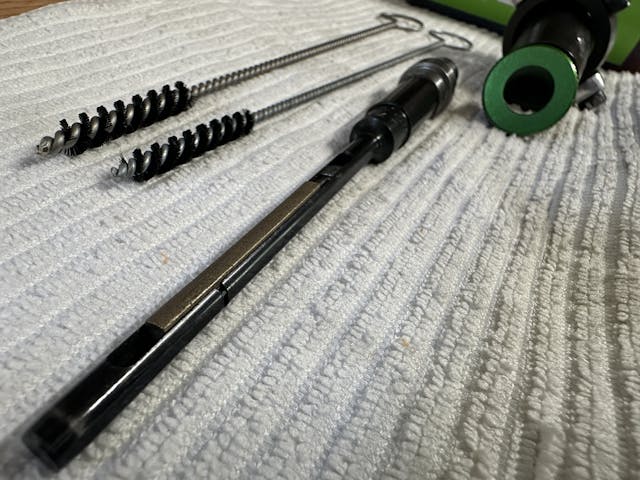
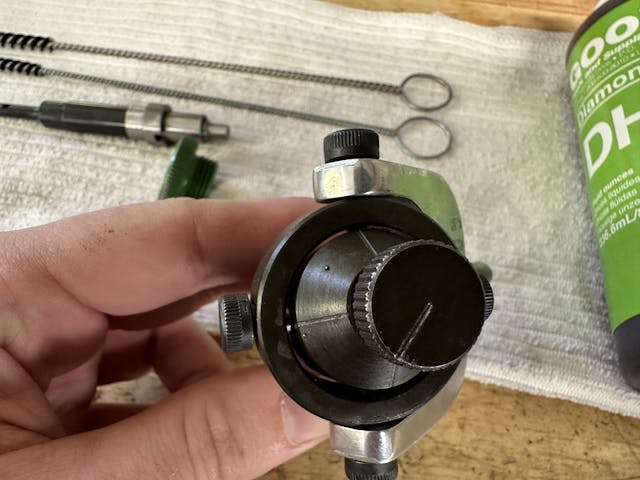
The tooling itself is a really sweet piece from Goodson. It has only one simple adjustment: a knob with four marks. Turning the adjuster clockwise a quarter turn from one reference mark to the next pushes the diamond stone out to contact the valve guide. Not so scary after all, then. The process was as follows: Retract the diamond stone to its lowest setting, insert stone and mandrel into valve guide, then adjust the stone to put light pressure on the guide. Attach a hand drill, flood the hone with cutting oil, run the drill through the guide in a handful of long, smooth strokes, retract the stone, remove the mandrel, measure the diameter of the valve guide. Simple, right?
Sure sounded like it, but it was also an oddly scary proposition since I was using two tools that were new to me, one of which was also borrowed. The diamond stone needed to be broken in at least a little—the manufacturer of the mandrel says the stone won’t really hit its stride till it has machined several hundred guides—so I put an old guide into my bench vise and used that to get a feel for how the day was going to go.
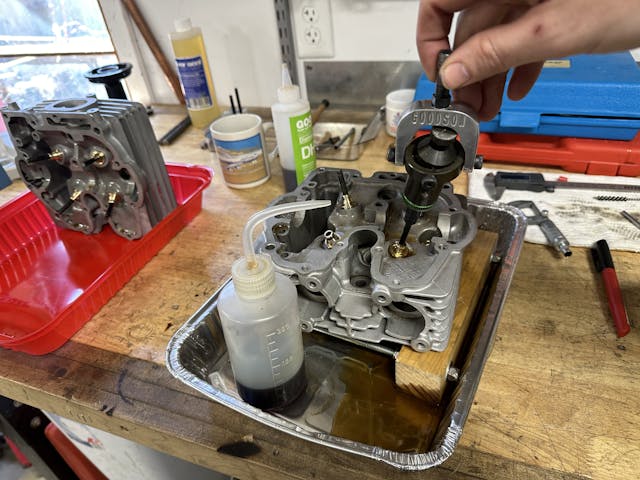
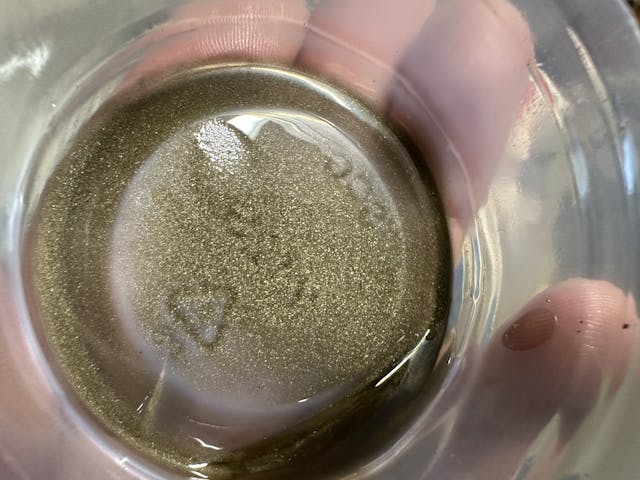
Holding a small squeeze bottle of oil in my left hand, I held a cordless drill in my right, plunging in and out of the guide at a nice steady pace while squeezing a steady steam of oil into the valve guide and keeping a keen feel for how much drag the hone had. Using the cordless drill made the process almost too easy; the hardest part was mentally adjusting to the fact that very glittery oil was, in this case, a positive thing.
Even in the slower speed setting, I didn’t have to run the drill wide-open to get a smooth feed, so no oil was slinging about the bench. To get the full stroke of the diamond stone, I had to make a small spacer for the cylinder head to sit on, which had the added benefit of keeping things cleaner, too.
It was a slightly hypnotizing process. The concentration required mixed with repetitive movements would have lulled me into honing away an entire guide if it weren’t for my fear of blowing past the perfect diameter for the valves.
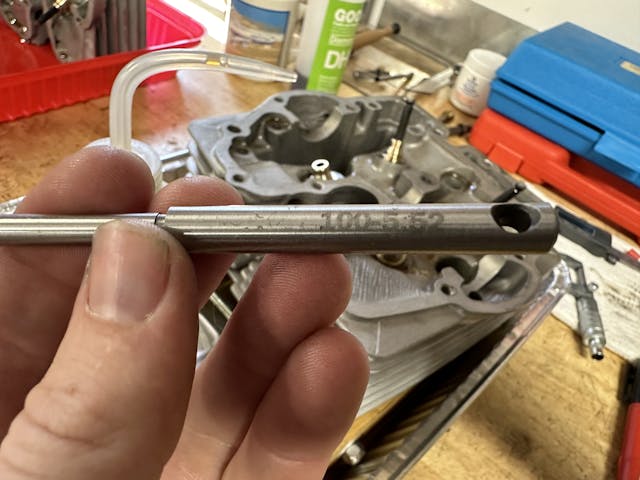
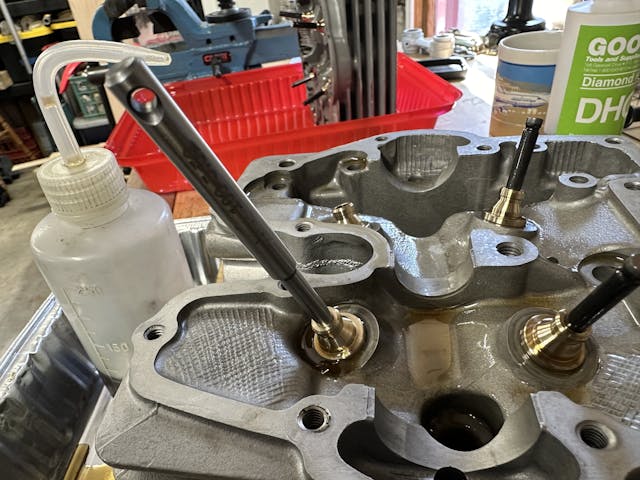

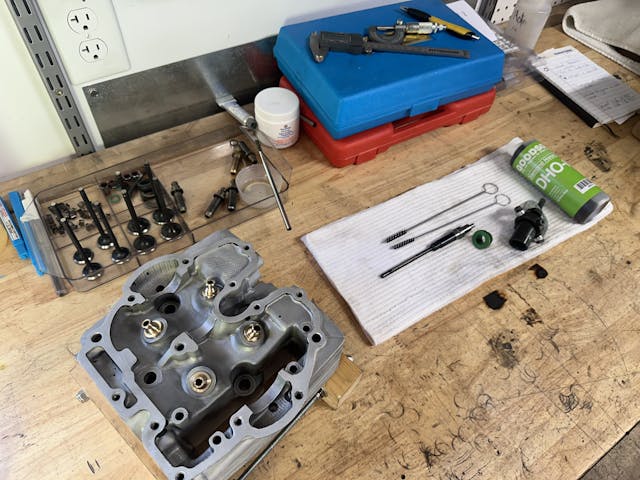
When it came to measuring the progress of cutting, I felt as though I was getting crafty, but I was just being resourceful. A proper bore gauge for valve guides would be a one-trick pony in a stable of tools already overrun with horses for countless courses, so instead of buying a new tool to measure the inside diameter of the guide, I used one of the pilots from my valve seat cutting kit. The pilot has a very mellow taper that is meant to center and lightly wedge it in the valve guide, and by fitting the pilot into the valve guide, and noting how far it extended into the guide, I could figure out where I was at in the machining process and how much material I had left to remove. Once I reached a point where the valve stem would insert through the guide, I made a final pass to machine a nice slip fit that will keep these valves running smoothly for what I hope to be hundreds, if not thousands, of hours.
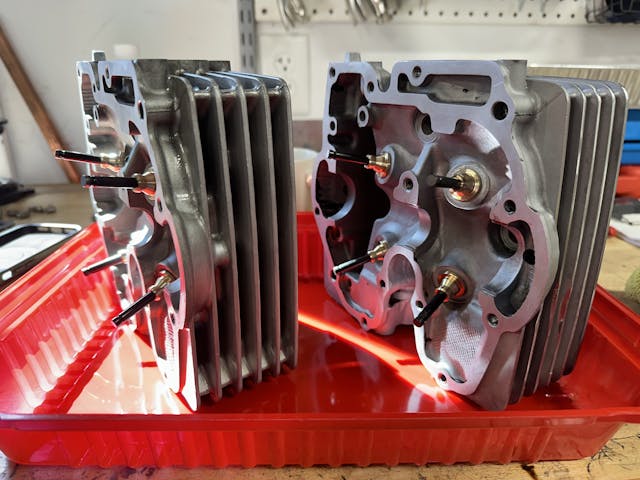
After the first four valve guides, I had the process just about locked in. The second cylinder head took a fraction of the time and the results were likely slightly better. Now that these heads have smooth valve action, the next step in prepping them is mating the valves to their seats. A proper three-angle valve job is the only acceptable way to do that, so the next installment of this series will be getting the seats cut and some final prep items before I make the final preparations for installing the valves and closing up two engines that have been haunting my workbench for over a year. The sound of them popping to life is so close, yet so far away.
***
Check out the Hagerty Media homepage so you don’t miss a single story, or better yet, bookmark it. To get our best stories delivered right to your inbox, subscribe to our newsletters.


Apparently your local machinist is either very rich or has a lot smaller cajónes than you do, Kyle. Turning down work isn’t something that most shops can afford to do around my area. Congrats on taking on the challenge and (presumably) beating it!
Good job, Kyle! Valve guide honing is a very good skill to have. Looks like you picked it up right away.
That does look to be a cool process to see. You are braver than I am.
Congratulations from this corner as well! You’ve accomplished an operation that I’ve never done, and made what I think is a mutually beneficial arrangement with your local shop.
I never had a problem getting to place that you are now. The Honda shop I worked at had all the necessary reamers to get proper clearance. The big issue when working on RFVC heads was always getting the valves to seat good as the guide angles would not be accurate enough after guide replacement. However, I was always trying replace broken guides. It will be interesting to see if you can make this work. Good luck.