Attempting a Bare-Minimum Repair
There are a lot of projects in my garage at any point in time. Often my celebration upon walking into my shop on a Friday evening is sullied when I am forced to pick from the options—and especially when I realize that there is a project sitting in the back corner, covered in dust, a sad hulk of what it once was. For the last year, the saddest machine in my garage has been the 1989 Honda XR250R. It’s the machine that somehow survived a lot of racing before losing compression and becoming hard to start. Now is the time to deal with it.
Any project like this starts with diagnostics—or, if you’re lazy, parts replacement. I threw a head gasket at this engine last fall thinking that would address the problem, but I did no checks prior to tearing off the cylinder head, scraping the surfaces clean, and reassembling everything. In a tale of true karmic beauty, this evening of work fixed nothing. I knew better but apparently needed the reminder to walk through the steps rather than skipping straight to the fun part.
Lack of compression and hard starts can be due to a number of problems. To rule out a few, I checked the adjustment of the valves, along with the camshaft timing, before going out and buying new tools. Somehow, up until this spring I’ve managed to get by without owning a compression or leak-down tester. A few weeks ago, I took the plunge.
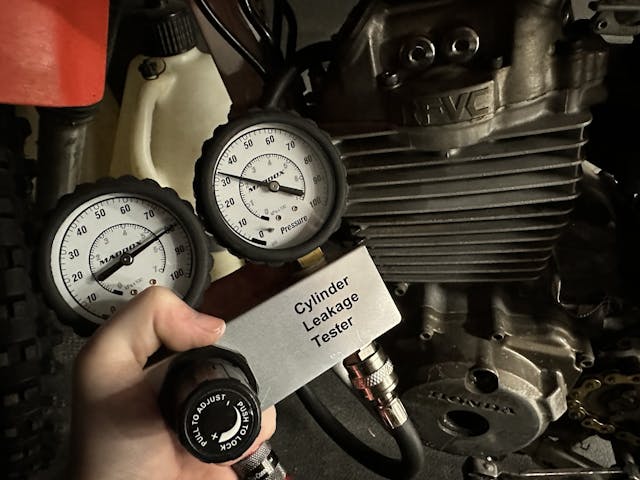
The gauges on the leak-down tester told a bad story. Over 30 percent of the air that should have been trapped inside the cylinder with the piston at top dead center of the compression stroke was whistling right out into the exhaust pipe. The leak drained my little pancake air compressor faster than I could understand what was happening. When I hooked the tester to my friend’s heavier-duty compressor, I realized I was asking a doctor to diagnose a stab wound that was spurting blood across the exam room.
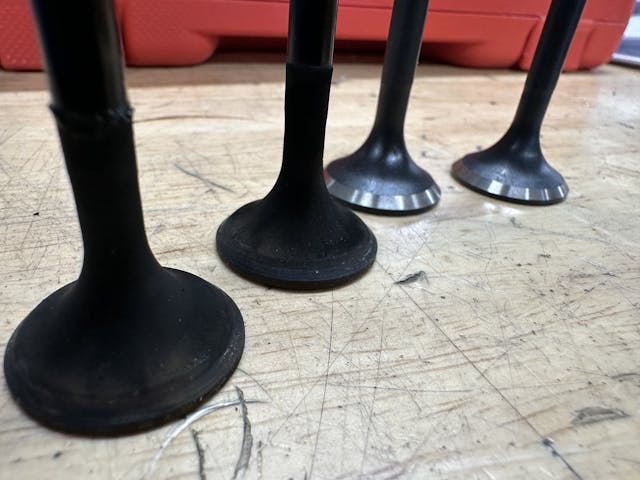
One or both of the exhaust valves were no longer valves but restrictions. Disassembling the top end of the engine—a simple enough process—hurt a bit: The engine had only run for a few minutes since I assembled it last fall, before the snow flew. The snow is barely gone and the cylinder head is again on the bench. Once I had compressed the valve springs, pulled the keepers, and removed the valves, I became impressed that the engine ran at all: The valves were the picture of burned, and carbon build-up on both the seats and valves was preventing them from sealing properly. Thanks to some parts-ordering for a future project, I had two brand-new exhaust valves on hand, along with the tooling to refresh the valve seats: A perfect trial run for the future project.
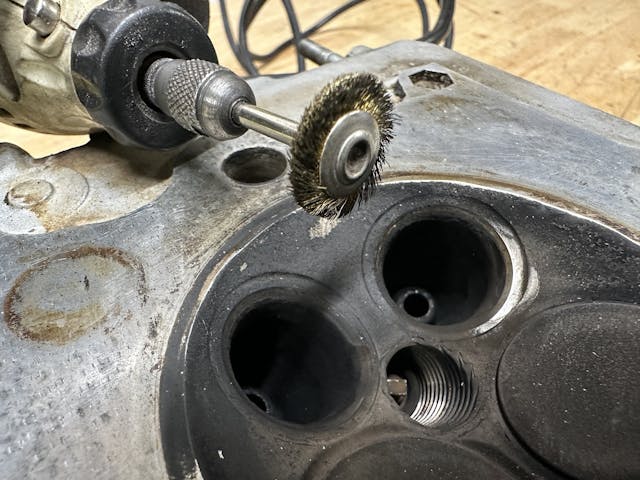
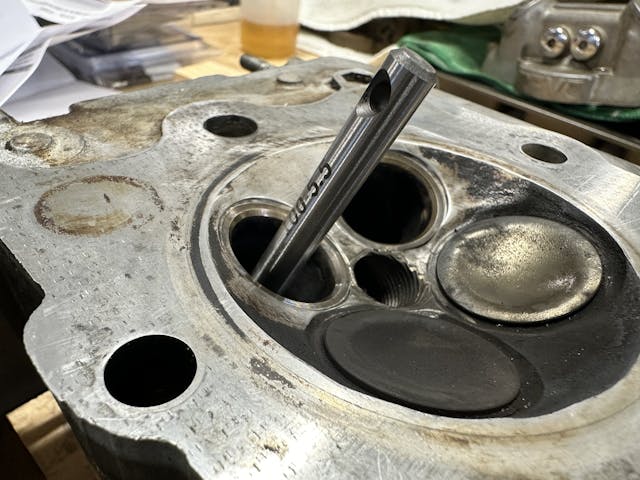
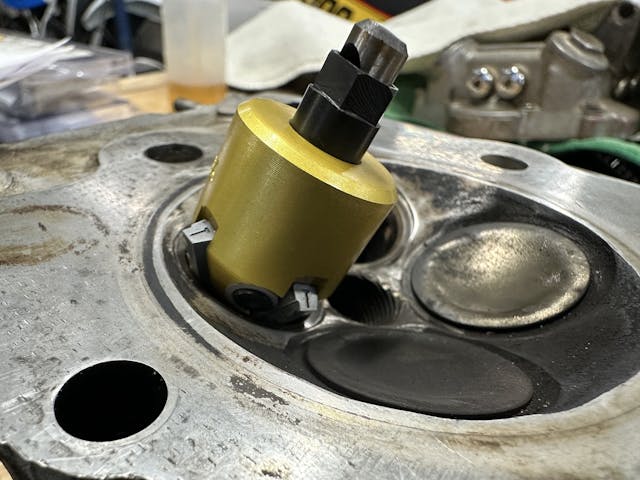
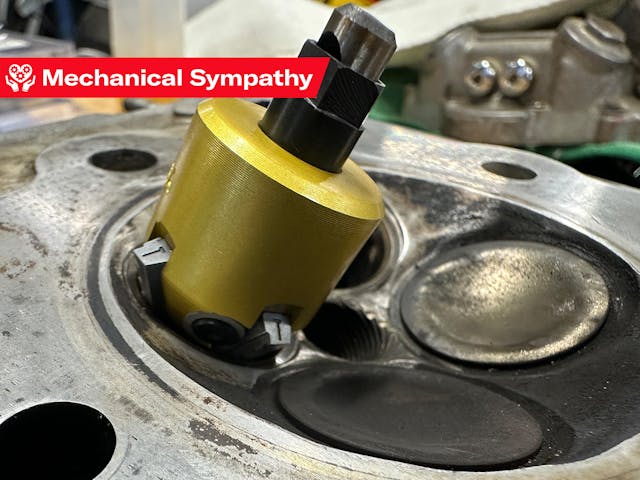
I used a Neway Manufacturing valve seat-cutting kit that allowed me to put a fresh, three-angle valve job on both exhaust seats in the time between leaving the office and eating dinner. I’m going to dive into the nitty-gritty of this tool and of the process in a few weeks; for now, I will say this challenge was both slightly intimidating and exciting, a perfect trial run for the two cylinder heads waiting for full rebuilds and installation onto two freshly rebuilt engines.
I could have left the XR250R sitting in the corner, finished up the two engines, then put one in the bike (as I had initially planned). Doing so would both fix the hard-start problem and allow me the chance to dig deeper into a damaged engine that was out of the bike. However, when the weather got nice this spring, and a friend called me to go riding, the idea of leaving the bike out of commission much longer just felt icky. I knew if I shuffled off the project one more time, the Honda would be buried forever.
The decision to do the bare minimum—for once—and just get the engine running again felt forced, and the thought of not indulging a single “while I’m in there” inclination patently absurd. But who was I to turn down a challenge?
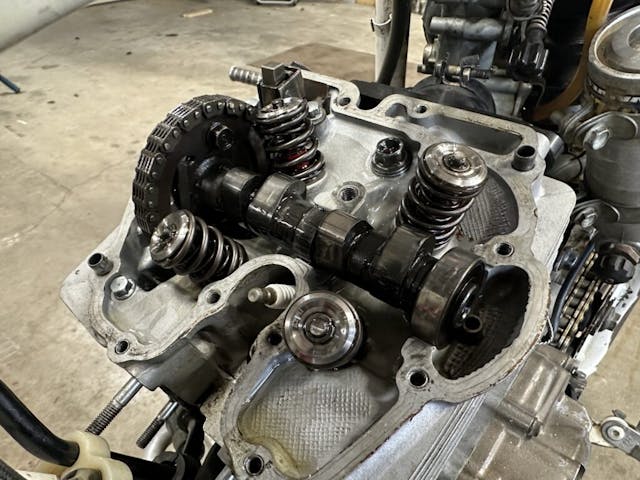
Since I’ve had the top end off an XR250R about six times in the last four years, the whole process took about five hours over Friday evening and Saturday afternoon. By dinner time on Saturday, I was puttering around the yard on an XR250R that ran as well as the day it went together the first time back in 2021. The bike didn’t need a new engine; it didn’t need anything more than the bare minimum. (Well, proper diagnostics and the bare minimum.) Leaving well enough alone is not always a bad decision, and realizing just how little is required to fix something is helpful from time to time. This XR250R project only got six new parts: two valves, two valve seals, two gaskets. Not too shabby.
I’m still excited to get a fresh engine into this bike, but between here and there are some real interesting experiences: The last step of the engine-rebuild process is machine work on the cylinder heads. Machining new valve guides, installing new valves, and fitting up the whole works are tasks I intend to do 100% at home in the next couple weeks. Part two comes next week with a dive into the process of installing and preparing valve guides. Let’s just say, I’ve learned a lot in the process.
***
Check out the Hagerty Media homepage so you don’t miss a single story, or better yet, bookmark it. To get our best stories delivered right to your inbox, subscribe to our newsletters.


My mechanical background comes largely from being a Diesel mechanic in a past live. The mantra was get in, fix the problem, get out. There are a lot of good reasons for this. One – Class 8 engines and their parts are expensive. Two, every hour of down time costs. Three – every time you touch something that wasn’t already broken, you create the potential of being the cause of the next failure. This happens more often than that thing you decided not to replace actually breaking. The get in – fix it – get out strategy has a lot of plusses.
Well said! 👍
You are a braver man than I, looking forward to the next part.
I’m doing the same thing right now,except on a Kohler cast iron engine. New valves, cut the seats, never did it before
It was a really rewarding process. Quite intimidating at first, but after the first one it was a breeze!
Great article, Kyle. I’m looking forward to the next one. I think this approach of just fixing the problem was pretty common when the idea of regular maintenance was the norm. This is a more accesible approach to the hobby and arguably more appropriate for many older cars that were designed to be serviced and repaired by local garages with basic equipment. It’s a good feeling when you complete an accurately diagnosed targeted repair, and get a smooth running engine as a result. Fixing a hand full of things in an attempt to compensate for poor diagnostics might get the car back on the road sooner, but you can’t really know what the actual limitation was that sidelined it to begin with working like that.
I don’t recall you mentioning Neway before Kyle, if you haven’t then welcome to the world of easy, quick valve and seat cutting! The entry cost is steep but no more stones, dressing requirements or grinding swarf. With your access to a lathe the blades in your seat cutter can be used in a valve cutter:
https://youtu.be/BK2YzMSnAqY
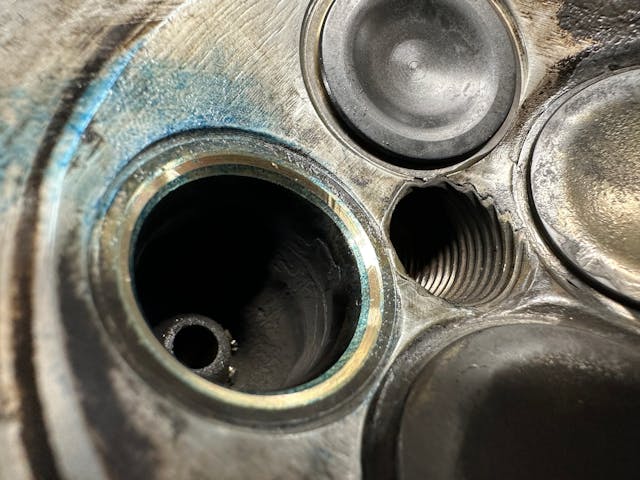
The 45 degree seat face picture……
The actual sealing face part.
No one going to say anything of the excellent quality of the picture showing the cutter tool, chatter-ripple…???
You need to practice on some junk heads to get your technique better to produce a smoother sealing surface.
Possible that surface in the picture will lead to a burned seat or valve in a short time frame.
Stones are the best but I would like to try a set of cutters myself…one of these days!!!