8 DIY projects to make any car feel more luxurious
Not all of us can afford luxury cars. Heck, some of us can’t even afford nice versions of plebeian cars from 50 years ago. But even a tight budget doesn’t mean we can’t have nice things, though, and luxury is in the eye of the beholder. Instead of replacing your current ride with a luxury vehicle, you’re probably best served by making whatever you already own into the best version of itself.
Some enthusiasts may not think of DIY projects beyond those necessary to keep a vehicle running and drivable. Branching out into cosmetic and functional improvements is both fun and less stressful than the highly mechanical nature of projects under the hood.
Tackle a few of these eight ideas to add a little more comfort to your ride—and have the fun of accomplishing a new project, too.
Sound deadening
Often, a luxury car is one of the vehicles most disconnected from the road. Take, for instance, its lack of road noise. The difference between the sound of a door closing—a tin-can sound, in a tired economy car, or the bank-vault whump of a luxury car’s—is just the start.
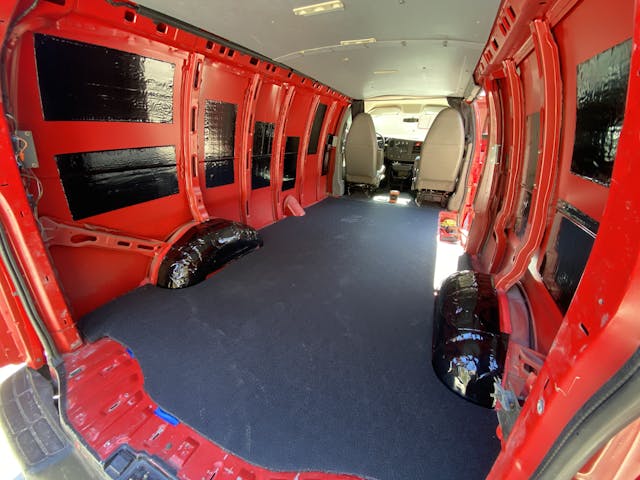
With just a few sheets of stick-on sound-deadening like Dynamat or Kilmat can eliminate a surprising amount of noise for minimal effort. Remove door panels, stick sound deadener to the sheetmetal surfaces, reassemble, and off you go, quieter than ever.
You don’t need to cover every square inch of metal to notice the effects: you’ll actually experience diminishing returns past 60 percent coverage. Plan to add sound-deadening at least 25 percent of your interior sheetmetal to hear a difference. That 60 percent coverage will often remove 95 percent of the noise you want it to, so save a few dollars and some effort by not going too crazy.
New weatherstripping
Leaks are not luxe, whether they’re admitting wind noise or water. New weatherstripping can be fitted easily on the vast majority of cars and can make a dramatic difference in how the car feels. Doors shut tighter, windows seal better, and trunks are weathertight again.
New weatherstripping often also makes doors, windows, hoods, and trunks close better and more solidly. It can also get rid of rattles around windows and doorframes. For the effort it takes to put new foam rubber in place along the seams, the return is huge.
Refinished (or new) steering wheel

There are really only three touch-points in a car for the driver: seat, pedals, and steering wheel. Replacing upholstery can be complicated and expensive, and refreshing pedals is even more work, but changing a steering wheel is not bad.
Removing a vintage wheel is likely to require special tools but those can often be easily borrowed (with a deposit) from chain auto-parts stores. Even just sanding down, filling cracks, and painting a wheel can go a long way. Be sure, if you do this, to use the appropriate paint and clearcoat. You want durability and proper feel, neither of which is likely to come out of a traditional rattle can.
Fixing torn seats
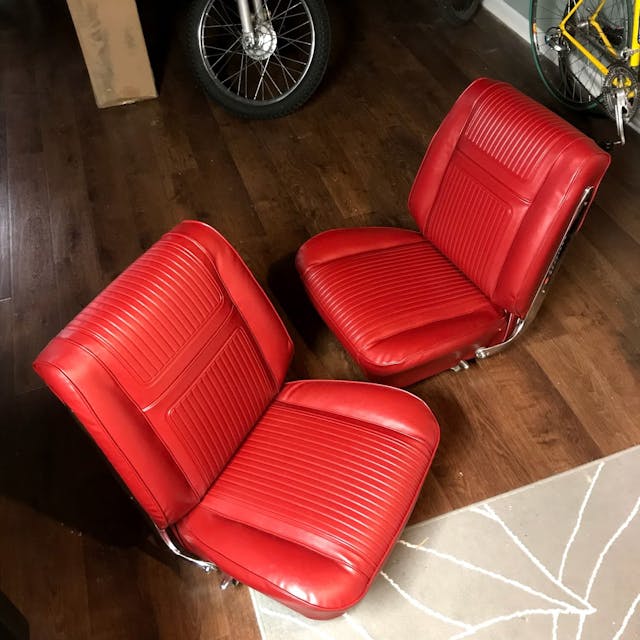
Only five sentences ago I said re-upholstery can be difficult, but for the right DIY person, it is absolutely doable. New foam under original covers, or new covers alone, transform a seat and make driving enjoyable again. Having seat foam cling to your pants after you arrive at cars and coffee is not luxurious, after all.
Removing seats and dropping them off at an upholstery shop is DIY enough to qualify for this list, but if you are feeling adventurous, we encourage you to research doing seats yourself. Get those hog-ring pliers out and make that interior one that not only looks good but becomes something you can point at with pride.
Look into OEM+ mods

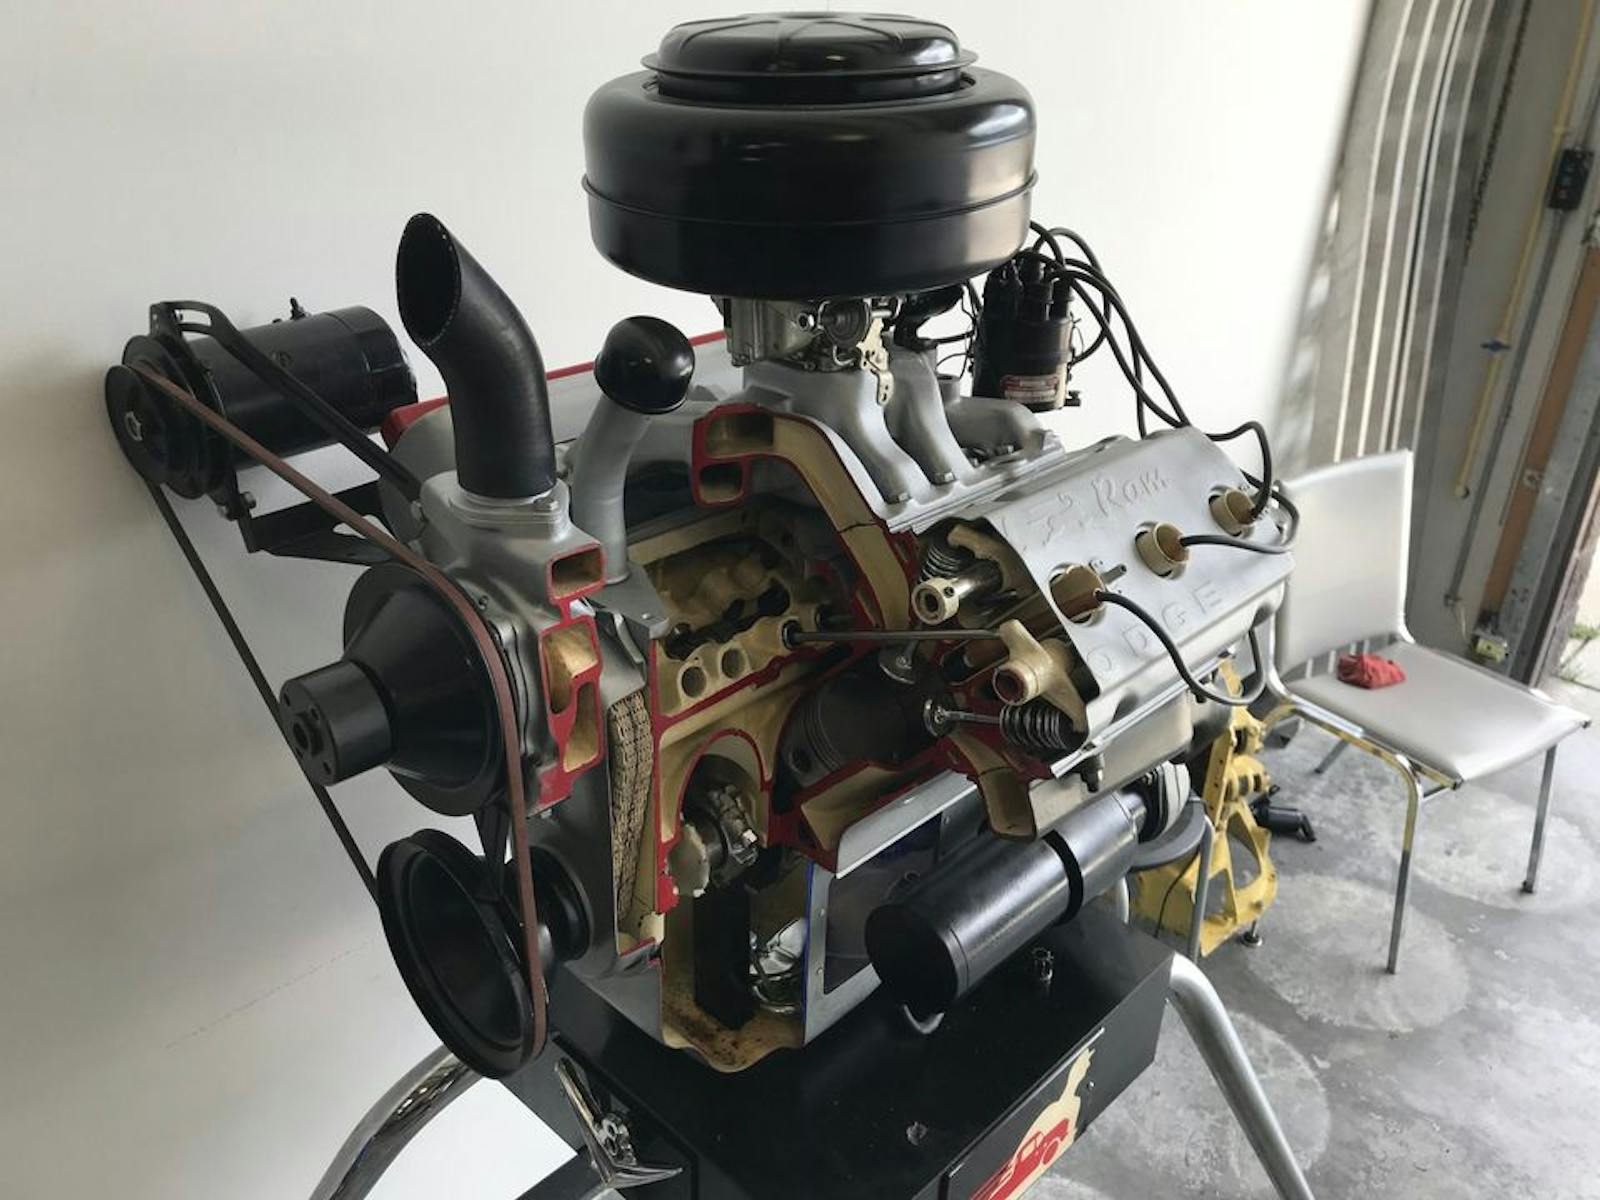
This term came into my life from the man who is better at it than anyone else: Sajeev Mehta. Simply put, OEM+ upgrades use parts that were built for your model but not installed on your particular car at the factory. For modern cars, think nicer stereos, or steering wheels with radio controls. For more vintage cars, a logical OEM+ changes could be switching your vintage bumpside Ford truck’s rear suspension to lighter duty leaf springs, because it isn’t used for work anymore and the factory-installed 3/4-ton leafs just make for a harsh ride.
Or maybe change from a two-barrel carb and manifold to a factory-spec four-barrel for period-correct fit and finish—and easy assembly, since you can follow the factory service manual. Beat that, aftermarket.
Weighted shifter/short shifter

So maybe I lied earlier when I said that a driver only has three touch-points. Some enthusiasts prefer four, since they want a transmission that requires manual persuasion to shift gears. If that’s your thing, than an upgrade to the shifter can totally change the driving experience.
I went OEM+ by using a three-speed shifter on a four-speed transmission in my Corvair, which equated to a short-throw unit and factory fit, but not everyone is so lucky. Your DIY upgrade could be as easy as a weighted shift knob in modern cars, or adding a new Hurst T-handle to your muscle car. Whatever it is, this could be the easiest bit of wrenching that will change how your car feels from the driver’s seat.
Fixing little rattles and squeaks
That loose piece of trim should be annoying: there is no reason for it to be loose. Items like this can be low-hanging fruit, and transform a beater into a vehicle to be proud of. Having a rattle- or squeak-free driving experience immediately changes your perception of any car, so taking the time to track down and properly affix or lubricate small parts and pieces is well worth your time.
A quick tip: The most common cause I’ve seen for squeaky suspension is when people tighten all the suspension bolts while the suspension is hanging. Many suspension bolts and fasteners should be tightened with the weight of the car on the suspension. Get everything snug, set the car down, and only then break out the torque wrench.
Stereo upgrade
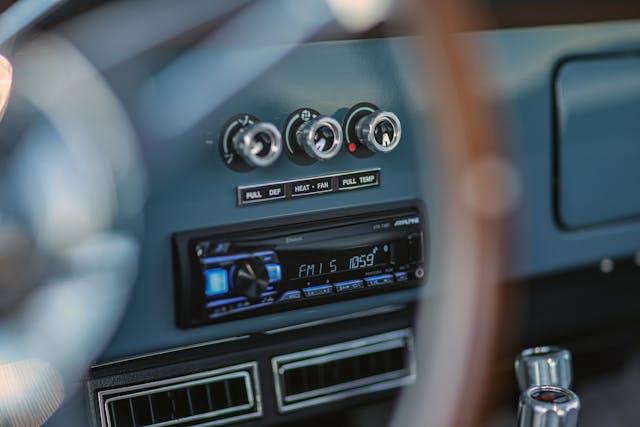
Last but not least is an upgrade that is easier than ever to hide. Vintage cars have vintage audio, but modern speakers can be fit behind original speaker grilles, and Bluetooth receivers and amplifiers can be hidden in glove boxes or under seats. Totally stock appearance with modern or upgraded sound is attainable and not nearly as expensive as it once was.
Combine that with a few other items on this list and your car is going to feel nearly new, or at least a little more luxurious than what you are used to.
Check out the Hagerty Media homepage so you don’t miss a single story, or better yet, bookmark it.
For my ‘73 TR6, poly bushings actually improved the ride over 50 year old OE rubber ones, and sound deadening on the floors trans-tunnel and firewall not only quieted undesirable sounds, rattles, and heat in summer, I can better hear that glorious exhaust. But the two BIGGEST improvements were having the distributor rebuilt and converted from vacuum retard to vacuum advance, which has totally transformed the drivability; and I installed heating elements in the seats, making the car so much more comfortable with the top down in November and April.
I say ditch the Muncie and install a Hurst Competition Plus shifter for those with manual transmissions. So easy to find reverse when coming to a near stop at a traffic light-controlled intersection. I’ve got a
guilt-ridden conscience after totally rebuilding the M-20 in my Chevelle and easily missing 1st when I should have known better. The new reverse gear is surely chipped up after just one oopsie. Time to drain the fluid of certain metal fragments and get that Hurst installed!
Regarding the sound deadening material. I’m glad someone has finally brought out the futility of applying a mat to all the surfaces of the interior’s sheet metal. Since sound has a point of origin and can be reflected, the placement and shape of the mat can make a world of difference. For instance, in the pic of the van interior an open rectangle with a smaller mat patch in the center can do the same amount deadening as a full rectangle. Then the cut out mat material can be used in another location.
Most of these items are on my list already, or already done to the best of my ability to source parts.
That brings me to my biggest gripe / problem with restoration. For some cars it is easy to source enough parts to build an entire car Mustangs are a prime example of this, you could start with nothing but a VIN tag and a title and with enough money it is possible to build the entire car. Try finding the correct cloth seat upholstery for a 1989-1993 Miata, or even a Generation 1 Barracuda for that mater. The best thing Auto makers ever did was to stich flat material up to make seat covers so they could be reproduced, the worst thing they ever did was use exotic fabric that can’t be easily sourced, or worse embossed material, even embryoid stuff is easier to reproduce. Weather stripping is another thing, There should have been several cross sections that were allowed and no more, and they should all be in production forever.
Here is a fantastic way to hide a stereo. All the controls are phone based. A small round interface is provided as well that you could stash easily and operate by touch.
The best upgrade I did to my chevelle was put in a new wiring harness. It’s pretty simple to do and there’s a few good brands out there to choose from. Now I know all connections are reliable. I would recommend it to anyone with a classic that has electrical issues
I will probably get stomped on for this comment but, It is my experience that the upgraded radio segment or type shown in the image above is not an upgrade. The buttons are crammed together ridiculously tight and the features difficult and complicated to work when driving. I have done a few of these “upgrades” in my day. Have since replaced (downgraded) with simple knobbed radios with large buttons for channels sized for my shaking ham fisted fingers! There are vintage sound companies out there that can give you a new retro looking and easy operating player for the same money. Can we just agree to call this a “downgraded upgrade”?
Both thumbs up for center wheel caps and other inexpensive ‘why didn’t I do this sooner’ upgrades that bring a smile walking to or looking back at your toy.
I have increased the number of compliments and pleasant conversations by car show attendees by upgrading to period correct wide whitehall tires. Same result on my other car with raised letter tires! Big improvement to crowd feedback “performance.” LOL.
So, I am 8 month late. When I was young (25), I had a 65 Corvair 4 door that I loved. I spent literally months installing power windows in a car never designed for them, using GM regulators cut to size. I also installed factory A/C, another job that took forever. I added cruise control, and put insulation above the headliner. I spent many hours fixing wind noise issues. When I got done, it really was a nice cruiser on the hiway, and I took many long trips in it. Would I do it again? Hmm… I’m buying another 4 door next month, and it already has A/C. I probably will install sound insulation above the headliner. The windows?? NEVER again!
BTW, I drove that car for 20 years. I am 70 now, so who knows how long I have?
…but my Wonder Bar radio still gets the AM Detroit Tigers baseball games. No need to change.
Stereo upgrade is easier on cars with DIN or double din slots. Today’s cars are integrating the audio with touchscreens that control so many non-audio functions making it very difficult. I have ignored some good cars due to the fact the stereo stinks and there is little I can do beyond put a lot of money into something that can be integrated and hidden so I can have better amplification and speakers.
Two Projects to add to your list:
Heated Seats;
Cruise Control.
I’ve been doing the OEM+ thing for over 30 years now. On my 75 F250 Ranger that I bought from the original owner, which only came with the options of Super Cooling, AM radio, cab lights, and cigarette lighter, I’ve added factory power steering, A/C, cruise, tilt (w/ cancelling turn signals!), intermittent wipers, and interior locking hood release, along with XLT or Lariat interior trim, including knobs, wood dash panels, and headliner. Still working on getting those 79 Lariat door panels put in…
New shocks! That is the first think I change on every car I buy that is more than 5 years old…regardless of mileage. I was shocked when I did it on my Tahoe…was stout and solid before I did it and so much smoother and friendly after. I usually do fluids etc. immediately and then every car gets them changed regardless when I do the first “freshening up” of my cars after purchase.