7 tips for cleaning car parts
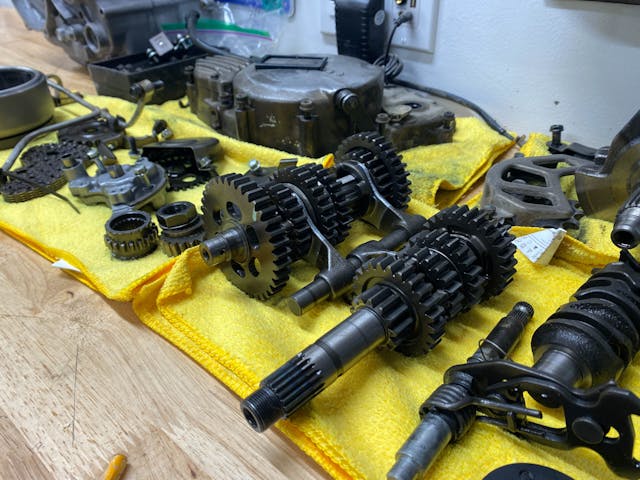
Of all the unsexy projects and tasks that comprise the step-by-step of any project or restoration, cleaning the parts and pieces while everything is apart tops the list of most un-fun. It’s a necessary evil though and a little attention to detail at this point goes a very long way in the final product. There is no sense in “saving time” by leaving everything dirty and dealing with grease and grime working its way back into places it shouldn’t be and causing you to do the task twice.
Cleaning can be simple as wiping off some schmutz and as involved as soaking a bunch of little parts in a solution overnight before a thorough scrubbing. Regardless of how deep you need to clean, here are seven tips that will make sure your final product is one to be proud of.
Start soft

Start with the easiest and safest form of cleaning first. This often means a wipe with a clean towel or rag to see just how bad the situation really is. Sometimes just a clean rag is a enough to remove everything that needs to go and leave the surface in acceptable condition. Otherwise it will tell you just how bad it is and what the right course of action might be.
Glove up
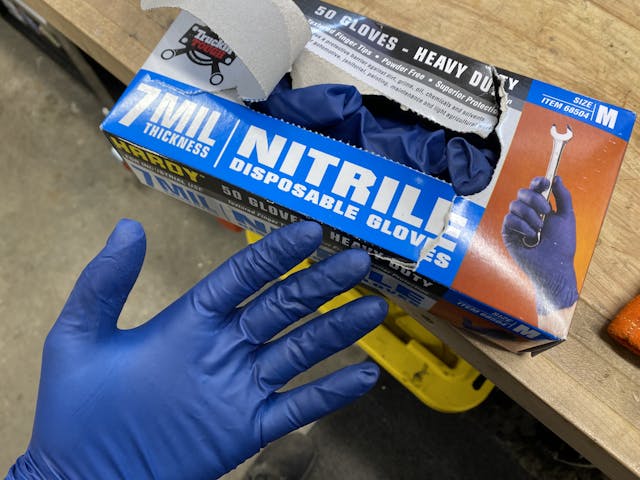
This isn’t an article about safety, but it bears a mention here. So many chemicals used in automotive processes are quite hazardous or damaging to the human body–and it might not be immediately evident. For example, brake cleaner is very common to use to remove oily residue, but it is also very rapidly absorbed by the skin and carried in the bloodstream to the liver where it sits, and sits, and sits. Our organs cannot process chemicals like carb or brake cleaner and therefore it just accumulates and can cause long-term health issues. Disposable nitrile gloves keep fluids and chemicals from being absorbed and while they can be inconvenient at times, but then again so is having to show up to dialysis on a regular basis.
Use the right stuff

There is a huge array of chemicals on the shelves of your local parts store or grocery market that claim to remove the nasty grime with a spray and rinse process. Sometimes those work easily, other times it causes chaos. One such example is a product like Simple Green, which is very useful to cut grease, but can leave residue on aluminum surfaces and cause corrosion if not rinsed thoroughly.
The same goes for rubber pieces. Warm water and a light detergent is often the best solution to prevent rubber from distorting, discoloring, or getting eaten up by aggressive solvents. On the other side oven cleaner can work miracles on cast iron pieces that have tons of baked-on grease and can only be chipped away with aggressive wire brushes before a water rinse. Match the product and process to your material for best results.
Be careful with your finish
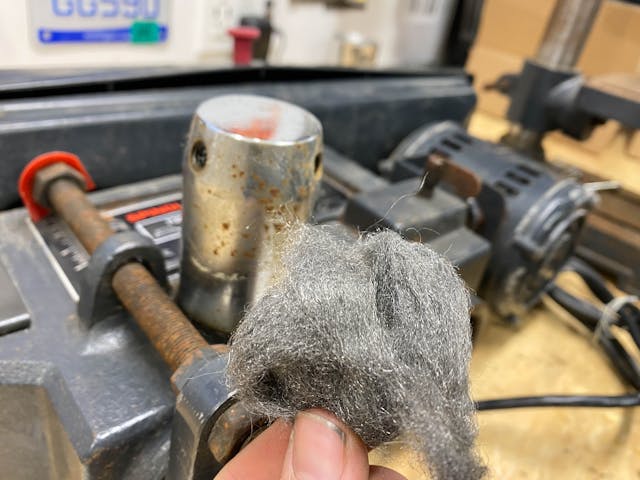
A key thing to remember when cleaning is what the final surface finish will be. If you are painting or otherwise covering the part it might not be a big deal that there are some scrub marks or a less than perfect surface finish. If you are painting or polishing the piece though, suddenly you want to exercise a lot of caution while cleaning so that any marks that happen during cleaning don’t pop through or create more work to remove later.
A steel wire brush on soft aluminum is a prime example of something that can wreak havoc quickly. Plastic or brass bristles are much softer and will prevent scoring or damaging the finish and save you work in the end despite taking a little longer to actually remove grease and grime. Even a green Scotch-Brite pad can be too much for some rubber pieces, so be sure to check in an inconspicuous area to see if your plan will leave marks of damage before going to town scrubbing.
Hide the evidence
Dry or wet blasting are easier than ever with home kits available and cheap enough that its not out of the ordinary for someone doing enough restoration work to make the investment to having a cabinet. The key to remember if you are so lucky is to make sure to blow out or rinse out all the blasting media from the nooks and crannies of whatever gets cleaned up. Having that sand, walnut shell, aluminum oxide, or glass bead pop out while painting or assembling is frustrating at best and downright damaging at worst.
Careful with the tags
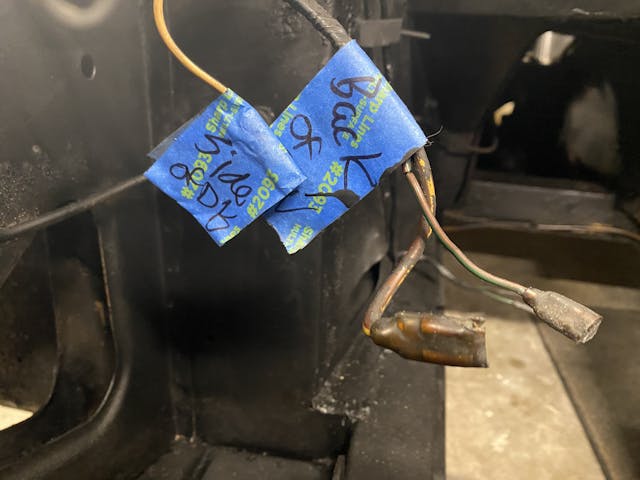
It’s important to not ruin the proper bagging and tagging of all the parts and pieces you did during disassembly when you go to clean everything up. If you have tags be sure they stay legible or be sure to transfer them after the cleaning is completed doing it piece by piece. If there are adjustments that you have to remove to fully get something clean–think carburetor adjustment screws or adjustable suspension components–be sure to document the adjustment so you can use it as a ballpark during reassembly.
Under pressure leads to failure

It’s really tempting to toss that working transmission or rear axle in the truck and take it to a car wash and use the high pressure nozzle to blast away the grease and grime quarter-by-quarter. Be careful though. Many of the gaskets are not made to withstand the high pressure pinpointed in one little area and can quickly fail and allow water and soap to flood inside and cause rust, corrosion, or leaks from the damaged gasket.
If a soap-and-water wash is required often times the best course of action is to use nothing more than household hose water pressure. That pressure is low enough that it is safe for gaskets and seals while still getting things clean. It does mean you will spend more time scrubbing, but would you rather scrub or replace gaskets due to damage?
While tedious and oft annoying, cleaning your project will make for a much more satisfying assembly. Take the time to make every project something worth showing off and being proud of and it will elevate your DIY confidence far more than you might realize. Have a tip not on this list? Leave it in a comment below.
Check out the Hagerty Media homepage so you don’t miss a single story, or better yet, bookmark it.
Dry ice blasting I heard works well.
also, mineral spirits works great.
Dry ice blasting I heard works well.
also, mineral spirits works great.
ZEP HEAVY DUTY CITRUS DEGREASER available at Home Depot…
I’ve been using this powerful multi-purpose cleaner and degreaser for years, it is made with a natural citrus solvent that powers through the toughest grease, dirt and grime. Dissolving away the most stubborn stains, ZEP Heavy-Duty Citrus Degreaser is great for cleaning in the home, garage, shop and office. This degreaser can be used on appliances, grills, stove tops, concrete, tools, engines, car parts, fiberglass, aluminum, stainless steel and kitchen surfaces. Is is concentrated so it can be used straight or mixed with water for milder strengths.
Has anyone used a steam cleaner? I used my Wagner steam cleaner on my oven rack and it worked perfectly.
As a life long tinkerer, mechanic, and user of light hydrocarbons (gasoine, kerosene, mineral spirits, brake cleaner, etc) and spending the last 15 years as a workplace safety professional I cannot stress strongly enough use your PPE. Gloves, eye protection, and respiratory especially. I am experiencing the longterm effects of hydrocarbon exposure on the skin of my hands. I have seen a lot of eye injuries from objects and liquids in the eyes, including my own. Using aerosol sprays which easily enter the respiratory tract through inhalation in small but repeated doses does affect you in the long term. Use of a respirator (N-95 mask, a cheap 3M respirator with the appropriate cartridges) will go a long way in protecting your lungs. Dust from grinding, sanding paint & body filler; vapors and mist from paint finishes and the hardener used in them don’t play nice with the lungs.
I know everybody has an uncle who worked in a body shop and smoked for 50 years and lived to be 90. [Lecture here]–> These precautions are about you. Keep yourself healthy to enjoy your hobby!
My Dad used to clean chrome with Coke a cola and then look at me and say how can you drink that stuff?
When reusing soft, extruded, or molded rubber parts that are original and in fairly good shape, or a reproduction is N/A, here’s what I do. I soak the parts in a strong solution of Simple Green and water overnight. I check them the following morning, and if needed I scrub carefully with a soft nylon brush, or a soft toothbrush if it’s a small part. If satisfied with the results, I rinse and hand dry them off. Then, I heavily glop them up with at thick coat of Goop Original Smooth hand cleaner(contains lanolin), and seal them in zip lock bags. I keep various sizes on hand. Let them soak overnight. The rubber absorbs the lanolin and softens them up. This will return the suppleness to the rubber. I rinse well with water, give them a quick wipe, and let air dry. This works especially well for factory ribbed or hoses that have factory applied OE part numbers on them. Also works on factory battery cables that are in good shape that have the OE numbers heat stamped into them. It’s a little tedious, and may take a couple of days, but to me,the results are worth it. Another trick I use to restore plastic radiator overflow or windshield wiper tanks, is to soak them in a strong solution of bleach and water. In a lot of cases, this will restore them to their original whiteness. I take nylon cleaning brushes to scrub up the tanks inside. Of course, you want to do this with plenty of ventilation and wearing proper PPE. There’s nothing worse than having a restored engine compartment and looking at an old nasty plastic tank under the hood. I’ve used these techniques on my own vehicles and have done this for some friends and others in the car community, and they are amazed at the results. It’s all in the details. Nothing more gratifying than popping the hood at a show or cars and coffee, and having people gather around to check out under the the hood.
I use Simple Green Extreme Aircraft and Precision Cleaner. It’s great but not super-aggressive at breaking down grease and grime and safe on aluminum and plastics and rubber. Being an aviation product, it’s reassuring that it meets much higher standards than regular automotive products.
Also a point about clean-up afterwards. Don’t let dissolved oils and grease run off into storm sewers or go down the drain. It is a toxic soup of chemicals that is harmful to life. Take it to the household hazardous waste collection depot in your municipality for proper disposal.
The most important part about cleaning parts is to make sure and not clean anything inside your home using an explosive material. Years ago a young man was cleaning parts for his car he was taking to Autorama in his basement using alcohol and the fumes exploded and killed his mother and sister.
These are a couple of old school things I use for cleaning up stuff.
For rusty smaller items like brackets and hardware I soak those in white vinegar and that works great, also for removing rust from panels too. On those though I spray it down with vinegar , place a paper towel over the area and soak it then cover it all with plastic wrap and let it sit till the rust lifts, usually 24 hrs will take most any off. That will take rust off better, safer and WAY cheaper than anything else I’ve found. Many times just using a “scotch brite” pad or a fine wire brush will take even heavy rust off after soaking.
For grease I’ve found that the ZEP commercial floor stripper will cut grease like crazy and can be found at most home improvement stores. Do be aware that this will will strip non catilized paint and any wax or ceramic coating known to man as well so be real careful what you use it on and rinse everything very well when done and DON’T forget gloves, it will make your fingers crack like crazy if you don’t !
It will strip rattle can paint like nobody’s business too so be real careful with it, in a parts cleaner it rocks, especially in a ultra sonic cleaner in place of “simple green” but myself I use it mostly for engines, transmissions, wheels ect that need extra heavy duty cleaning / de-greasing . And if you want to super clean a car and strip all the old detailer and wax off , mix 1/2 Dawn dish detergent and 1/2 Zep wax stripper run through a car “foamer” and it cleans EVERYTHING off , just remember it eats paint too , so it’s something to do quickly and not to leave on for very long. A quick foaming and rinse usually does it, just remember that Zep is extremely strong and does have some draw backs !
For chrome I only use “Never Dull” chrome polish and all I’ve ever used for the last 50+ years, best polish ever, bar none , even on the new softer chrome ! It works great for keeping a mirror finish on aluminum as well once it’s been polished plus it removes most of the “blueing ” on chrome headers and motorcycle pipes.
Those are some old school tricks that will save your pocket book, a ton of time , save a ton of scrubbing and sanding and that will do a great job for you if used right. Especially the vinegar for lifting rust .
Hope this helps out,,,,,