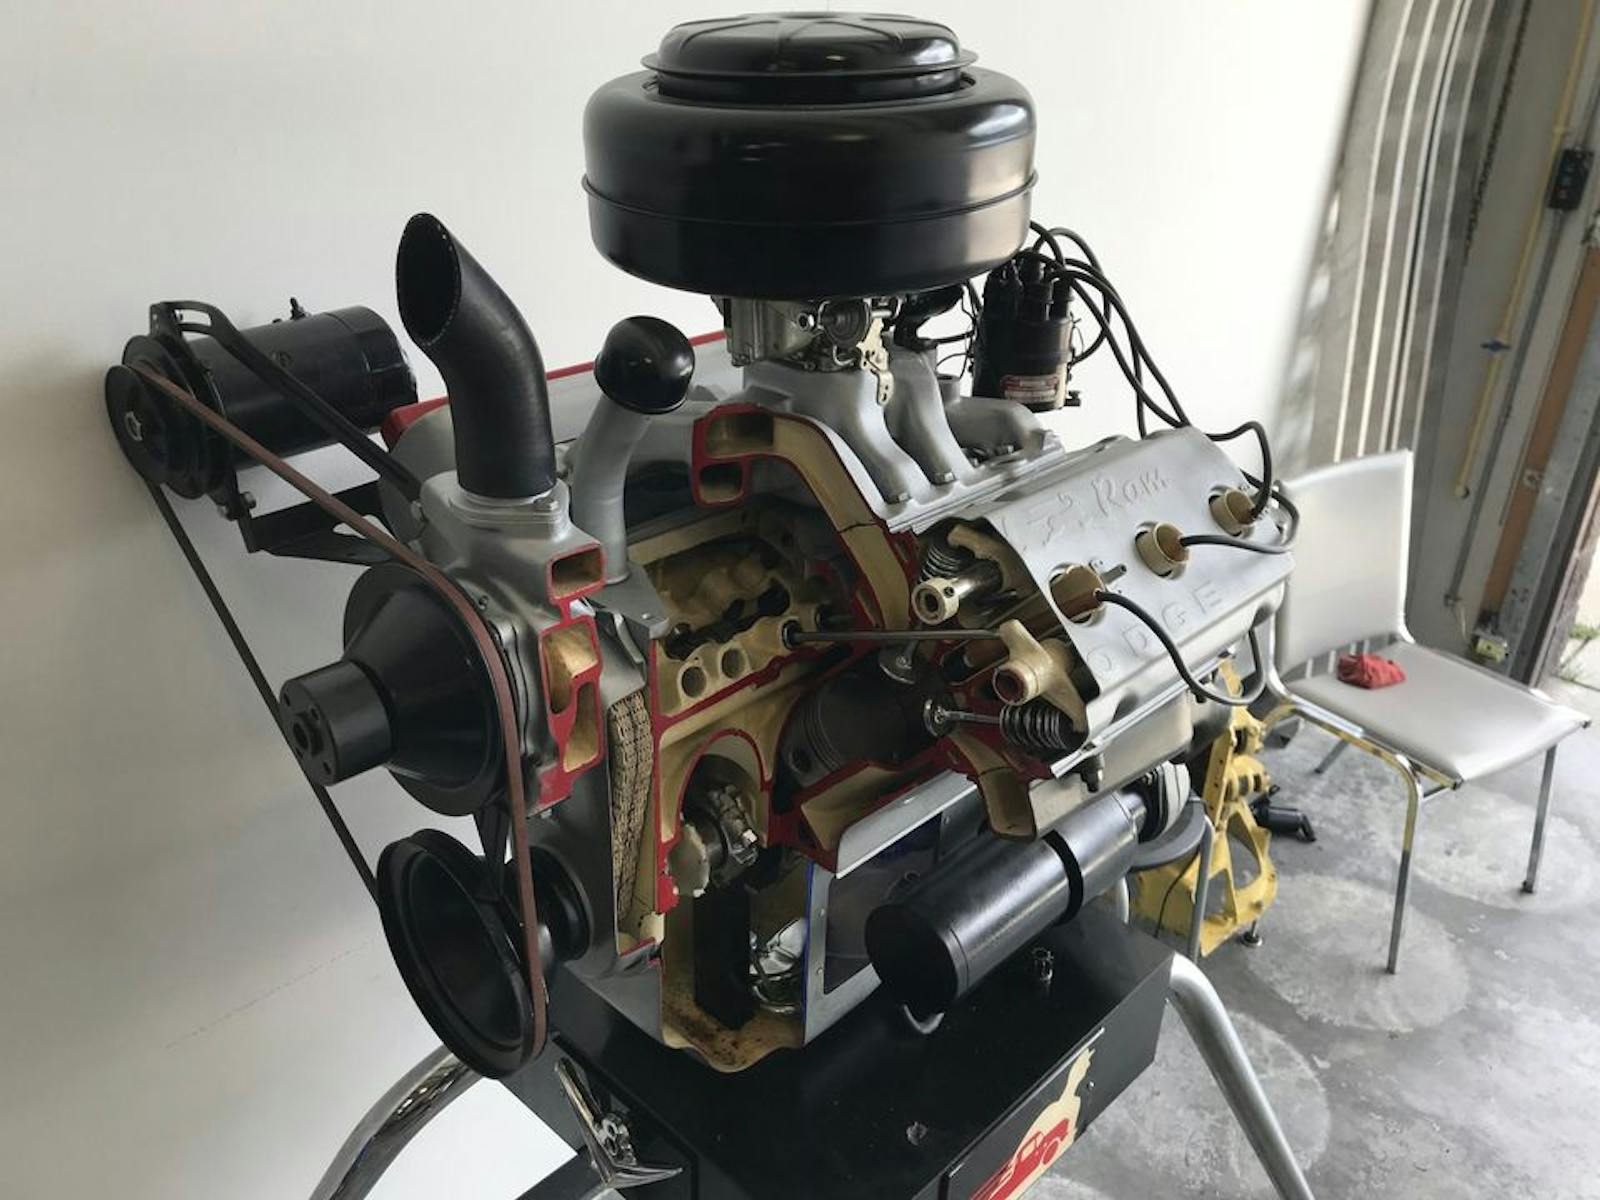
7 tips for cleaning car parts
Of all the unsexy projects and tasks that comprise the step-by-step of any project or restoration, cleaning the parts and pieces while everything is apart tops the list of most un-fun. It’s a necessary evil though and a little attention to detail at this point goes a very long way in the final product. There is no sense in “saving time” by leaving everything dirty and dealing with grease and grime working its way back into places it shouldn’t be and causing you to do the task twice.
Cleaning can be simple as wiping off some schmutz and as involved as soaking a bunch of little parts in a solution overnight before a thorough scrubbing. Regardless of how deep you need to clean, here are seven tips that will make sure your final product is one to be proud of.
Start soft

Start with the easiest and safest form of cleaning first. This often means a wipe with a clean towel or rag to see just how bad the situation really is. Sometimes just a clean rag is a enough to remove everything that needs to go and leave the surface in acceptable condition. Otherwise it will tell you just how bad it is and what the right course of action might be.
Glove up
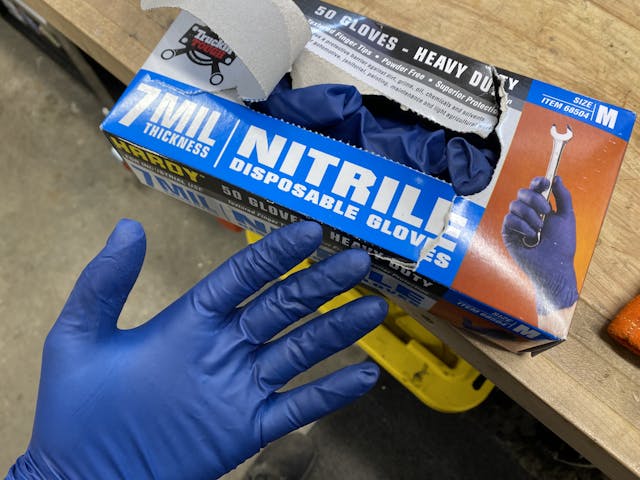
This isn’t an article about safety, but it bears a mention here. So many chemicals used in automotive processes are quite hazardous or damaging to the human body–and it might not be immediately evident. For example, brake cleaner is very common to use to remove oily residue, but it is also very rapidly absorbed by the skin and carried in the bloodstream to the liver where it sits, and sits, and sits. Our organs cannot process chemicals like carb or brake cleaner and therefore it just accumulates and can cause long-term health issues. Disposable nitrile gloves keep fluids and chemicals from being absorbed and while they can be inconvenient at times, but then again so is having to show up to dialysis on a regular basis.
Use the right stuff

There is a huge array of chemicals on the shelves of your local parts store or grocery market that claim to remove the nasty grime with a spray and rinse process. Sometimes those work easily, other times it causes chaos. One such example is a product like Simple Green, which is very useful to cut grease, but can leave residue on aluminum surfaces and cause corrosion if not rinsed thoroughly.
The same goes for rubber pieces. Warm water and a light detergent is often the best solution to prevent rubber from distorting, discoloring, or getting eaten up by aggressive solvents. On the other side oven cleaner can work miracles on cast iron pieces that have tons of baked-on grease and can only be chipped away with aggressive wire brushes before a water rinse. Match the product and process to your material for best results.
Be careful with your finish
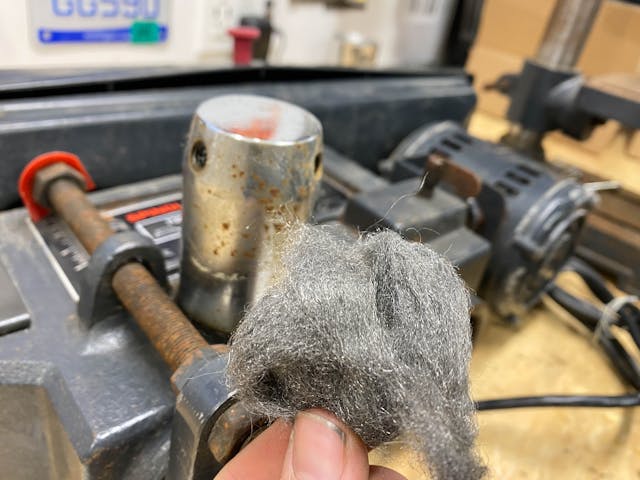
A key thing to remember when cleaning is what the final surface finish will be. If you are painting or otherwise covering the part it might not be a big deal that there are some scrub marks or a less than perfect surface finish. If you are painting or polishing the piece though, suddenly you want to exercise a lot of caution while cleaning so that any marks that happen during cleaning don’t pop through or create more work to remove later.
A steel wire brush on soft aluminum is a prime example of something that can wreak havoc quickly. Plastic or brass bristles are much softer and will prevent scoring or damaging the finish and save you work in the end despite taking a little longer to actually remove grease and grime. Even a green Scotch-Brite pad can be too much for some rubber pieces, so be sure to check in an inconspicuous area to see if your plan will leave marks of damage before going to town scrubbing.
Hide the evidence
Dry or wet blasting are easier than ever with home kits available and cheap enough that its not out of the ordinary for someone doing enough restoration work to make the investment to having a cabinet. The key to remember if you are so lucky is to make sure to blow out or rinse out all the blasting media from the nooks and crannies of whatever gets cleaned up. Having that sand, walnut shell, aluminum oxide, or glass bead pop out while painting or assembling is frustrating at best and downright damaging at worst.
Careful with the tags
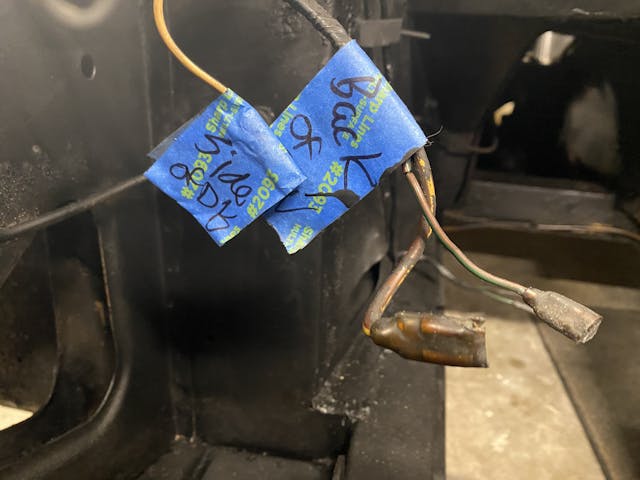
It’s important to not ruin the proper bagging and tagging of all the parts and pieces you did during disassembly when you go to clean everything up. If you have tags be sure they stay legible or be sure to transfer them after the cleaning is completed doing it piece by piece. If there are adjustments that you have to remove to fully get something clean–think carburetor adjustment screws or adjustable suspension components–be sure to document the adjustment so you can use it as a ballpark during reassembly.
Under pressure leads to failure

It’s really tempting to toss that working transmission or rear axle in the truck and take it to a car wash and use the high pressure nozzle to blast away the grease and grime quarter-by-quarter. Be careful though. Many of the gaskets are not made to withstand the high pressure pinpointed in one little area and can quickly fail and allow water and soap to flood inside and cause rust, corrosion, or leaks from the damaged gasket.
If a soap-and-water wash is required often times the best course of action is to use nothing more than household hose water pressure. That pressure is low enough that it is safe for gaskets and seals while still getting things clean. It does mean you will spend more time scrubbing, but would you rather scrub or replace gaskets due to damage?
While tedious and oft annoying, cleaning your project will make for a much more satisfying assembly. Take the time to make every project something worth showing off and being proud of and it will elevate your DIY confidence far more than you might realize. Have a tip not on this list? Leave it in a comment below.
Check out the Hagerty Media homepage so you don’t miss a single story, or better yet, bookmark it.
When using chemicals for cleaning–ALWAYS–do so in a well ventilated environment. Even some seemingly innocuous cleaning products can and will volatilize and replace the oxygen your lungs need! Even when you cannot smell the cleaner! Even if the container touts “Low Odor”! Having cleaned thousands of greasy parts, I buy and use Mineral Spirits (often called “Paint Thinner”). This product is not as flammable as is gasoline (never, never use gasoline or other highly volatile cleaners). I use volatile liquids away from the garage–outdoors, Carefully (and immediately–do not wait until tomorrow) remove cleaning rags, etc. from the garage. Allow to dry outdoors. Or, buy a new gallon paint bucket with a lid. Place tainted rags into the bucket and secure the lid tightly! Check with your city’s disposal regulations. Safe is good. Haste brings sorrow!
Spontaneous Combustion? NEVER put rags with solvents in them in anything less than a fireproof bucket. Lots of garages burn because someone goes to bed with a trash can full of some papers and rag soaked solvent.
A few years back at a local garage a worker was killed by an explosion in the garage. Apparently they had a large tank of windshield washer fluid that must not have been sealed and the vapor (alcohol?) filled the closed cold weather shop. When the worker lit off a torch to do some cutting….boom. Got severely burned and died a few days later. I guess the moral is to make sure to follow any ventilation recommendations. My thoughts are if the odor is noticeable, its too strong to do anything but vent the area.
Put your oily/solvent rags in a plastic bag and fill with water. Never will spontaneously combust.
Simple Green Extreme Aircraft and Precision Cleaner does not attack aluminum or rubber products like the standard Simple Green can.
I use a product called Rust Check Enviro Rust Wash to dissolve rust on steel parts. It is very effective at removing only rust and leaving just metal behind. The downside is that it’s expensive at $30 Canadian for a gallon. It works even better in an ultrasonic cleaner. Proper disposal is still a question I need to contact the manufacturer about.
The effluent from degreasing parts is toxic and harmful to drinking water. Even though the degreaser might claim to be “safe”, the fine print often says it is deadly to aquatic life even in trace amounts. Make sure petroleum products are recovered for safe disposal. Protect the earth for future generations. It’s the right thing to do.
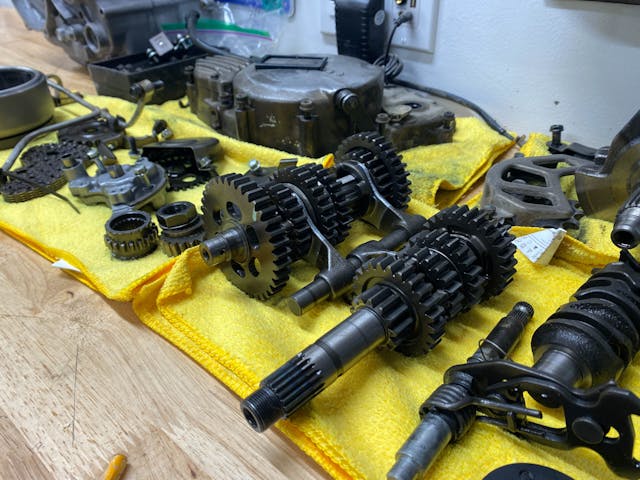
I recently picked up an ultrasonic cleaner for small parts like carbs, fuel pumps, distributors, transmission gears. I set it to run for 15 mins with a 1:1 mixture of Simple Green to clean off the grease and grime. If there is any surface rust, I then change out the fluid to EvapoRust, do a one or two 15 minute runs, and then finish off with 15 minutes of Citric Acid. 70 year old rusty, grimy parts have been coming out squeaky clean. The best part is that I can work on other parts and bits while the cleaner does the work. Handy hint; when your wife makes grape jam and her hands and the pots get all stained purple, the citric acid will clean them up real nice. Just make sure she doesn’t have any cuts on her hands. Ask me how I know.
My father was a vintage car enthusiast and these guys always used petrol or kerosene and a paint brush to clean mechanical car parts, so I had no idea that water based products were so effective.
Back in the prehistoric days, my father showed me how to clean the bearings on my bicycle with gasoline…..that he had siphoned out of the tank on his old Chevy. Probably not a great idea
I read with interest all of these messages from those of you who are really into taking things apart and cleaning them and putting them back together again. However, I am just an average person with what I think is a simple question. I have a 2004 Chevrolet Aveo LS that I bought for my mom back in 2004. There is only 34,000 miles on the car, but I would like to clean up the engine bay a little bit and I’m not exactly sure if I should try to have it done professionally maybe with steam cleaning? I don’t know. I do know years ago there was a product called Gunk that I used on cars back in the 60s and 70s with no apparent problems, but with today’s engines I’m not so sure. That said, I don’t really see any answers to things that people have posted. Can anyone direct me in the right direction with some suggestions?
One other problem that concerns me is the car’s silver gray finish. Several years ago I bought what I thought was a good car cover with a flannel like backing supposedly made for this car although I can’t really say that it was a snug fit like a glove, but it was what I thought at the time sufficient. Then, a year or so ago when I took off the cover and was cleaning the car I noticed all these tiny scratches all over the car on the hood and the top of the car and the trunk etc. I know they were not there before I put the car cover on so I couldn’t imagine where they came from. I know there are scratches underneath the doors on both sides from decades ago going to carwashes with abrasive brushes on them, but I never went to a car wash that I can recall that used brushes on the car directly. With my current cars I only go through no touch car washes. I have tried many car, waxes, polishes, scratch remover‘s with no effect. I have read that it says as long as you can’t feel a scratch through the clear finish you should be able to remove the scratches with the various products that I tried, but none of them have worked. I have decided that the scratches apparently came from the car cover itself on days when it would be windy out and maybe little particles of sand or dust or whatever would get under the car cover somehow and make the cover “flap” a little and that is what caused the scratches to appear? I have decided that I’m going to take it to my body shop man and see if he can buff these scratches out or if I just have to live with them? I would try to buff them out myself, but I am afraid that I would make matters worse because I don’t want to ruin the clearcoat finish by pressing too hard or whatever you have to be careful of with an electric buffer. Far away the car looks great, close up you can see all the scratches.
Any help or suggestions about what to do with my two questions here would be greatly appreciated. Thank you.
Bob Trotta: Those scratches are almost certainly from your car cover flapping in the breeze. Toss it in the trash and have a local detailer or body shop buff them out.
I have a black collector car and a black motorcycle. A “flappy” cover will most definitely dull the paint. I’ve used do-it-yourself ceramic coating (after good multi-step polishing) and it has worked really well for me. The hood on my car looks like a mirror.
I agree with the assessment of S100 Motorcycle Cleaner. Not cheap, but very safe and leaves a water-repellant coating. And by the way, liver damage does not get you into dialysis; that’s kidney damage.
I don’t know where all this fear of scratching chrome with fine steel wool comes from. I have cleaned the chrome on my Harley for 42 years and can not detect any scratching. I use it on all my bumpers including my collector cars and even use it on wind shields to get bug residue off. Every other way to clean chrome is more difficult.
Drape a wet towel over your windshield for an hour. The bug residue will then wipe right off!
Dawn Power spay works Great on grease spay let sit wash off
If you have time on your hands, Coca-Cola is the cheapest, easiest rust remover there is, assuming the things you want to remove the rust from fit in a 5-gallon bucket. The thing is, it takes weeks, even months, but the rust will really fall off and then you just dump the old Coke down the drain and scrub the parts with Scotch pads, a wire wheel, etc. Let’s face it, most projects can endure some parts sitting in buckets of Coke for a month or two.
I agree with your thoughts, but did anyone else ever stop and think about….well, if this stuff cuts grease, removes rust, etc what the heck does this do to your gut?
Don’t forget about the fumes. Anytime one uses these products its best to do it outside and/ or w/ plenty of fresh air. For example, brake cleaner also goes up the nose, not only on the skin.
I did love S100 on my 2 Harleys for years! I used the regular on the paint & the gel on the chains, sprocket, motor, etc,! It’s not cheap, made in Germany? I switched to Simple Green, No Problems! I tried using my car wheel, safe on Aluminum wheel cleaner, on my custom Sun Aluminum Spoke Rims,on my Antique 86 Sportster it left them all stained? Then tried Simple Green, stains gone! You can get gallons of Simple Green, for the price of a small bottle of S100? Happy New Year to everybody!
I was the Amsoil Dealer at Carlisle, every show, from 2005 – 2014, till I got eye problems, Enbrel melted my Corneas, can’t drive, life sucks! Take Care, Be Safe, Boston Jim
The best degreaser I have found, and I’ve tried many, Is called “OIL EATER”. It is a strong detergent, water soluble. Check internet for sources.
Always have trouble with salt stains on carpet from the nasty winters in Canada. Any suggestions?