5 Tips When Replacing Steering Components on Your Project Car

The three critical systems of a car, in order of importance, are: Steering, brakes, and the drivetrain. If you question this ordering think no further than how many times you have heard someone tell stories of driving a vehicle with no brakes. I’ve never heard a story of someone intentionally driving a vehicle that had no steering.
Now that we agree that steering is critical, we therefore also all agree that maintaining your steering components is important. For those of the DIY proclivity it is a relatively simple system to understand and work on. To get you started, here are five tips for tackling the system of tie-rods, drag links, and idler arms, steering boxes, and pitman arms.
Check your threads
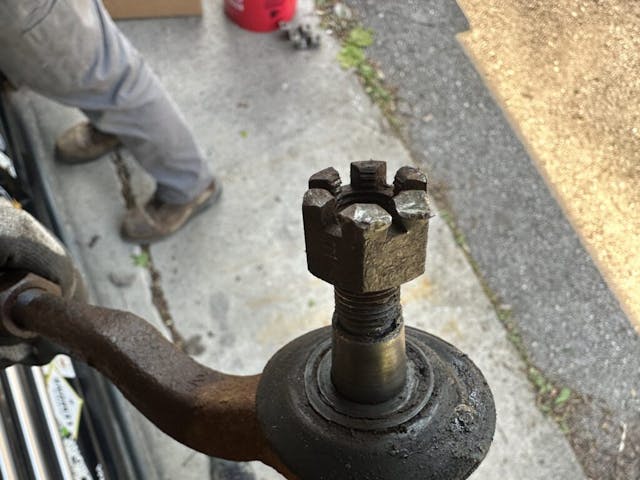
There aren’t many areas on a car where left- and right-hand threads are mixed together in an assembly. Steering is one of them. With modern impact tools capable of twisting the threads right off a nut or bolt, going the proper direction is important because you might not get a second chance. Trace the threads with your finger or a pick to confirm if “righty tighty, lefty loosey” still applies.
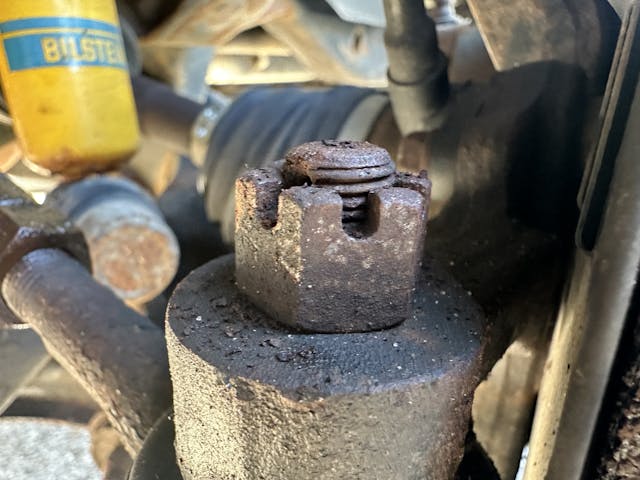
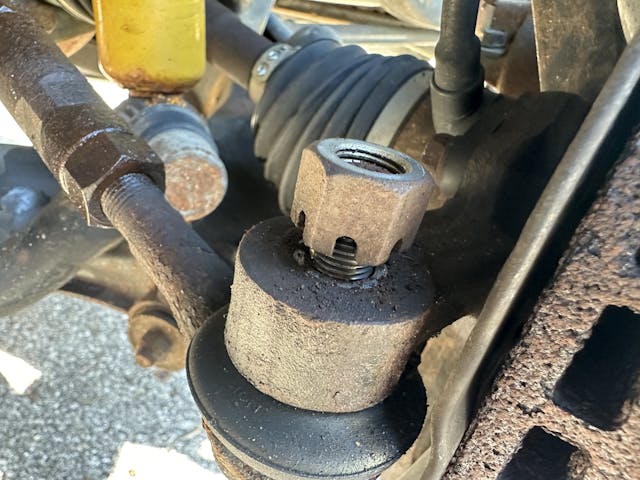
Careful with your castles
While it sounds like advice pulled from a Dungeons and Dragons rulebook, it’s also true for cars. Castle nuts get their name from the crenellations cut into the top which allow the use of cotter keys to keep the nuts from turning. They work well too, but unfortunately, they are often relatively delicate. Failing to get a socket fully seated can easily strip a castle nut, and a misplaced hammer blow can deform it enough that it will be difficult to remove. If you need to use a hammer for persuasion on one of these, remove it completely, flip it over, and thread it back on. This gives you a flat surface to hit with a hammer that will also not damage the threads.
Get the special puller

There are a couple of tight-fitting joints on the steering components. This means getting things apart can be frustrating—but it doesn’t have to be. Buying a proper ball joint press or pitman arm puller can be a steep investment considering this work is not done weekly or even monthly for most at-home DIY’ers.
Luckily most chain auto parts stores are happy to rent the special tools to people like you and me. This often requires putting down the full price and getting a refund upon returning the tools, but compared to the frustration of using the wrong tools the hold on some of my cash is very much worth it. Be sure to find proper instructions on use online as the rental tools rarely include them.
Match the new tie rods to the old ones
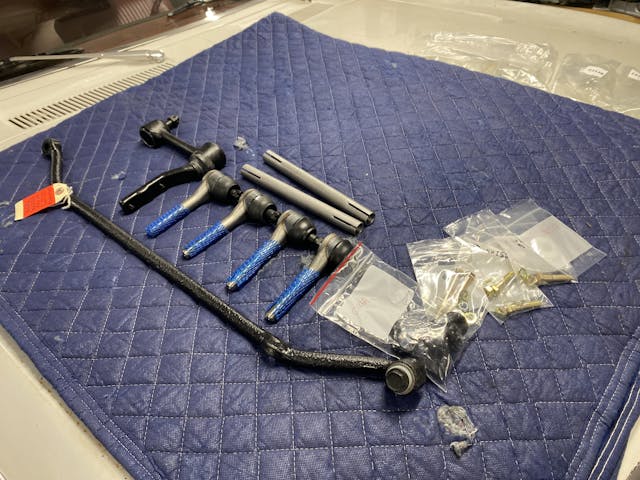
Nearly everything in your steering system has some form of adjustment, and the most critical and obvious are the tie rods. While it is possible to just assemble them and ignore the horrible toe in or out just long enough to get to the alignment shop, your alignment guy is going to like you a lot more if you take the minute to thread the new tie rods together to roughly the same length as the one being removed. This puts the adjustment in the ballpark and also makes the drive to the alignment shop much more pleasant.
Assemble with anti-seize
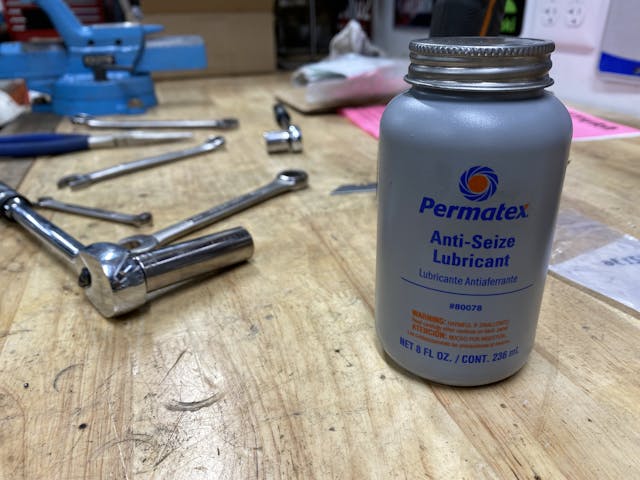
The hardworking components of your steering system are sitting on the underside of your car under constant assault from every size and type of road debris. Water, road salt, dirt, rocks, and radical temperature changes can supercharge the hold of corrosion on threaded parts. A dab of anti-seize goes a long way in keeping this at bay. It will also help the parts last longer as there is the option of doing a second alignment later. Ask anyone who has argued with stubborn, crusty tie rods and you’ll learn that anti-seize can be the small difference between a routine job and testing your patience while mangling tie rod sleeves.
Don’t forget the cotter pins
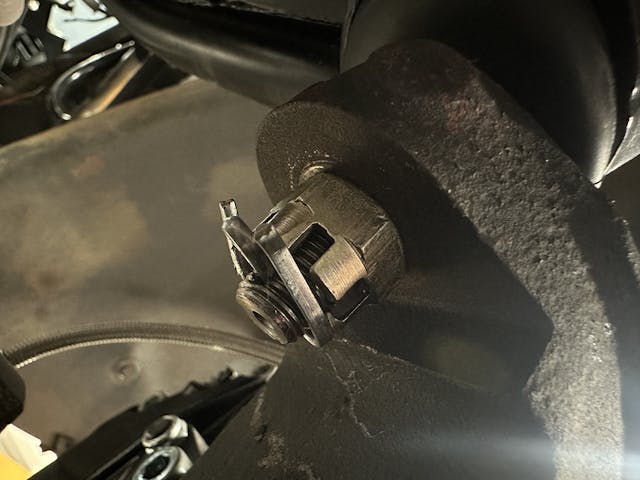
Torquing hardware to spec determines both clamping pressure and helps keep things from loosening up. Because many of the parts in a steering system see a rotational movement that could potentially loosen the threaded fasteners, many steering components have the additional positive retention of a cotter key going through the bolt and castle nuts to keep them from turning. Aligning the castle nut to the hole through the bolt can be annoying, but it’s an important step to keep your steering from unintentionally coming apart. No one wants that.
***
Check out the Hagerty Media homepage so you don’t miss a single story, or better yet, bookmark it. To get our best stories delivered right to your inbox, subscribe to our newsletters.


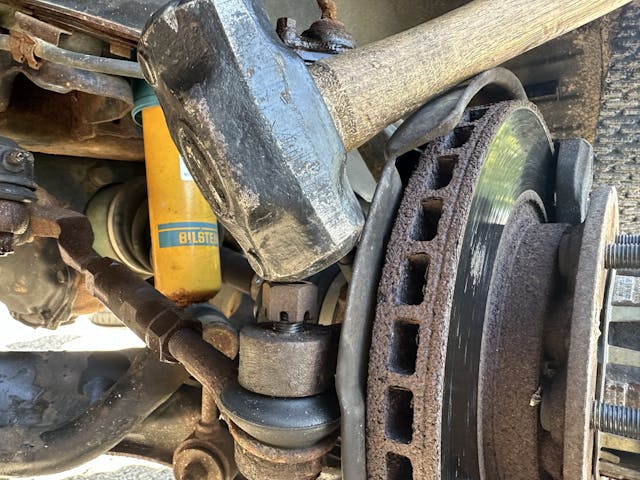
Pickle forks. I could be wrong, but judging by your photographic evidence, you do not have pickle forks and have resorted to hammering on the castle nut. Now both techniques are sometimes required to free a stubborn tie rod end, but definitely have a set of pickle forks on hand
If you feel that you absolutely must hammer on the nut, replace the castle nut with a non-castle grade-8 nut and beat that one to death.
I won’t say you are wrong, but we did have a pickle fork. There just isn’t always clearance–or occasionally too much clearance–to make use of a pickle fork. Rarely is there one tool that solves all problems, and even if there is, not everyone has it. That said, you are right, should have included a mention to pickle forks!
Everyone has a hammer.
Do NOT use a pickle fork on anything you want to reuse as it tears up the grease boot. Hammering on the nut or shaft doesn’t work well as the shaft you are trying to loosen is tapered. Hammer on the side of the part it goes INTO instead and put away that tack hammer and get out the BFH!
Hammer on both sides of that fitting at the same time that the taper goes into and watch it drop out. Just don’t take the nut all the way off first.
Yes it takes 2 BFHs.
Came here to say that. 2 hammers on either side at once!
Worked in a frame & alignment shop for 3.5 years and hammering on the sides is the way to go!
JOHN HENRY!
I use a pickle fork now and then, but prefer a six dollar tool from Harbor Freight. Just tighten the bolt and off it pops.
Good call! That’s the first thing I thought of when reading that.
THe greatest mistakes I see are people welding and heating steering parts to the point that they will fail or possibly fail. That is the scary part. I am not sure how many pitman and idler arms I have seen where they were welded to save money on a lifted truck by folks that do not understand what could happen.
I think the castle nut in the top photo is too short. The cotter pin should go through one of the slots in the castle to keep the nut from turning.
Agree! The cotter key will keep the nut from falling off, but won’t prevent the nut from loosening.
I was wondering how far I would need to go to have someone notice the incorrect installation of the cotter pin and the castle nut in the photo. Bravo George! And the “hammering of the nut” is a big NO NO. Common iknowledge tells us to hit the part that the taper goes into. High five to Joe! Makes me wonder who hired this Kyle Smith guy anyway….(Just kidding, we all learn here, including me).
No question the castle nut/cotter pin installation in the photo is wrong. Is the author incompetent or clueless, or did someone substitute the photograph and the editor fail to spot it? That bodge-up is asking for someone to get killed.
A little rust will keep that nut from backing off, I don’t see a problem here.
Yeah, i was having a good laugh at that one myself
Excellent advice, as usual!
Don’t forget about the steering coupler (aka rag joint). Luckily mine broke in the driveway and not on the road.
Good point. It is amazing how much a bad one can cause poor handling.
I’ve reversed the castle nut on a bolt or stud to successfully straighten distorted threads by screwing it down the threads with some lube. The slots seem to ‘stroke’ bad threads closer to true when you don’t have the proper replacement bolt- or tool.
That’s what a die is for. you’re just messing up the threads on both he nut and the rod.
A good alternate way to remove a tight tie rod end without a puller or pickle fork is to use two hammers. Put one, the larger if there is a difference, on one side up firmly against the body of the end as an anvil then whack the opposite side soundly. They will usually pop right out on the first or second hit without damage to boots or tie rod.
Enjoyed the article, Kyle. Thank you !!! Staring at the 1st pic, of the tie rod end w/castle nut attached, gave me pause. Having gone thru Auto Tech back in Dark Ages (before computers but w/ carbs & points) I don’t ever recall anyone specifically mentioning you could determine L or R thread by observation. So, noting thread in pic I mentioned, it slopes downward to L. Am guessing then that L thread slopes in a different direction than R thread. Thinking of your comment then”….. because you might not get a second chance. ….) which thread is shown in that 1st pic; R or L ??? Guessing perhaps L as it slopes to L????
That’s the common, right hand thread. As you turn the nut right it spirals down the threaded rod, and tightens.
Thanks for the tips! Would like to see a similar article with rack and pinion replacement tips, for those of us with the more “modern” setups. But I can remember the idler arms always going bad on my older Mopars, replaced many!
Nobody made the pun about this article “steering us in the right direction”. That’s low hanging fruit! :^)
I don’t like to bend over that far. 🙂
An air hammer will make very quick work of all steering and suspension service.
I learned a long time ago it does little to no good to hammer on the threaded end of a tie rod end or ball joint. Decades ago I learned from an experienced mechanic to use your 48oz hammer and make solid hits on the side and thinnest part of the tapered socket the tapered tie rod end or ball joint goes through. Using this method I very seldom need to use a pickle fork. And those specialty removal tools are only good for the specific vehicles they’re designed for.
Also, don’t trust your life to some unnamed foreign parts. Unless you know the quality of the parts you’re getting, quit buying suspension and steering kits on Amazon or any other online source if you’re doing this. Buy quality OEM, Moog or other known quality parts. In my shop I will install the parts a customer supplies and it almost always bites them when they buy cheap, low quality parts, especially suspension and steering parts because I charge them a second time to install quality parts when theirs’ fail.
Moog isn’t all that great anymore either.
It is so easy to forget the cotter pins, especially in the driveway at 2:AM the morning, 4 hours before leaving for vacation. Cotter pin came out while we skirted 500 foot cliffs in the canyon. Tie rod dropped off the next morning (Monday) right in front of the local brake and wheel shop! That Ford and camper and someone else was looking out after us! And yes, I used pickle forks; they work!
Pickle Fork on an Air Chisel works real good for getting joints apart, but sometimes damage the joint and seal.
I always thought they were castellated nuts. Thanks for taking me down a wormhole of crenellated vs castellated. FWIW castellated were decorative so therefore as these serve a purpose crenellated would be correct.