The Honda CT70 is looking beautiful after its Redline Rebuild treatment and, of course, it’s running like a top. Davin is not one to keep secrets about the work that’s been done and what challenges arose along the way. There were  plenty of updates along the way, but sometimes the best time to talk particulars is when looking at it reflectively. So Davin and lead videographer Ben sat down to talk through the nuts and bolts of this big little project.

First, Davin explains why he chose a Trail 70. “We’d been getting messages about doing something other than an engine for awhile, and motorcycles always rose to the top of the conversation. Between my personal experience with the Trail 70 and its nearly legendary status with enthusiasts, it was the perfect choice.” Of course, when it came time to pick up a restoration candidate, Davin fell back on an old maxim: Purchase the best example you can find to restore. In this case it meant a running and riding bike.

“That machine was pretty tired though. Complete, but tired.” That often makes things a lot easier for a restoration. Documenting how parts fit together during disassembly is a lot easier when they’re all there. Also it can make better financial sense to buy something with parts that can be restored rather than swiping the credit card for each missing piece. Davin guesstimates there are about as many parts into the entire Trail 70 than a single V-8 engine, which means this project might look fairly simple, but it  can also be deceptively complex—mainly to keep organized once it’s all apart.

In that blown apart phase it was all about cleaning and acquiring parts. Luckily, Davin had the experts at Trail Buddy on call to help find and advise on just what he needed. They also helped rebuild the front forks and sprayed the tri-stage candy paint, a paint that surprised Davin both then and now. “It really blows me away that Honda would have done such a complicated paint process on what amounts to a kids bike. These were often used and abused, and that paint makes touch ups really difficult.” No matter when he was re-spraying the entire frame.

Then it came down to assembly, which is where this man thrives. Between Davin’s trusty shop manual and the guys at Trail Buddy, the bike slipped together quite quickly. Now it’s ready for some off road adventures—right after someone puts the first scratch in that beautiful paint. Davin is still a bit squeamish, but he knows that after that first ding, all bets are off. This bike was made to have fun, and that’s what it’s going to do.

To keep track of this and other projects in the Redline Garage, be sure to subscribe to the Hagerty YouTube channel. — Kyle Smith

Thanks to our sponsor RockAuto.com, an auto parts retailer founded in 1999 by automotive engineers with two goals: Liberate information hidden behind the auto parts store counter (by listing all available parts, not just what one store stocks or one counter-person knows), and make auto parts affordable so vehicles of all ages can be kept reliable and fun to drive. Visit RockAuto.com to order auto parts online 24 hours a day, 7 days a week, and have them conveniently delivered to your door. Need help finding parts or placing an order? Visit the Help pages for further assistance.

  • 1
  • /
  • 3

Enjoy V-8 engine stories, opinion, and features from across the car world - Hagerty Media

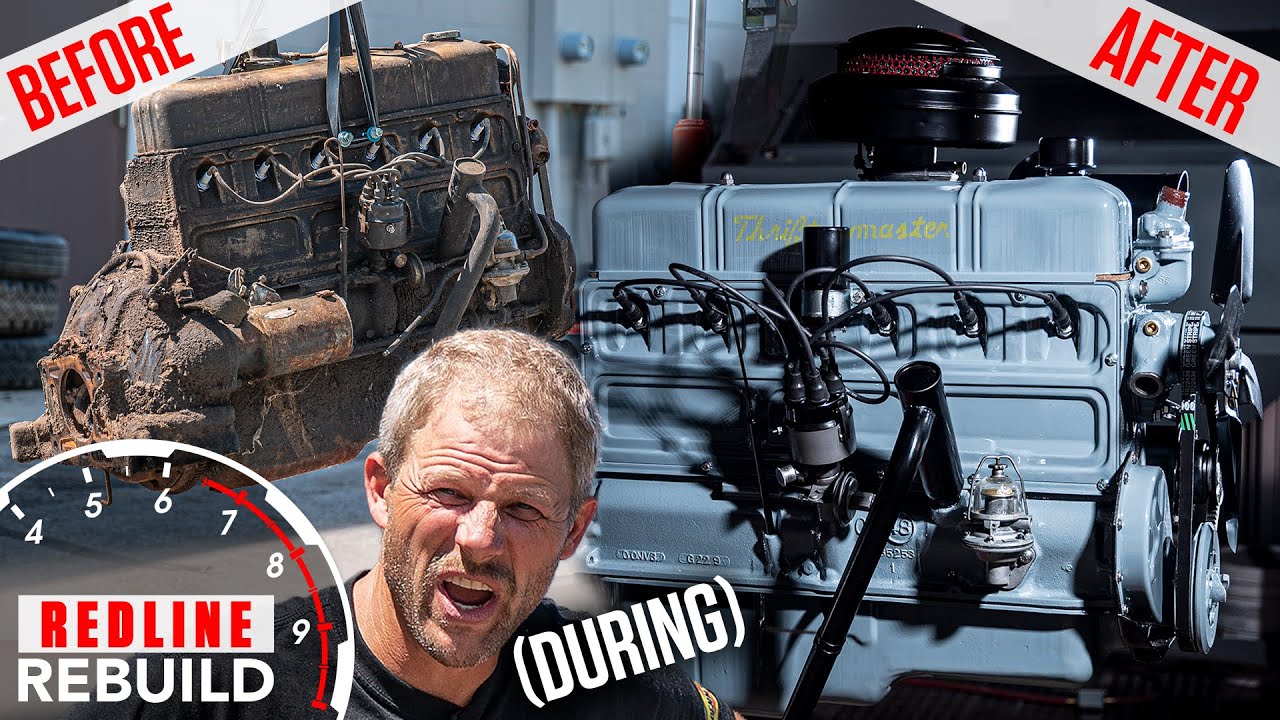
The engines that come into the Redline Rebuild garage have run the gamut. Volkswagen flat-fours in boxes and bins, running Chevrolet big-blocks, and stuck-solid Buicks have each presented their own challenges, but the latest project was a luxury. at least, it came from a luxury car.

This Cadillac 365 V-8 was not the worst project Davin and the Redline Rebuild crew has taken on. It might actually be one of the nicer ones. It was a smooth running, albeit quite tired, engine from a driving car. That didn’t guarantee a smooth rebuild process though. From the first turn of a wrench there were questions and concerns about parts, but the crew got lucky.

“I was nervous about the availability of pistons and rings after hearing from a supplier that it had recently sold off virtually all its stockpile for these engines,” Davin says about the parts concerns. “Luckily, we were able to source what we needed quite easily, and all the parts played together nicely.”

It’s easy to say the parts went together well, but the reality is there was more than a little extra work on Davin’s side than just bolting everything together. That’s the nature of engine building—not assembling. You could just bolt it all together, but the engine would not perform like it could or should. Properly fitting each and every piece means this Cadillac engine will be smooth and reliable when it returns to the four-door cruiser that it was pulled from.

The 4-inch bore block was in great shape once everything was removed, so basic degreasing and clean-up machine work were all that was needed from the experts at Thirlby Machine Shop. The rotating assembly was in similar shape, but Davin elected for new pistons, which required heating up the connecting rods and pushing the piston wrist pins through for the perfect press-fit. The cylinder heads got fresh valve guides and seats pressed in before returning to the garage for the final assembly.

The coat of Royal Blue paint really dressed up the package and made the assembly that much more rewarding to watch. It’s a stock rebuild without any crazy changes, but ask any engine builder about the first moments of startup and they’ll tell you they’re always nervous.

Davin admits “it’s not the scariest thing, but I always have at least a small amount of concern on first start of a flat-tappet cam engine like this one” referring to the style of lifters and how they engage with the camshaft. For flat-tappet engines, it is best for them to start up with minimal cranking and very quickly get to around 2000 rpm to start breaking in the lifters and make sure the lifters do not “wipe” or flatten a lobe on the camshaft. With modern assembly lubes and break-in oils, this is not as high risk as decades ago, but it still happens from time to time. Luckily, it didn’t happen to Davin this time—but that doesn’t mean there wasn’t an issue with that first start.

Davin admits to checking and double checking the distributor timing, but on that first turn of the starter, a fireball from the carb confirmed that despite the careful check it was still 180 degrees off. Easy correction, and the next turn of the keys brought the humble Caddy to life and started the break-in process. It’s a sweet sounding engine and will sound even better once reinstalled its four-door home.

Another successful rebuild in the books, but there is no rest for the weary, and plenty of other projects are underway in the Redline Rebuild garage. Be sure to subscribe to the Hagerty YouTube channel so you never miss an oil-soaked minute.

  • 1
  • /
  • 3

Next episodes

You may also like

Enjoy V-8 engine stories, opinion, and features from across the car world - Hagerty Media

The 365 Cadillac is quickly becoming less of a mess of parts on a table and more of a tidy beautiful blue engine. The process is not a game of simply fitting parts and tightening bolts, however. Davin encountered a few hiccups while assembling the long block of this V-8, but luckily the cameras were around to show you how he got around them.

“Every engine is a little different, and how some of these vintage engines were built new is not nearly as precise as we build them now,” Davin says as he sorts through the valvetrain components on the large table. “Taking the time now to make sure reproduction parts and original pieces play nice together is important, and that might require doing a little extra work.”

For instance, assembling the cylinder heads is always a careful and time-consuming process. This go around was even more so because the special micrometer Davin uses to help set the correct assembled spring height and pressure didn’t fit with the design of the valve seals and cylinder head casting. That’s no problem though. A standard digital caliper did the job with a little bit of ingenuity.

In the same way that a caliper is modern technology being put to work on a vintage project, Davin highlights a great tech tip while rebuilding the mechanical fuel pump. We are all likely guilty of taking something apart and telling ourselves, “I’ll remember how that goes back together. No big deal.” And then we’ve all likely been caught by the err of our ways when we went to reassemble those small bits and pieces, too. Instead of relying on our fleeting memory, reach for your phone (or a small digital camera) and snap a couple quick pictures. It has never been cheaper or easier to document how items are assembled. Keep the photos as long as you need them and delete them when the project is done. It’s that simple.

The Cadillac has come a long way, and now it only has a few final steps in the Redline Rebuild garage. It’s time for the test stand to roll in before this beautiful engine rolls out. Be sure to subscribe to the Hagerty YouTube channel to receive a notification when the next video goes live—we know you want to be the first to hear it run.

  • 1
  • /
  • 3

Next episodes

You may also like

Enjoy V-8 engine stories, opinion, and features from across the car world - Hagerty Media

There are two words most people use when describing the process of putting an engine together: assembling or building. Davin is here to make sure you don’t confuse the two. The Cadillac is getting its pistons and connecting rods, and that requires the person holding the tools to be an engine builder—not an assembler.

“At times it can seems like building an engine is just putting parts together, and it sort of is,” Davin says about the progress on the 365 V-8, “but it is also a process that requires great care and precision at times. Knowing when those times are is very important.”

For instance, the pistons rings for this engine are not file-to-fit, but Davin still takes the time to check that the end gap is correct once fitted in the cylinder bores. A few of the rings came in a bit too tight, which would have ended badly if Davin had simply assembled the parts. A quick run on the ring filer sorted it out though.

The oil pan closes up the bottom end of the Caddy, and the final touch of the short block is the installation of the timing set. Similar to the pistons, this is a step that requires close attention. There are timing marks relative to crank and camshaft location that need to be properly aligned. This ensures that the two are in proper sync as the camshaft rotates at half speed relative to the crank.

From there on out, it’s tightening up a couple bolts before Davin calls it a day. It won’t be long now before the Cadillac is on the run stand for break in. If you want to see what’s left to be built, be sure to subscribe to the Hagerty YouTube channel to never miss an oily minute.

  • 1
  • /
  • 3

Next episodes

You may also like

Enjoy V-8 engine stories, opinion, and features from across the car world - Hagerty Media

Davin is a man who sweats small details, and let’s just say that painting the Cadillac 365 engine block and starting the assembly of the shortblock called for some perspiration. Nothing is too small for Davin’s attention, and that means ensuring no bare metal is showing that shouldn’t be.

“I could assemble the whole engine and then paint it,” said Davin in a conversation while looking over the bare engine block, “but I’ve never really like the finished product of doing it that way. Painting it all separate just has a much cleaner look and I think it’s worth the effort.”

That effort involves taking the time to cleanly tape off the gasket surfaces and protect the innards of the engine from overspray that could cause premature wear and tear. This precaution ensures the gaskets themselves work properly and the paint does not interfere with a good seal. Once taped off, the block can be wiped down with a wax and grease remover and rolled into the paint booth for a gentle coating of color.

Once back at the shop, Davin unmasks the block and brushes on a coat of Glyptal paint to seal up the porosity of the engine block, and doing so also helps with oil drainback. No assembly manual will tell you to do it, but little things like this add up to a more reliable, longer-lasting package.

With both the inside and the outside painted, Davin can begin assembly in earnest. The main bearings are put in place and the crankshaft is delicately lowered into its forever home. The caps are torqued, and at long last the engine is ready for rods and pistons.

That momentous step will have to wait til next time though, as our assembly series on the Cadillac 365 continues. Be sure to subscribe to the Hagerty YouTube channel to never miss an update—include the final, full timelapse and startup of this engine at the end of the Redline Rebuild tunnel.

  • 1
  • /
  • 3

Next episodes

You may also like

Enjoy V-8 engine stories, opinion, and features from across the car world - Hagerty Media

Jim Gelfat never went looking for a Camaro. He was merely tagging along with a friend who had asked for a hand in cleaning out a garage ahead of an estate sale. Rumor had it there was a car buried in there somewhere. Jim was curious.

When they opened the garage on that day, 20-odd years ago, Jim couldn’t even see a car inside. Fifteen years of boxes, junk, and debris made sure of that. But slowly, as they cleared away the mess, the outline of a car took shape.

“That’s an early Camaro,” Jim thought to himself, when he caught sight of those hips.

1967 Chevrolet Camaro in the fog

By the time they had the gold car fully uncovered, Jim set his heart on bringing the ’67 with him. It arrived at his house on a flatbed with four flat tires, a dead engine, and countless rats nests. Before jumping into the cleanup project, Jim had to explain to his wife—who is more partial to vintage Alfa Romeos and Mustangs—that this Camaro project was, in fact, a bright idea.

And what a project it was. Jim pulled the car apart, swapped out the transmission, added new rims and tires, and even did a little frame straightening (the original owner had apparently had a little fender bender at some point). He pulled the motor—the original 50,000-mile 327-cubic-inch V-8, which ran but leaked at every seal—and installed a new 350. Jim customized the new engine to appear as similar to the original 327 as possible, and the original now sits boxed up in his garage in case the desire for a numbers-matching restoration arises.

1967 Chevrolet Camaro front
1967 Chevrolet Camaro profile

1967 Chevrolet Camaro nose
1967 Chevrolet Camaro rear 3/4

Jim’s goal was never to restore the car to the same condition in which it rolled off the assembly line in Van Nuys, California, in 1966. Rather, he wanted a car that he wasn’t afraid to drive around town, to take surfing, to use on errands. Sure, there are places where the paint is flaking off, but instead of worrying about it, Jim takes it as license to get the car dirty, to park it in the sun when necessary, and just generally enjoy the bejeezus out of it.  The imperfections give him a sense of endless possibility.

Sometimes the perfect car is imperfect, even when it burst its way into your life from the clutches of a cluttered garage.

Jim Gelfat and his 1967 Chevrolet Camaro
  • 1
  • /
  • 3

Next episodes

You may also like