The most expensive project-car mistakes

Making mistakes is human. Unfortunately that is a fact of life. We just can’t get it right every time, all the time. Tougher than that reality is the one that suggests some mistakes carry more weight than others. I mean, just ask anyone that has a project car.
It is nearly a rite of passage to drop a bolt, slip an adjustment inadvertently, or just completely miss something while working. It happens to all of us, but as noted not all of these mistakes are as easily forgotten or forgiven. As an example, we rounded up some of the worst mistakes you can make working on a project car.
That’s not the jack point…
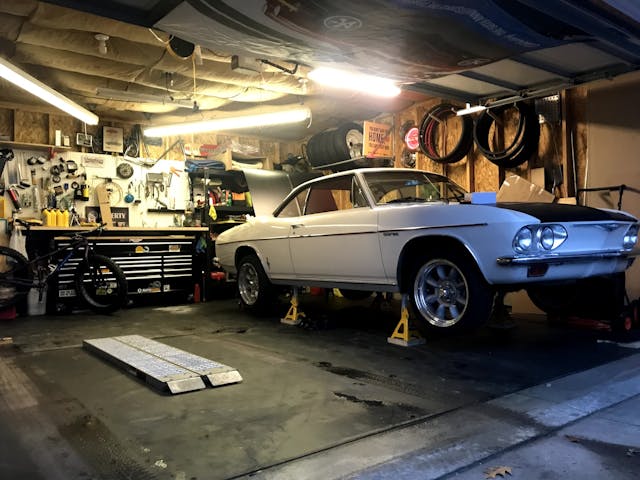
Even just a simple oil change often requires lifting your vehicle and placing it on jack stands. Doesn’t matter if its ignorance or just being in a rush, people have learned that where they placed the jack to lift the car was, well, not where they should be lifting. This can cause crumpling of trim, floors, or other sheetmetal parts which can be costly to repair properly. Even worse, there are times when jacking or supporting a car by fragile differentials or suspension pieces can affect alignment or other safety aspects without the driver even realizing it.
Service and owners manuals outline the proper lifting points and sometimes it seems trivial to look something so simple up, but the potential damage is not worth the time savings of a risky pick up point.
Starting the engine without oil
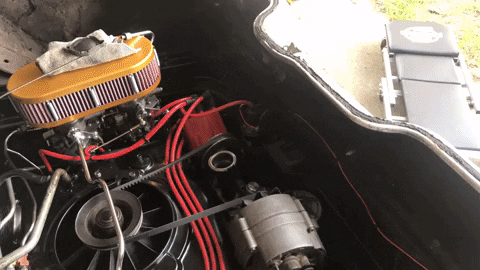
The final steps of assembling an engine are borderline intoxicating, and can be even more so if you have friends around waiting to hear the first startup. One of the last steps is filling the engine with oil. You’re in for a really bad day should that slip your mind for some reason. This can also be true for an extensive project where the engine stays in the chassis and you lose track of the steps and the realization often washes over in waves of “oh no.”
Project tracking is tough, but this one is simple to prevent. At the same time that you drain the oil, place a label (like blue painter’s tape with black ink writing) over the ignition switch, disconnect ignition coil, or even let a battery terminal hang loose. Only remove that label and reconnect power to allow the engine to run once the crankcase is properly lubricated.
Underestimating the power of ice

Encountering ice while driving can be treacherous, but if your vintage car encounters ice while parked it can be even worse. Water expands with great force as it freezes–enough to split engine blocks or otherwise destroy an engine. (Or ancillary pieces like a water pump.) As water freezes it can expand as much as 9% and exert a total force of over 100,000 psi of pressure. Even an iron engine block doesn’t stand a chance against that.
If your project car has any chance of seeing freezing temps, be sure that the cooling system is filled with the appropriate mix of antifreeze. Not only will this keep freezing at bay, there is additional benefits that antifreeze carries, like lubrication for seals in the cooling system and additional cooling capacity. Straight water should be left for track-only vehicles where the slipperiness of most coolants is banned for safety reasons, though special formulation antifreeze mixtures exist for just such use cases.
In search of shine
While hazed-over paint and flat patina has its place, many enthusiasts want cars to be shiny and slick. A well polished and waxed paint job can absolutely take a car over the top. Unfortunately the process to get that finish requires a gamble of carefully sanding–that is all polishing is after all–the finish. Use the wrong compound, machine setting, or pad on a polisher and suddenly the paint is burned through. Also watch out for the edges where paint gets thinner than the open flat surfaces.
This is a tough one because–short of owning a paint meter–there is no way to know exactly how thick the paint is. Taking a measured, careful approach to cleaning up aging paint is always recommended and most of the time that means starting with manual polishing. Hand polishing an entire car is tedious, but doing at least a few places could save you more than a little frustration of seeing the primer underneath pop through. Working by hand also allows you to see exactly how much work needs to be done to achieve you desired result and then you can scale that appropriately to using a machine.
A terminal mistake
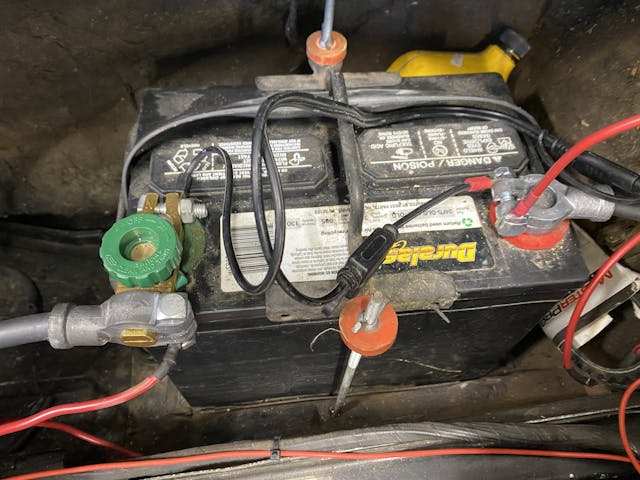
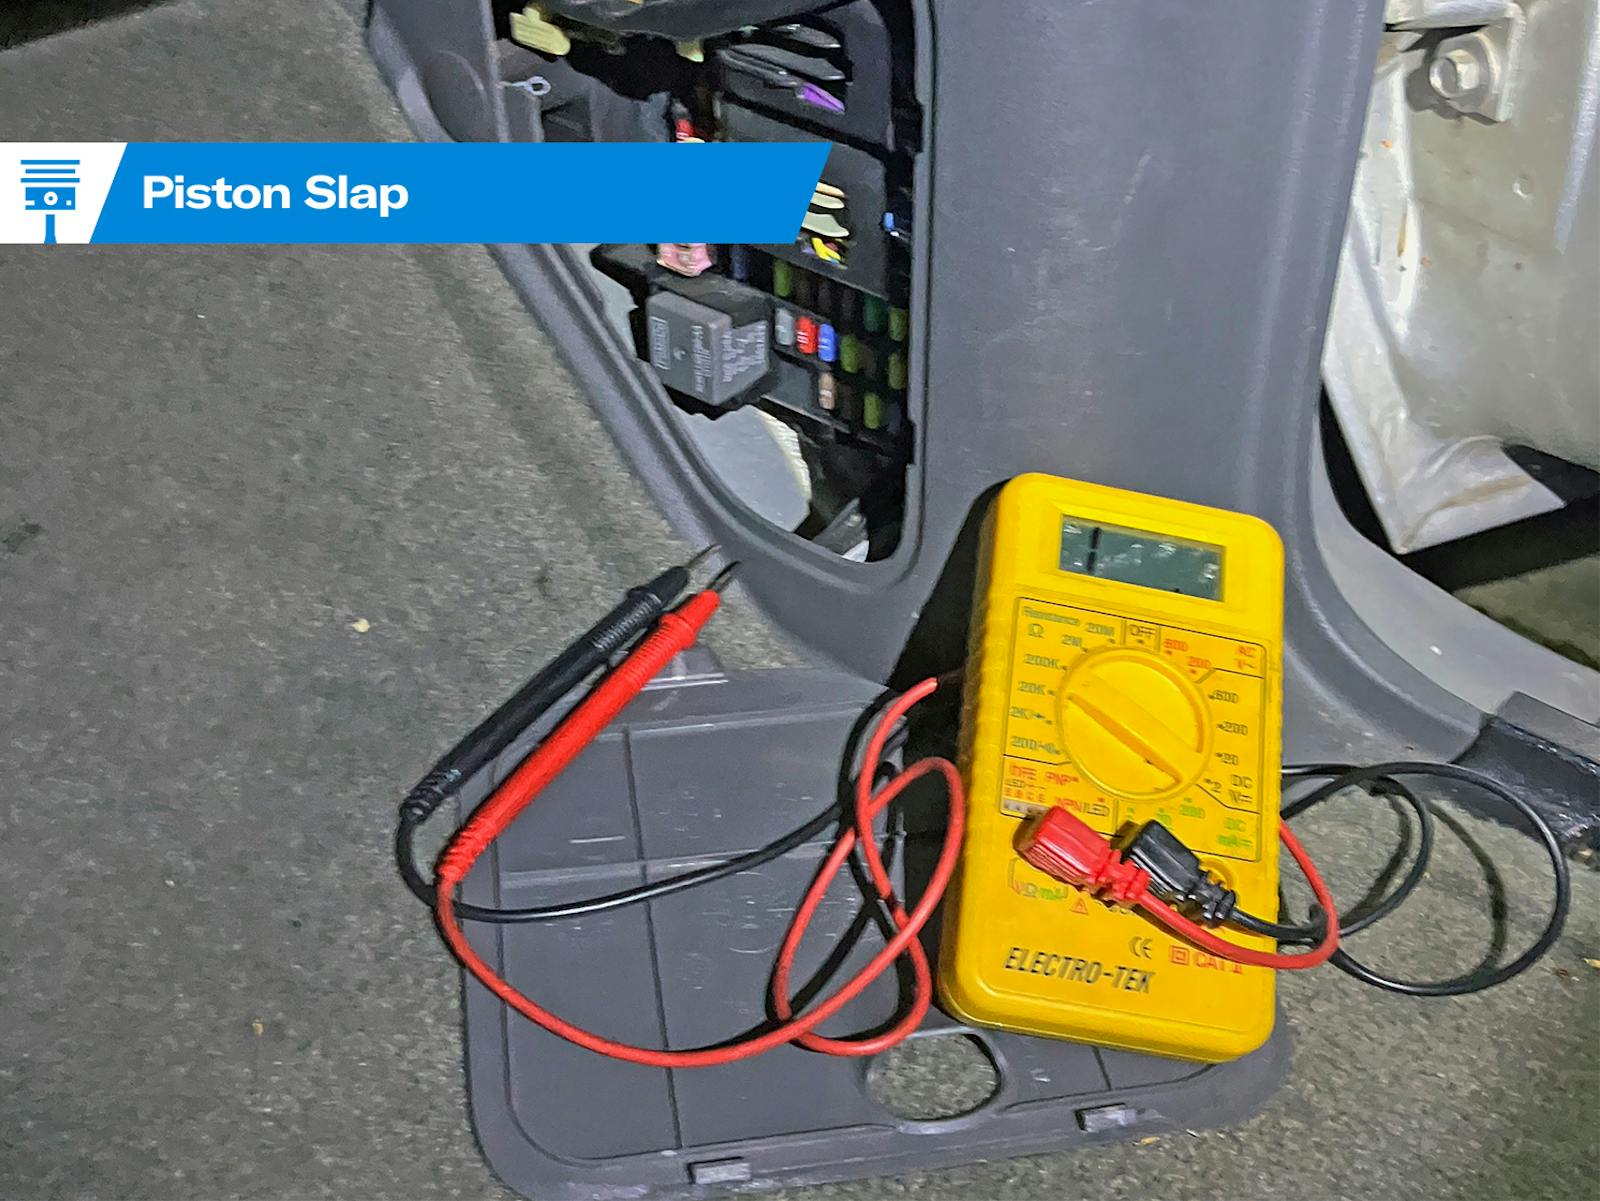
Electricity is dangerous for a bunch of reasons, but its indifference to polarity is a strong reason to be extra mindful when reconnecting it to a car. The battery doesn’t care how its flow of electrons affect what it is connected to, so all it would take is an errant touch of the wrong terminals to fry an engine or transmission control module in modern cars. Vintage cars are a little safer but it is very much still possible to melt down a wiring harness if not careful with connections.
Keeping this at bay does require a little extra work in some cases, but properly color matching the battery cables with the polarity is a good start. Should you have a truly vintage car like a Model A Ford, you need to be aware of the positive ground and not get mixed up when making connections. If unsure, research and find out the proper way before you end up rewiring a cooked wiring harness.
Well that didn’t need a hole in it…
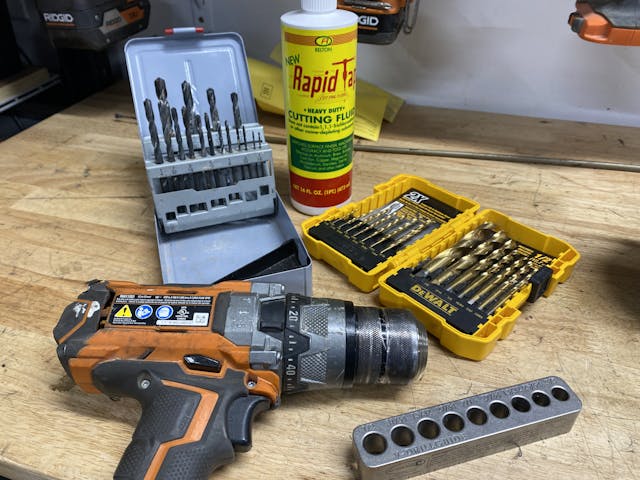
When parts and pieces don’t come apart like they should or you are mounting something new, there’s a legitimate need to make a hole where there wasn’t one. Grab the drill, chuck up a sharp spiral bit and watch the chips fly. Did you check what was behind that panel before you shoved a spinning cutter through it? You’re likely to get bad news if you didn’t.
Sometimes viewing what’s behind a panel is impossible, but to blindly drill holes is asking for trouble. Either look where you are going, or start with a very small (think 1/8″) pilot hole drilled very carefully so that the bit barely–if at all–breaks through the workpiece. This allows you to insert a pick (or similar) to get a depth gauge or feel what you might be up against.
Spilling the forbidden sauce

So many chemicals that go in and around your car are great for one specific part or system, while being absolutely horrible for everything around it. Case in point: brake fluid. Hell hath no fury like brake fluid’s ability to ruin a car’s finish. Paint will lift right off, rubber gaskets/bushings will swell and distort, and brake fluid can even ruin your brakes if spilled on friction surfaces and not cleaned properly.
Treat every automotive fluid or chemical as though it will damage delicate surfaces. The chance is too high that a random bottle of something will create a problem you don’t want to deal with.
To err is human, but to avoid these big ticket expenses is enlightened automotive restoration.
I lean towards the more practical advice about not spending too much initially, on parts you don’t need – at least yet. I have picked up quite a few cheap projects from people who got in over their heads money-wise, by buying new interiors, chrome wire wheel sets and new tires – for cars that needed substantial structural repairs and/or an engine rebuild before they were EVER going to need shiny, pretty things.
Be careful where you casually toss things. I was doing a little parts cleaning in the garage when I threw what I thought was a clean rag on the hood of my newly painted MGB. When I picked the rag a few hours later I was greeted with a saucer sized section of pickled and lifted paint in the middle of the hood. I had forgotten that was the rag that I was parts cleaning with some acetone. My dumb a$$! I got the “Bent-Wrench Screw-up” award from my club that year.
Sounds like a good opportunity to cut a hole and install a scoop to me… 😛
My neighbor bought a old Ford tractor with a blade to push snow. It had a 6 volt system.
The battery was always dead and he said the ammeter didn’t work. I took a look and told him the battery was in backwards. He looked at me like I was crazy. I told him I was a positive ground system. Just discharge the battery and switch the cables I told him. I lived on a farm as a boy and knew those old Fords in and out. He took it to a dealer and for a tidy sum they sold him a new battery, new generator and voltage regulator. He apologized when he saw the negative cable attached to the positive post. Positive is not always live. Know your vehicle.
My 1952 8N taught me all I wanted to know about 6-volt systems. Lesson #1: switch everything over to 12-volts, ’cause it’s something I know more about. 😄
I personally know someone who remembered to put the oil in during a change, but had forgotten to put the drain plug back in. He blasted around the block with it and came back wondering “Why’s this thing so noisy?” The mystery was solved and corrected immediately and the ’70 Road Runner (383) recovered amazingly with no noticeable after effects. Not as expensive a mistake as shameful.
Hired at Shelby in 1965 for 350 line. First assignment, drill two holes in rear fascia for 359 emblems. Outsmarted self by drilling 3-4 cars before opening trunk to put on clips. Guess where the spares were located! Oops! Nice start to a great job experience.
I’ve owned 3 classics over the past 30 years. One was a money pit, one was a good driver & one was perfect. I bought the perfect one for about $.40 on the dollar that tý poor guy had in it & đô the other two. My advice is, unless you are a trained professional and enjoy the work let the other poor guy sink the money into your dream car, and then buy it from him. Cheers.
My best polarity story. My friend across the street was around 18 and kept asking about a Lotus Elan that was at a gas station for a very long time. His offer was finally accepted on the car. The papers were signed and the money paid. Jim switched the battery terminals and drove the car away with a great deal.
On paint I go backwards first. 5000 grit may take the top dimple off and nothing else and go courser till you get what, then carefully go finer again to take out the scratches. Same with compound, but before you start use a clay bar to clean the paint so aren’t dragging dirt around. If this is your first time doing this, try it on a used fender, NOT dad’s Oldsmobile.
I’m fortunate enough to have a lift, but floor jack in the driveway is often required. Years ago I built ramps out of 2″x8″ to run the car up on. Now you can get the jack under and onto a crossmember or axle. The suspension for the stands can cause issues as you lower to the vehicle and the suspension settles. If you use this method the control arm mount to the frame is safest.
When using a lip roller on the fenders lifting behind the wheel enough to get it off is enough and more accurate. Make sure the paint on the car is warm. The paint may flex enough, though I’ve never actually seen that happen. Satin black has hidden many sins over the years.
When doing electrical one of the best safety tricks I’ve found is using a 10 amp 12 volt circuit breaker between the battery and cable or using a home made adapter to fit in the place of a blown fuse. If their is a short you know right away.
My most recent build I used DOT 5 brake fluid. It doesn’t eat paint and it was so nice. Wish I’d discovered it sooner.
YAMAHA build quality; years ago I had a Yamaha XS500 twin motorcycle. My brother-in-law asked me to give him some riding lessons; he could drive a clutch and ride a bicycle. No problem. We hopped on the bike together drove to a big empty lot nearby. We spent almost an hour there as he practiced and I gave him pointers. After a while the bike started to stall out and lose power. I said it is time to go, something is wrong with the bike. We rode back home and after he and his family leave, I go into the garage to see what was wrong with the bike. After a minute or so I remember that I drained the oil to service the bike a few days before but ran out of time to finish the job because it was time to go to work! So I was riding the bike for over an hour total with no oil in the engine! I thought it was ruined but no, it was fine after I put oil in it! It ran like a top until I sold it about 10, 000 miles later. I was so impressed!
Just a little brake fluid on a 66 Mustang K Code that has a #7 paint job so I wasn’t heartbroken, but it’s definitely the first thing that draws your eye. Sooner or later fluids get slung around. Starting vehicles with compromised fuel seems to be my biggest issue recently as a collector with cars I was going to drive and then didn’t for years. I went to all ethanol free about a year ago. That helps some.
The most EXPENSIVE project car mistake is a rash decision to start tearing a car apart because you want to do a full restoration, especially if you have never done one before!. Most people totally underestimate the COST and the TIME required to complete a full “frame-off”/unibody restoration. Half the time the cars did not need that, especially now that REAL SURVIVOR CARS are worth as much or more than a restored version. How many times do you see “PROJECT CAR” for sale, “all the parts are there just needs to be put back together” and if you do it’s worth this much money! LOL. Amazing how many people still think that a full restoration “will only take a few months” to complete. DO YOUR RESEARCH before you attempt it, whatever you think it should cost AT LEAST DOUBLE IT!, I’ve been in this hobby for over 50 years, people ask for my advice all the time, my best advice is BUY THE BEST RESTORED OR SURVIVOR CAR YOU CAN AFFORD, don’t pay attention to what a car sold for huge money at Barrett Jackson or Mecum. You did actually want to go for ice cream and a car show with your new ride while you can still afford it and are still 6 feet above the ground…..
only electrical issue I ever had wasn’t me but did involve one of my trucks, my brother needed to move my 1989 Chevy R2500 Crewcab to put his camper in my parents pole shed, I was out of town so I told him where the keys where and the battery was (I had removed it to keep it from getting drained) My brother (older) decided he didn’t want to lug the trucks battery out to the truck, so he takes his truck out to mine and runs jumper cables from his battery to teh battery cables on my truck, he gets my truck started and everything disconnected and his truck moved, but when he puts my truck in gear and starts moving it the positive battery cable hits the fender and the truck of course dies, I get home see my truck moved and don’t think anything about it till my brother tells me that he pushed my truck to were it was, I go look, Positive battery cable is melted, along with the wire for the alternator, the alternator is fried, the spark control module in the distributer is fried, both TBI injectors are dead(and they weren’t even a year old), multiple fuses are blown headlight switch is dead, driver side fuel pump is dead, and several other wires are partially melted or show signs of overheating. My brother then gets a now battery cable and alternator, while I canabalize the injector off a 90 suburban I had given up on, got the truck running and shut it off, next morning go to start it again and the battery is stone dead, hook up to a charger and charger won’t charge it, put a different battery on crank teh truck it sputters once and then everything dies, quickly get out and see something glowing down by the starter so quickly grab a pliers and disconnect the battery just as smoke starts to rise, that was four years ago, and finally got everything but the fuel pump fixed. (My brother never did put his camper in the pole shed.)
Now you tell me.
Where were you when I was mounting an air horn on my Jeep JK and wound up with a 1/4 hole in my radiator?
Thanks for the article.
It made me feel a tiny bit less foolish.