How to Re-Form Damaged Threads
“I think I cross-threaded it.”
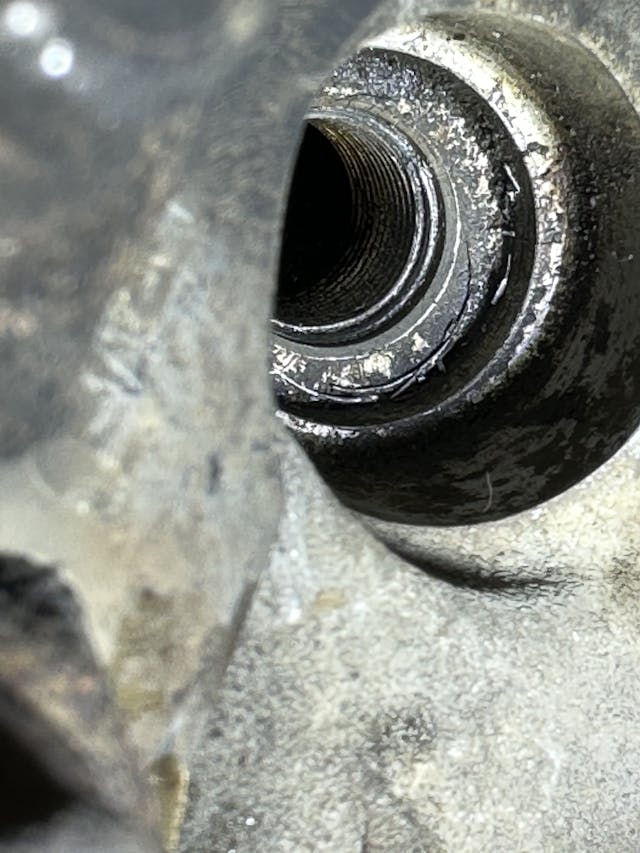
The voice on the other end of the phone was sullen. It belonged to a friend who had just emerged from under the hood of his 1999 Chevrolet pickup. As he was putting the #4 spark plug back into the aluminum cylinder head after performing some maintenance, the plug had bit and started threading at a slightly wrong angle.
Nobody wants to deal with damaged threads, but with a little prep and know-how you can save the thread, the part, and your sanity.
Threads are a critical part of the assembly of pieces we call automobiles. The spiral-incline plane that creates a bolt, nut, or threaded hole allows for easy disassembly and generates a strong, durable clamping force. The effectiveness of threads relies on a smooth and well-fitting assembly which means any bit of corrosion or damage can be a big problem.
When—not if—some damaged threads appear on your project, there is a lot going through your head: Everything from horror stories of drills and threaded inserts to tales in which the hero was a wire brush. In the middle of the chart of options is chasing the threads to clean them and remove damage. You might be tempted to reach for your tap and die kit … but that might not be the best idea.
When I dropped by my friend’s driveway for moral support, we pulled the inner fender and got a decent look at the reality of the problem. Luckily, my friend has a good feel for how spark plugs start, and the thread was only barely miffed. However, the idea of getting the plug started correctly and powering through to make it fit again was just not on the table. We needed to chase the threads.
Method #1: Use a Tap
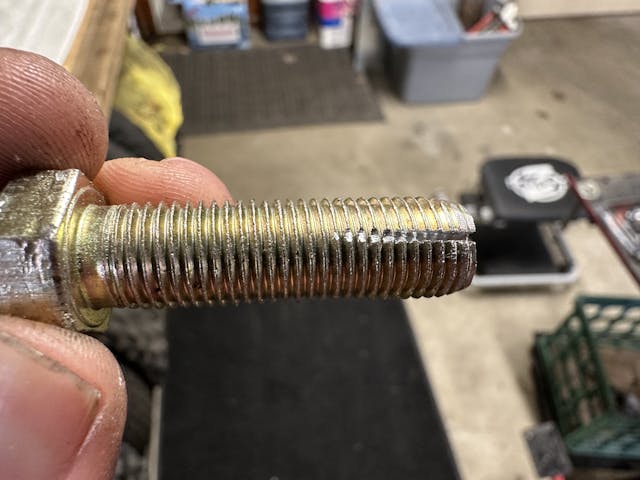
I had an appropriate M14-1.25 tap that would theoretically match the aluminum heads on his engine—a 5.3 LM7—but there is always the chance that whatever tap you have is slightly different than the one that originally cut those threads. Any differences between the two would be settled by force, and in our case the hardened tap would easily bite a chunk out of the aluminum cylinder head to declare victory. We were not interested in that.
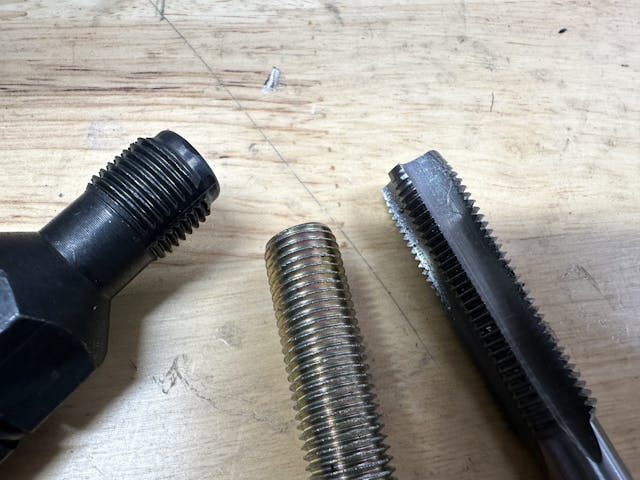
Method #2: Buy a Thread Chaser
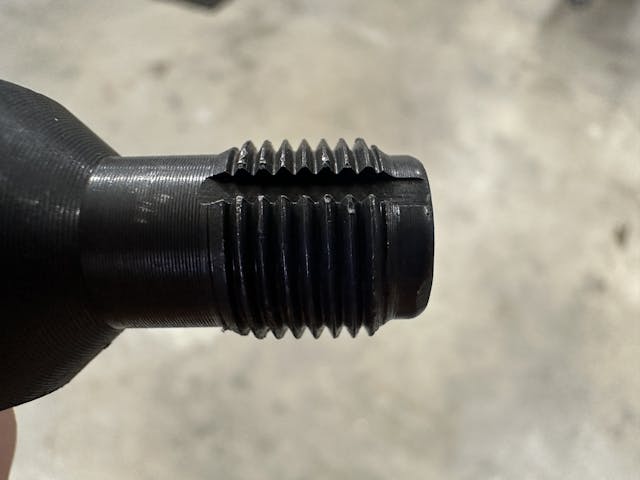
If you’re looking at that thread chaser and thinking, “Kyle, that looks an awful lot like a tap,” you’re correct. It does, but a couple key features are hiding in plain view that make a chaser different than a tap—and better for this situation. The first is right on the nose: A pilot section, which helps align the tool into the thread bore. Taps lead with a cutting edge in most cases, which means if the tap starts slightly crooked, you’ll have a harder time feeling the misalignment. If you try multiple times, you will start to remove material. Remove enough, and the chance of stripping the thread increases significantly.
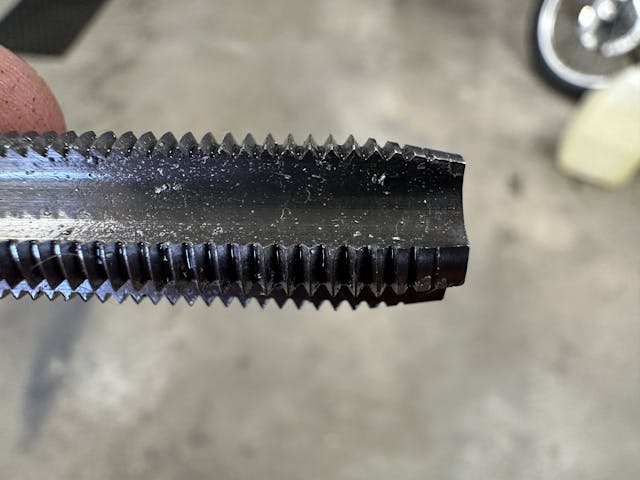
Notice that, behind the pilot, the threads do not have the same lead-in as a cutting tap. Again, since a chaser is only meant to restore damaged threads, the design is just less aggressive overall. Using a chaser means less chance of swarf falling into your project, too, and we certainly didn’t want any aluminum in the combustion chamber of my friend’s 5.3. Just to be cautious, we coated the chaser with grease to catch any debris it might loosen.
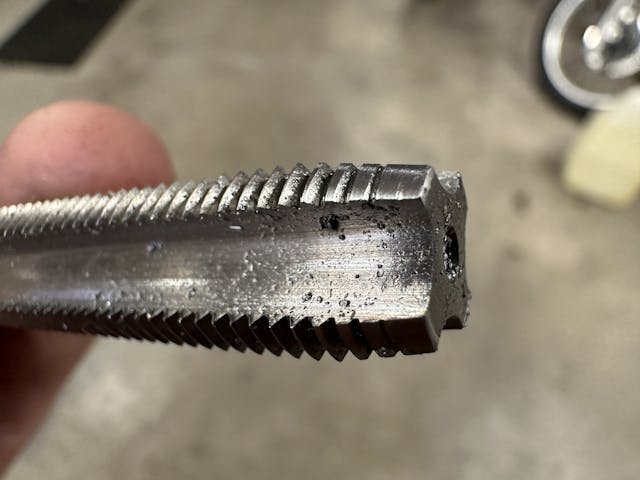
We got real lucky: The threads got reshaped perfectly and the plug threaded in and tightened up nicely, a reminder that using the right tool always makes a job easier. A good quality set of thread chasers is under $100 and covers a variety of pitches.
This is actually the first thread chaser I’ve purchased. It’s a tool that has always been on the shortlist, but it was never in the cart come checkout time. Any time I need a thread chaser, I usually just make one.
Method #3: Make Your Own

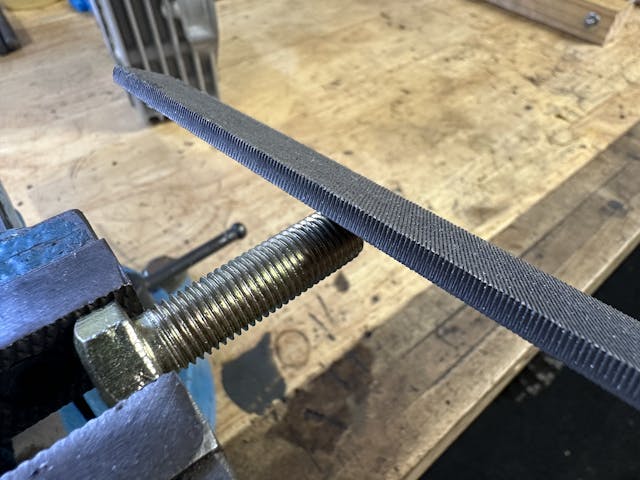

Making a thread chaser is not difficult, and the skill is a nice trick to have up your sleeve. Just take a grade 8 bolt and file down the first few threads to create that pilot and lead-in threads. If you are really motivated, use a hacksaw or small cutoff wheel to create a few reliefs that can collect any debris that will be forced out of the threads as it re-shapes and cleans them.
Next time you are in the middle of that project and miff a set of threads, you are prepared to handle the problem the right way … or at least understand the risks of doing it the other way. Like I said, there is a place and time for each, and having more skills and understanding of what you are doing is always a good thing.
***
Check out the Hagerty Media homepage so you don’t miss a single story, or better yet, bookmark it. To get our best stories delivered right to your inbox, subscribe to our newsletters.


One caveat about making your own thread chaser from a bolt; I’d recommend against cutting the slots with a cutoff tool as the heat generated from the high speed can distort the profile of the teeth you’ve just created. Better to use a hacksaw blade which (should) leave the thread profile as designed. As with many operations, slow and steady wins the race. Also the suggestion about installing a nut behind where you’re cutting the slots is brilliant.
Y’all should look up Loctite thread repair kits: PC3967. It’s basically an epoxy with a nonstick component that you paint on the threads of the bolt. Mix the epoxy, put it in the hole, coat the bolt with a nonstick, screw the bolt into the epoxied hole, and let it all set up. Come back later and unscrew the bolt. Worked great for me on a motorcycle windscreen bolt in soft aluminum. I now keep it in my toolbox all the time.
Looks interesting. Does threading the bolt in push a glob of the stuff into the hole or create a ridge? Looks like it might be really nice for cosmetic repairs with access problems.
You don’t need to put too much of the epoxy into the hole. Remember you’re just trying to form new threads not fill the entire hole. Just enough and not too much. It also seems to keep pretty well in your toolbox once it’s opened. I just used it again last year and it had been sitting in my toolbox for probably four or five years.
I’ll bet the nonstick paint they provide in the kit would also work with JB weld if you wanted something a little more substantial.
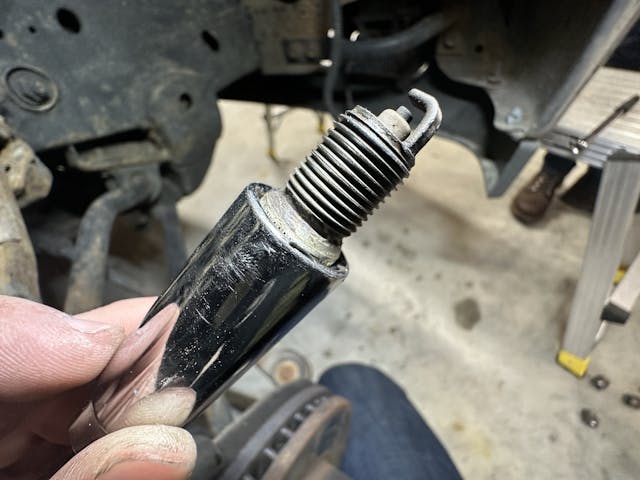
My next door neighbor was changing the spark plugs in his 1993 Ford F-150 6 cylinder using a 3/8″ air ratchet and putting them back in using the same air ratchet. As luck would have it he cross threaded #4 cylinder and messed the threads on the spark plug. I borrowed a 18mm thread chaser from a machine shop, coated it with grease, then aligned the pitch by looking at all the other spark plugs. Using a short 3/8″ strong arm I started to work the thread chaser back and forth until I could turn the extension using only my hand. To ensure nothing was left in the cylinder I took a home made 1/8″ tube air nozzle attached to a blow gun and blew out the cylinder. I took a spark plug from another cylinder and installed it in #4, by hand and tightened it using the strong arm. I told my neighbor not to use his method of using the air ratchet, but instead thread it in by hand and then use a manual ratchet, or strong arm to tighten the spark plug.
The old trick I learned for installing spark plugs on back cylinders involved using a section of rubber fuel line inserted over the spark plug tip. The fuel line is flexible and gives enough friction to turn the spark plug without damaging threads if the plug is started. Cross threaded.
The old trick I learned for installing spark plugs on back cylinders involved using a section of rubber fuel line inserted over the spark plug tip. The fuel line is flexible and gives enough friction to turn the spark plug without damaging threads if the plug is cross threaded.
I’m shocked everytime I see an auto tv show where someone is removing / installing spark plugs with a power tool (air impact). I don’t understand the logic. It’s as if they think they are doing a pit stop on an Indy car or something. Also when I see them disassembling an engine and they use an impact gun to pull intake bolts, head bolts, main bearings, rods, etc. I can’t imagine the impact hammering those bolts does them any good, plus you don’t have the ability to feel the bolts release and pick up on any problems such as a loose, stuck or over tight bolt.
Being a retired machinist I was a little shocked that there was no mention of thread files. In the absence of a thread die, they are relatively cheap and most sets include American and metric pitches. You just select the pitch to match your bolt. Great article.
Or use something like the Hazet 842AIG-1/4 Universal thread repair tool set. It universal and include for chasing bolt threads and 2 tools for inside threads, all universal. And because the tools are adjustable you can start anywhere along the thread path. I’ve used them many times and are helpful.
Yes! I set of thread chasers are in my future. Hopefully like some of the the other one-off tools I own it will allow me the axiom, “If I have it, I will never need it”.
Buy a “backthreader” for sparkplugs. They’re not expensive. Coat it with grease to catch chip, insert into the sparkplug hole, then you turn a nut to expand it and thread it up from the bottom. Since most crossthreadings occur at the top, the reverse tap gets aligned at the bottom and runs up in perfect alignment to the damaged area.
Correct.
I just replaced the plugs in my Bird’s 4.6L V8 with aluminum heads with the factory specified Autolite Double-Platinums. Their metal body is nickel-plated and they strongly recommend NOT using anti-seize, because it’s already formulated into the plating.
My old plugs were the same as new plugs, but with an updated design, and were installed in 2007 and came out without a problem (Car clocks only about 1,200 miles/year). After breaking them free, I slowly re-tightened them a bit, then slowly backed them out, occasionally re-tightening a little, then continuing to back them out. Then I threaded in the new ones by hand and torqued to spec. I was frankly amazed that after being in the aluminum heads for 17 years & 20K miles, those plated Autolites came out with ease.
What most don’t read or know, is that anti-seize is best used on un-plated plugs that usually go into iron heads, whereas most quality plugs for aluminum heads are already plated and don’t require anti-seize. I believe the visual identifier between both types of plugs are the color: Black body are the older plugs for iron heads and anti-seize should be used, while the silver body plugs are plated for newer or aluminum heads and don’t require anti-seize.
I learned a simple rule to separate taps & dies from thread chasers, because early on I didn’t know the difference:
If you’re cutting new threats = taps & dies.
If you’re cleaning or repairing existing threads = thread chasers