5 things that changed how I build engines

Few things in the automotive world are as complex as building an engine. Not assembling an engine; building an engine. It’s similar to cutting a diamond: The beauty of the finished product is simple, but the process—taking the time to ensure proper setup and function at every step—can be intense.
Becoming a professional engine builder requires years of experience. I’m definitely still an amateur, but these five things helped me make huge leaps in my own engine-building process.
Layout/space for layout
One of my first engine-rebuild jobs wasn’t even the full engine, just the top end of a vintage thumper after it was destroyed by a short and torrid love affair between intake valve and piston. I set up shop in a friend’s garage. We pulled bits and pieces off with reckless abandon, stacking them on the motorcycle lift under the bike. Only once we reached the reassembly stage did I realize all the parts we needed were a jumbled mess.
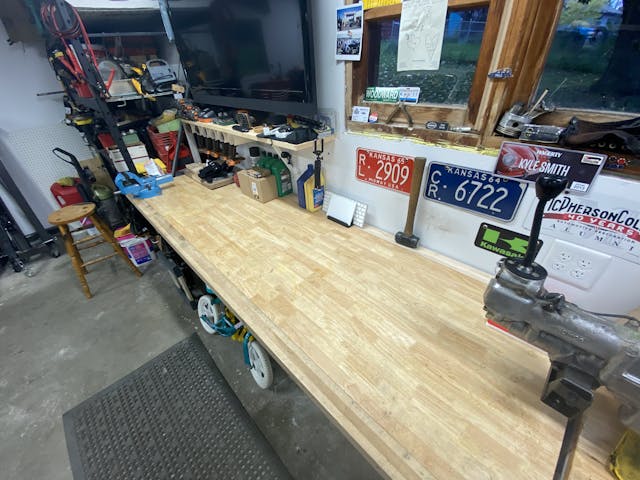
Today, I prepare my workspace. I prefer to have enough room to lay out each and every part: They don’t have to be organized very strictly, but nothing is stacked, in a box, or otherwise hidden from sight. Attention to detail is one of the most important resources in engine-building; I don’t want to waste it on making sure parts didn’t fall off the table or get jumbled underneath it.
White linens

Honda famously requires all its assembly-line workers to wear white head to toe: The process should be so clean that the uniform stays white. I’m not a professional engine builder, but I did stay at a hotel last night—and I kept the towel to lay on my workbench. Only once a part is fully ready to assemble is it placed on this now-sacred space. Depending on the component, I might even wrap it in a plastic bag or container first.
That clean white space is where I first assemble the engine—mentally. I can visually take stock of the parts and pieces and know that I have everything, and each component is properly prepared. This prevents me from being surprised or having to source something on short notice: If a part I thought was cleaned and ready needs additional work, I address it now, before assembly starts.
Write it down

A failed seal once forced me to rebuild an engine I had already assembled. As I took the engine apart, I did the standard “while I’m in there” look-around. The only problem was that I couldn’t tell whether the wear on a given part was new: Certain pieces like rocker arms are totally safe to reuse if still in spec, but failing to document the wear in specific terms leaves me open to confusion when trying to diagnose other issues. Did I re-use a worn part, or did I produce that wear because of a sloppy assembly?
Eliminate that game and draft a personalized cheat sheet. Anything that can be nominally measured gets touched by the digital calipers before being final-assembled. If taking a measurement isn’t possible, document a part’s condition, including any flaws that you might need to monitor or allow for in the future.
These sheets are also handy if any of my engines go up for sale before I run them or put them in a bike: The buyer can see from photos and notes exactly what they are buying.
Understand each part

Once I started noticing each individual piece of the engine worked, my brain was able to prioritize. Suddenly I worried less about using factory hardware to hold on a side cover and obsessed instead of the one little lip seal that ensures oil coming out of the oil pump goes through the crankshaft to the rod bearing.
This mental process is also great for troubleshooting issues, especially if, like me, you use some components outside of the engine’s original design parameters, and thus deal with problems and fixes that the original engineers would never imagine. If you truly understand the system, you can more quickly deduce which component is not doing its job.
Repetition

Just like it takes a couple of watches of Inception to know what the hell is going on in the second half of the movie, it takes more than one rebuild of an engine to fully understand what you are doing. It’s tough for us home garage folks, but rebuilding the same engine multiple times is an awesome way to learn a lot in a short amount of time.
Your first time through a build is often spent just trying to not do things wrong. Then, as your confidence builds, you start asking why this works, not how it works. Suddenly you are primed to understand what improvements you can make and, if you seek more performance, what is a good spend of your time and money.
***
Check out the Hagerty Media homepage so you don’t miss a single story, or better yet, bookmark it. To get our best stories delivered right to your inbox, subscribe to our newsletters.


I still do engine work the Diesel mechanic way… get in, find the problem, fix the problem, get out. If I need engine bearings, the heads do not come off… that sort of thing.
just a word of caution, don’t use a towel like that. Use either clean carboard, lint free mat or thick butcher brown paper. A roll is cheap. A small piece of lint missed in a bad area like a ring or bearing can cause issues. Work as if you were in a clean room.
A fair point. With all these roller bearings the motorcycle engines seem a lot more tolerant of stuff like that, but I will keep that in mind in the future. Thanks for sharing!
I like to keep my air blower nearby to clean things initially during assembly and them wipe and of course a final visual inspection. I have used white poster board as well for layout because lint from towels isn’t always friendly, but if you know that you can you can deal with it. Its the not knowing what can contaminate that will bite you.
I like that tip! A quick blast of air can keep things nice, just have to make sure I’m not blowing anything on top of the rest of the pieces to be assembled.
You in todays wold most everyone has a cell phone with a camera. Start a file named for the vehicle and take pictures start to finish! Not sure what went where or connected to what- go back to your pictures!
Have you had lint issues before? I’m having a mystery problem with cylinder wall scoring from startup.
Hi. Total Seal has several products that might be of interest to you. One is a standard liquid piston ring lube. The other is a dry film cylinder wall lubricant. It comes in a jar and looks like graphite. They are both designed to allow your new rings to seat without scoring.
Love the article! Breaker Bar is right on with the Butcher Paper. It works very well.
I also agree with Breaker Bar. But I use red rosin paper from a home improvement store. A 36″ X 172′ roll is under 15 bucks and stores on a roller bar under my bench for easy replacement.
me too!! it’s great for all kinds of things around the shop.. just used some to prevent overspray from gas tank that was sitting on top of a cart…
Good outline – agree on the lint. Also, use a surface where things can’t roll off and disappear into the 4th dimension. Maybe mot important is to really observe every part, looking at surface condition, indications of wear, gouges, marks, sometimes even the color – as in bluing from heat. Every disassembly is something of an autopsy, and sometimes you find things that aren’t exactly why you’re rebuilding, but will save you grief if you notice them and address the issue. The scope of any rebuild is likely to expand, but you’ll be happier with the final result.
Not sure what others do, but the first thing I do when rebuilding an engine is throw every moving part in the trash. If you’re doing it, do it correctly. Keeping old junk in you rebuild defeats the purpose of rebuilding. Maybe just pour gasket sealer and some oil treatment for old motors and call it a day if you reuse junk.
Even these relatively modern engines I do have multiple parts that are no longer available new or NOS. Cleaning, checking, and re-using parts that are within serviceable spec is required to keep certain things in use. Not a thing wrong with that.
I see your point of taking care not to reuse worn parts but I’ve taught my boys not to throw anything away until the job is completed. This allows you to catch variations in new parts that might require slight modifications to your assembly. Throwing everything away at the beginning of the rebuilding process can keep you in the dark and you wind up with problems later on. But you are correct. Don’t cheap out on small parts that could cause you major headaches in the long run.
Loved your steps. Especially how important enough space to work and spread out is. My first full engine rebuild was a straight 8 Buick in my grandmother’s dirt floor garage.I learned early on how not to disassemble because no matter how much we think we’ll remember, we don’t. I save my paper-board egg cartons, labeled with a sharpie for front/rear, driver or passenger side. nothing is loose or unlabeled. And with our phones, there are never too many photos of how things come apart or in what order.
White broadcloth works well too. Amazon has it 60″ wide x 5-yards for $26.00, it is pretty much lint free and can be cut to size. It seems to hold the parts in place well. My mother sewed alot so I use to use her material when I needed clean rags to layout carb parts when rebuilding. When I was younger and first started rebuilding things. Got in trouble for ruining some material a few times. Fabric stores have all kinds of neat stuff to use.
I have overhauled several XK engines used in the Jaguar E-Types and the best help I can provide is to keep your work area and parts clean as if you were in a operating room. I can reassure you that parts cleanliness is the key element to a long-lasting overhaul including covering them up when not in work.
First and foremost, understand what you are doing and recognize your limitations. If you don’t have the proper tools, obtain them. If you don’t completely understand how what’s in front of works, learn as much as possible before disassembly. Time spent being a student of internal combustion engines is time well spent. If you don’t know all the particulars about your project, ask someone that is familiar with what you are working on. Take notes, take pictures, and as stated before, keep everything clean. Close the garage door and keep young inquisitive fingers away from your work area. Try to obtain everything you need (replacement parts, gaskets, cleaning supplies, etc) before beginning the reassembly process. Check every torqued fastener twice. And most importantly, be patient. Quality takes time.
Great article! Cardboard, an air hose for cleaning, and a parts cleaner with spray and a huge bath of that wondeful liquid – with a screen on the bottom to prevent parts contacting sludge from the soaking.
My experiences include a 4 cyl Model A motor, and a 250 Suzuki X-6 twin rebuild.
If the budget and the motor warrant it, I recommend blueprinting. Talk about smooth and powerful.
TAKE PICTURES! Digital cameras/phones make this a snap. Then have a black Sharpie and lots of baggies for putting things. An assistant is good for this (small children included). Then, make sure you get the project done before you forget how it goes back together.
Joe you gave some of the most important advice to all, especially greenhorns in your last sentence. I only know from experience
For removed fasteners I use corrugated cardboard (cut up a cardboard box) and punch the fasteners through, lining them up in rows and writing beside each row, what component they are from and how many. I find it makes it quick and easy to find them later, ensure none are missing, inspect them if I want to re-use them or to compare them with the new ones if I replace them.
I would appreciate any input from you guys. Dealing with a classic Kawasaki KZ1000 top end. Mystery cylinder wall scoring. Going on the 4th time. Bored and honed by a top machinist, new Wiseco pistons and rings. Cleaned the walls and everything to an extreme. Assembled the block indoors assuming it’s the cleanest place. But no matter what, there was always lint accumulating on the oiled walls, pistons, and rings. It’s airborne lint, most likely from the degrading cheap nylon carpet in my apartment. Is it possible that’s the cause I can’t figure out. I see the beginning of scratches on the walls with a borescope after just turning the engine by hand. Thanks for any help.
Soap and water to clean the bores until an oiled rag comes out clean. Honing leaves abrasive in the bore that needs to be removes. This is harder to remove than most think.
Rings – you need to ensure they are sized properly for gap and check to make sure they do not have a burr. Using your borescope, see if the scratches line up with where you think the end gaps were located during assembly.
You also might want to be checking for this before putting on the heads. Rotating the crank is part of the assembly process already, and it is much easier to give it several rotations and see things at this point.
All been done. Bores couldn’t be any cleaner. Scrubbed multiple times in hot soapy water, wiped with a white lint-free cloth and ATF for hours. Pistons and rings spotless, end-gap correct and burs removed. The scratches begin very slight and increase in number and depth with run time. They are all around the cylinders. Not at the gaps or even just the thrust sides. After a few hundred miles the scoring is too deep to hone out. Airbox spotless and sealed, new filter. Haven’t sent out an oil sample yet, but don’t see that could be. Assembly was sterile aside from the lint.
Sounds like you did things right and I know how frustrating re-work can be. Lint is unlikely to cause scratching in my experience. You focus a lot on the visual related to the cylinder bores, are there other symptoms e.g. excessive oil consumption, wet spark plugs, oily tail pipe, poor performance? If yes, are any of these symptoms getting worse with increasing scratches? Not familiar with this motor but is it stock or were there mods such as different heads, cam, etc. These can require carb re-jetting. Changes can result in a lean or rich condition which can effect ring to bore break in. I’ve had some break in issues due to mods resulting in a rich condition throwing too much fuel washing out the oil from the cylinder walls. Depending on the above, further investigation may be warranted but if the only symptoms are visual scratches, and you’ve already done four rebuilds, and found no cause, I would keep running it until something else materializes to help point to the issue. Sometimes that is the only way to solve these mysteries. Getting this thing on a tuning dyno may help, it helped me figure out that I needed to change the jet size on the carb. Good luck.
I haven’t condemned the top-end due to the visual scratches. As miles accumulate oil consumption and loss of compression. Blue smoke, poor performance. No dyno but I use an O2 sensor and air/fuel gauge. High 13s and decreases (richer) as compression drops. By the time I tear it down the scoring is a few thousands deep, too far to hone out and save the cylinders.
Alex, stupid question…
How well did you check your rods? Is it on the thrust end of the cylinder wall?
I had issues similar to this on an old engine. In my case, the little end of the rod was machined ever so slightly egg-shaped, the pin would allow a slight amount of movement on power stroke, and…. It would wobble the piston, scuff the wall.
Something isn’t round. Period. Keep measuring until you find it. We’re talking thousandths here, but measure everything that rotates. Piston pins. Rods. Crank. And ask a second machinist for help, just because the first guy is “good”, and he claims to have checked it doesn’t mean something isn’t off… Another set of eyes always helps.
This isn’t carpet fiber (that’d scuff once and dissolve/get caught by filter/etc.)
I like the organization in that setup. I also agree on the compressed air nearby is a good thing.
‘Lint’ is NOT scoring your cylinders. Only something as hard or harder than the base material can score metal. Simple hardness logic.
I was asking in response to Breaker Bar’s comment: “A small piece of lint missed in a bad area like a ring or bearing can cause issues.” I’ve run out of ideas.
Re lint:
Probably not not a killer, but even a tiny lint blob trapped between a bearing shell and its rod or block bore will cause a “hot spot” on the working side of the bearing.
Advertises sloppy workmanship next disassembly!
my opinion is Greg Edwards pointed towards the only possible culprit of something missed in the component installation just a burr or contaminate on any of the parts could be it.