5 Things Every Great Workbench Has
There are many staples of a DIY shop or garage, but the workbench stands above the rest. Having a work surface that is not the floor can make working on projects safer, more efficient, and more enjoyable. Sadly, just because benches are ubiquitous does not mean each one is good.
Like so many other things in life, a workbench must balance budget, function, appearance, and specialization. While we can’t help you with the last one on that list, we can get you to a great starting point by calling out some of the attributes that every good workbench will have. Whether you are building a new one or checking up on one that you’ve been using for years, here are five characteristics every great workbench needs.
A Flat (ish) Surface
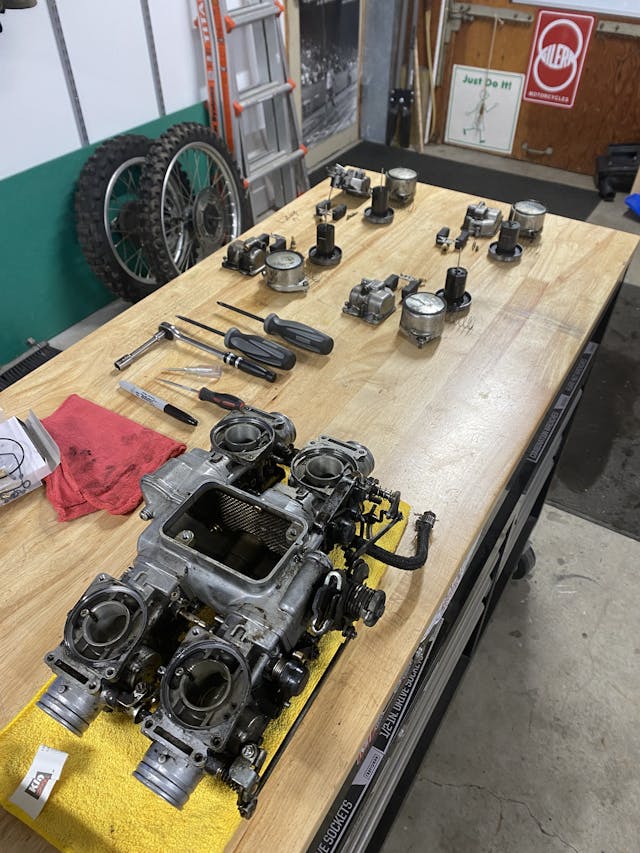
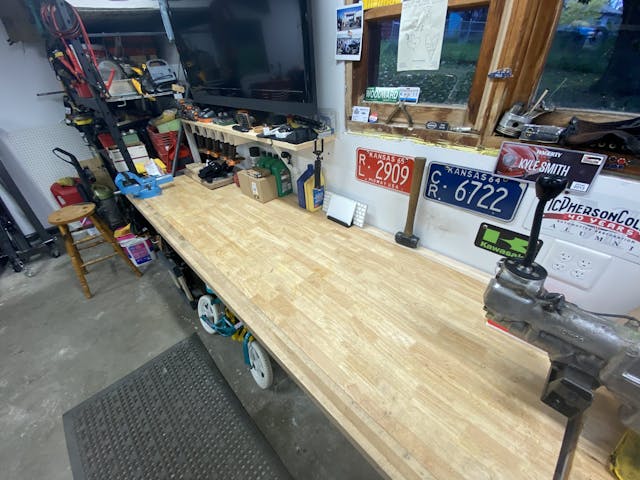
You don’t need to rebuild a carburetor on a certified granite slab, but you do want a surface that can be clean and smooth while not allowing parts to roll away. You’ll often need to level your bench using shims or some other method, because garage floors are not typically very even—occasionally, on purpose.
Dozens of materials can be appropriate for bench tops, so be sure to take a deep look at what kinds of projects you think you’ll tackle and choose a material that can take the amount of weight you need it to and that won’t deform during use. Butcher’s block surfaces have been great to me, though there are a few sections of my bench that have some serious dents from hammer blows or heavy parts.
Height
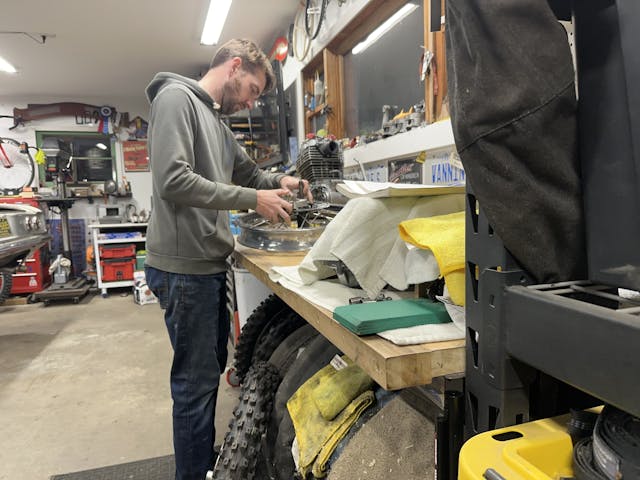
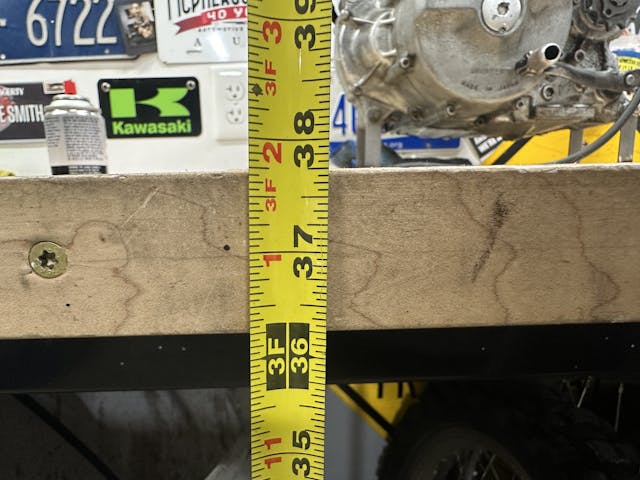
It might be tempting to plan your workbench around the height of a kitchen countertop (36 inches is standard), but be careful: Most kitchen tasks are less precise than most DIY projects, and food prep and cooking don’t require leverage or a large range of movement, like garage work often does. A lower work surface height is more tolerable in a kitchen, the arrangement of which needs to be somewhat standardized. Your workspace has no such constraints. Set your bench at a comfortable height for you and the work you do. That might even mean two benches at two different heights: parts cleaning is best done at a lower bench, while carburetor rebuilding is best done at a higher one, so that it’s easier to see.
Heft
A flimsy bench makes work difficult in a number of ways. If you’ve got a component plopped on top of your workbench and every time you move it or shift something for access, the whole bench moves, you won’t feel confident in the work you’re doing.
Again, be careful: You can have too much of a good thing. Nice and sturdy does not require using 6×6-inch steel tubing for legs and 1/2-inch plate for the top. There’s a place for a bench like that in a welding shop, but in most home shops, it would be more annoying than helpful.
A Solid Vise
The third hand we always seem to need, a vise is a necessity for any shop for many reasons. It can be a anvil, a press, or an anchor that can help projects big and small in a multitude of ways. Don’t believe me? Try and work without one for a while.
Like the other characteristics listed here, consider your specific needs and choose accordingly. Do we all need Wilton Bullets? No, but most people would be better served with one than with an import vise whose jaws don’t line up evenly and have a ton of slop. If you’re on a budget, consider buying an old vise to restore. It’s a fun project, and we can honestly say that cast metals aren’t what they once used to be.
Sturdiness

When wrenching on something, it’s nice to have a workbench that doesn’t move an inch to the left when trying to loosen something and an inch to the right when tightening something. Especially if you are not planning to bolt the bench to a wall or other structure in your garage, consider using an under-bench shelf for storage: It will add a nice, low weight and improve stability.
Bonus: Wheels
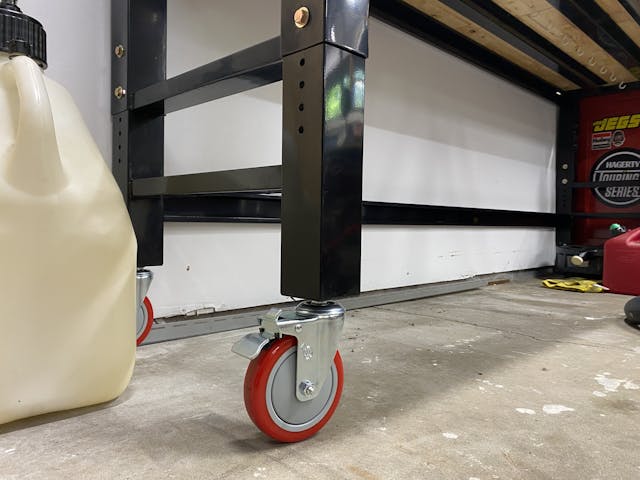
I’ve said it before and will say it again: The ability to bring your tools and workspace to your project is a superpower. Buy a good set of double-locking casters, put them on your bench, and suddendly it is a tool that goes places with you. The other side of the shop? Easy. The driveway? No problem. Putting multiple benches together to create super bench? Also an option! Use this power wisely.
No matter what, having a workbench is better than not having one. If you are looking to maximize your workspace and haven’t assessed whether your workbench is working for or against you, now is the time.
***
Check out the Hagerty Media homepage so you don’t miss a single story, or better yet, bookmark it. To get our best stories delivered right to your inbox, subscribe to our newsletters.


In one area of my shop space, I have a split bench. One part is 44″ high and has a 1.5″ thick solid wood top. There is knee room under and a rolling stool. If I’m doing close-up type work, I can either stand at it or sit to get even closer. The other part is 38″ with a stainless steel top. It’s a stand-up only bench, but I don’t worry about smacking it with a hammer or what sparks will do to it when grinding something. It’s also easier to clean up if I spill, or take something apart that leaks oil or grease (like rebuilding a transmission). Both have locking casters, tool drawers underneath, and power outlets. I have other benches in the barn, woodshop and garage, but these two seem to get 99% of my typical work use.
That sounds like a really cool setup! I can already think of how that would be nice in my space.
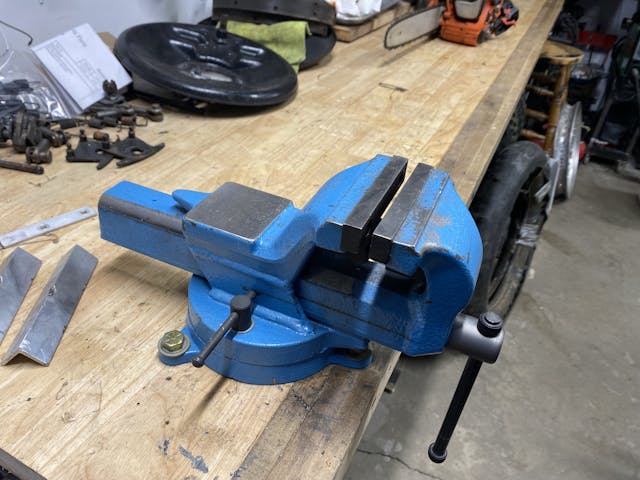
Good article! A minor suggestion – it may be the pic doesn’t show but you vise should be mounted so the fixed face is parallel or slightly proud of the edge of the beach, it allows long items to be clamped extending towards the floor.
I picked that up immediately as well. Not so minor. I frequently work on a bit that I need to extend below the bench. Also sometimes helpful to have pipe jaws below the flat jaws. You can’t really get a good purchase on a shaft with a flat face.
Good tip. Sadly, with how my bench is set up it had added “wings” that stretch the width a bit and orienting the vise that way would put two of the three mounting bolts out onto the wing rather than having two in the larger, more stable, work surface. I keep meaning to figure out a better solution but it has just never made it to the top of the to-do list after 5-6 years.
I see the “wings” are a different colour. Just cut it away under the vise to about 1-2 inches each side of the vise. Now grip that long part.
I noticed this too. HOWEVER, I inherited my dad’s workbench with a Rock Island vice that is in super-nice condition – never abused. Both date back at least to the 1940s. That vice is not mounted “correctly”. I have thought about changing it but it’s been that way for over 80 years and it is seldom an issue so it will stay as is.
How do you make it uncluttered? I need my space, my workbench space!
If I hinted that ANY of my benches are uncluttered, I apologize! 😜 But as others – including Kyle in another column, I think – have talked about, there are some ways to organize that do help. It’s mostly just discipline, though, IMO. I’ve totally put everything “in its place” after a day of work sometimes, and it’s nice to see that open benchtop the next morning. But just as many times (more?), I’ve been too lazy to return everything to its “home”, and then when I return, there is just this pile of tools, parts, bits and pieces, screws, bolts, washers, nuts, cleaners, rags, coffee cups – you know what I mean. Some people have commented in other pieces about how they put EVERY tool back in the proper drawer or on the appropriate hanger EVERY time they stop work – and that’s very laudable. I do my best to try that, but I’m the first to admit to being hit-and-miss at best.
Discipline. That is what I need more of.
It’s overrated….
When you discover where to get that without nagging please let me know. lol
My weekends start with restowing all of my tools in the garage and basement workshop. Then I get to tinkering and toiling. The next weekend, I start by restowing all my tools in the garage and basement workshop… rinse and repeat. 🙂
I too need discipline!!
Yes, I seem to have every disciplne but “self”. But I never give up on clutter.
No matter how big my work benches have been, I always fill the available space. I never find the space I want when I need it. Once in a while I do attempt to unclutter it. This is always defeated in that I can’t find where to move the clutter to without creating just another cluttered area. The rule that “we will always fill the empty spaces” is just as true as “I know I have a 10 mm socket somewhere”.
That just means you’re an artist.
Wow. I’m Van Gogh!
One Job at a Time Hal. Finished with the Power Head rebuild of a Tower Of Power 6 cyl outboard Put all your tools away! How about that Muncie 4 speed out of your Olds 442… CRACK IT OPEN Take plenty of pictures,
Diagnose what’s going to be replaced, Dig In, spread it out, Clean it up, Assemble it. (Dont lose any needle bearings. Clean the bench… Next up…Lawn Mower, weed wacker, Pool Pump, Kids Bicycles, Garbage disposal, Oil burner..R&R……AND THE Beat Goes On & On & On ….. I feel your pain…LOL
STOP! you just filled 4 weeks worth of work over the next year. i’m already tired. good thing i’m REtired!
Skip the wheels.
Seconded… you aren’t wheeling anything that big through my garage without moving 100 things (not including the 100 things on top of the bench)
I have wheels on my 11 footer that lock, but they are only there for the occasional Spring cleaning, so I can move the bench far enough to clean under it. Otherwise it doesn’t move.
I have a smaller Husky roller with tool drawers and a wooden top that migrates from project to project.
I can totally respect that. Shop setup is super personal, and a super solid bench can be really nice.
Well yeah, that’s right. Also, just total square footage is an important factor, as well as what the project is. If I’ve got a full-sized vehicle in the bay, those benches aren’t going much of anywhere. But often there are smaller things being worked on, and I can and do move the benches around to get closer. All things are subject to your own layout, of course. The wheels just work good for me (especially when I move the benches out to clean under them, or – as happens quite often – to retrieve something that I’ve dropped that invariably goes under them).
I had the same thought. Yea, I know – casters can be locked. Still, if you have a vise on the bench, you are going to be sawing and hammering on it. Having your workbench walk around while you are working just won’t cut it. Sure, if you have multiple benches, put the light one(s) on wheels and anchor the heavy one. But for us space-limited people who only have room for a single bench, one that’s anchored solidly is the only way to go.
I also have a tall heavy wood bench with maple bowling ally top that I use for hammering and beating on things, and a steel bench for rebuilding things and clean work. Both have a vice and are bolted to the wall. They are typically cluttered, lately with old Jeep parts. I have a few fixtures that I can attach to the wood bench, such as a Kohler single cylinder block holder for rebuilding these engines. My shop is small and usually a mess, but just like the Millennium Falcon, she’s got it where it counts.
Love my bowling alley bench!!
My bench has to do service for woodworking as well as other things. It has a large vise similar to the one shown in this article. That one is on the right end and can be removed in a few minute if I need that space, The other is a standard woodworker’s vise and is at the other end. The height is the height of my elbow (you need to be able to use the weight of your upper body when planing material). The legs are heavy maple tied with mortise and tenon joints and I have toolboxes loaded on the stretchers. It’s rock-solid and isn’t going anywhere. The top is maple butcher-block. I surfaced it flat with hand planes years ago. Of course, the first step in using it for any project is to move all the crap on it to some other surface in the shop (usually the table saw).
Thanks for the info, about to start building my first work bench as mostly finished repairing the work shop I inherited with the house, would ideally like a bigger workshop than the 20x 8ft I have, but it’s a good start, for my first real workshop.
I’m just using an old kitchen laminate top for now, just to save on money and in time can upgrade, but I am just keen to start making and repairing things.
So its good to pick up tips where I can.
I bought the butcher block from Grizzly. They probably still sell it. Much faster than gluing it up yourself.
Another surface option is truck trailer/body laminated hardwood flooring. I worked for Fruehauf Trailer engineering for many years, so I got used flooring for free. Tongue and groove edges makes a sturdy bench in 12, 24, 36, etc. widths.
I saw a bowling alley being demolished and asked if I could have some of the wood from the lanes. They said to take all I wanted. It not only made great workbenches, it made beautiful countertops for my kitchen as well
I built my bench top from three 2x8s. I squared off the edges with a table saw, glued them together, and smoothed the top with a big fat router. Not much money, and if it gets dinged up, wood fill and a little sanding (it doesn’t need to be pretty) makes it smooth again.
I’ve built a number of “built for life” benches that have served me well for 40+yrs. The first 8 ft. bench used two sheets of quality 3/4” plywood glued and clamped till dry. I then finished the top with a layer of tempered Masonite and edged with 1X2” Oak, screwed on so that the Masonite could be replaced if necessary. My original bench top shows nice patina but is completely serviceable. A nice vintage Wilton Vice is absolutely worth the investment. My 2nd and 3rd benches incorporated recycled Rock Maple bowling alley wood. I rented a floor sander to freshen up the surface and then only use linseed oil as a periodically applied finish. These bench tops can handle whatever I could possibly throw at them!
Bowling alley sections make great bench tops. We bought several when a local alley replaced lanes a few years ago. But they are very heavy to handle.
I am a fan of the multiple height (I use 30”, 36” and 44” heights) and multiple work top material (butcher block, steel, painted 3/4” ply that can be cheaply replaced, and flat stone countertop I pulled out of a dumpster. Stone is impervious most all of our cleaning products and is a great surface to spray fix different grits of sandpaper sheets if you need to get mating surfaces perfectly flat. Those 12”x 12” stone tiles that you can find individually or in open boxes for cheap are great for this too. When the paper is done, just remove it with a razor without worrying about damaging the work top. I also have a piece short nap carpeting (also a dumpster snatch and grab) that fits one of the tops. I can cut on that with a box knife without marring a top and on bigger projects it also keeps parts from easily running off.
But often getting to the main project takes several smaller projects. One of the things that slows down my progress is all the bits, pieces and tools that pile up on my work tops while I am getting to the main event. So I took an idea from our local bakery (which i need to spend less time visiting).
They had 6’ tall rolling “baker’s rack” with slots for trays every two inches or so vertically. The variety of goods came right out of the oven on trays and were slid directly into the open rack to cool. So I built a very simple 2’ high version that lives under my bench. This one has as a few tray slots to fit standard baking sheets. The sheets come in many sizes. I have three, I think they 13”x 18” and it’s is a game changer. It frees up so much counter space.
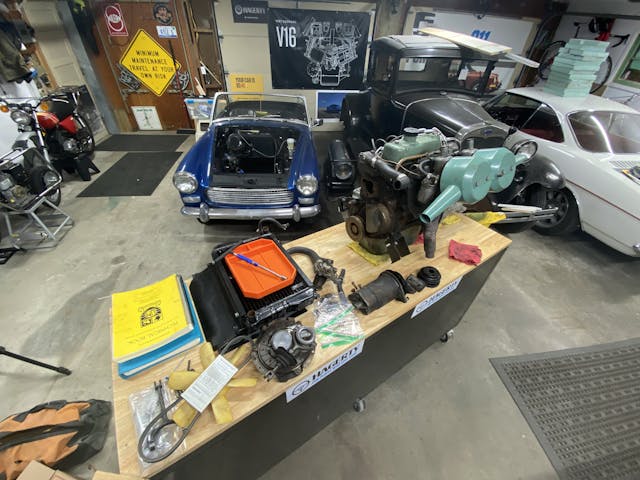
So for each project, I slide out a tray, place the selected tools for the job on it, and bring it out to the car or over to the area I am working. As I disassemble, all parts of that project stay on the tray. I can put a towel down and often a rare earth magnet to keep nuts and bolts from rolling around or one of those harbor freight silicon trays like in your pic above to keep bits organized. If I made notes, I put them there as well. Then take it over and I slide it into the rack under the bench and there it stays, safe, contained and out of the way, keeping my counter tops clear. When that tray is the project to focus on, I just slide it out and everything is right there.
The trays are inexpensive, have about a 1” raised lip that acts as a drawer slide and keeps parts and liquids contained. I think they are perfect. I also use them to catch spray brake cleaner, oil or errant falling parts while working. And the best thing of all is I took my wife’s well used baker’s sheets and replaced them with nice shiny ones. She thinks I was just being thoughtful. Please don’t tell her. That was a win win.
Yes… partially done projects sit on the bench and risk losing pieces…. I am getting close to adding a set of shelves ”over there” to put boxes and totes of the in process projects. I have several very different projects going all the time and work on them when I am in the mood for that type of project… some take a while.
Sage advice Ramsey – on many levels. The baking sheets are brilliant coupled with magnets. Repurposing and replacing baking sheets is a win, win, win.
Honestly, this tray setup is genius. Such a great idea.
Lights! You must have good lighting, both a fluorescent or LED equiv, plus an anglepoise or two
CLEM
Excellent point!!!
Yes, and multiple power taps.
No reason not to have great LED lighting over work benches and work areas. We replaced (14) 4ft fluorescent shop lights with LED in our 24 x 40. Around $20 each a few years ago, but for the extra bright lighting and half the power required, we have no regrets spending the money for it.
I have most of that on the cheap. A Harbor Freight or Home Depot rolling tool chest with a butcher block top and a 5″ vise bolted to one end gives me a work top, storage and a vise, plus a folding table for extra space and an improvised grinder stand.
A must have is good lighting!
Absolutely.
Power outlets.
This is a good one. I mounted a power strip to the side of my bench, and it powers my lights above my bench and a wall-mounted fan for working in the summer. Admittedly I’m more likely to use the retractable extension cord reel to power my hand tools, but it’s nice to have the extra outlets.
In designing my current bench I purposely mounted the 110 volt outlets on the front of the bench just below the heavy top. I find that this works better than outlets on the wall at the back of the bench because the cords on hand-held power tools do not drape across the bench, but instead hang to the floor in front of the bench out of the way of your work.
What a great idea, Ren!
Wheels on a work bench. Interesting. Ever tried to muscle something in a vice or hacksaw something on a workbench with wheels, lockable or not? The bench is moving all over the place. That bench needs to be solidly attached to a wall or the floor. And most shops, which are mostly house garages do not have enough room to be moving a bench around the project. Space is limited as the shop/garage also serves as a storage unit for the family.
My builder built me an eight-foot steel worktable. I mounted my vice, drill press, grinding and wire wheel on it. He also spaced outlets the entire length about 2 foot apart. He also installed many outlets in my shop and made it ready for a lift as well as 240 power ready to go for a lift, and reinforced concrete for that area.
When I set up my shop (a former garage), I installed an electrical load panel. I have three 15 amp 220 volt circuits and two 20 amp 110 volt circuits. My workbench has five duplex outlets behind it.
I used a piece of salvaged Wiremold Plugstrip on the front of my bench. The single receptacles are spaced at 6” intervals. No cords draped across my workspace.
That’s my workbench! I’ve got two Gladiator garage works 8′ benches side by side, with a big, blue Chinese made vice. After 20 plus years, mine is stll spotless. How? Whenever ever I get a super size cardboard box, I cut it into sheets that fit the bench. I even LAYER them. How do I keep them uncluttered? Pick up after yourself. It’s a WORKbench, not a SHELF. Even have the wife trained to ask permission before placing anything on the workbench.
When my wife and I married she would come into the shop, grab a tool out of the drawer, use it and throw it back into whatever drawer was open.
One day she came into the shop to get a tool and noticed that the drawers were labeled. Never asked why I did it. She just put tools back where they came from.
I remember one time friend was talking to me and his girlfriend told him that one of her relatives needed a new transmission and could he “throw one in it”, I told him “Sure let’s go get it and throw it into the front seat, job done”. I think he got a new girlfriend shortly after.
Scott, you’re a gutsy guy. I’ll delete this item before my wife can even READ your comment about “training” your wife. (Married since 1966.)