Taking another shot at do-it-yourself alignment
Last February, I wrote a piece about do-it-yourself alignment. I talked about a number of methods, including using strings stretched along the sides of the car, and using two tape measures to measure the distance between the fronts and backs of metal plates leaning against both wheels. I extoled the utility of the method I’d settled on—purchasing an inexpensive toe-in gauge that’s a metal bar with a sprung pointer. You hold it against the midpoint of the rear edges of the tires, set it to zero, move it to the midpoint of the front edges, and the reading is the amount of toe-in or toe-out. The advantage over strings or plates and tape measures is that it’s rigid—nothing sags—and you get a quick measurement. I used the toe-in gauge effectively and efficiently to align the front wheels on my BMW 2002tii.
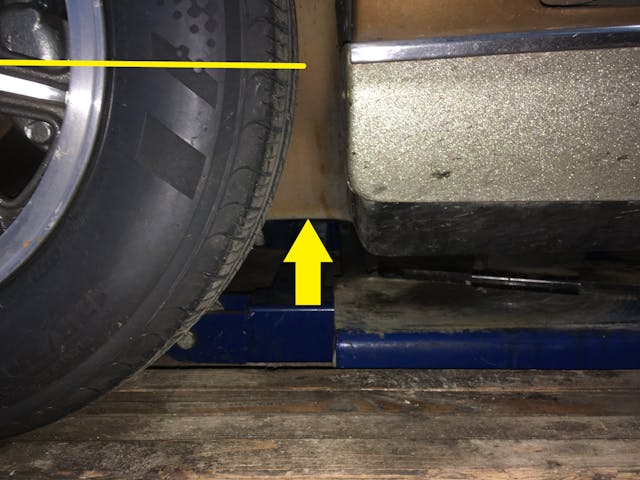
However, as I found when I tried to use the toe gauge on my Lotus Europa, the disadvantage is that, on a small, low car like the Lotus, you can’t place the rigid metal bar between the midpoint of the back edges of the front tires. The body of the car itself is in the way. Thus, plates and tape measures won’t work either.
Now, it’s reasonable to ask, “So why not just take the car to a repair shop like any normal person would and pay for them to align it by attaching the sensors to the hubs and wheels? It’s not that expensive.” True. But the reason I was revisiting this wasn’t to align the front wheels. It was because I’d replaced the bushings between the frame and the rear trailing arms in the Lotus’ rear end, so it also needed a rear wheel alignment, and changing rear toe-in isn’t a simple twisting of threaded tie rods like on the front. It’s achieved in a very primitive Lotus-like fashion using shims—washers, really—inserted or removed between the bushing and the trailing arm. A generic alignment shop could certainly perform the toe-in measurement, but it wouldn’t have the expertise to do the shimming. A vintage car specialty shop with an alignment rack certainly could do it, but the iterative nature of the shimming needed to achieve proper alignment would certainly result in a substantial bill.
In the piece I wrote last February, I showed another option—a toe pointer bar, also sometimes referred to as a trammel bar. Instead of measuring the distance between the outer edges of the tires like the toe-in gauge I’d purchased, these require you to first spin the wheels, then scribe a line on the tires. The pointer bar is then used like a giant pair of vernier calipers to accurately measure the distance between the two scribed lines via a pair of pointers that stick up from sliding brackets, one of which is on a graduated ruler with 16th-inch marks. Actually, it doesn’t accurately measure the distances; like the toe-in gauge I bought, it accurately measures the differences between the distances at the front and rear edges. The main advertised advantage is that, by spinning the wheels and scribing a line on the tires, you ensure that you’re measuring something that’s actually parallel to the wheel hubs and not being thrown off by lettering or bulges on the tire sidewalls.
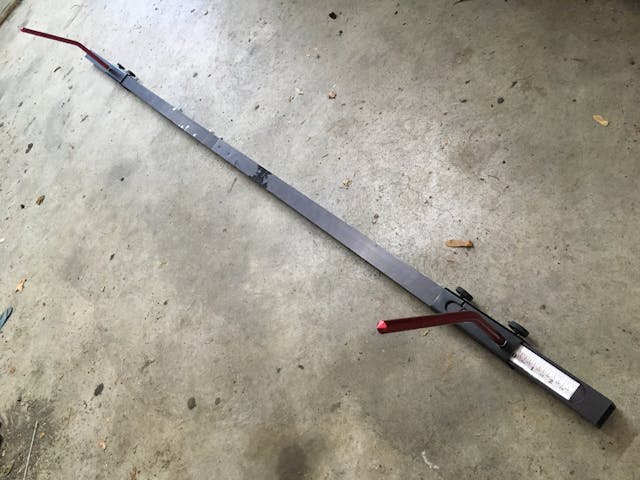
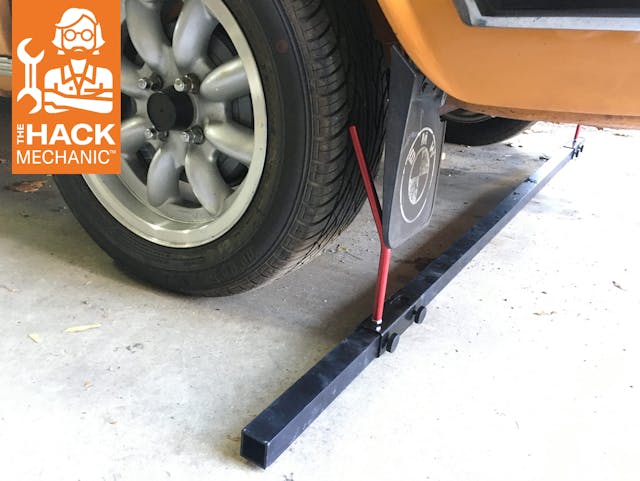
But there’s another advantage, and it’s that, unlike my toe gauge or the plates-and-tape-measures, the pointer bar itself lies flat on the ground, and its two pointers stick up to aim at the scribed lines and measure the distance between them. For my Lotus, this meant that I thought there was a possibility that I could rotate the bar so the pointers were lying flat, slide the bar under the car, then carefully rotate it up while sliding the pointers into the part of the wheel wells where the body of the car blocks my toe-in bar. I thought I’d order one from Amazon and try doing this, and if I couldn’t use it this way, return it. There are a few of these toe pointer bars made by Longacre, the least expensive of which is about $120, but I bought a “Speedway 3008000 toe alignment tool” (available from Speedway, Amazon, and eBay) for about $80.
As it turns out, its usefulness on a low car is even better than I anticipated. Once I began using it, I discovered something very cool: I found that, while I could rotate the pointers upward and just barely slide them into position in the wheel wells, there’s an even better way to use it that I haven’t seen described anywhere that makes it perfect for this sort of application where a toe-in gauge or plates and tape measures are blocked by the body of the car: You can take one end off, slide the bar under the car, then put the end back on. Which end you take off depends on what part of the process you’re in.
First, if you haven’t already assembled the pointer bar, do so. Be certain that the dog-leg-shaped pointers that stick up from the brackets are pointing away from the brackets’ locking knurled nuts, are really tight, and can’t be accidentally rotated if they’re bumped.
Next, you need lines on the tires that are perfectly parallel to the wheel’s axis of rotation. You can spin each wheel and use an awl or the corner of a sharp screwdriver held firmly on a jack stand to scratch them into the tread. Some forums advise spinning the wheels and spraying some cheap primer on the surface of the tires and scratching that instead. In my case, I verified that the edges on one of the thin tread grooves of my just-installed tires didn’t deviate from a held screwdriver while I spun them, and used those, but scratching lines is safer.
The pointer bar has a short ruler with about six inches of 16th-inch measurement marks on one end. Slide the bracket onto the ruler end, adjust it so it reads zero, and lock it down. If you have a car where the bar can easily be slid into position under both the front and rear sides of the wheels, then you do so and adjust the bracket at the end without the ruler on it so both pointers are on the scribed lines. Then you side the bar out, put it on the front side of the tires, put the pointer without the ruler on its scribe mark, and then adjust the pointer with the ruler until it’s on its scribe mark. On both the back-of-tires and front-of-tires measurements, you need to iteratively check side-to-side to make sure both pointers are right on their marks, compensate for off-angle viewing of where the end of the pointer is relative to the scribed line, and tweak things until both pointers are dead-on their lines.
But here’s the beauty of the pointer bar. If you have a car like mine where the bar can’t be slid under with the pointers attached, either because the car is too low, or because there isn’t enough room in the wheel wells for the bar to be rotated and the pointers stood up, here’s what you do:
1) Adjust the bracket and pointer on the end with the ruler to read zero and lock it down.
2) Take the other bracket (the one without the ruler) off the bar, and slide that end of the bar under the car. Without the bracket and pointer on it, that end of the bar won’t hang up on anything.
3) Align the pointer on the ruler end of the bar with the scribe mark on the tire.
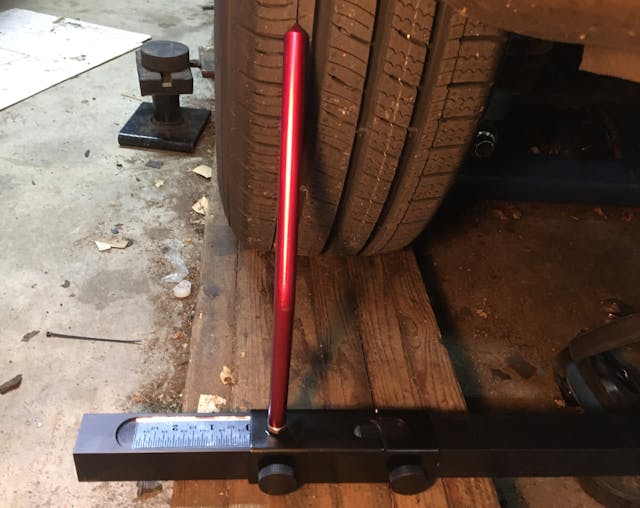
4) Walk around to the other side of the car, put the other bracket and pointer back on the bar, and align it so its pointer is on its scribe line. Iterate until both pointers are dead-on their lines, adjusting only the bracket without the ruler.
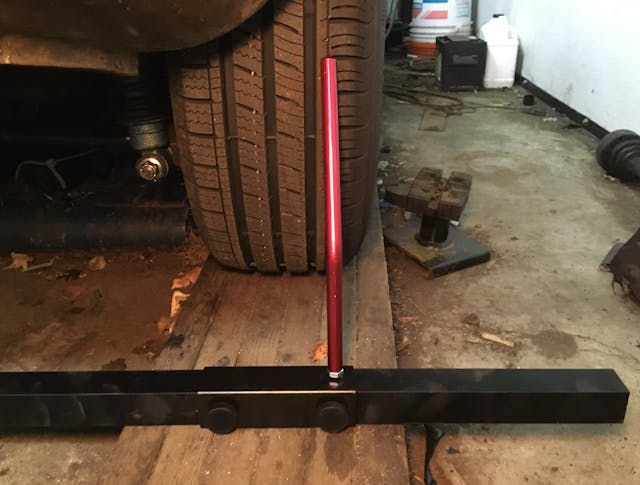
5) Now that you’ve effectively zeroed the giant set of calipers on the back-of-tire toe measurement, lock down the bracket without the ruler, then take the bracket and pointer on the ruler end off. Do not touch the bracket on the end without the ruler.
6) Withdraw the bar from behind the tires, then slide the ruler end of the bar under the car in front of the tires. Again, without the bracket and pointer on it, that end of the bar won’t hang up on anything.
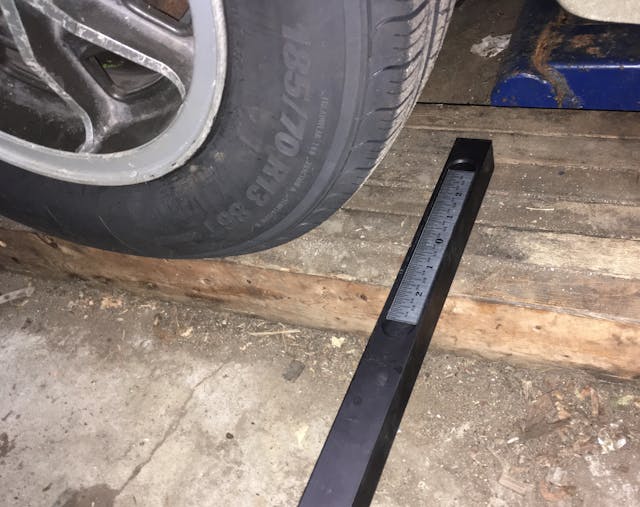
7) Align the pointer on the end of the bar without the ruler on its tire scribe mark.
8) Now, slide the bracket and pointer onto the end of the bar with the ruler.
9) Iteratively adjust the bar so that both pointers are on their scribe mark, but only move the bracket on the ruler end.
10) If you’ve done it right, the reading on the ruler is now the toe-in measurement.
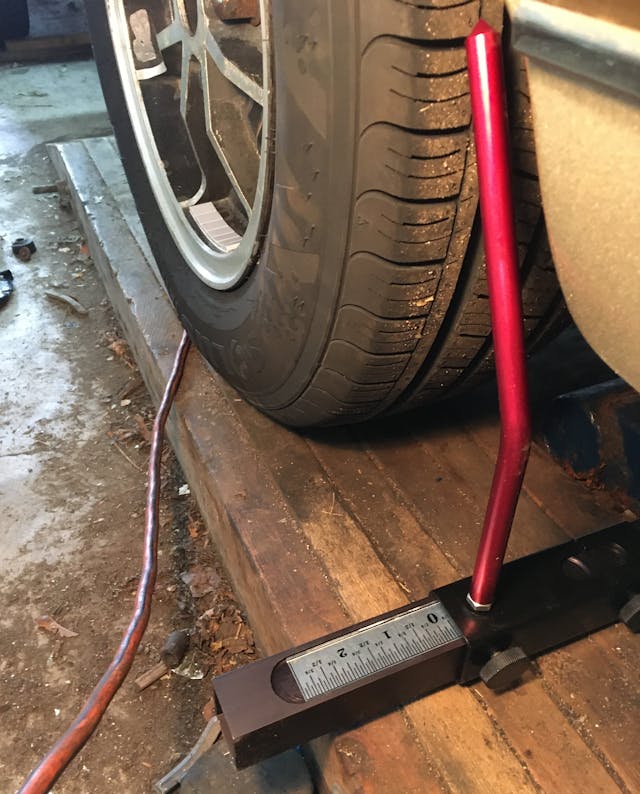
Even though there was sufficient room to maneuver the bar’s pointers into position behind the Lotus’ rear tires without sliding one bracket and pointer off the bar, I got into the habit of doing it anyway, as I found that leaving both pointers on risked nicking the paint on the car. (Meaning: I nicked the paint on the car. Twice.)
I should add that, with any of these do-it-yourself measurements that are based on the tire diameter, you may need to scale them to correct them if the toe-in spec is for the wheel diameter instead. In other words, because the tire diameter is bigger than the wheel diameter, the toe measurement at the tire’s edges is bigger than it would be if it were measured at the wheel’s edges. To correct the measurement, you need to make it smaller by multiplying it by the ratio of the wheel diameter to the tire diameter.
For example, on my Lotus, the wheel diameter is 13 inches and the tire diameter is 23.2 inches. In the photo above, I measured toe-in of 0.25-inch at the tires. Correcting this for the wheel diameter:
Corrected toe at wheel = Measured toe at tire * (wheel diameter / tire diameter)
= 0.25 * (13 / 23.2)
= 0.14 inches
The Lotus’ rear toe spec, specified at the wheels, is a surprisingly large 0.25 inches to 0.5 inches, so although I thought I’d set it correctly at 0.25 inches, in fact I’d gone past it and had to add shims back in.
To me, it makes more sense to do this calculation the other way around—to convert the wheel-based toe spec into a tire-based spec that you then can shoot for without having to do the calculation for each measurement. To do this, you invert the ratio to make the spec number larger:
Tire toe spec = Wheel toe spec * (tire diameter / wheel diameter)
Doing this with the Lotus yields:
Upper tire toe spec = 0.5 * (23.2 / 13) = 0.89 inches
Lower tire toe spec = 0.25 * (23.2 / 13) = 0.45 inches
That way, I knew that I was shooting for 0.45 inches.
The toe pointer bar was plenty enough accurate for me to find that, initially, my rear wheels were substantially toed out, which jived with the feeling that, on the highway, high-speed lane changes were scary quick. The root cause turned out to be that I’d misinterpreted an old Lotus service bulletin and had installed the trailing arm bushings backwards. I corrected it and shimmed them to the lower-toe end of the spec. The hyper-twitchiness is now gone. I may tweak it more toward neutral toe, as now, to me it feels like, during highway lane-changes, the rear end is lagging the front end slightly. But boy, I saved a lot of money over what this same type of iterative measure-correct-test-repeat work would’ve cost me at a specialty shop.
The only other negative of the pointer bar is that, like the toe gauge and the plate-and-tapes method, it doesn’t provide independent measurement of left and right toe relative to the center line of the car. On the front end, you don’t care, because both the left and right toe change when you steer the car, and as long as their center position is close, the worst side effect is that the steering wheel isn’t centered, and you can fix that by pulling it off, rotating it by one spline, and centering it. But on the rear, uneven toe can cause the car to crab, or for the rear end to want to come out on hard acceleration or braking. For now, I’m not experiencing any of those symptoms, so I’m not overly concerned about it. But over the winter, I may see if I can drop some plumb bobs from the frame corners and see if I can get accurate independent rear toe measurements.
In summary, the toe pointer bar is a nice cost-effective addition to my at-home alignment arsenal.
***
Rob Siegel has been writing a column (The Hack Mechanic™) for BMW CCA Roundel magazine for 34 years and is the author of seven automotive books. His new book, The Lotus Chronicles: One man’s sordid tale of passion and madness resurrecting a 40-year-dead Lotus Europa Twin Cam Special, is now available on Amazon (as are his other books), or you can order personally-inscribed copies from Rob’s website, robsiegel.com.


A handy article, but some basic proofreading would help.
Great article, the trammel bar is the way to go for a DIY I’d say. Used to build race cars , bump steer track, roll centers etc. Like your exotics it can get into frame rollers wheel scales etc. Thing is if you have a four wheel independent suspended with unequal A-arm suspension and shims doing a full alignment is a substantial task as you well know. Being an ASE cert heavy truck mechanic you need a starting point. Usually on ‘big rigs’ there are lines scribed on top of the frame rails to locate distances fore and aft with a straight edge across both frame rails. But ‘Large Trucks’ require a frame cross member inspection and Rivet and bolt inspections , then check for frame square and twist before even getting to the suspension. I’d think the exotics like race cars would be similar. So start out by one process lines pulled front to back parallel to the centerline of the chassis then check square and twist of the frame . after that do you initial alignment off side to side squared mars on each frame squared to fore and aft lines on either side of the car. Since you have one car the first time measurements will be most labor intensive. The rest it seems you are dead on with, I guess it’s the never assume rule. I was taught everything known about alignments by an old time mechanic who was known by everyone within a hundred miles that he was ‘The Best’ frequently with ‘If nobody can fix it take it to Herbie, he’s expensive but you’ll only need to do it one time.’ I’d seen that proven sooo many times. In actuality he wasn’t expensive but he was meticulous and there was NO assuming anything. I really enjoyed your article as it brought back some good memories of ‘real’ suspension work with caster camber work etc. forgotten by the strut manufacturing crowd. 🙂
Seems like this tool could also be used to do a four wheel toe alignment (ie setting toe of each wheel individually relative to the centerline of the vehicle) so long as you have measured the centerline of the vehicle.