The one thing worse than breaking a bolt—and how to deal with it

Nothing allows you to safely use a tool or material outside of its design parameters quite like understanding how it works and preparing for what could go wrong. The freedom enjoyed by most people who work on cars comes from the ability to understand what they can change about a project—tools, materials, process—and what they cannot. While the tools and space you need to work on a given project are rigid, curiosity is endless and often leads you into interesting adventures.
My latest adventure was self-inflicted: I broke the head off a stuck bolt, a rite of passage for DIY enthusiasts. Some of you are even familiar with the second level of that situation, dealing with the broken “easy-out” screw extractor.
Some people take the easy way out (I will not apologize for that pun) and pay to replace the whole part. At first, it may have made sense to fix the broken bolt; when that little chunk of unobtanium easy-out became embedded in the bolt, the purse strings suddenly got a little looser.
An easy-out is not formed of unobtanium, though, but of high-carbon steel. Badass stuff in the metal world. It is hard, enabling it to bite into and grab a mutilated bolt—a problem we never admit to creating but always boast about fixing. On the Rockwell hardness scale, high-carbon steel falls in the middle of the chart. Even so, the material is very brittle—and not in the delicious way, like the peanut brittle Nana used to make. If you introduce a fraction of a side load while using an extractor, you will snap it off—often flush with your workpiece—leaving you defeated.
At least partially defeated. Now comes the escalation of force, the switch from rigid to flexible. Solving the problem of a broken extractor requires understanding the materials you are dealing with. If you rush ahead, you will end up with a mangled part and a pile of dull drill bits.
The last time I broke an easy-out, I immediately picked up the phone instead of the tools. This time, I couldn’t bring myself to call for more experienced assistance. I needed to deal with this myself.
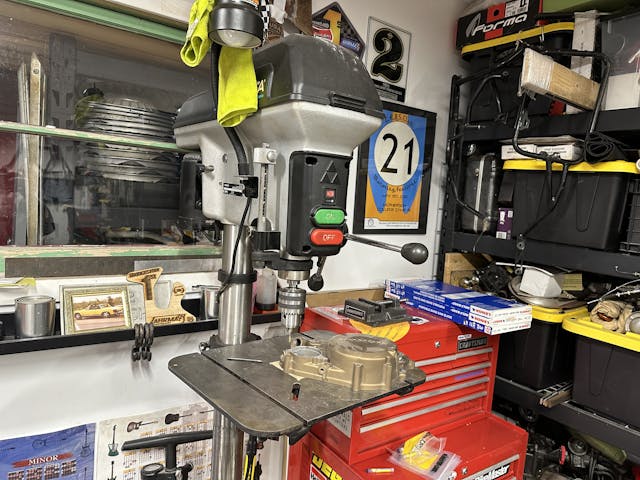
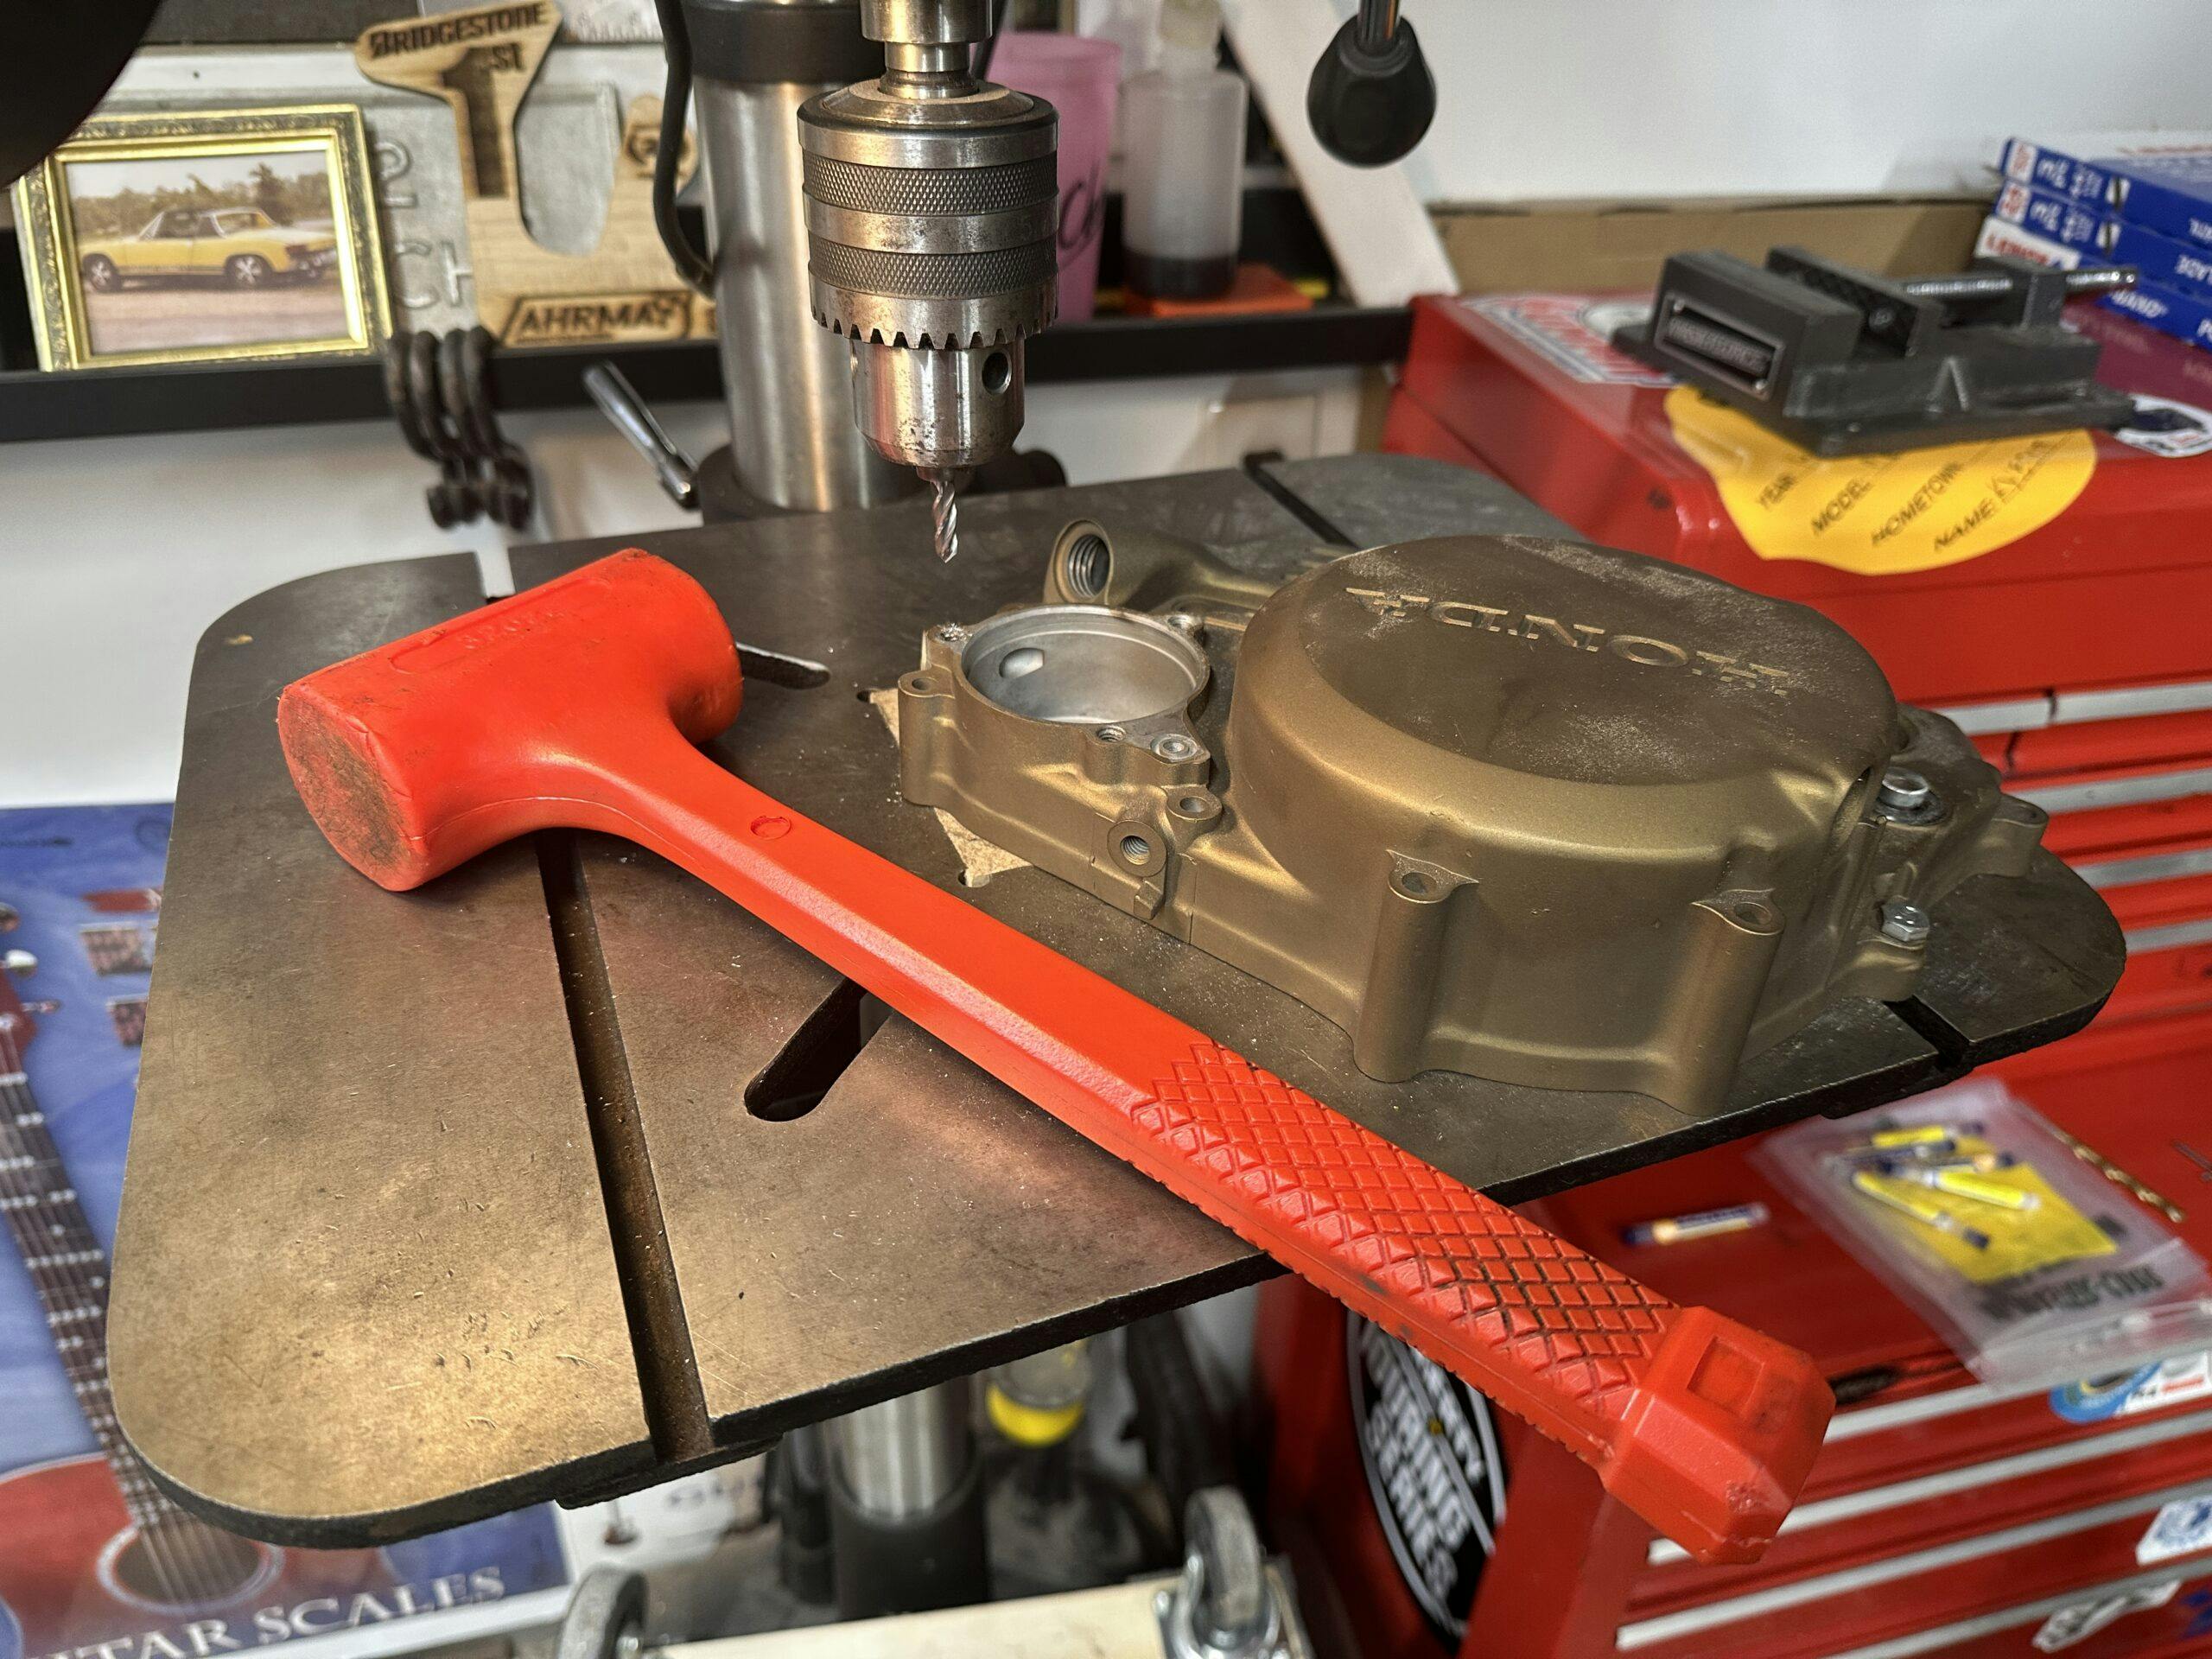
I have a drill press sitting on my shop floor. It’s not the Bridgeport of my dreams, but it’s decent, and the more I looked at it, the more I realized this drill press had the capability I needed. With a little effort, I could build a good, rigid setup—enough to drill a right-angle hole, at least. If I could figure out how to fix this broken extractor myself, the process would likely bestow upon me the knowledge and experience to avoid this whole song and dance again. The catastrophe you are prepared for rarely strikes, right? Off to McMaster-Carr to buy some carbide.
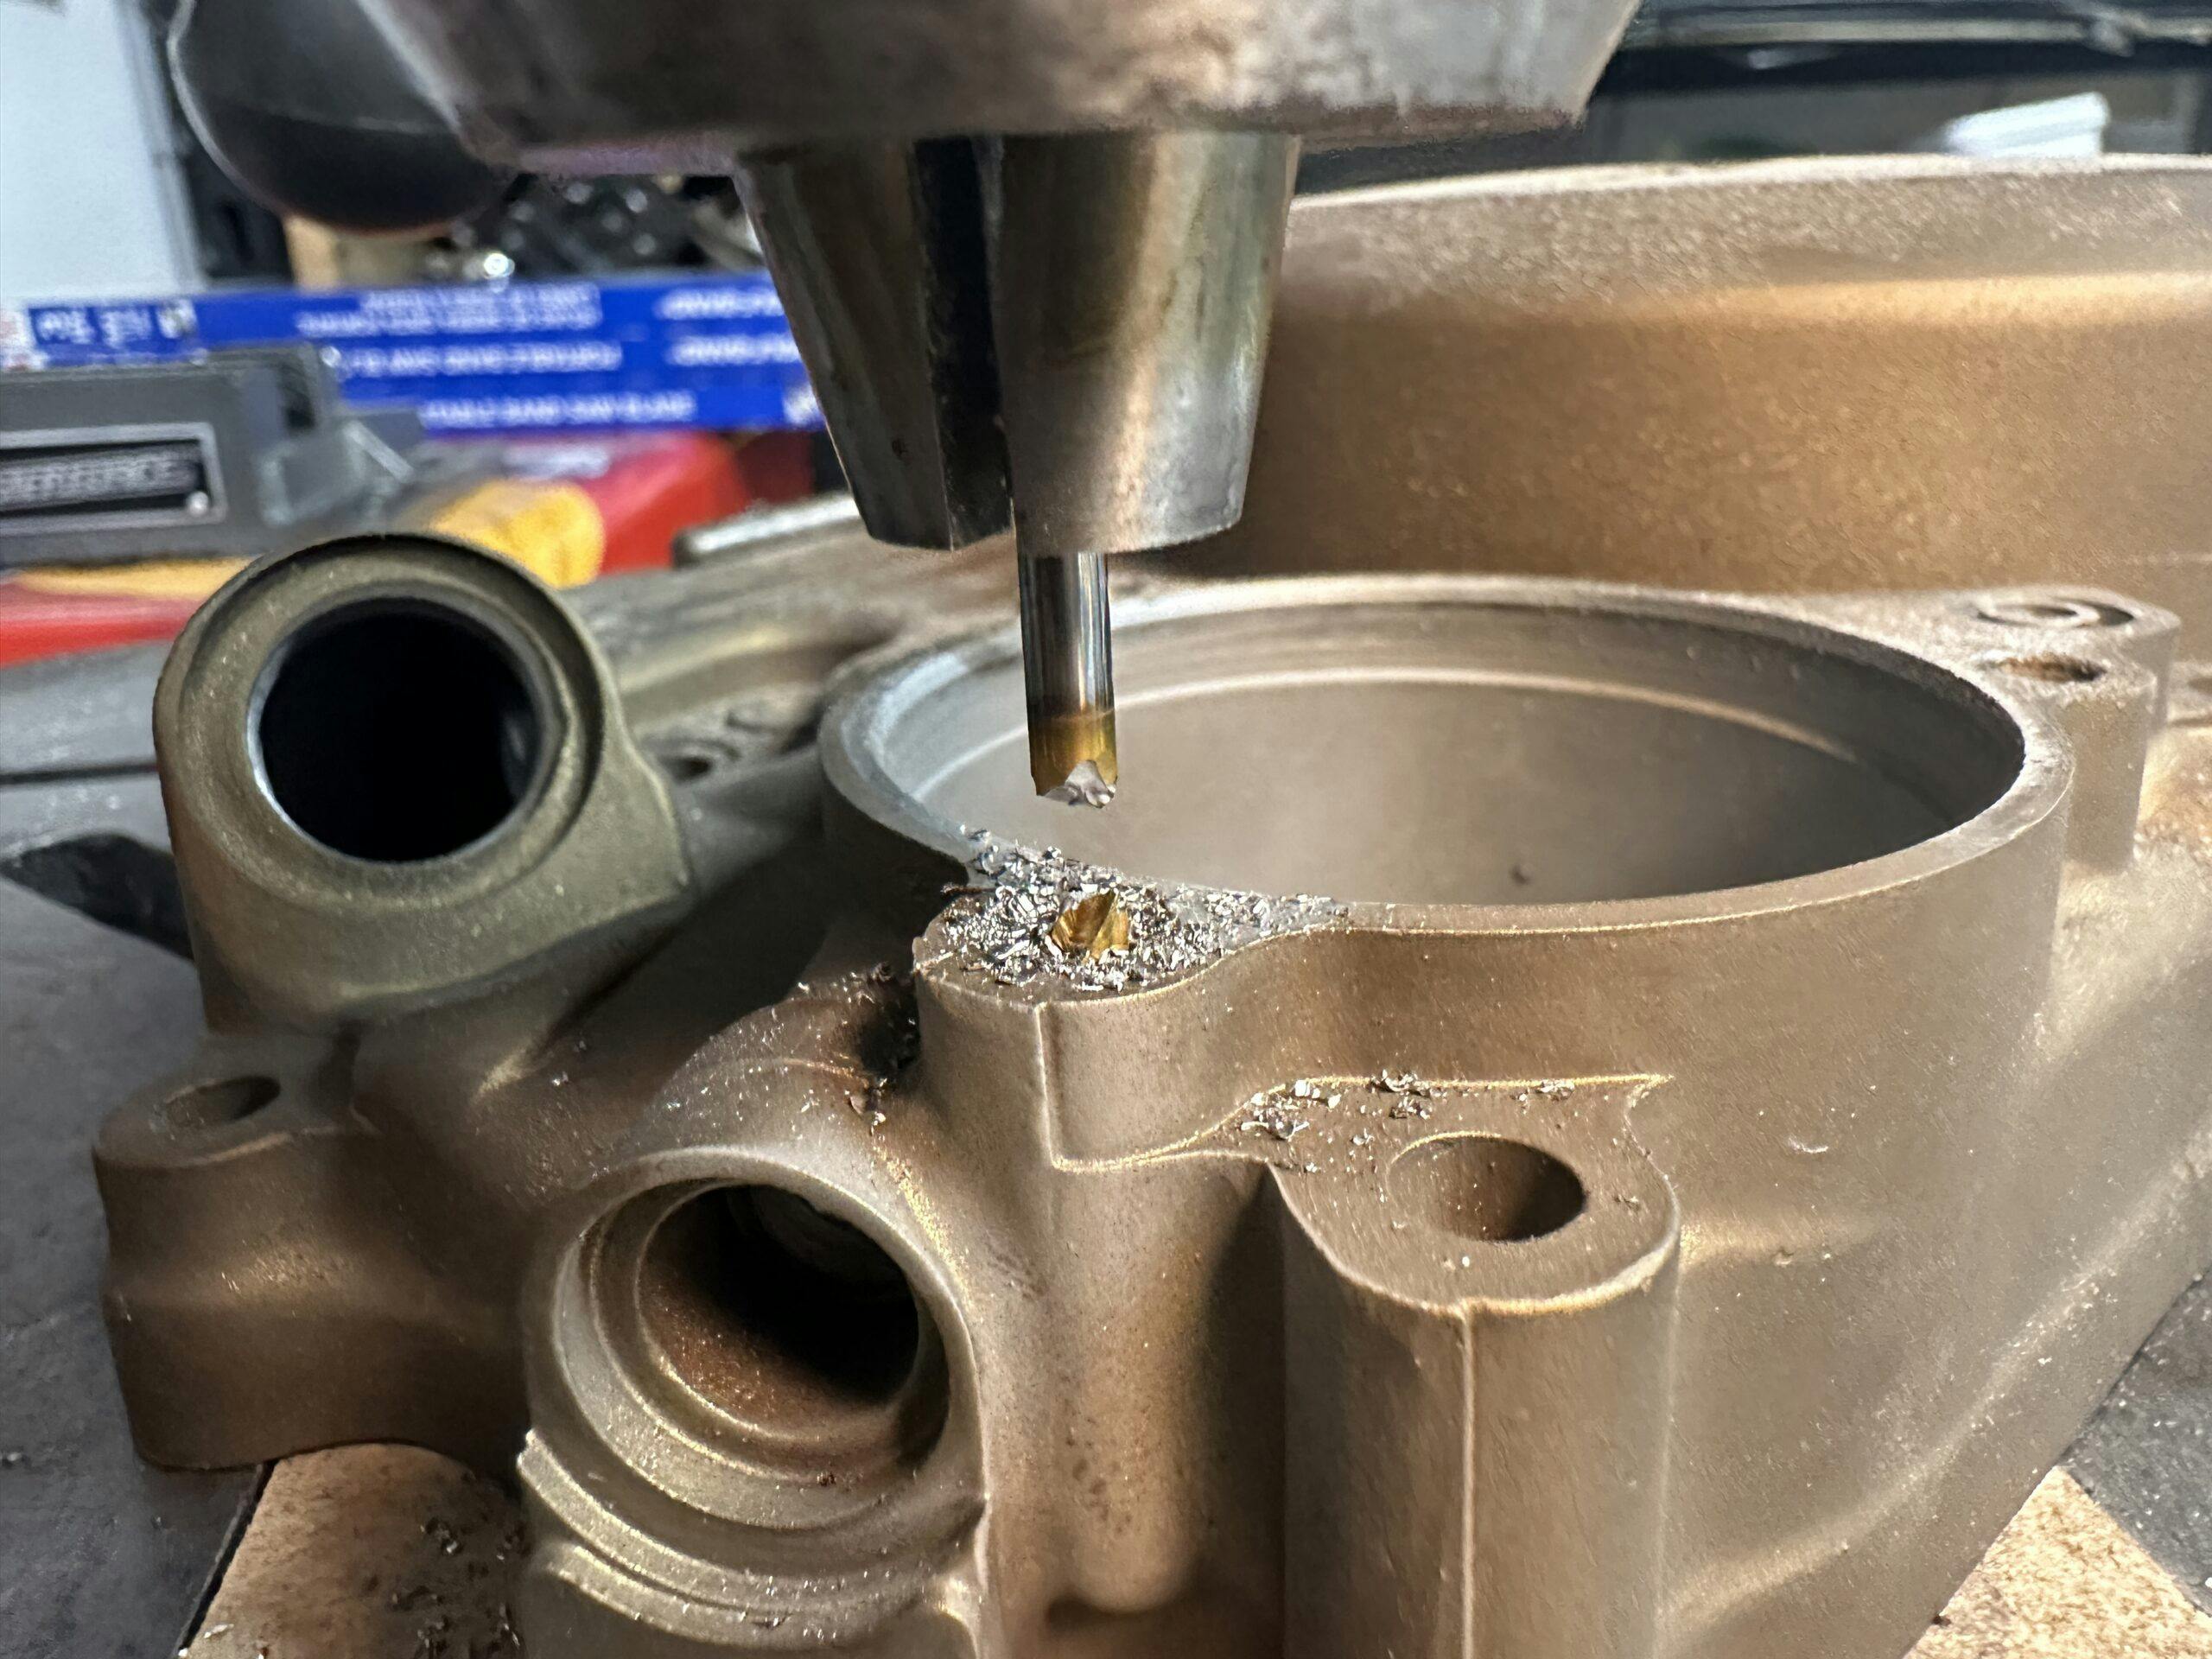
Carbide is the next step up from high-carbon steel on the Rockwell hardness scale, which means it can pierce high-carbon steel without losing its edge. I selected two sizes of end mills made of carbide. With 90-degree tips designed specifically for plunge cutting, they should be able to remove not only the easy-out but also the bolt—and, likely, a decent amount of the aluminum of my workpiece, a case cover.
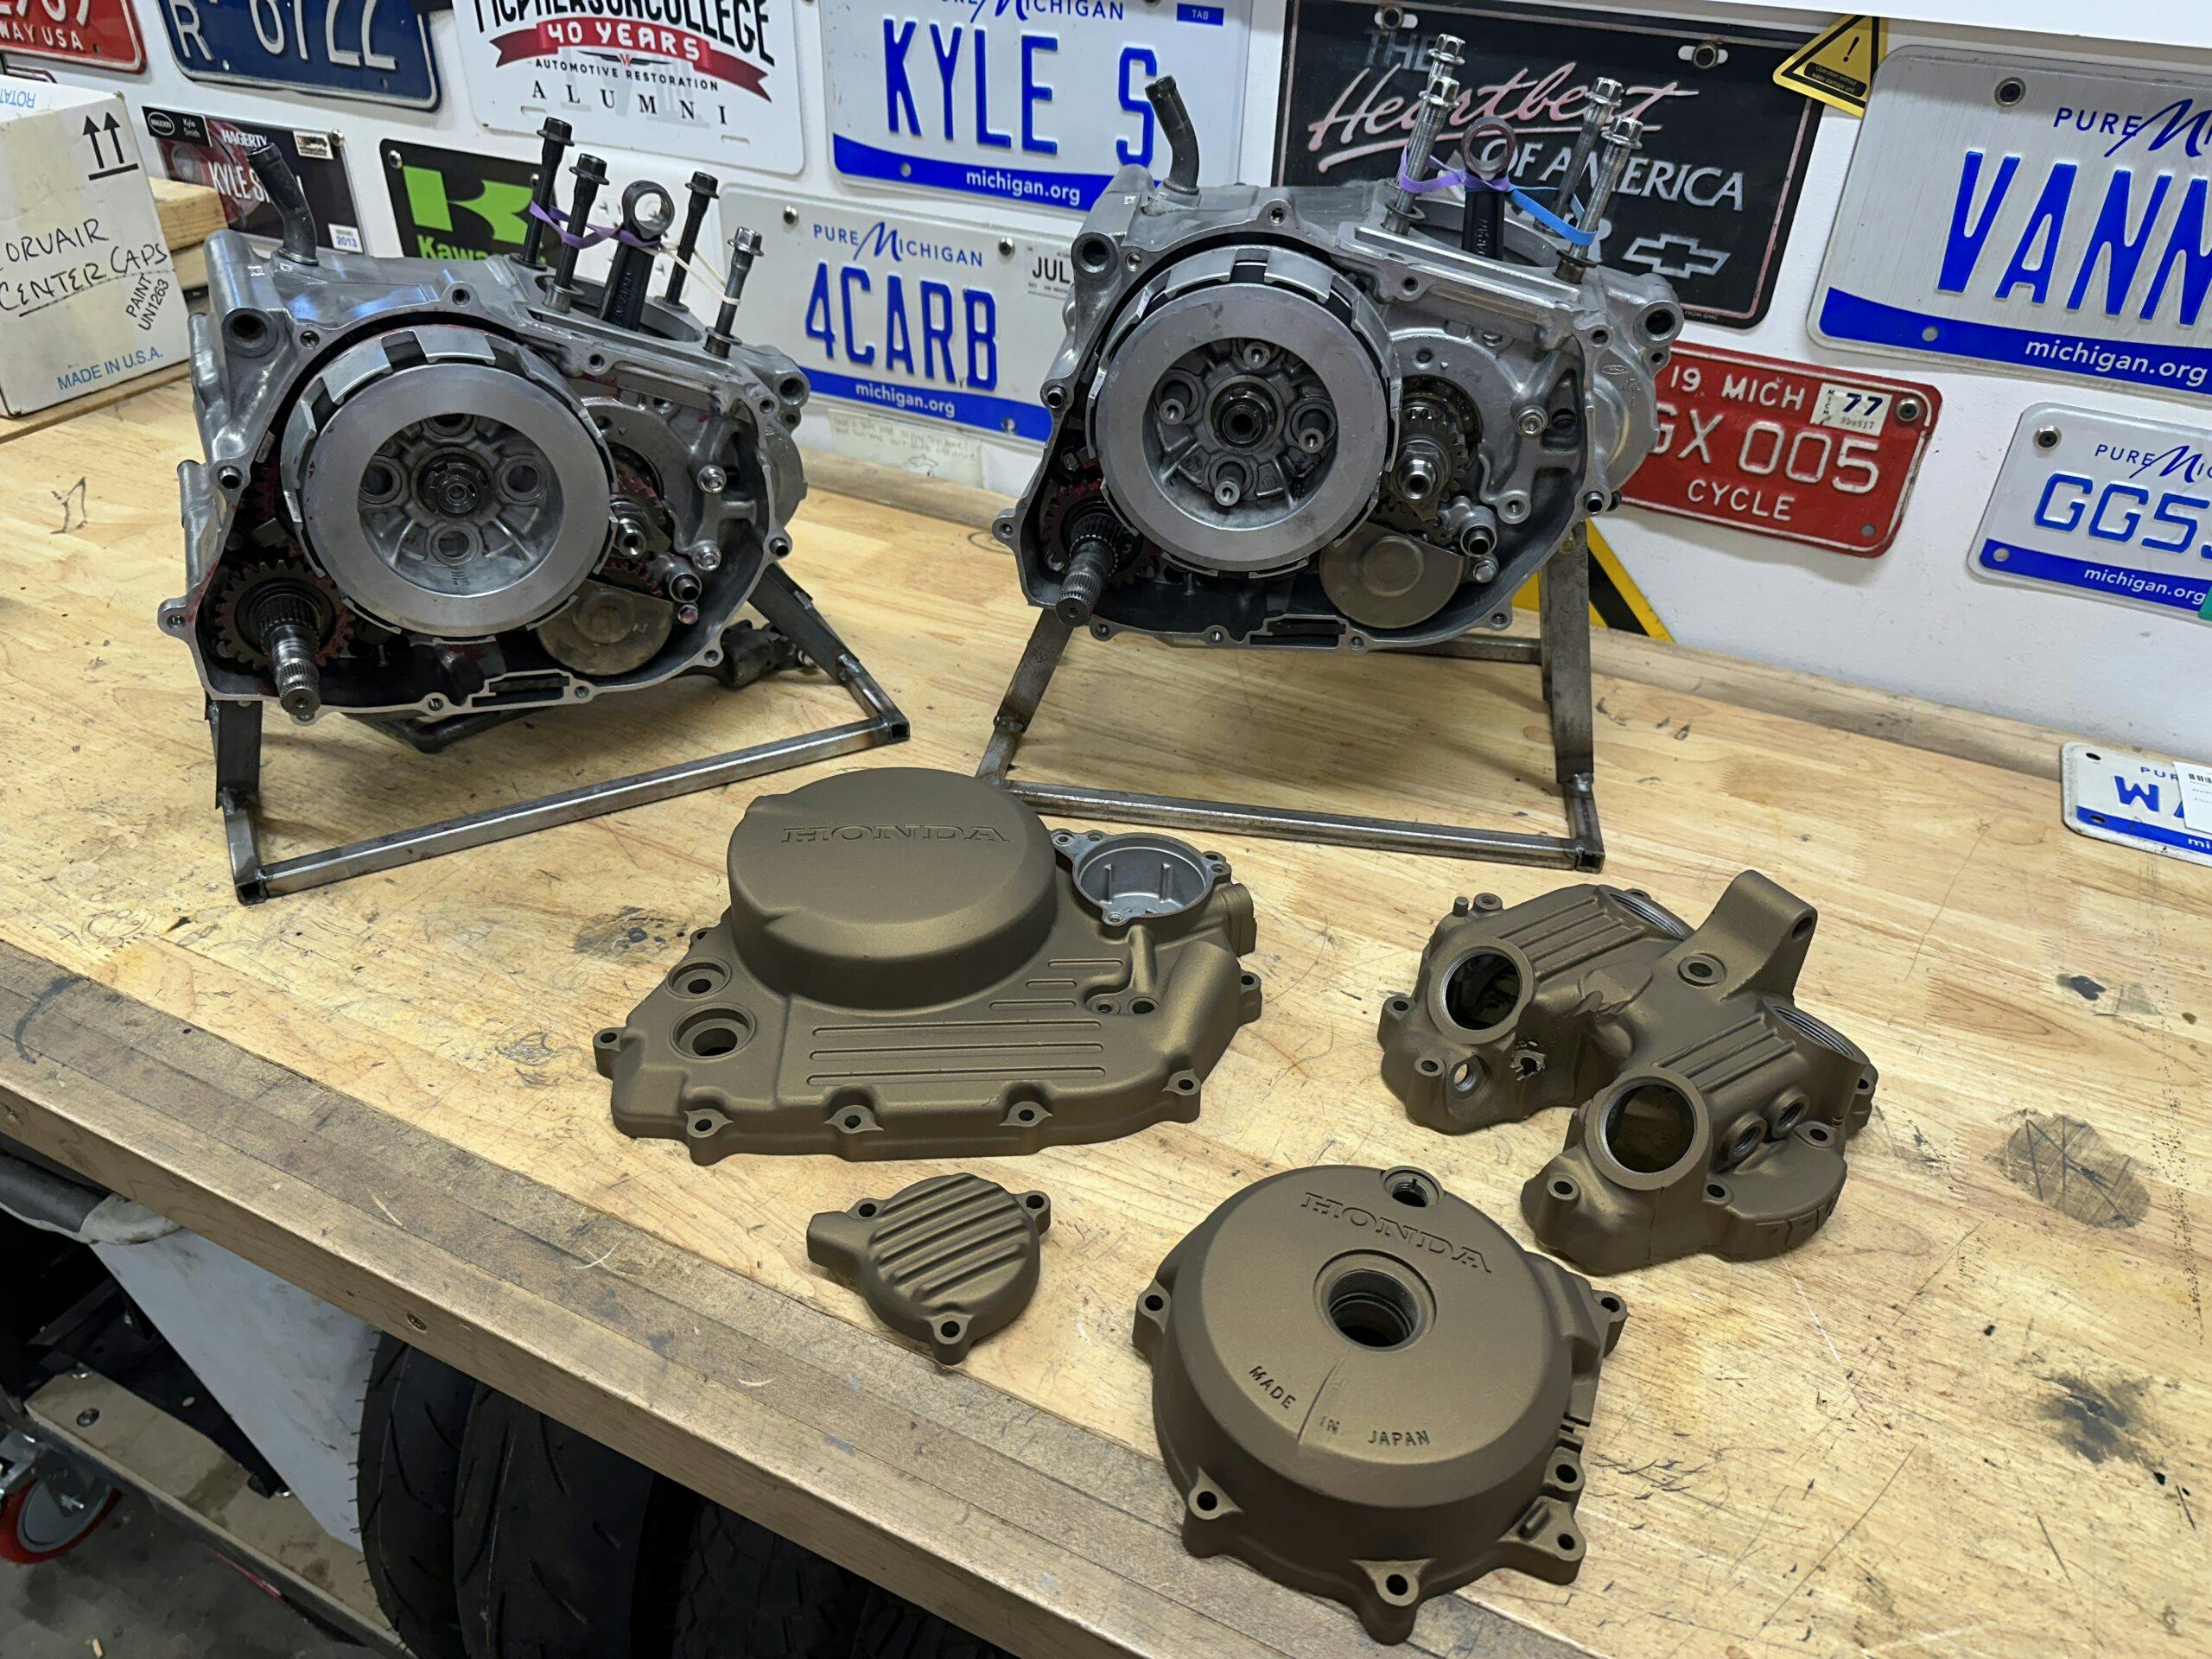
That last part was unfortunate but acceptable. Installing new threads or repairing those that remained would be easier than trying to save the delicate M6 threads. Not only were they formed decades ago, but, since they were on the oil-filter cover, they had also suffered hundreds of hamfisted tightenings and overtorques. Thread forms distort with multiple uses, especially when they are made of aluminum, so the thought of new threads in this piece was almost a little comforting. Doing the thread repair with the case cover off the motorcycle and on the bench was an obvious plus.
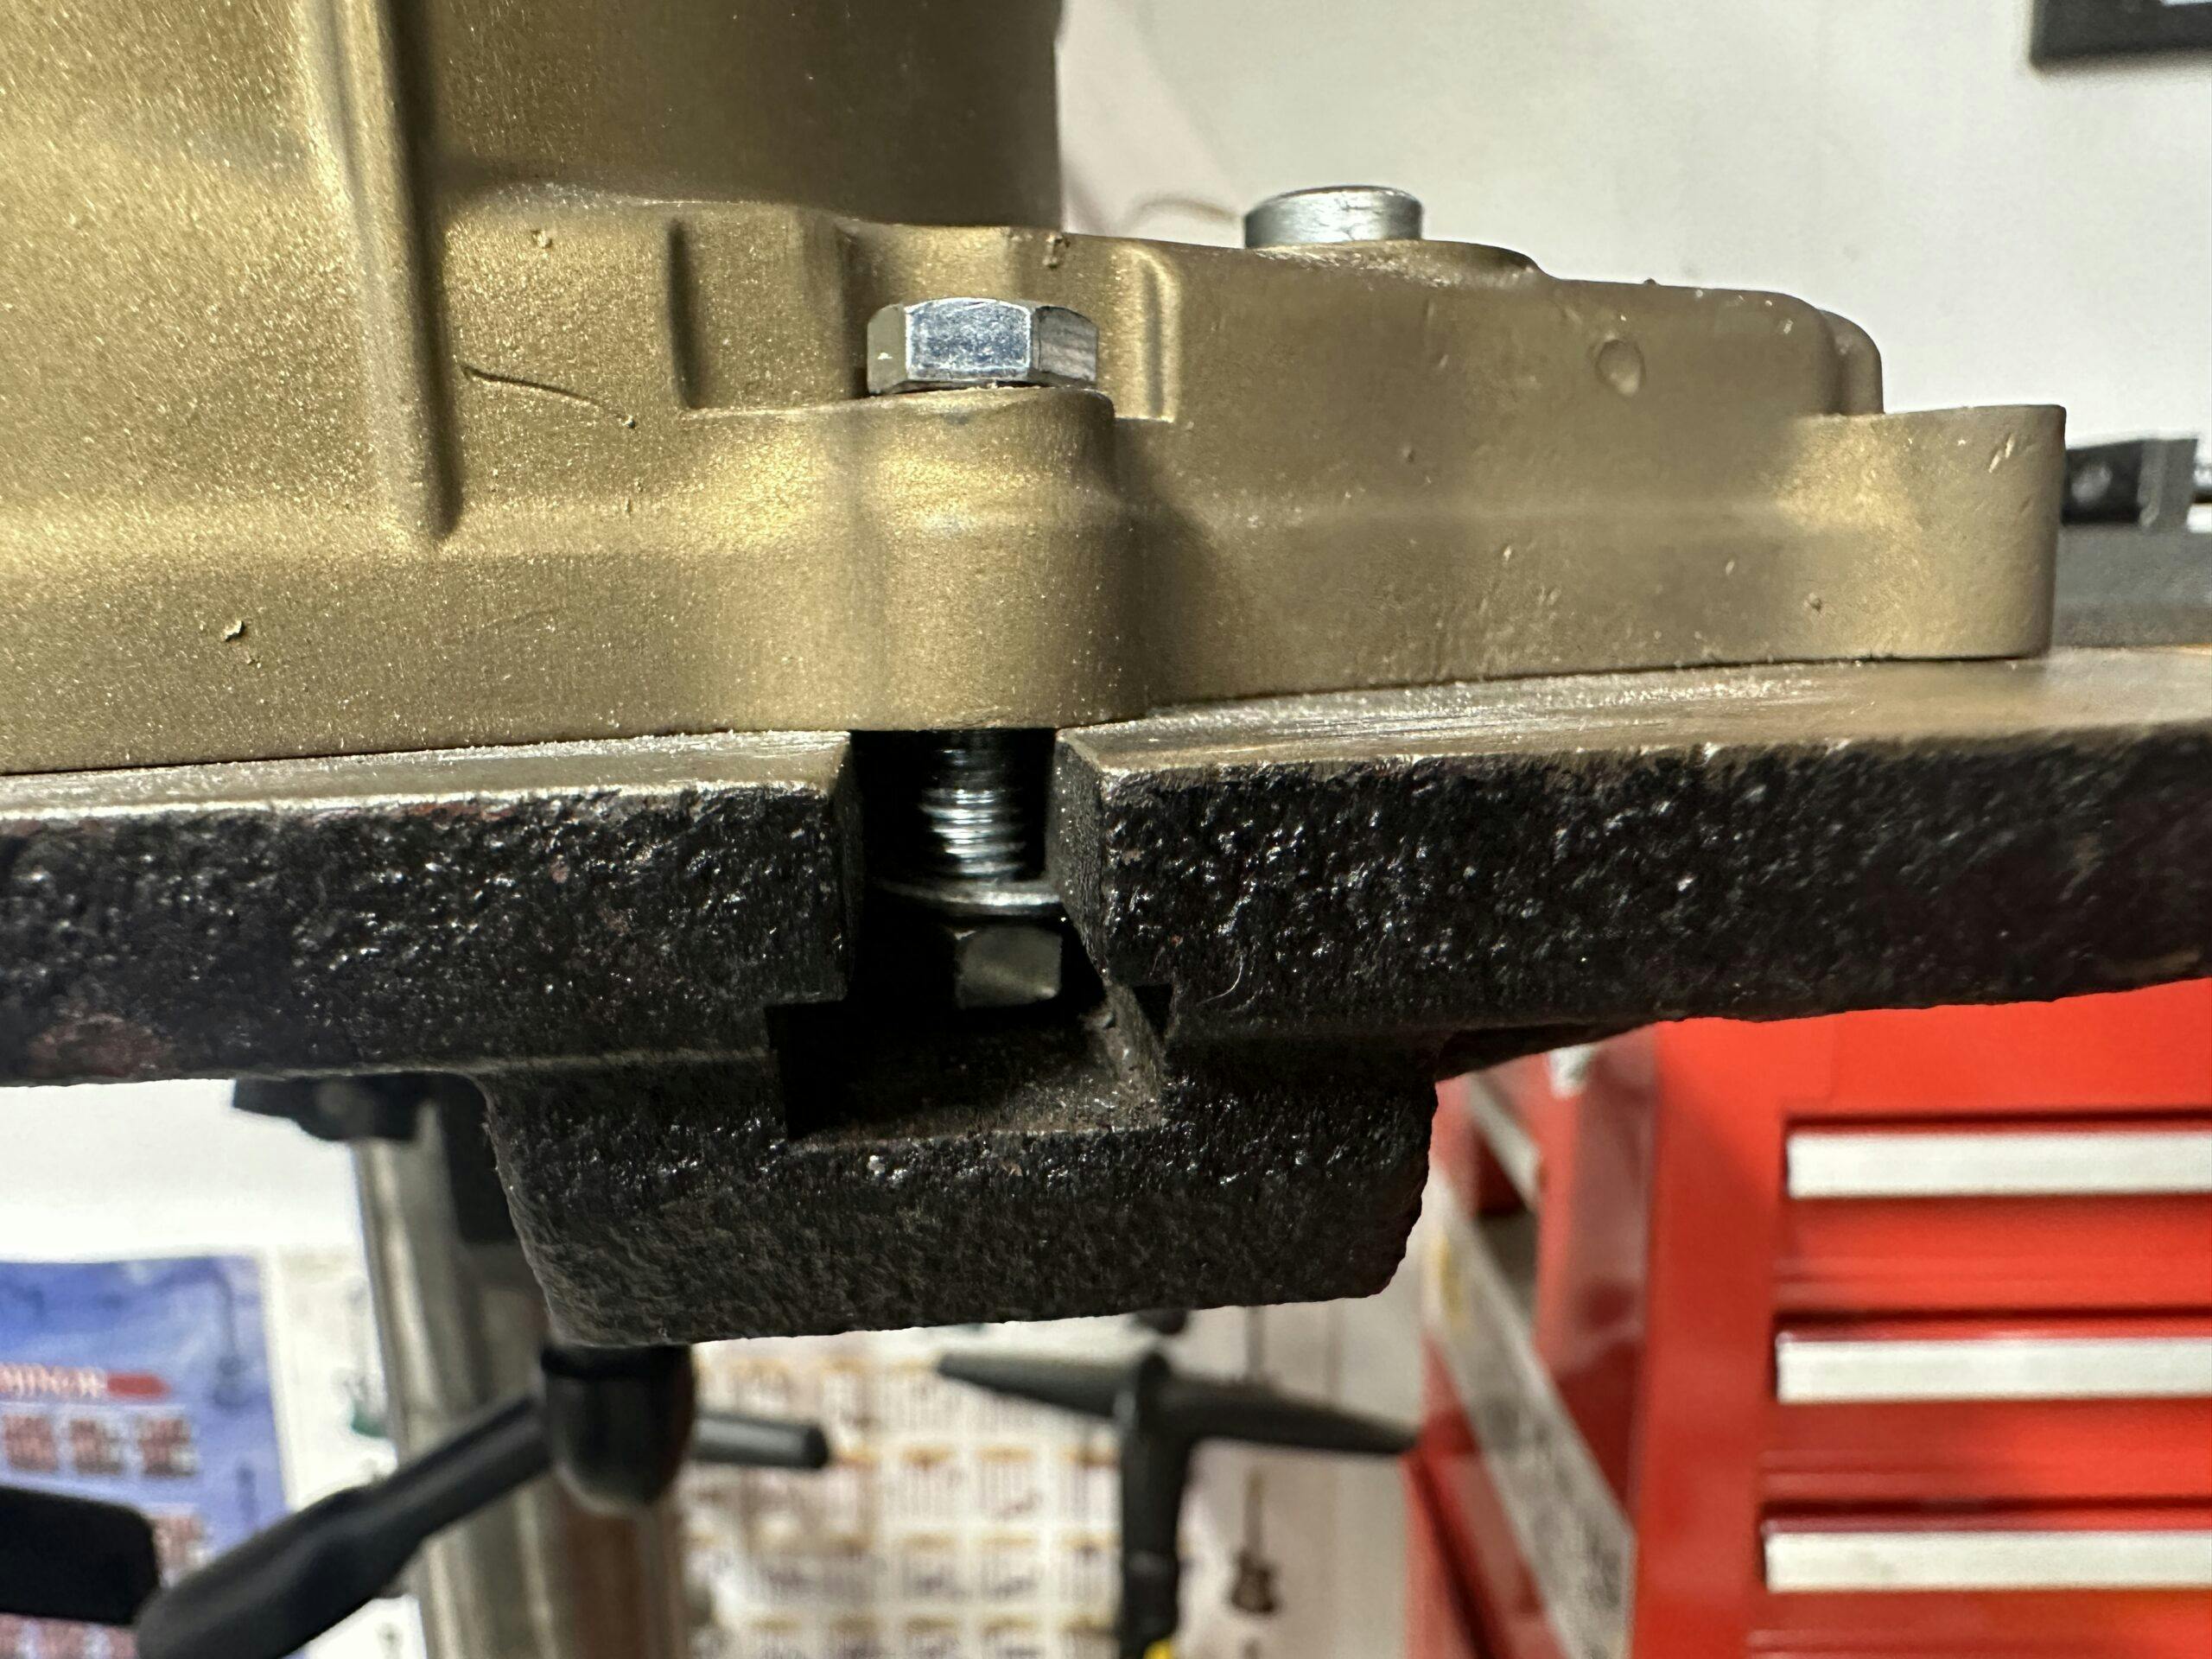
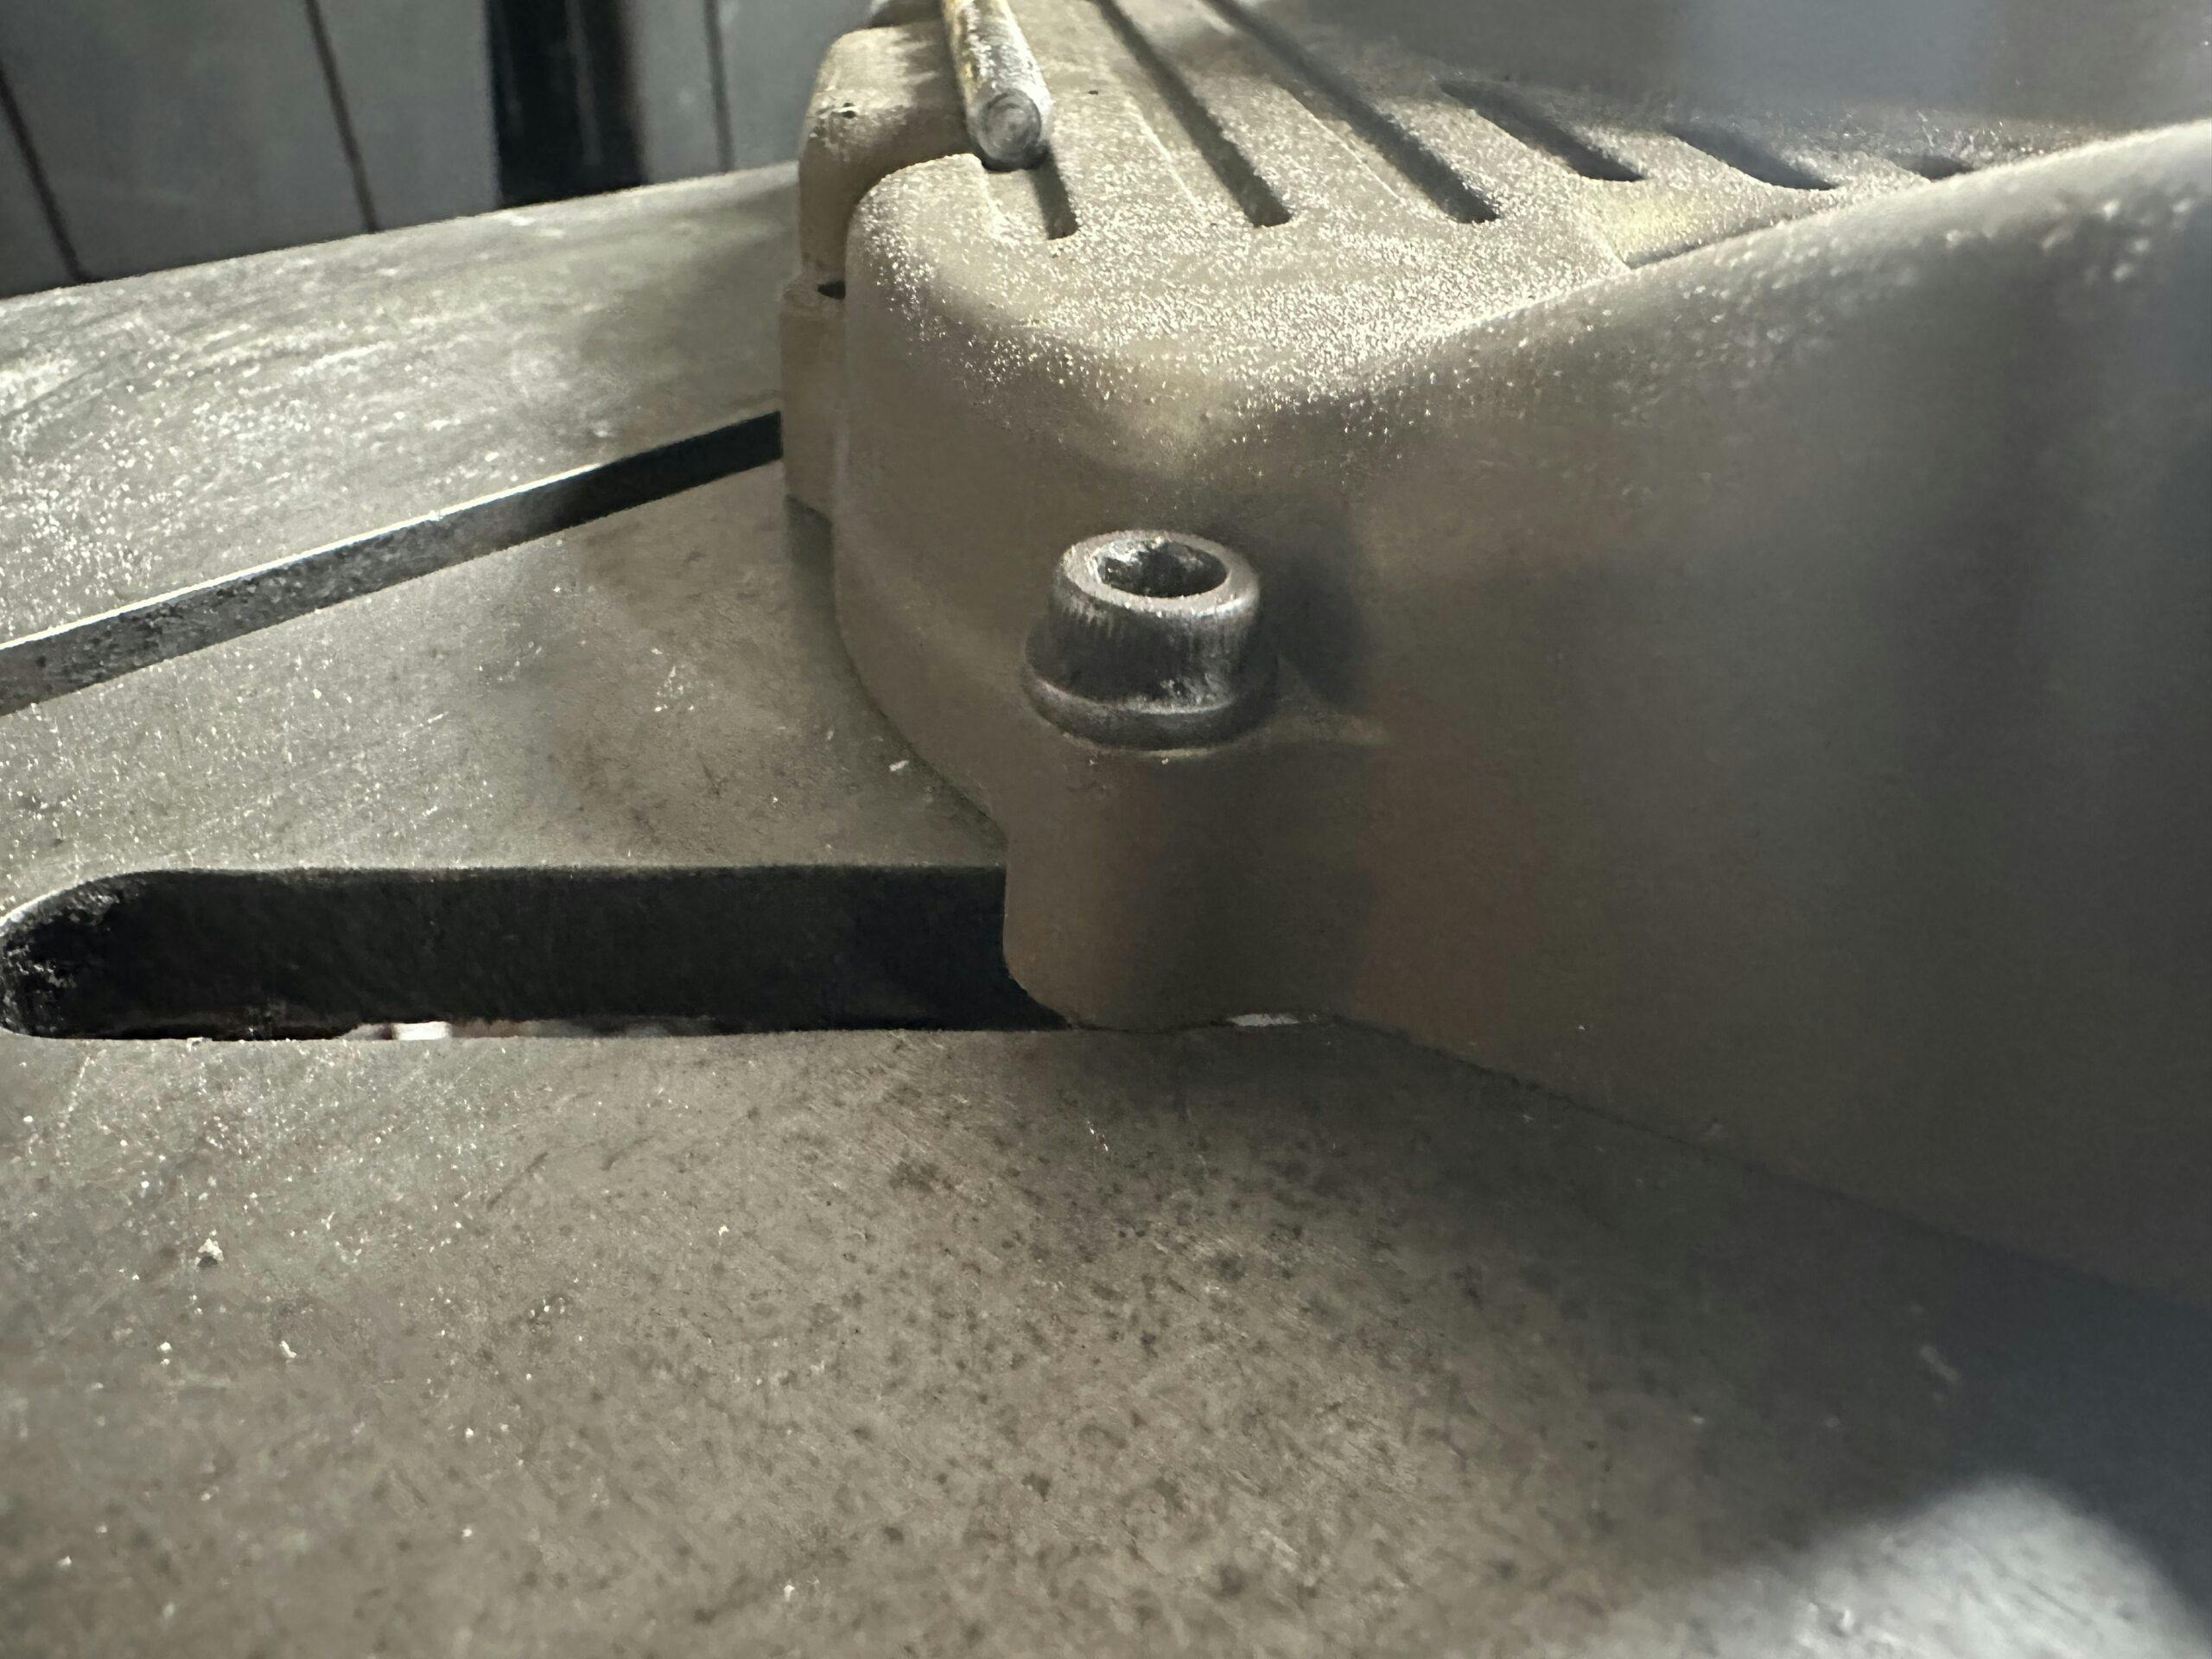
Carbide in hand, I had to think about setup. Luckily, the table of my drill press has T-slots in it to help the user create a more rigid setup. However, I could only do so much—especially after realizing there was no place locally to source T-nuts. My plan switched to going through my drawer of random hardware until I found the right combination of bolts and nuts. Finally, I had fastened the side cover to the table at three points. I then wound the table as high as I could to keep the quill as high and stiff as possible. The name of the game was rigidity. (This is not to be attempted with a cordless drill.)

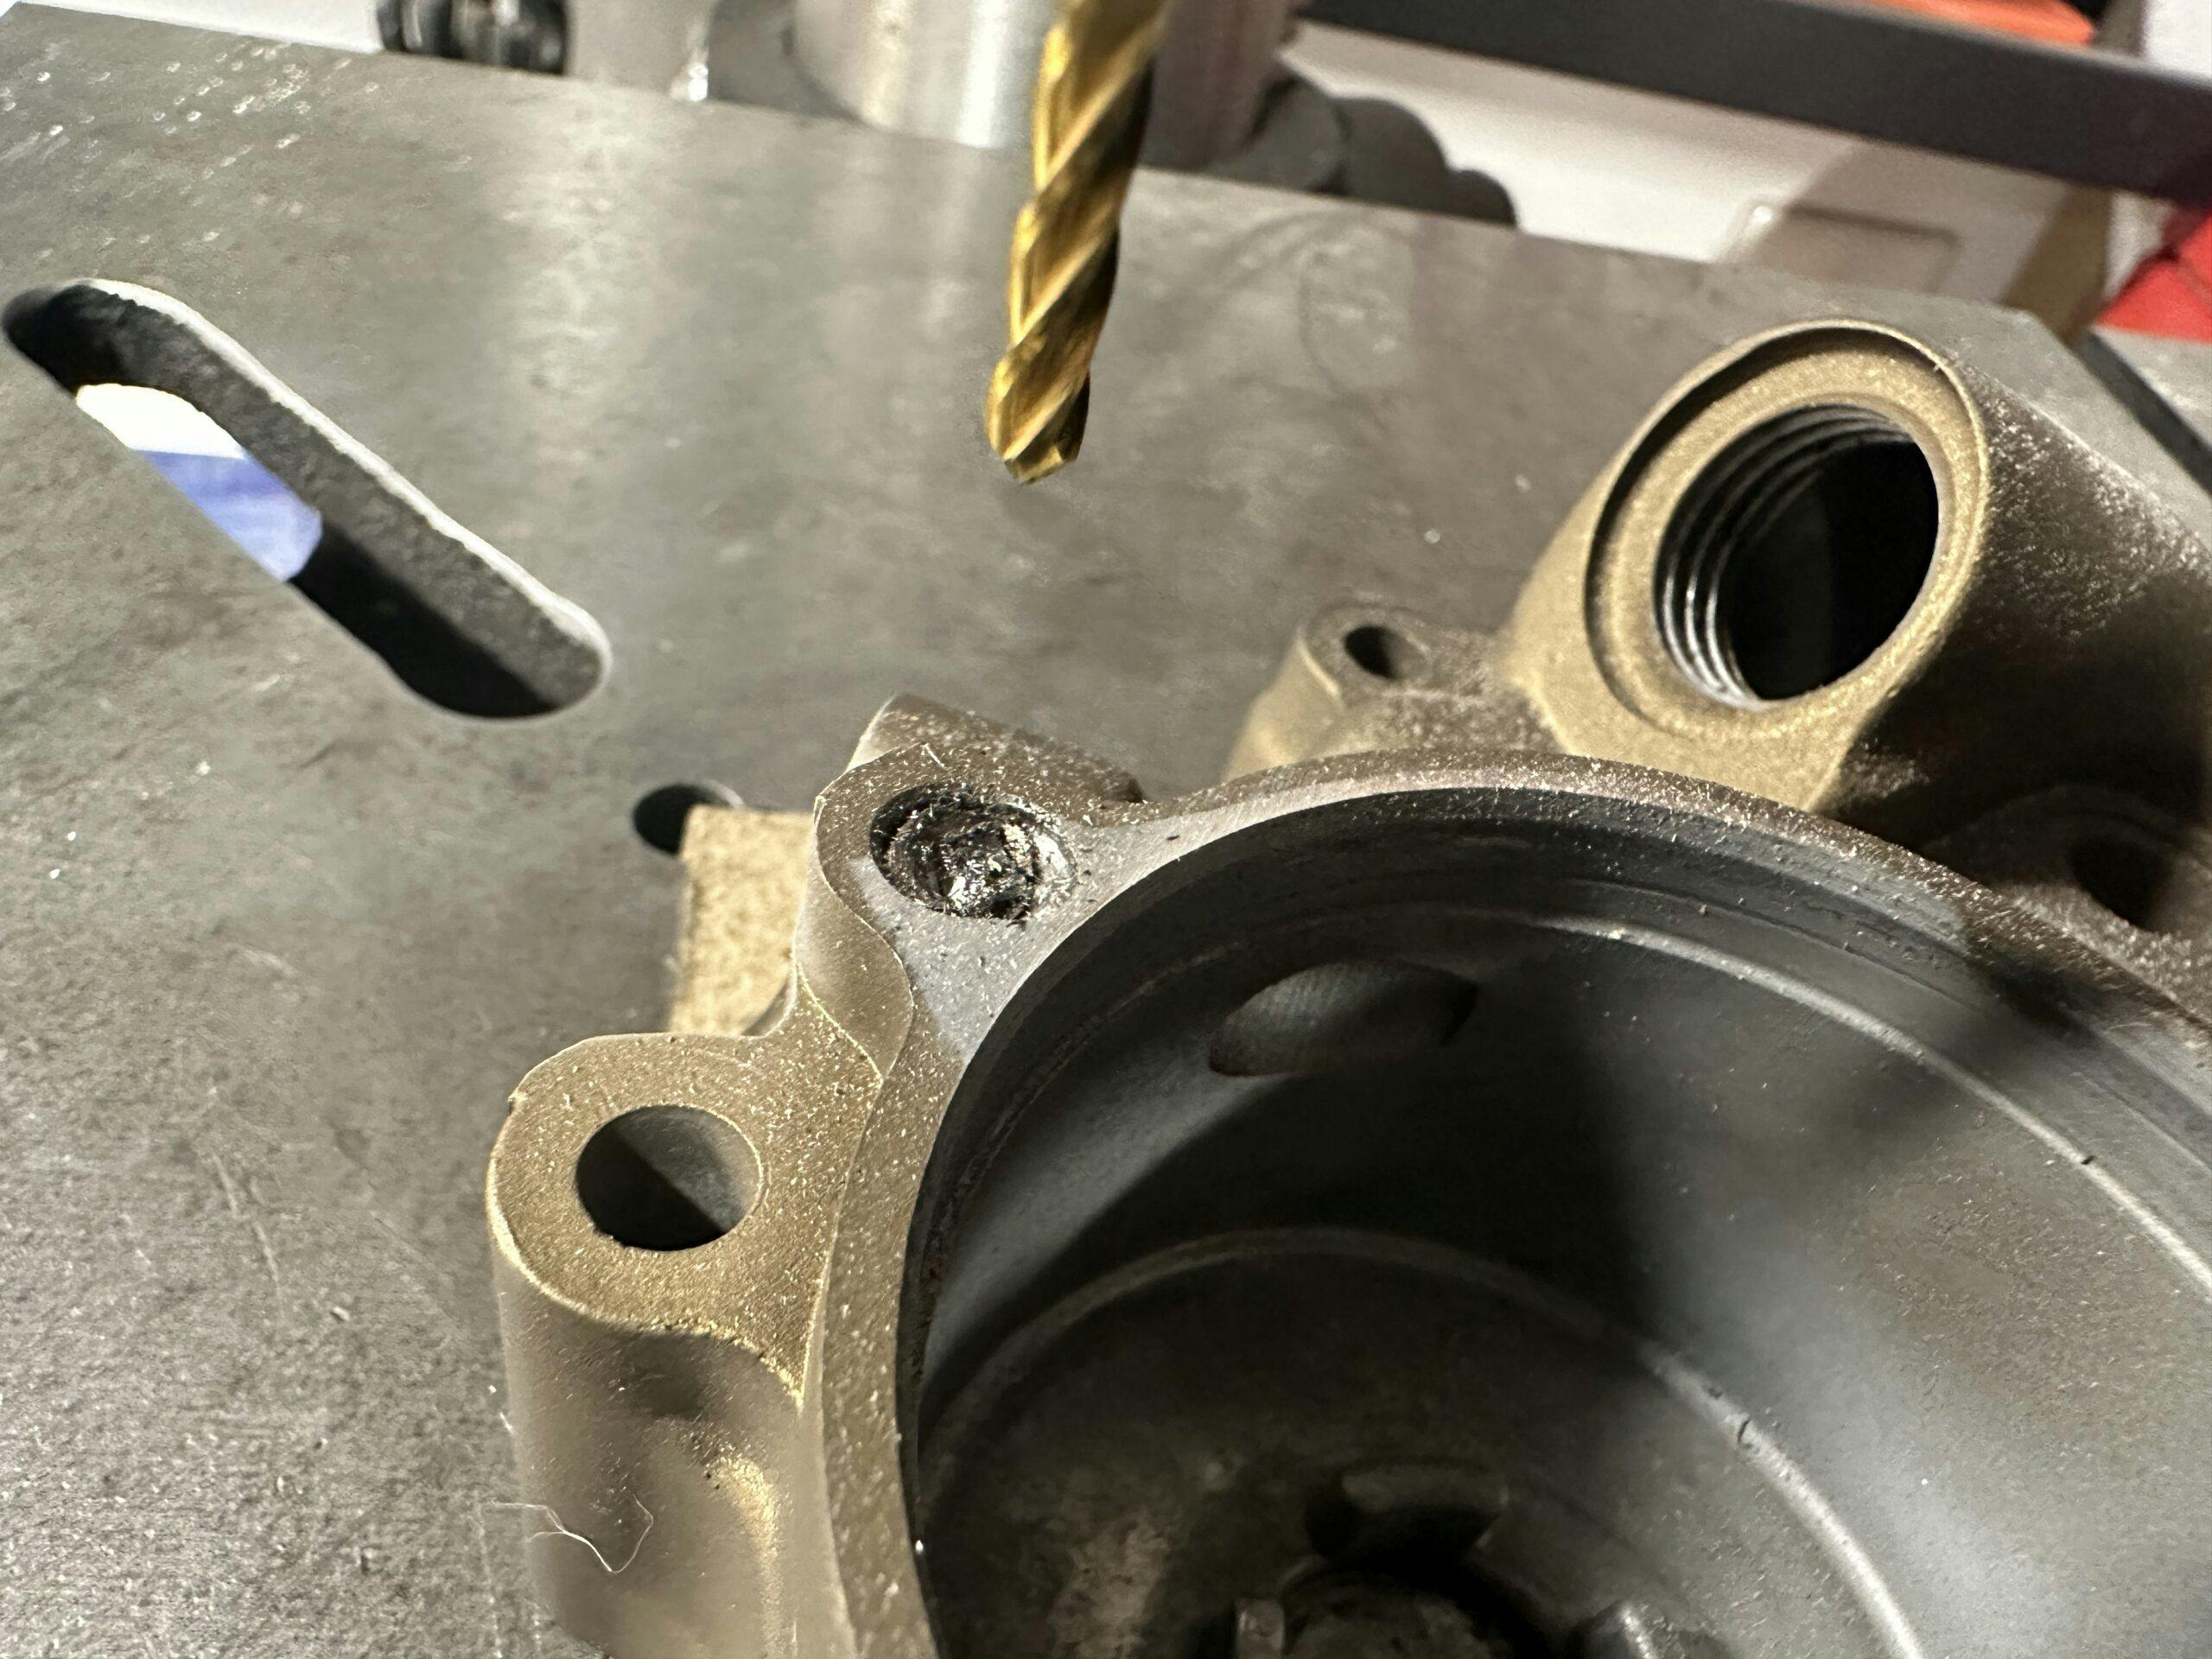
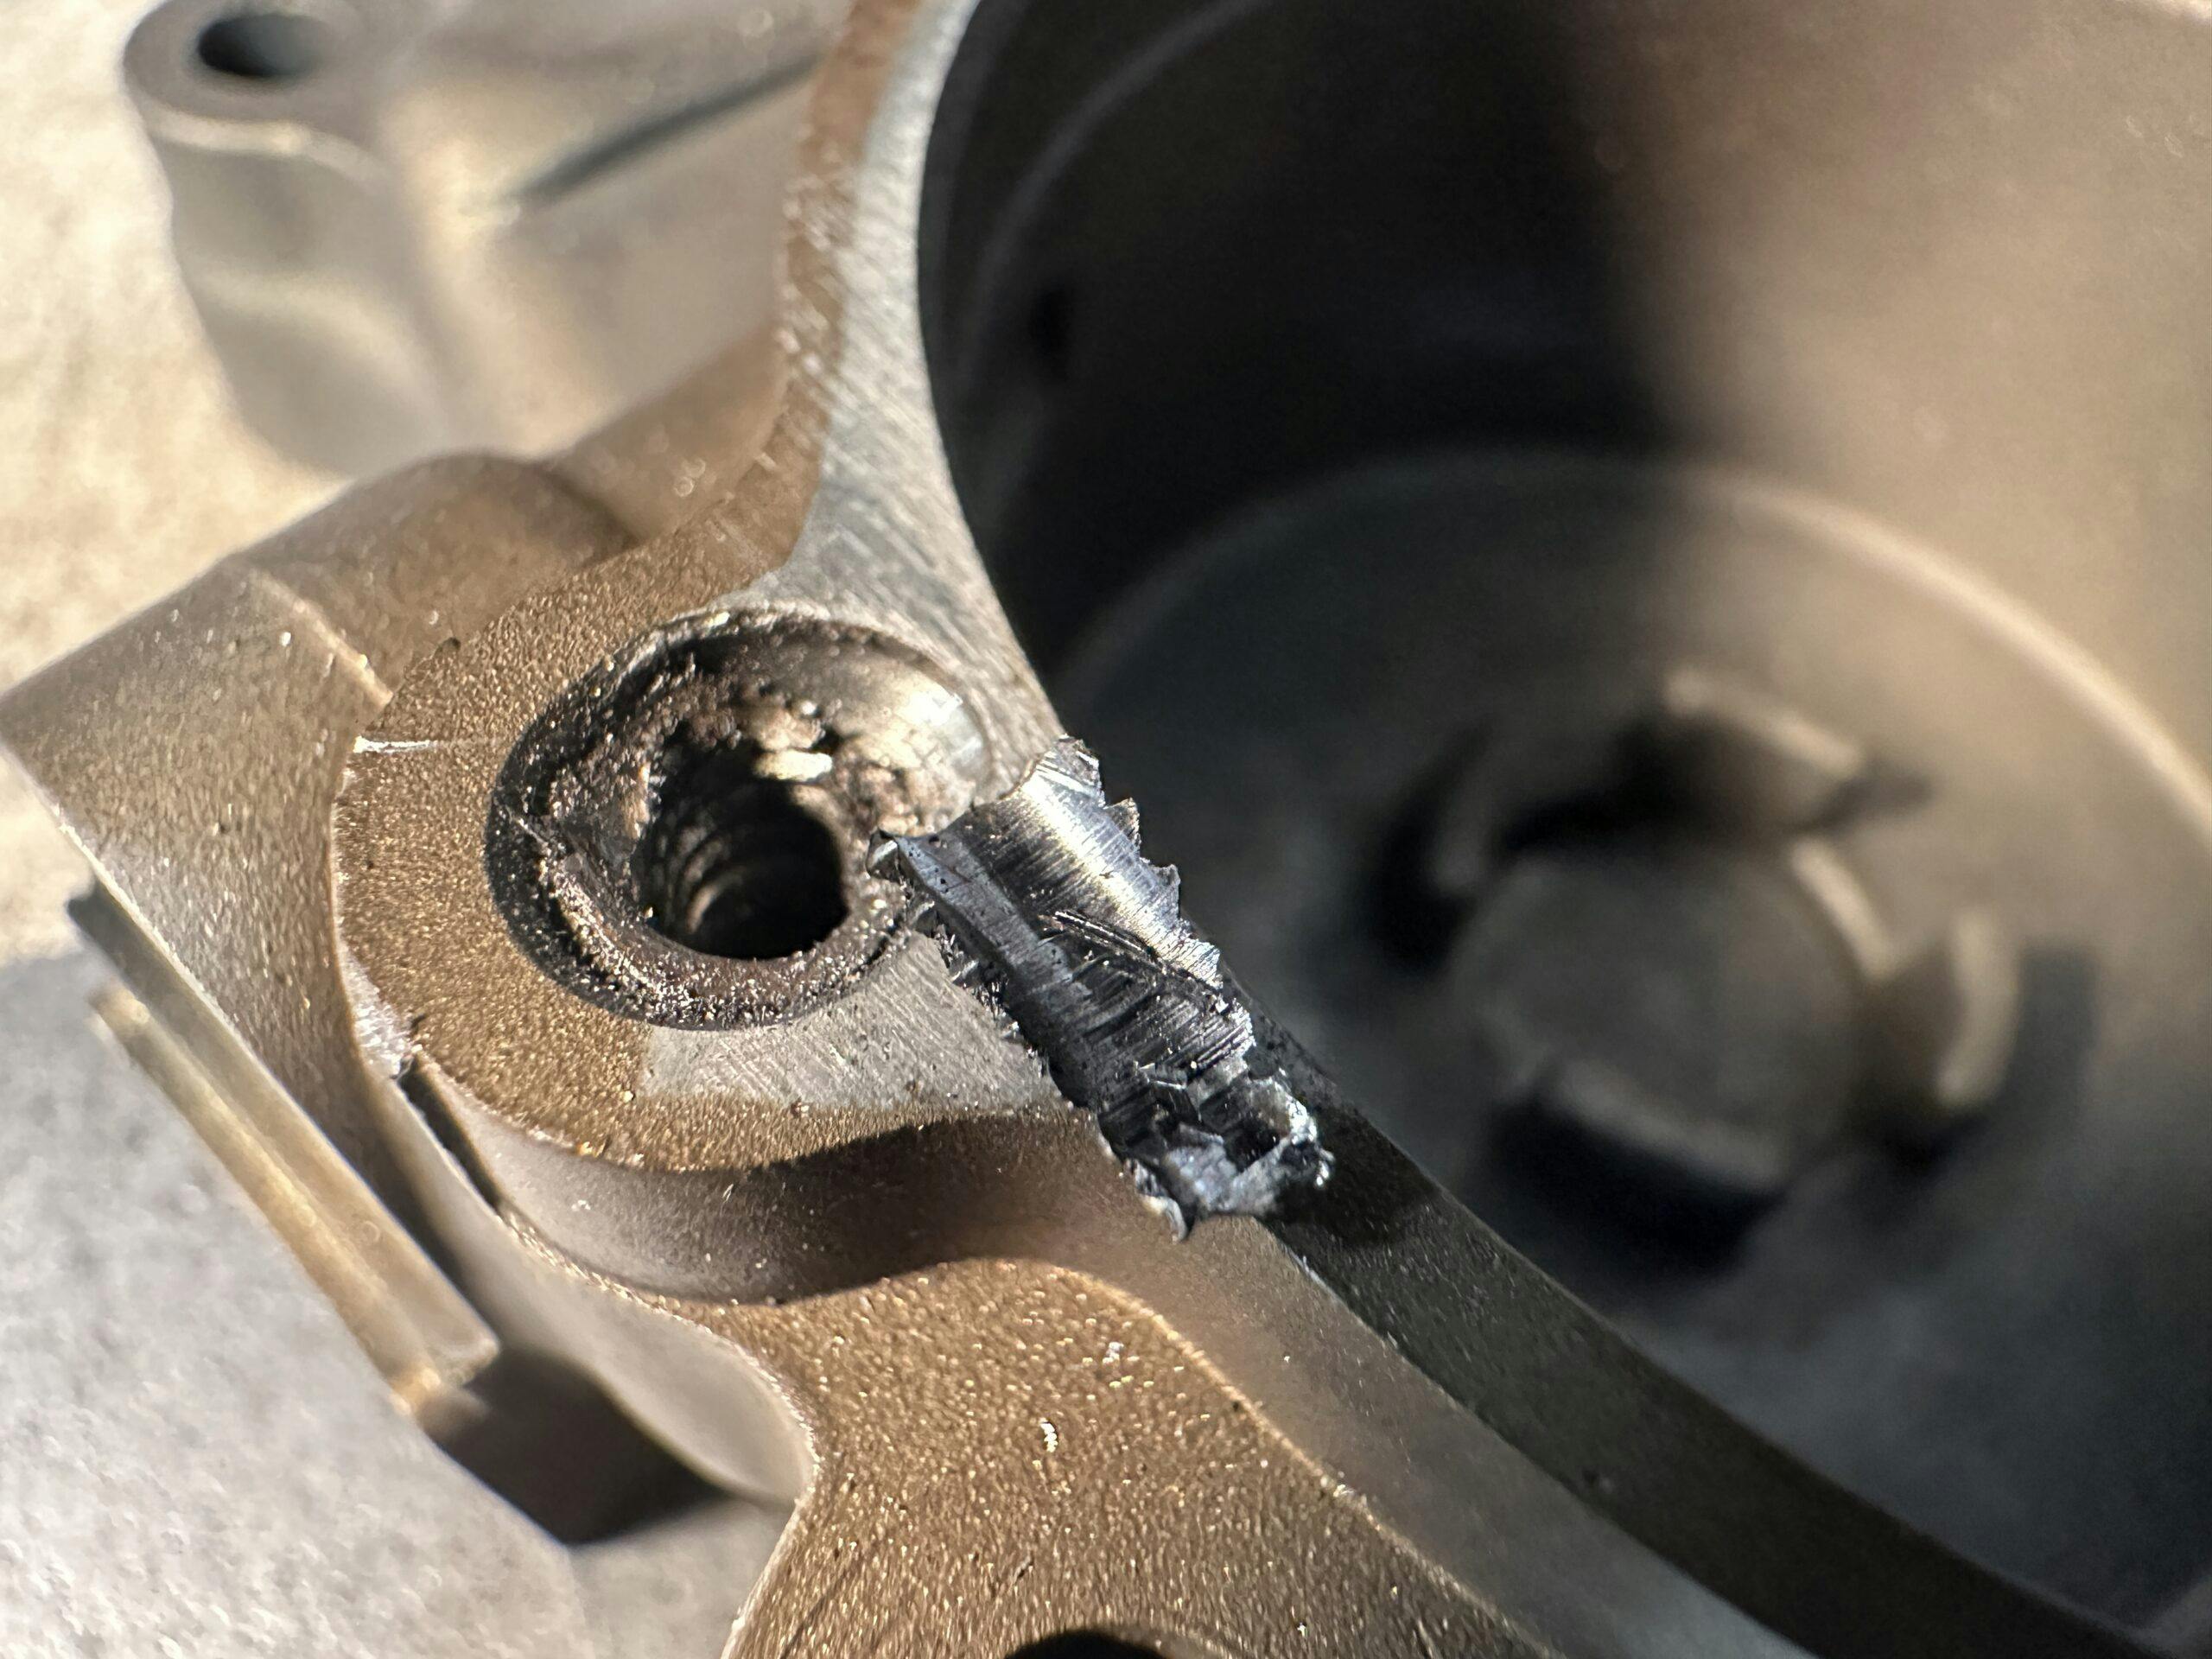
With a little cutting oil to keep things cool, I started pecking at the cover with the lever that controlled the quill of the press. The 90-degree tip of the end mill enabled me to carefully locate the actual center—not the poorly drilled hole now filled with easy-out—and begin to remove material. It was a delicate game of managing speeds and feeds by hand: I had to put enough downward pressure on the end mill to prevent chatter—the cutting faces skipping along the surface of the material rather than biting into it—but not so much pressure that I began to generate heat.
Applying cutting oil and taking breaks every few minutes made the whole process feel like it took forever, but it was really maybe 10 minutes of actual work stretched across an hour, me stressing the whole time about breaking the end mill. That would all but require me to call for help, and I would not be real proud to carry this mess into someone else’s workspace.
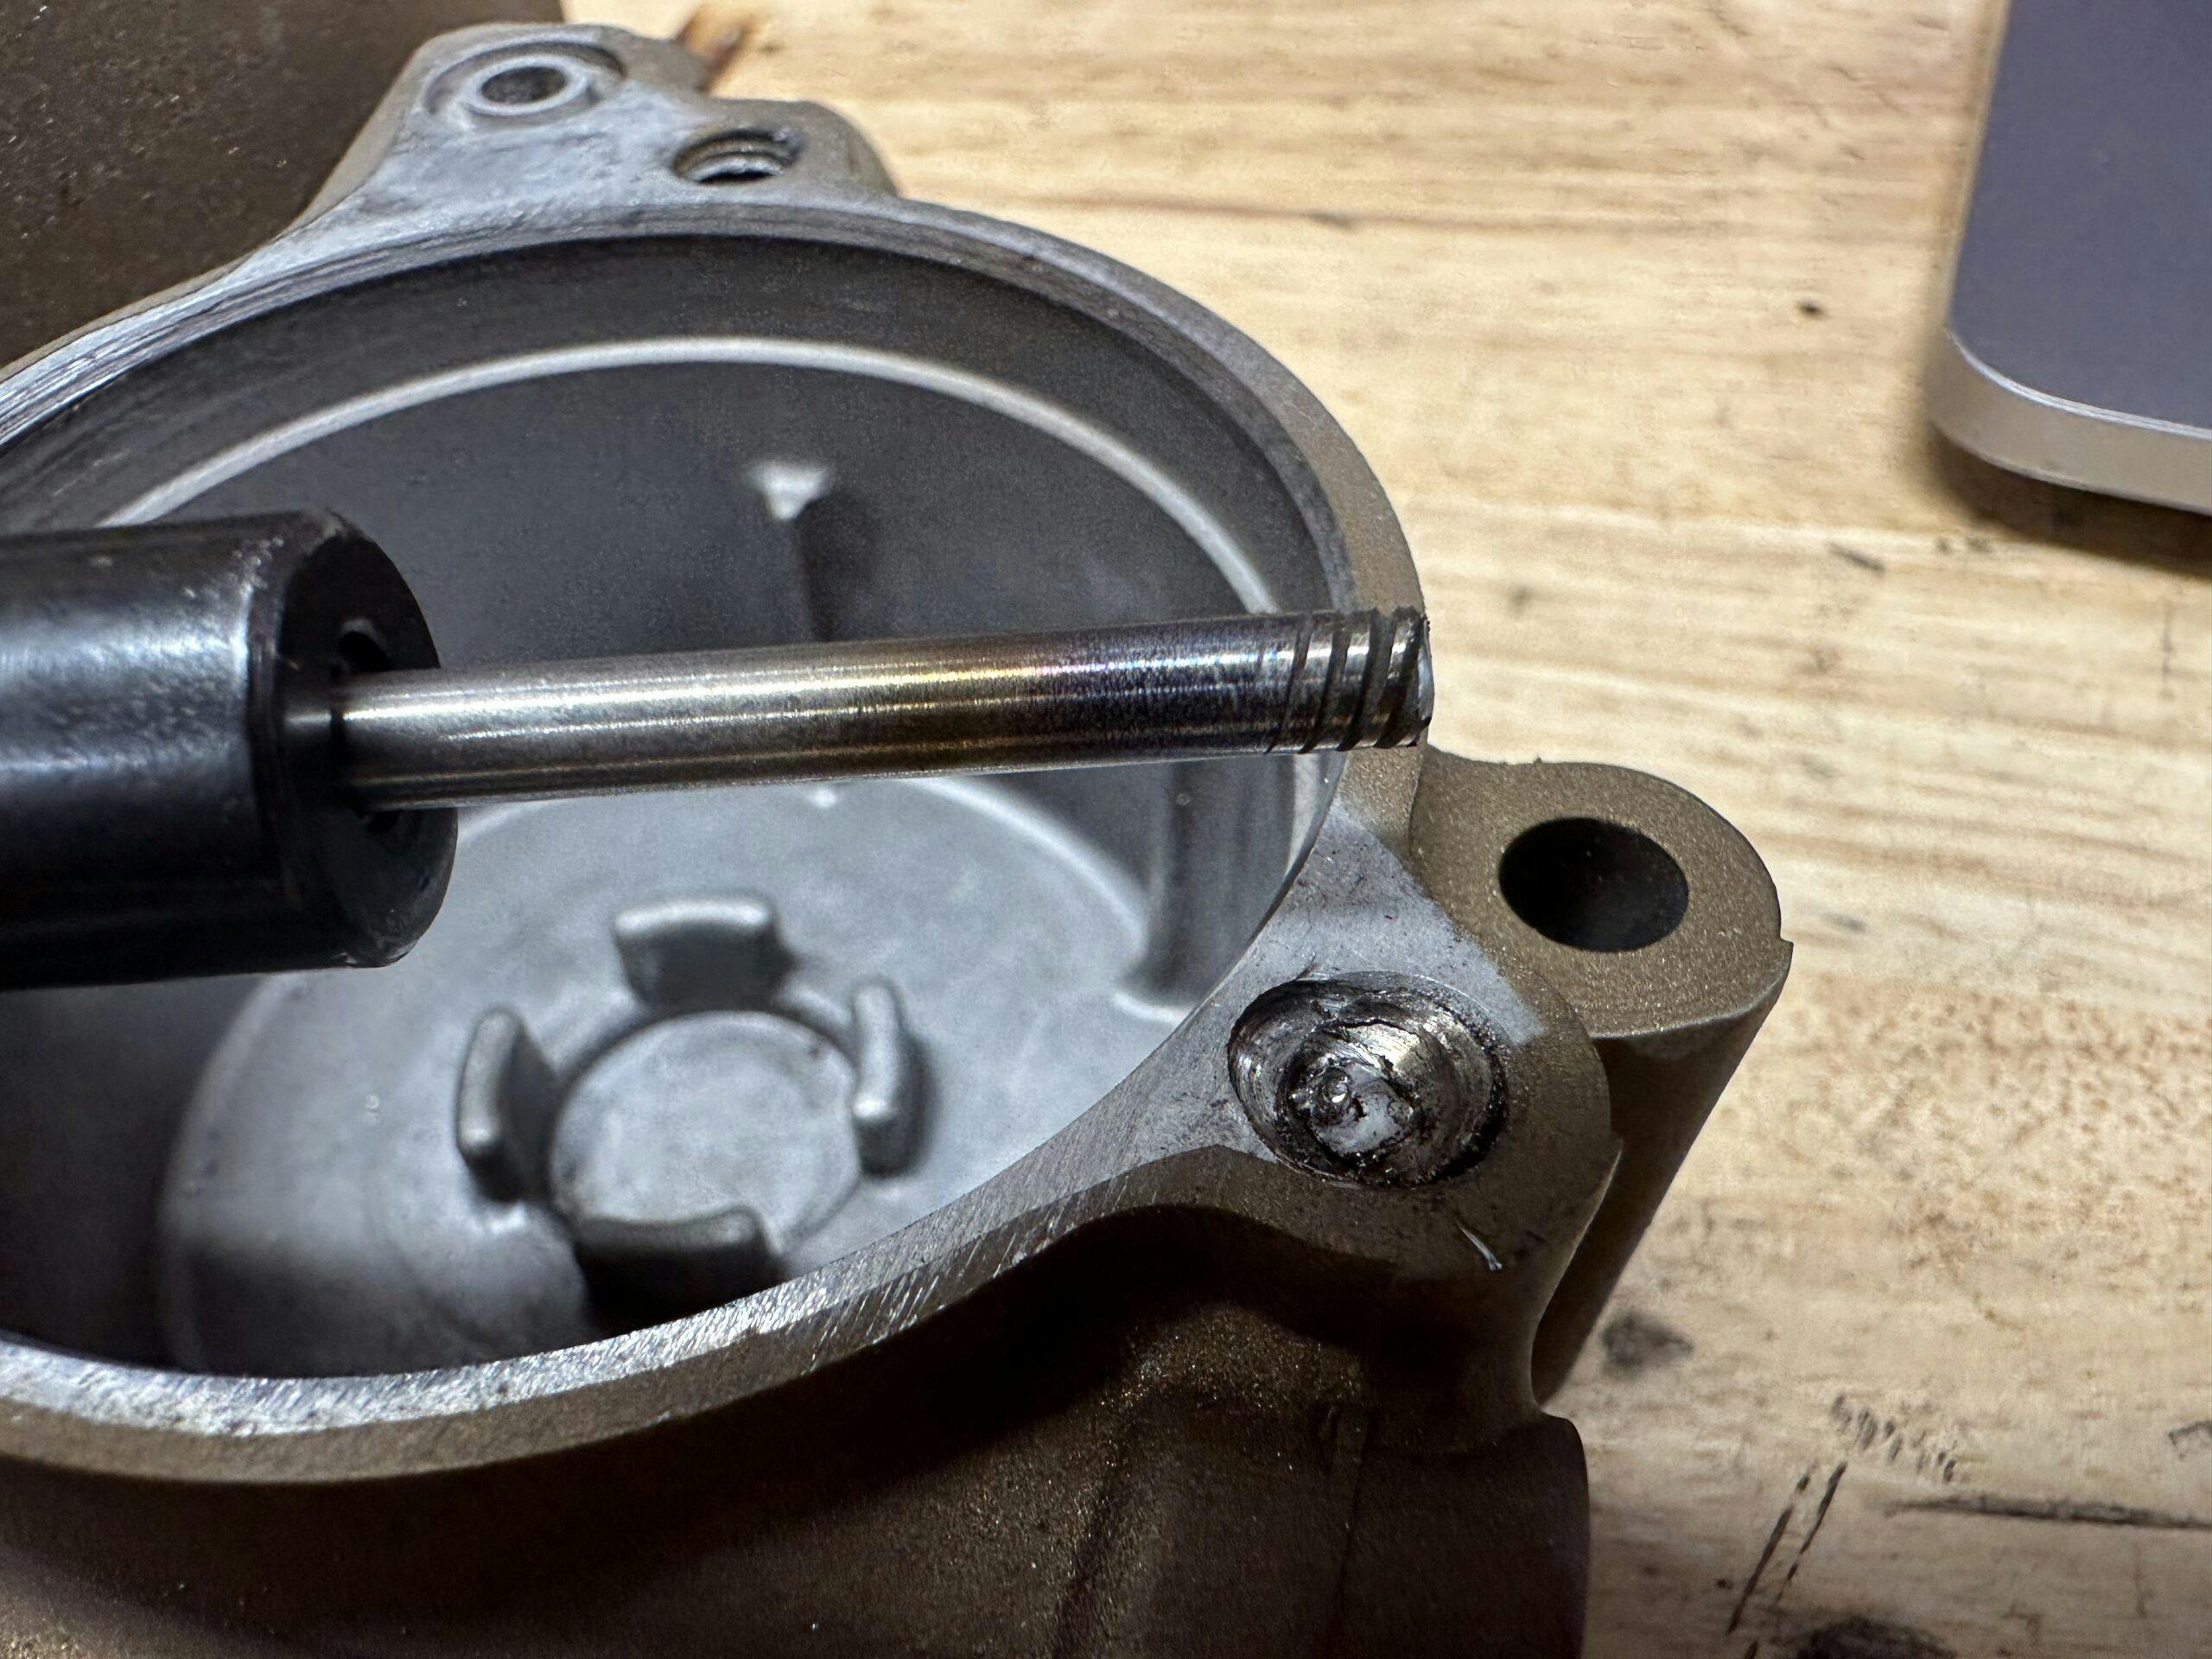
Of course, the end mill broke. Luckily, there was plenty sticking up, so I grabbed what remained and yanked out the end-mill. With a small punch, I knocked the leftover easy-out onto the bench, which allowed me to step up to the 6.4mm bit to cut the final diameter of the hole. I used a tap to form threads and the repair was complete.
There were a number of ways to go about solving that last piece of the problem, but mine was the most final. The re-formed threads would fail at the same rate as the OE production ones—good enough, considering that the other two bolts for this oil filter cover are original threads.

In the garage, there are some rigid concepts that define the ways we can do things. High-speed steel will not drill out a carbide end mill; that is fact. How you use this knowledge, however, is highly variable. Once you understand the facts that constrain a project, your brain can switch fully to creative thinking and problem-solving. The materials I use demand to be used a certain way; knowing that enables me to choose the right tool for the job or, when doing something off-piste, to stack the deck in my favor. The combination of the flexible and inflexible will set your project free. It is the workbench yin and yang.
***
Check out the Hagerty Media homepage so you don’t miss a single story, or better yet, bookmark it. To get our best stories delivered right to your inbox, subscribe to our newsletters.


If you have a 0.50 record of successfully extracting broken bolts and saving or repairing threads, you are in the major leagues… I don’t care how much helpful advice is out there. My neighbor just broke off a seized stainless bolt off in an aluminum marine engine, and I just informed him that he has about a nil chance of drilling it out without doing serious damage to the surrounding aluminum. Plan B is to use what remains of the bolt hole bore, tap it out larger, and use a shorter bolt
Spark erosion is the way to go for ferrous metal broken in aluminum. I made my own spark erosion rig and obtained a clean bore with threads intact in the aluminum. Look it up
Looks promising, but I don’t think my neighbor is going to shell out 5 grand for the machine
I agree. A lot of people aren’t familiar with EDM, but it works like a champ. Not everyone has that service available nearby, and you can build your own rig, but it would be a challenge for most. When I was the service manager at a Suzuki shop in Garden Grove many years ago, we had a local service and it was great. I also agree that welding a nut on the a protruding piece is a good way to go if you have that capability. I’ve done it every way you can, including the way Kyle did. It’s never fun.
I have heard about EDM but there isn’t a shop around here that does it (that I know of) and I’m not sure I’m to the point of building my own just yet.
Provide a good link that can be looked up, please.
More of a hint than a solution, but any port in the storm!
https://hackaday.com/blog/?s=EDM
Thomas. . . that spark erosion method reminded me of my apprenticeship days where broken taps and drills were routinely removed from high dollar items such as engine blocks. It’s the way to go for us DYI’ers if disaster strikes. It may mean a long trip to a suitable machine shop though. . . In the meantime, there’s always a Helicoil?
I have a better-than 50/50 record of extracting stripped screws from wood! Fortunately haven’t had to deal with broken bolts in metal. If so, I’m sure I would be batting at the bottom of the order with my average. 🙂
Boy, TG has it correct: extracting 1-out-of-2 is darned good. You can find about a zillion videos or blogs that’ll tell you that you can get it out 100% of the time, but in the real world, batting .500 is better than most of us can manage.
I would have tried welding a washer to the broken bolt through the hole, then welding a nut on it the same way. The heat will often break the bond. Use antiseize on reassembly, adjust the torque accordingly, it needs less.
I have not broken much off but when I have my buddy is a master of Helicoil. He has bailed me out several times.
Great job Kyle! Good thinking and good execution, with the machinery available. I run around 85-90% on stuck bolts, but I had a really good teacher who was a tool room machinist and machine builder for most of his life. I learned a lot and still do. It’s difficult to do what you did on a drill press, so I have a benchtop mill for small jobs, that is much more rigid than a drill press. They’re not too expensive from Little Machine Shop or some other vendors and are really handy.
I agree with HyperV6 on the use of heli-coils. They are a lifesaver and pretty easy to install. Keep up teh good work and good stories!
I’ve told myself that I’ll skip the benchtop mill or lathe because I do have space and ability to acquire the full-size real deal, but occasionally the thought of buying small and using until I actually am in the right place to buy a knee mill and then selling to upgrade creeps in and…It’s tough to shake out. You aren’t helping the cause (and maybe that’s a good thing?)
Kyle. . . your articles are a joy to read! Keep it up! If for no other reason that they remind us that others suffer the same problems!
With broken taps, and extractors, or sheared bolts , an easy way to drill it out is via diamonds, and buy the appropriate sized diamond tipped drill for around $10. Drills smooth and quick thru carbide like going thru butter. Here is a link for a 5/16″ size for example. These drills also work for glass, porcelain etc.
I needed to repair some stripped threads on an old aluminum intake manifold last year. Bought stainless threaded insert from Gard Industries , Eagle River Wisconsin. Owner took me upstairs in a workshop and drilled out a piece of steel and inserted one of his threaded threaded pieces. Spent about 15 minutes with me. Talk about customer service. These are self tapping inserts. Owner says they are used in the aerospace industry so they must be a decent product
I’m often reluctant to jump straight to the last resort (that’s what I view diamond bits as) because it leaves little room for error on something that is already giving me trouble. You are right though, it is a good option in the right situation.
I agree with Swamibob about the drill press. Tough thing to do! BTW, I like the picture of the yellow 914 behind the press. Is / was that yours?
That picture is the 1972 Porsche 914 my uncle drove back when. He also cast the aluminum plate that sits behind it that says 914 Porsche. It’s a fun piece of garage art with some cool history.
I would have heated the area with a propane torch first and let slow cool. That would help soften the easy out. Carbide does not like biding or shock.
I saw a good one on youtube for a bolt broken below the surface.
https://youtu.be/-8N0y0jVAng?si=fs2dllRxZGzxqnNc
Helicoil is the best way to go for me after removing the broken bolt.
I have never tapped into aluminum but I have into steel. Interesting to see what went down here.
I would have tried exactly what TMS said, weld a washer to what left of the broken piece and a nut to the washer & voilà ! I’ve seen it done that way a few times, I suppose the heat from the welding helped loosen the broken bolt enough to make it work ?
Good article. We’ve found Time-Sert thread repair better than Helicoil.
Sometimes drilling a broken off bolt or stud with a left hand drill will break it free.
Being of Scottish descent, it is genetically impossible for me to throw anything out, but I haven’t used any of my Ezi-Outs in decades* (a stronger man than I might overcome that and throw them away, or at least give them to someone you didn’t like…).
Left-handed drill bits For The Win here baby! If the heat and force generated by the act of drilling doesn’t “walk” the fastener remnants out by itself, well, you needed a hole there anyway!
Making this job easier, regardless of the direction your drill bit spins, I cannot recommend highly enough, drill GUIDE BUSHINGS! These are hardened steel “slugs” in a variety of diameters (common to popular fastener sizes) with a smaller diameter hole centered in the middle, typically for a 1/8″ – 3/16″ drill bit. These will get your pilot hole “centered” a lot better/easier than you can do freehand. Access to an end-mill (or even a Dremel tool) to smooth off the remnant shards will help getting your pilot hole started.
Ezi-Outs by their nature is flawed; when you drive one into a broken stub, you’re exerting more force on its external diameter making it tighter in the threaded bore. AND they can easily be broken. I avoid them.
Of course, the trick is to NOT break the fastener in the first place, and for that, I have saved MUCH GRIEF and extra work thanks to my hand-held Induction Innovations original tool. While not cheap, it’s no exaggeration that it has paid for itself many times over. https://www.theinductor.com/
* I did use/modify a large spiral-type easy-out to remove four (4) of those “internal spline-looking” security lug bolts on a BMW M Coupe when its owner lost the unique adapter (I used a cut-off wheel in a “bench-top” mill with the easy-out clamped in the vise to SLOWLY__and with LOTS of AIR__cut the tool shorter to work in the lug bolt). With that one (1) exception, I hadn’t thrown my faith into an Ezi-Out since the Carter Administration 😉
Good job on the write up Kyle, plus all the tips it generated from those reading it!
Broken-off steel bolts in steel or cast-iron can be a real problem. In aluminum, not so much, as heating the aluminum makes it expand much more than the steel does. Then an EZ out or even a left-hand drill will usually remove the bolt. Using penetrating oil first helps as well.
I use a center punch to create a guide for beginning to drill. I then begin by using a very small diameter drill bit–carefully and slowly–not pressing my luck. When I have drilled through (or to the correct depth) I choose the next bit size up and repeat. Each time it becomes easier–until I have removed most of the old bolt–leaving just the very least I can. Then, I slowly re-tap the hole, removing the remains of the old bolt. I use the same sized bolt–a fresh one or a cleaned original bolt. So far, I have not had a single failure.