Wrenchin’ Wendesday: Hang time with air-tools

Air-tools are a god-send for mechanics, offering an endless supply of force in the form of compressed air that allows for these high-powered tools to operate all day without needing to charge up (unless, that is, your air compressor asthmatically can’t keep up with them), and a variety of tools operate off the same universal air fitting — which we’ll exploit for today’s Wrenchin’ Wednesday.
As I’m laying out my shop, I’m building ways to place tools where I’ll need them most, and things like the impact gun and air chuck see regular duty. It also keeps more specialized things, like the air hammer, in an easy-to-remember home instead of being buried at the bottom of a toolbox.
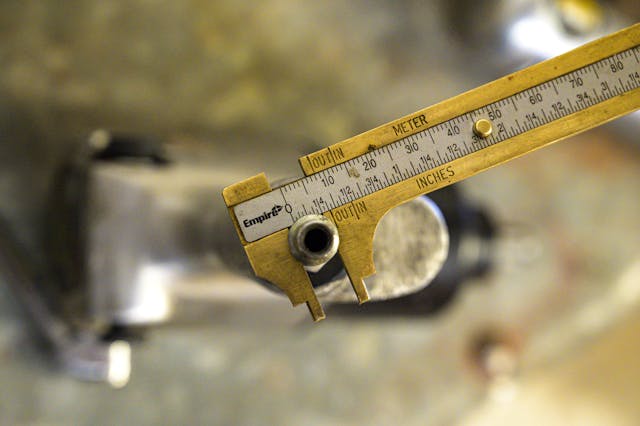
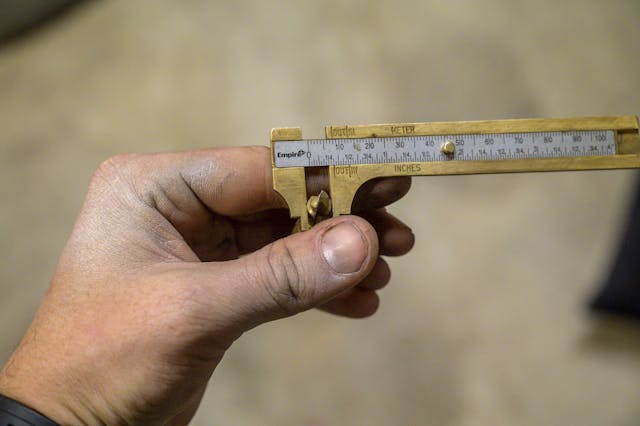
First, the tools were mocked up on the bench to figure out the spacing, and about 3.5 inches worked out. From there, the fitting was measured for its small- and large-diameters of the locking ring, so that the hanger’s slots could be sized. The narrow portion will slot into the bottom of our hanger, which will be made of square tubing, and set the maximum width of that slot. The flared locking ring will need to clear the front of the hanger in our tubing, so it too is measured.
Next, the end of the slot is marked out in the center of our box tubing and then drilled to the narrow diameter of the air fitting. This hole will serve as our guide for the width of the slot while also providing a nice, rounded edge to it. A small tip for using stepped drill bits: use a paint pen to mark the step where you need to stop drilling as an easy reminder — it’s not hard to accidentally lose count of the steps as the drill cuts, leading to over-drilled holes.


On the corner of the square tubing, a hole is drilled a bit larger than the diameter of the lock ring of the fitting. It will be the entrance for the air fitting when hung.


Next, the tubing is notched to the width of the narrow holes. Work slowly here so that the slots don’t become over-sized, which would result in dropping the air-tool.
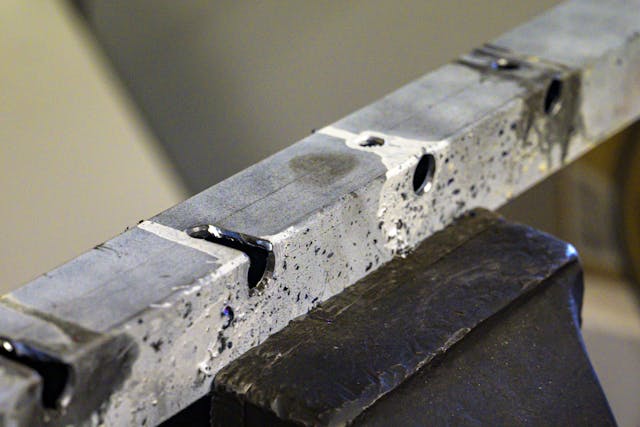
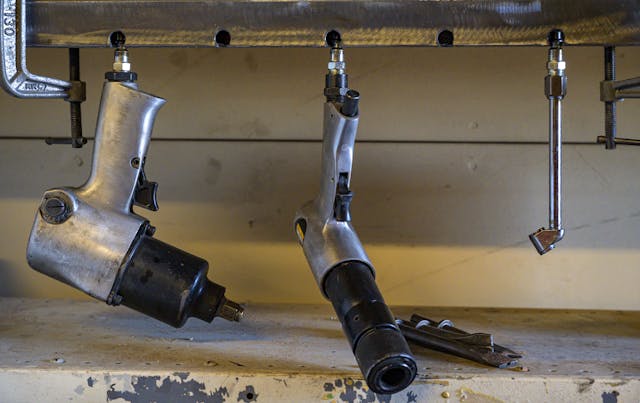
With the slots cleaned up and radiused for the forward entrance holes, the job is essentially done. With square tubing, this could be drilled front-to-back to hang it off a wall, or top-to-bottom as I’ve done here to hang it below a shelf. This may not be the final resting place for these air tools, so for now it’s just clamped. It can be worth it to temporarily affix organizational aids and feel out how they fall into your general workflow, as you may find that your original placement ends up inconvenient in some way once in action.

