Wrenchin’ Wednesday: The science behind CAD—cardboard aided design!

CAD, or Cardboard Aided Design, is the trick of building a template to transfer to metal in order to fabricate a one-off part, even something with a complex shape. The rule of thumb is that if you can make it in cardboard, it can be replicated in sheet metal, so having a well-practiced CAD workflow helps you to quickly design and fabricate unique solutions for a project. For example, you could use readily available and free cardboard to design brackets to fit a larger aftermarket radiator. A sheet of metal and a sheet of cardboard can be bent and shaped similarly, meaning that it’s an excellent proxy for the final material while working through design iterations.
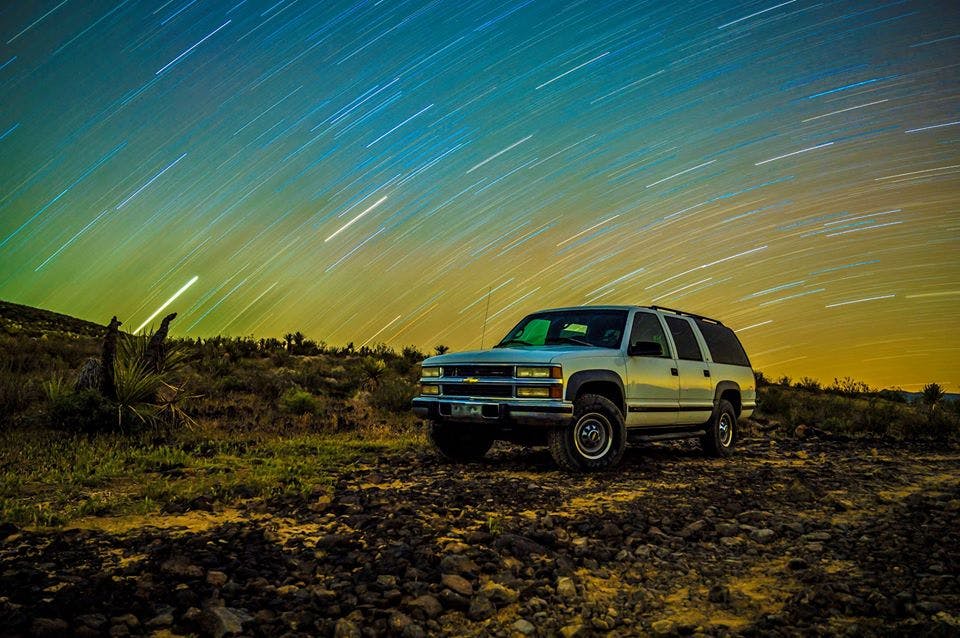
A project I’ve had in mind is a rock guard for the low-hanging HVAC lines that run along the frame of my 1996 Chevrolet Suburban K2500, which has a rear ventilation system. This 4×4 juice box has been an excellent camping rig over the past year, and the goal is to prepare it for some long-distance “overlanding” trips this fall. The HVAC lines have been a point of concern in rockier trails, where the gobby 33-inch tires slingshot gravel and other debris out of the canyon-like siping against the inlet and outlet lines for the rear heater core and a/c evaporator.
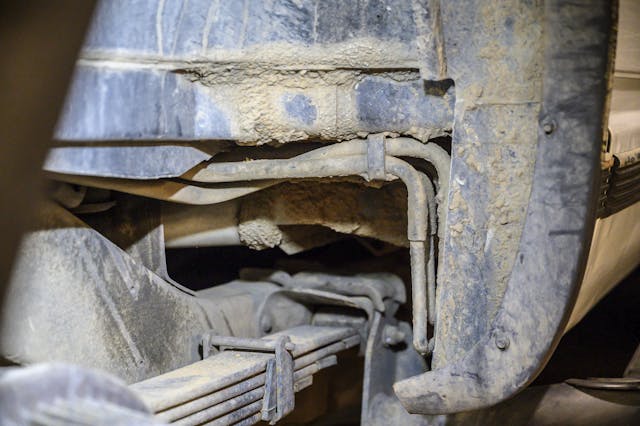
I’ve pulled stones and bricks of mud from between them enough times that it makes sense to cover the aluminum lines up. Sure, breaking the a/c would mostly be an inconvenience, but losing a heater line means the potential to lose huge amounts of coolant, so it was a good excuse to break out the CAD on this project.
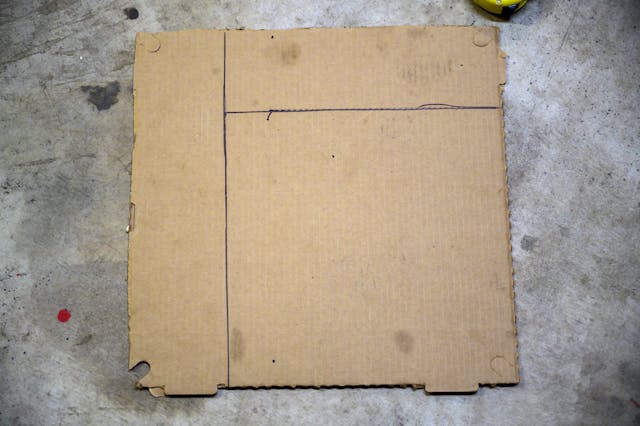
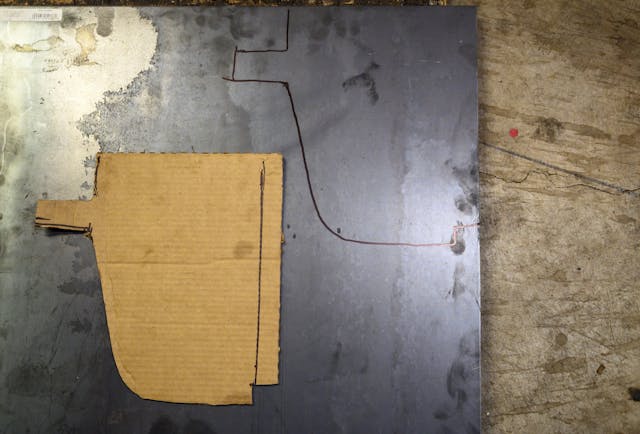
First, make rough measurements of the part that you need to make so that you can find a useful piece of cardboard or cardstock. Start off with a piece that’s a little larger than what you need, here I measured out a 12-inch by 12-inch patch to start with after making quick measurements of the wheel well.
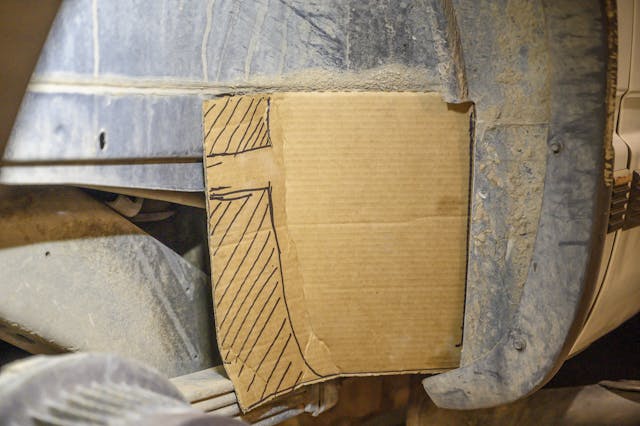
For this rock shield, it will attach to the pinch welds inside the wheel well, so the key mounting points were noted and a rough shape was drawn out to fit the shield around the leaf spring while still protecting the HVAC lines. The cross-hatched portions emphasize the sections that are being removed.

The main reason to start with cardboard instead of working directly in metal is that it’s faster and easier to work with and mistakes are cheap to make. We made changes to tuck the shield up higher while also giving the leaf spring more room to travel, so a few more clips with the scissors and the template was ready. It’s okay to leave the template a little oversized at this point, as the old adage goes that it’s always easier to take more metal off later than it is to put it back on.
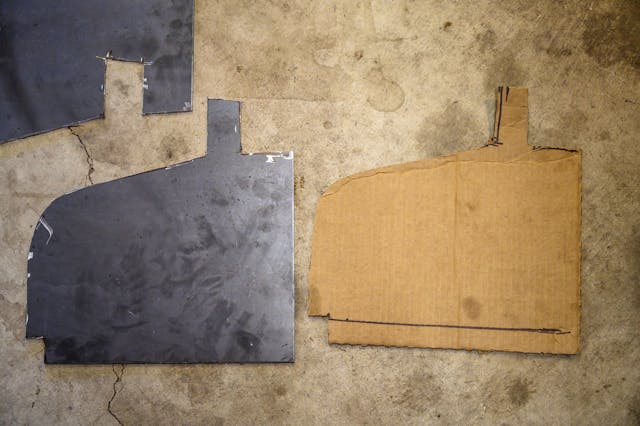
From here, it’s the straight forward step of tracing and cutting out the part you’ve created in cardboard. I managed this basic rock shield with just an angle grinder, probably the most versatile metal working tool in the shop. Because I needed to make a few bends on the mounting tab, it was left over-sized so that it could be trimmed down to its final shape after fitment.
On the first fit-up, the rock guard already fits into place nicely. The tab will need to be worked into its final shape next, and the top-right corner will need to be notched to clear a seam in the body, but designing this rock shield in cardboard meant I spent less time during mockup finding a cutting and grinding a precise shape for the outline of the part, along with planning the bends it would need to conform to the wheel well.

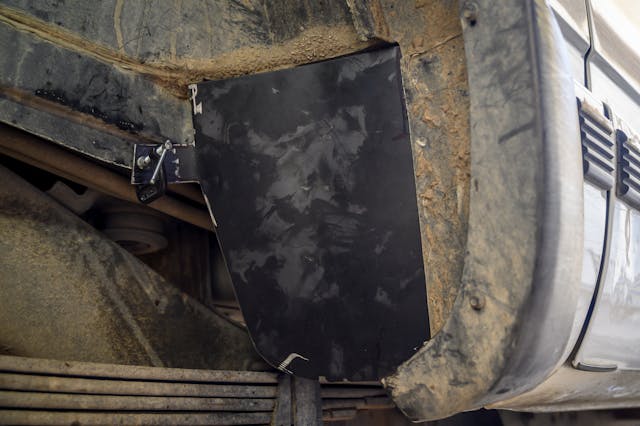
A little more time with a flap disk was spent rounding-off the inner bracket into its final shape while the shield was hammered into a slightly concave shape so that it tucked into the fender well tighter. After a coat of paint, it will be fastened to the pinch weld on either side of the rock shield, but we’ll talk about custom mounting solutions on another Wednesday—know what I’m saying?
That’s the basic principals of old school CAD. Once you get a hang of the process, wildly intricate parts can be built out of a single sheet of metal and a handful of bends. Fans of Project Binky, for example, are especially aware of just how capable the humble CAD method is, so use those recycled shipping and pizza boxes on your next project to build something that’s one-of-a-kind. For this old Suburban, it’s just a little extra peace of mind when beyond the echos of civilization.