Wrenchin’ Wednesday: Replacing U-joints without a shop press

Some people will tell you that you’ll need a hydraulic press in order to replace U-joints—those people are wrong. Here at Wrenchin’ Wednesday, the MO is to distill shop techniques and tools into something the home-gamer can do, and we’re going to pull back the veil on driveshaft service. Whether you’re chasing a mysterious vibration at higher speeds or listening to those poor needle bearings chirp in the morning, U-joints are a wear item that can sneak up on you and fail at the worst of times, putting your project out of commission and risking substantial damage from a newly liberated driveshaft once the joints catastrophically fail. On a typical labor book, a U-joint replacement is one or two labor hours, meaning that a $25 part can cost substantially more once someone else installs it for you and charges around $100/hour.
The truth is that with a few sockets you probably already have in the toolbox, a hammer, and a basic bench vise, you can easily knock out worn U-joints and wrap up the repair as an afternoon project.
1 . Start by dropping the driveshaft out of your vehicle. Most driveshafts seal against the transmission or transfer case, so it helps to put the rear of the vehicle on ramps or jack stands so that the fluid rushes away from the tail shaft seal we’re about to uncork. Also, you’re going to be flopping the driveshaft around a lot on the bench while working on it, so covering the slip yoke’s polished surface with an old sock or even painter’s tape will protect it from damage that could result in a leak down the road.

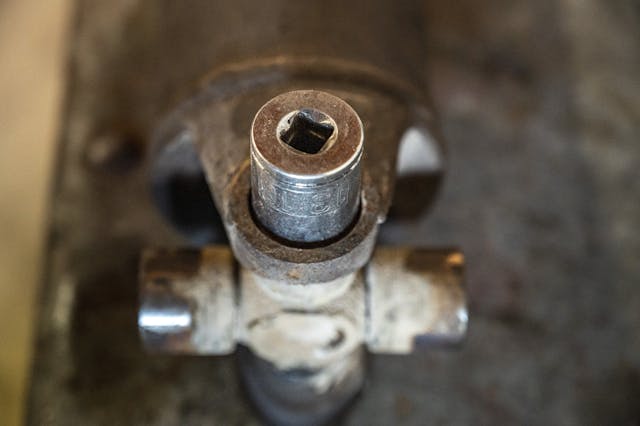
2. Next, you’ll need to find three sockets to use as pressing tools, two of them that are just a hair smaller than the U-joint caps, and one that is larger than the caps for them to slide into while removing the shaft. I found that a CV axle socket worked best for my big socket, but the U-joints on this 3/4-ton 1996 Suburban K2500 are bigger than what most people will be working with.
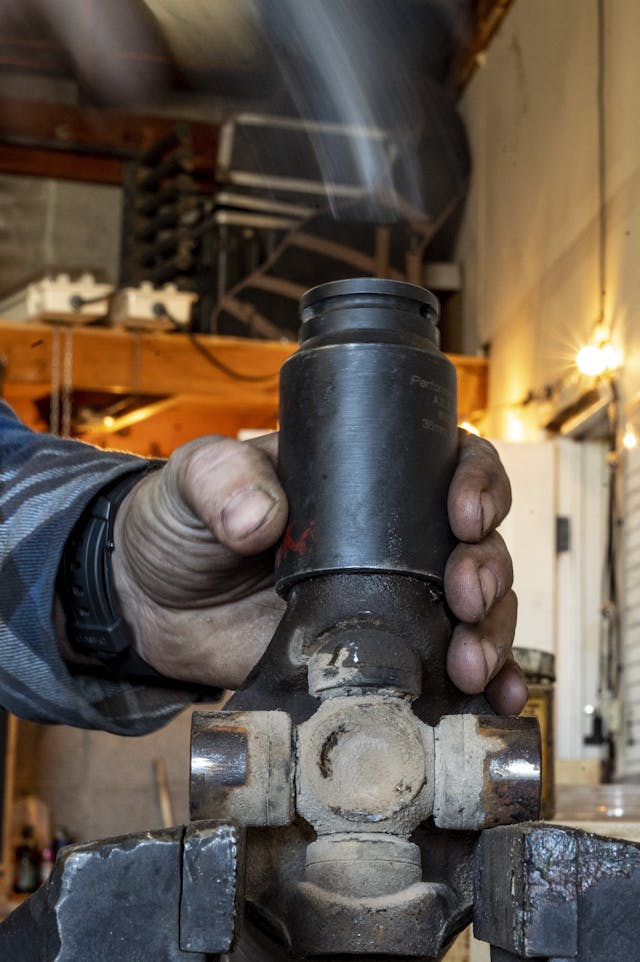

3. For this step, you have two options. One will be to use the vise as one giant screw press, but you’ll need a pretty stout one to do this, as the jaws will be spread far apart, which can be a lot of stress on the vise itself (you can see where the slide on mine is fractured from previous abuse—it finally chipped off during this shoot). Save this for a last resort if things are very rusty. As for the rest of the job, you’ll mostly be hammering the caps out. Either way, select your weapon and start pressing the first cap out.

4. Hammer until the joint slides up against the inner ear of the driveshaft, then flip the joint over and repeat the process to begin popping the opposite cap out.

5. Once both caps have been pushed as far as possible, the U-joint should be able to wiggle out.

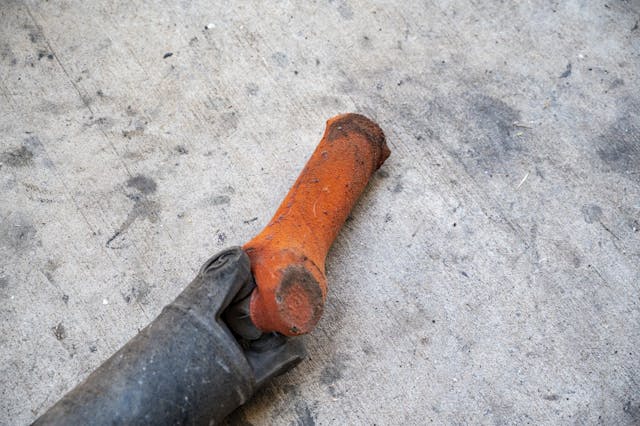
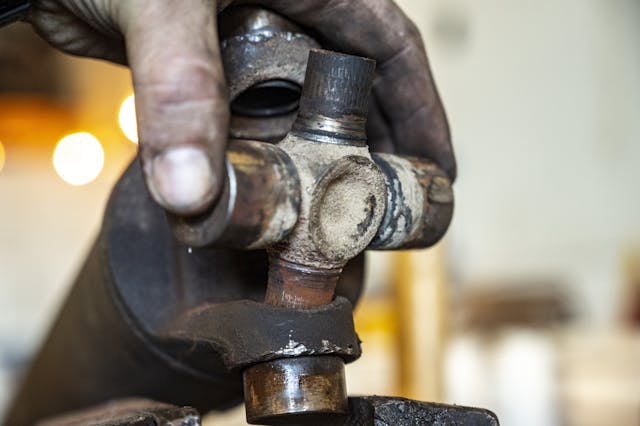
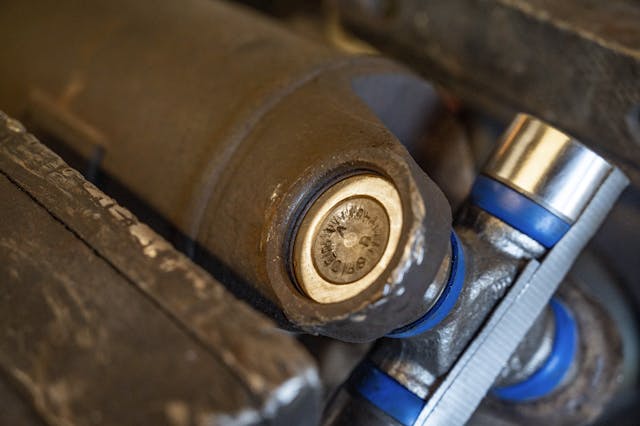
6. Up close, it’s easy to see why this one failed. These 259,000-mile factory joints are “lifetime” U-joints without any way to grease them, which is what led these to dry up and begin taking on water, as noted by the rust. Without proper lubrication, the needles began wearing into the U-joint, creating those ridges like a washboard road as the needle bearing rolls along. This created a high-pitched chirping sound at low speeds but was still tight when I grabbed and twisted the driveshaft under my Suburban. They don’t always become sloppy before failure; this guy was doomed to one day seize up and shatter.
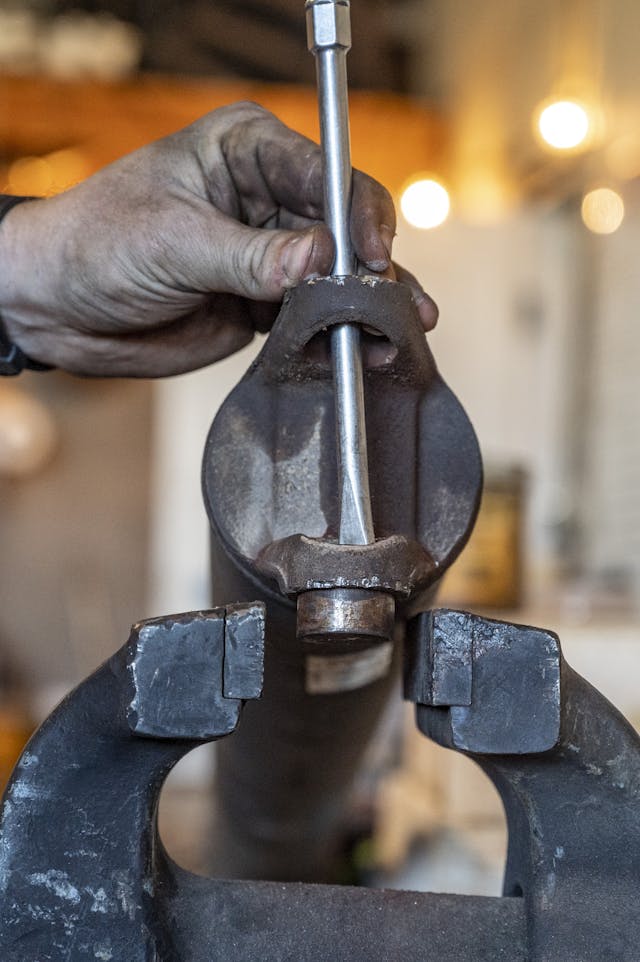

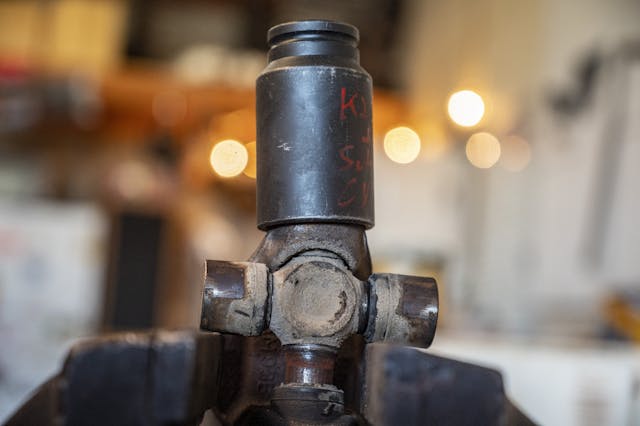
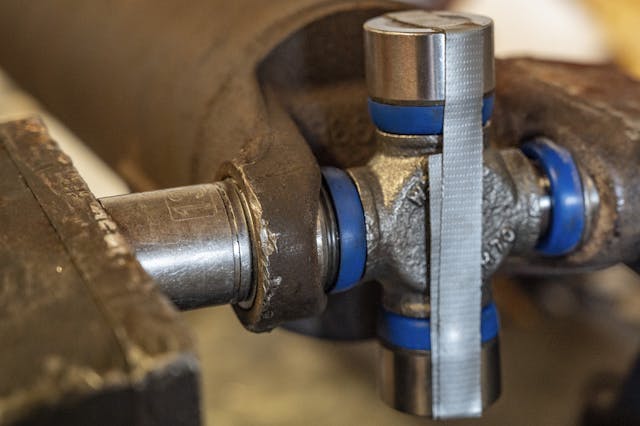
7. Knock out the remaining caps with a screwdriver or punch and hammer from the back side, and clean up the bores of any rust or gouges caused by the U-joint removal. You want these to be as clean as possible with no scratches or nicks so that the caps of the joints can slide in smoothly and evenly.

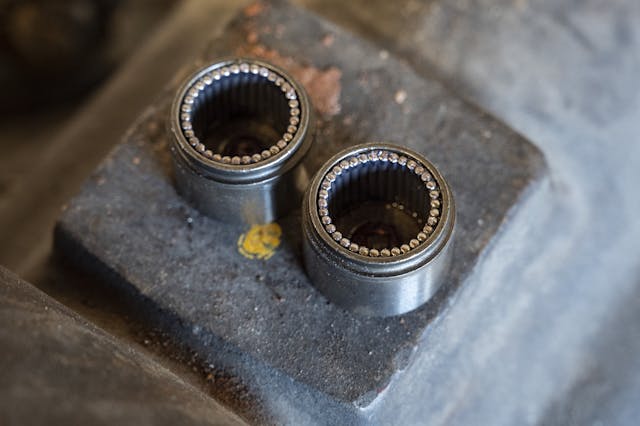
8. Here comes the trickiest part of the process: getting the new U-joint affixed before pressing them in. First off, run a piece of tape over the two caps that you won’t be working with during the install, and make sure that the grease zerk is installed and facing the driveshaft itself when placed into the caps. These caps are full of tiny needle bearings that must be kept together and clean—anyone who’s dropped one knows the nightmare of trying to get them to stick back inside in an organized manner without any driveway grit getting caught in the grease. Then, press the caps into the ears of the driveshaft by hand, and load it into the vise with the U-joint floating in one of them. Gently begin clamping down on the vise to press the caps in, but keep an eye on the alignment of the U-joint as it meets the other cap.

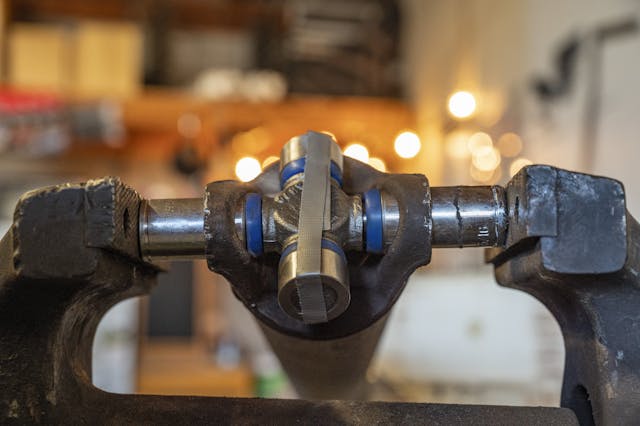
9. If you have to, offset the vise jaws to press on an edge of a cap if it’s not going in straight, initially. Very small adjustments of the vise make big changes here, so work carefully as you guide the U-joint into the other cap, and then continue pressing until the jaws of the vise just begin touching the ears of the drive shaft. At this point, the U-joint should be riding on both bearing caps, though with extra lateral play while the caps are still moving into place.
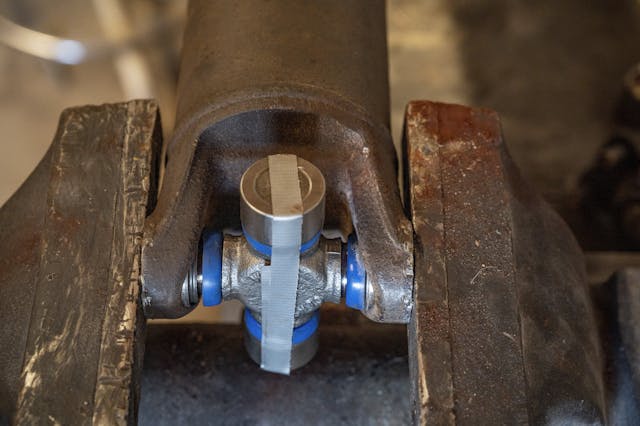
10. Now, use one of your small sockets to press a cap in a few millimeters until the cap clears the C-clip groove, and install the C-clip.

11. Once that first clip is installed, support it with the second small socket, and gently press the opposite cap into place until you can install the second C-clip.
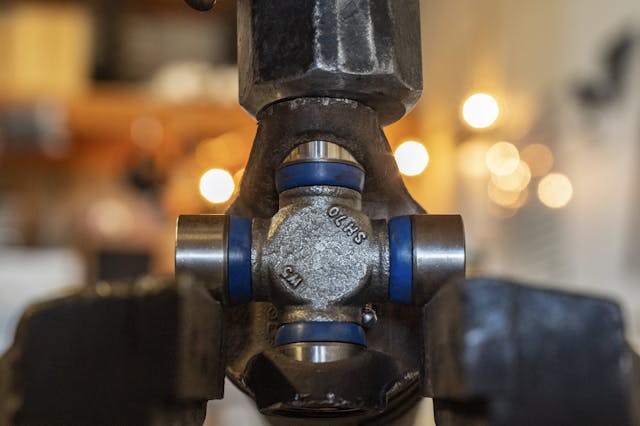
12. Now, spin the joint back and forth by hand; it should take very little effort to rotate, but if the caps are pressed in a hair too tight, a few light taps on the driveshaft ear with the horizontal caps supported by the vise will free it up—work gently at this point.

13. Once installed, don’t forget to grease it! Three-to-five pumps should be enough, but stop once you see the seals on the bearing caps begin to bulge with grease. If your retaining hardware is rusty and worn out, it’s cheap insurance to replace it now. Torque the driveshaft to spec, go for a quick drive, and then double-check them after a few miles—and it doesn’t hurt to mark them and keep an eye on them in the future. While only the axle-side needed a U-joint on this particular project, the technique is the same for slip-yoke end, other than needing to do it twice while pressing all four caps free.


No one ever talks about how to properly center the UJoint and get the axial play to spec using different thickness snap rings, particularly internal snap rings.