Wrenchin’ Wednesday: How to set toe after rebuilding your suspension

There are few jobs more satisfying than rebuilding the suspension under your project car, even if you walk out of the garage looking like a coal miner from all the road grime. As all its joints and pivots wear, the suspension becomes less and less precise in its control of the wheel and tire, which doesn’t just translate to a poor ride, it can severely affect the handling of your machine as the wheel inadvertently changes its alignment on the fly.
But once you get it back on the ground, the likelihood that the wheels will align back into the right position is nil. You can get them close by counting threads and studying witness marks, but even then the new parts almost never settle back into the same place—but how do you safely get your project between the garage and alignment rack without looking like a car sketched by Hanna-Barbera?
Towing the project is the simple answer, but having a tow rig, trailer, and straps on-hand isn’t a reality for most people. If the thing runs and drives anyway, why piggyback to the alignment rack? Today, we’re going to show you how to rough in a car’s alignment with simple house tools so that you can get your project on the ground and rolling with confidence. The key here is to get the toe angle set so that the vehicle will steer and stop reasonably straight, making it the key spec to sort over lesser evils like camber and caster, which the alignment shop can fine-tune on the rack.
Tools:
- Spray paint (light colors are best, like white)
- Pointed-tip tool (such as a screwdriver or pick)
- Measuring tape

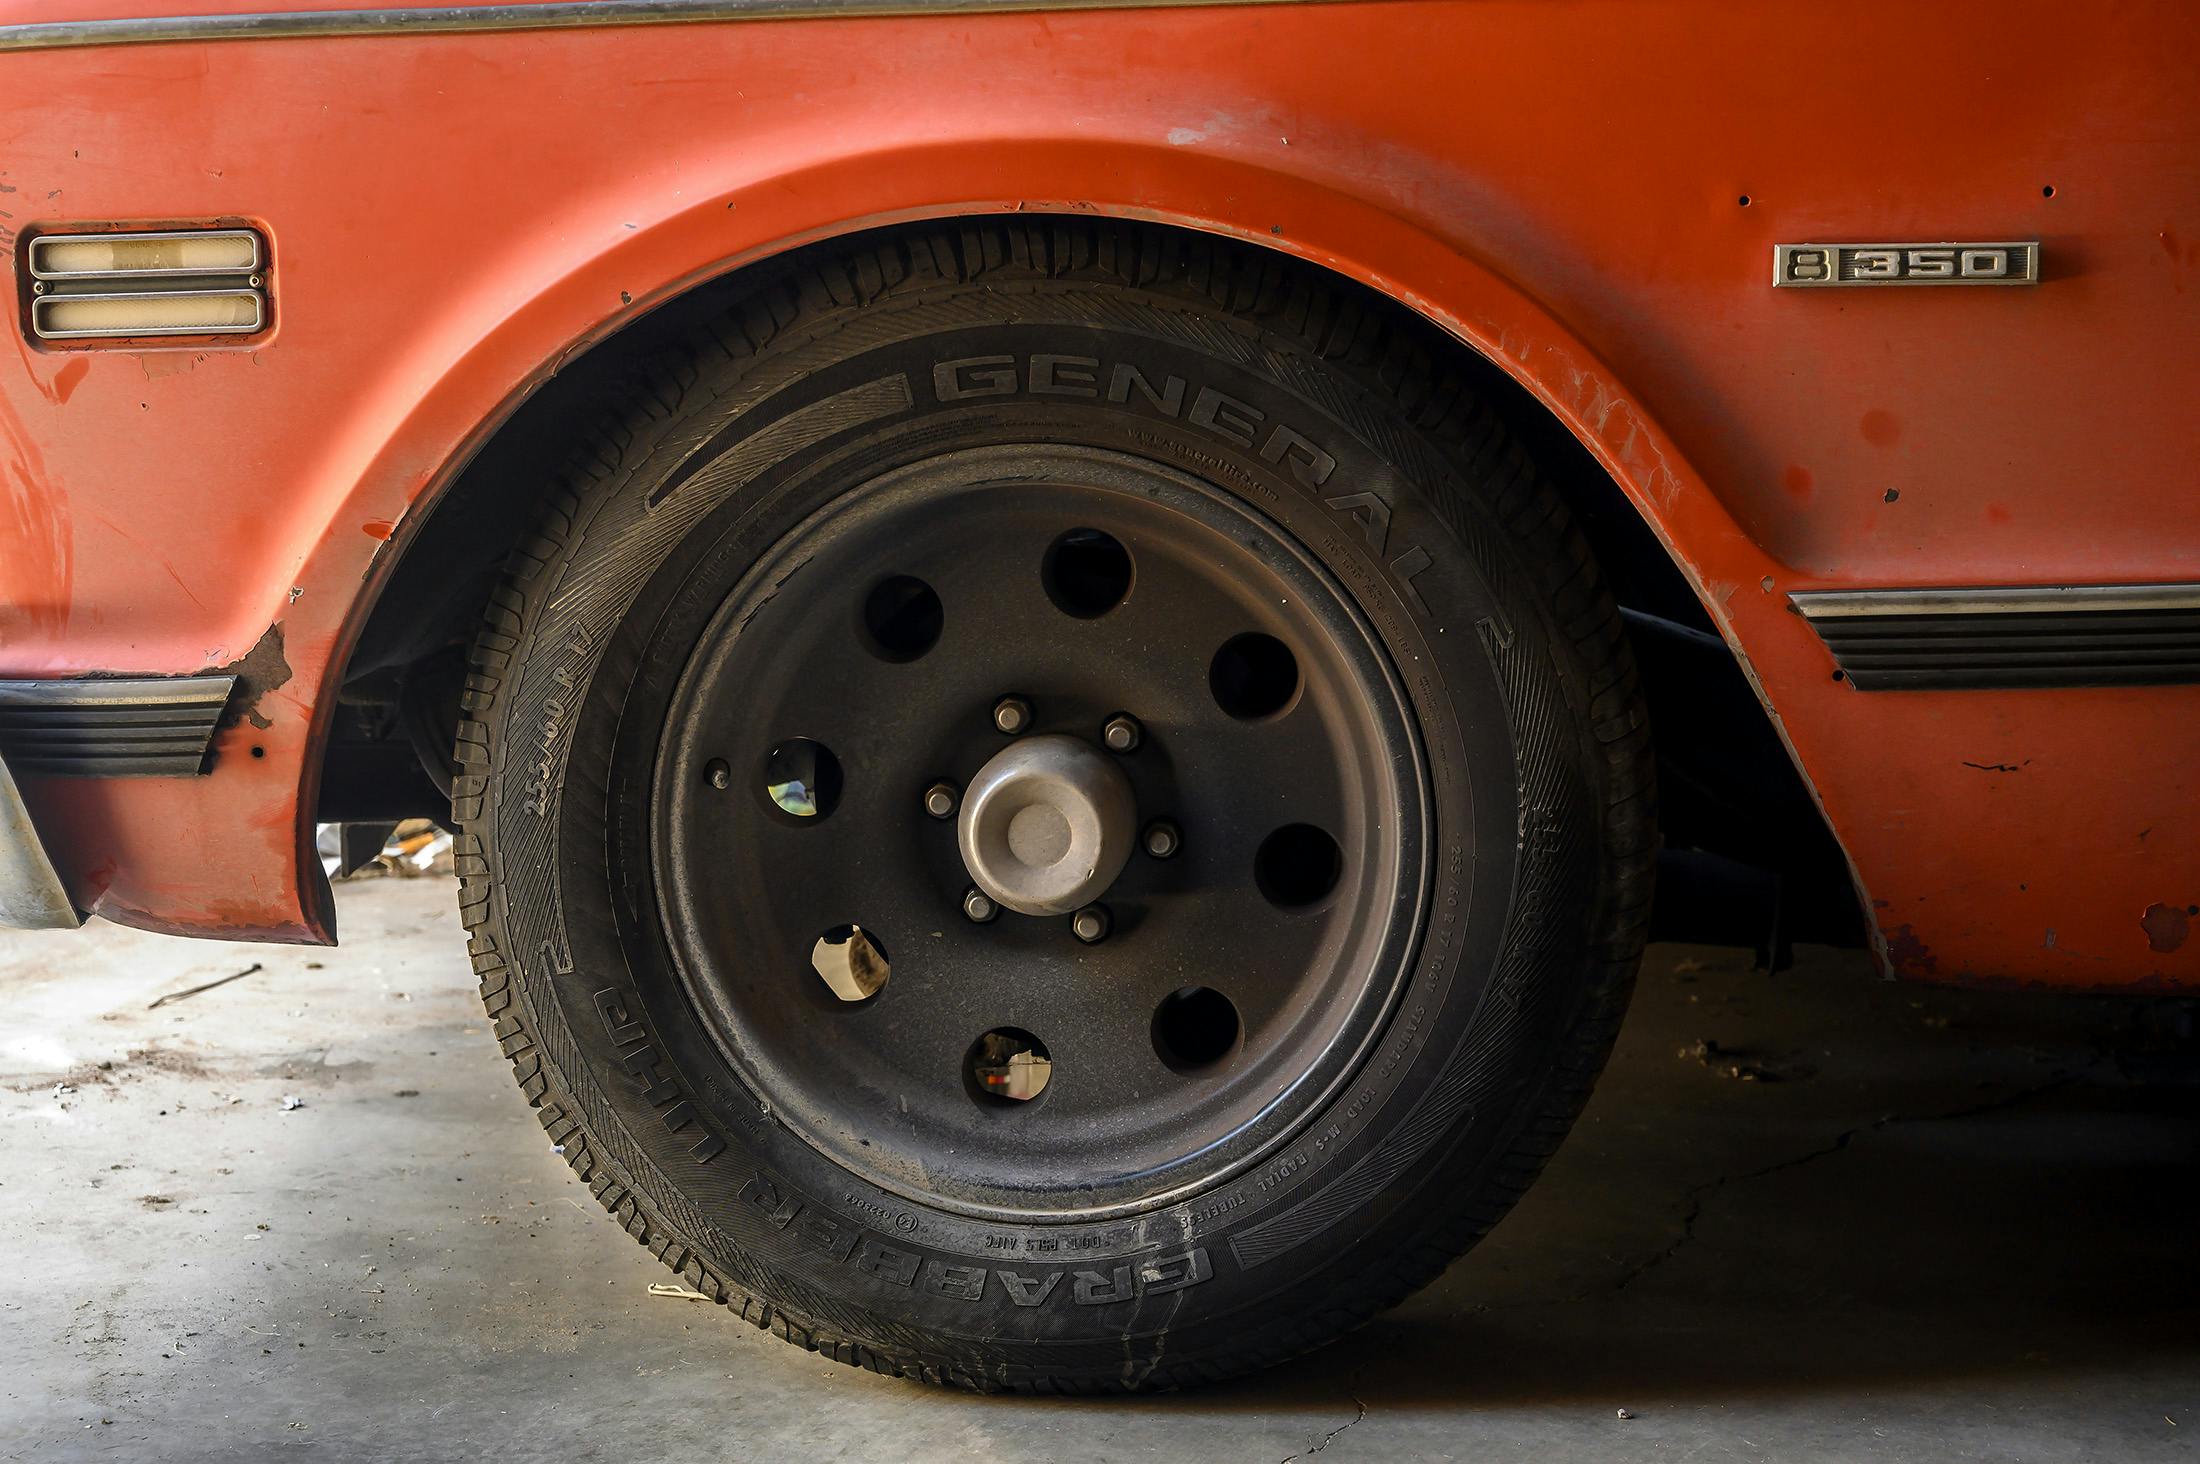
1. With both front tires lifted off the ground, place jack stands under the vehicle and grab your spray paint. Hold it flat on the ground with the nozzle pointed at the center of the tire, and spin the tire by hand. Once you get a good bit of momentum going, spray paint a line onto the center of the tire. Make two lines about 180-degrees apart, or just run a continuous line around the circumference of the tread. Repeat for the other tire.
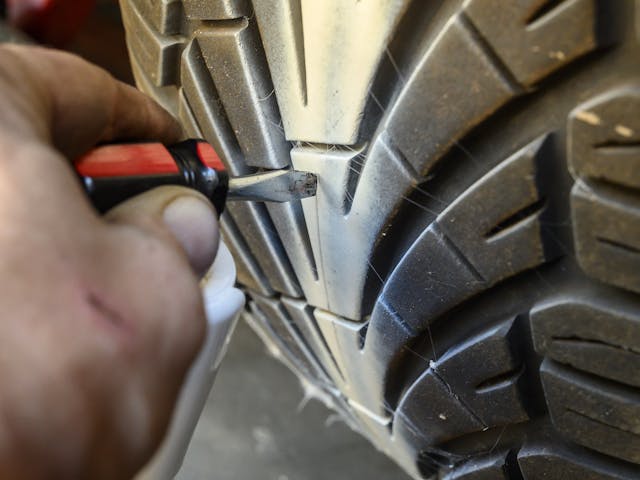
2. Slap the cap on the spray paint and use the can again to hold your pointing tool against the tread as you slowly rotate it to scribe a line into the wet paint on two opposite sides of the tire. This method eliminates the chance of a bent wheel or poorly manufactured tire from affecting your measurement by drawing a true reference line that follows along the center-line of rotation. Repeat on the other tire, of course.
3. Now, set the car back on the ground and give the paint a few minutes to dry. Once it’s happy, make sure to settle the suspension of the car by either turning the steering wheel to lock several times, bouncing the suspension, and/or roll the car back-and-forth a few feet so that everything is sitting at ride height. The tires scrub laterally across the ground when the suspension begins to compress and move back to its static position, so by “settling” the suspension with the above motions, we ensure that our tie rods will be floating at the same angle now as when we’re driving. If you didn’t settle the suspension and went on with the next steps, in all likelihood it would be out of alignment the moment you jumped into the seat. If you’re doing this on smooth concrete, you can also place something under the tire (metal plate, fast food tray—you get the idea), which will aid in settling the suspension and make your adjustments easier by reducing friction from the tire scrubbing.
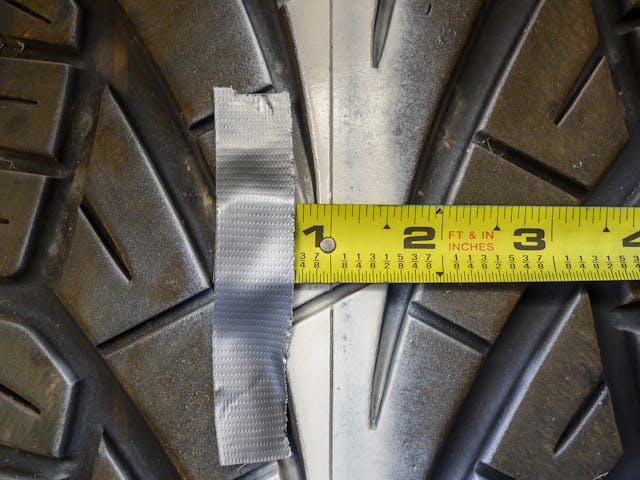
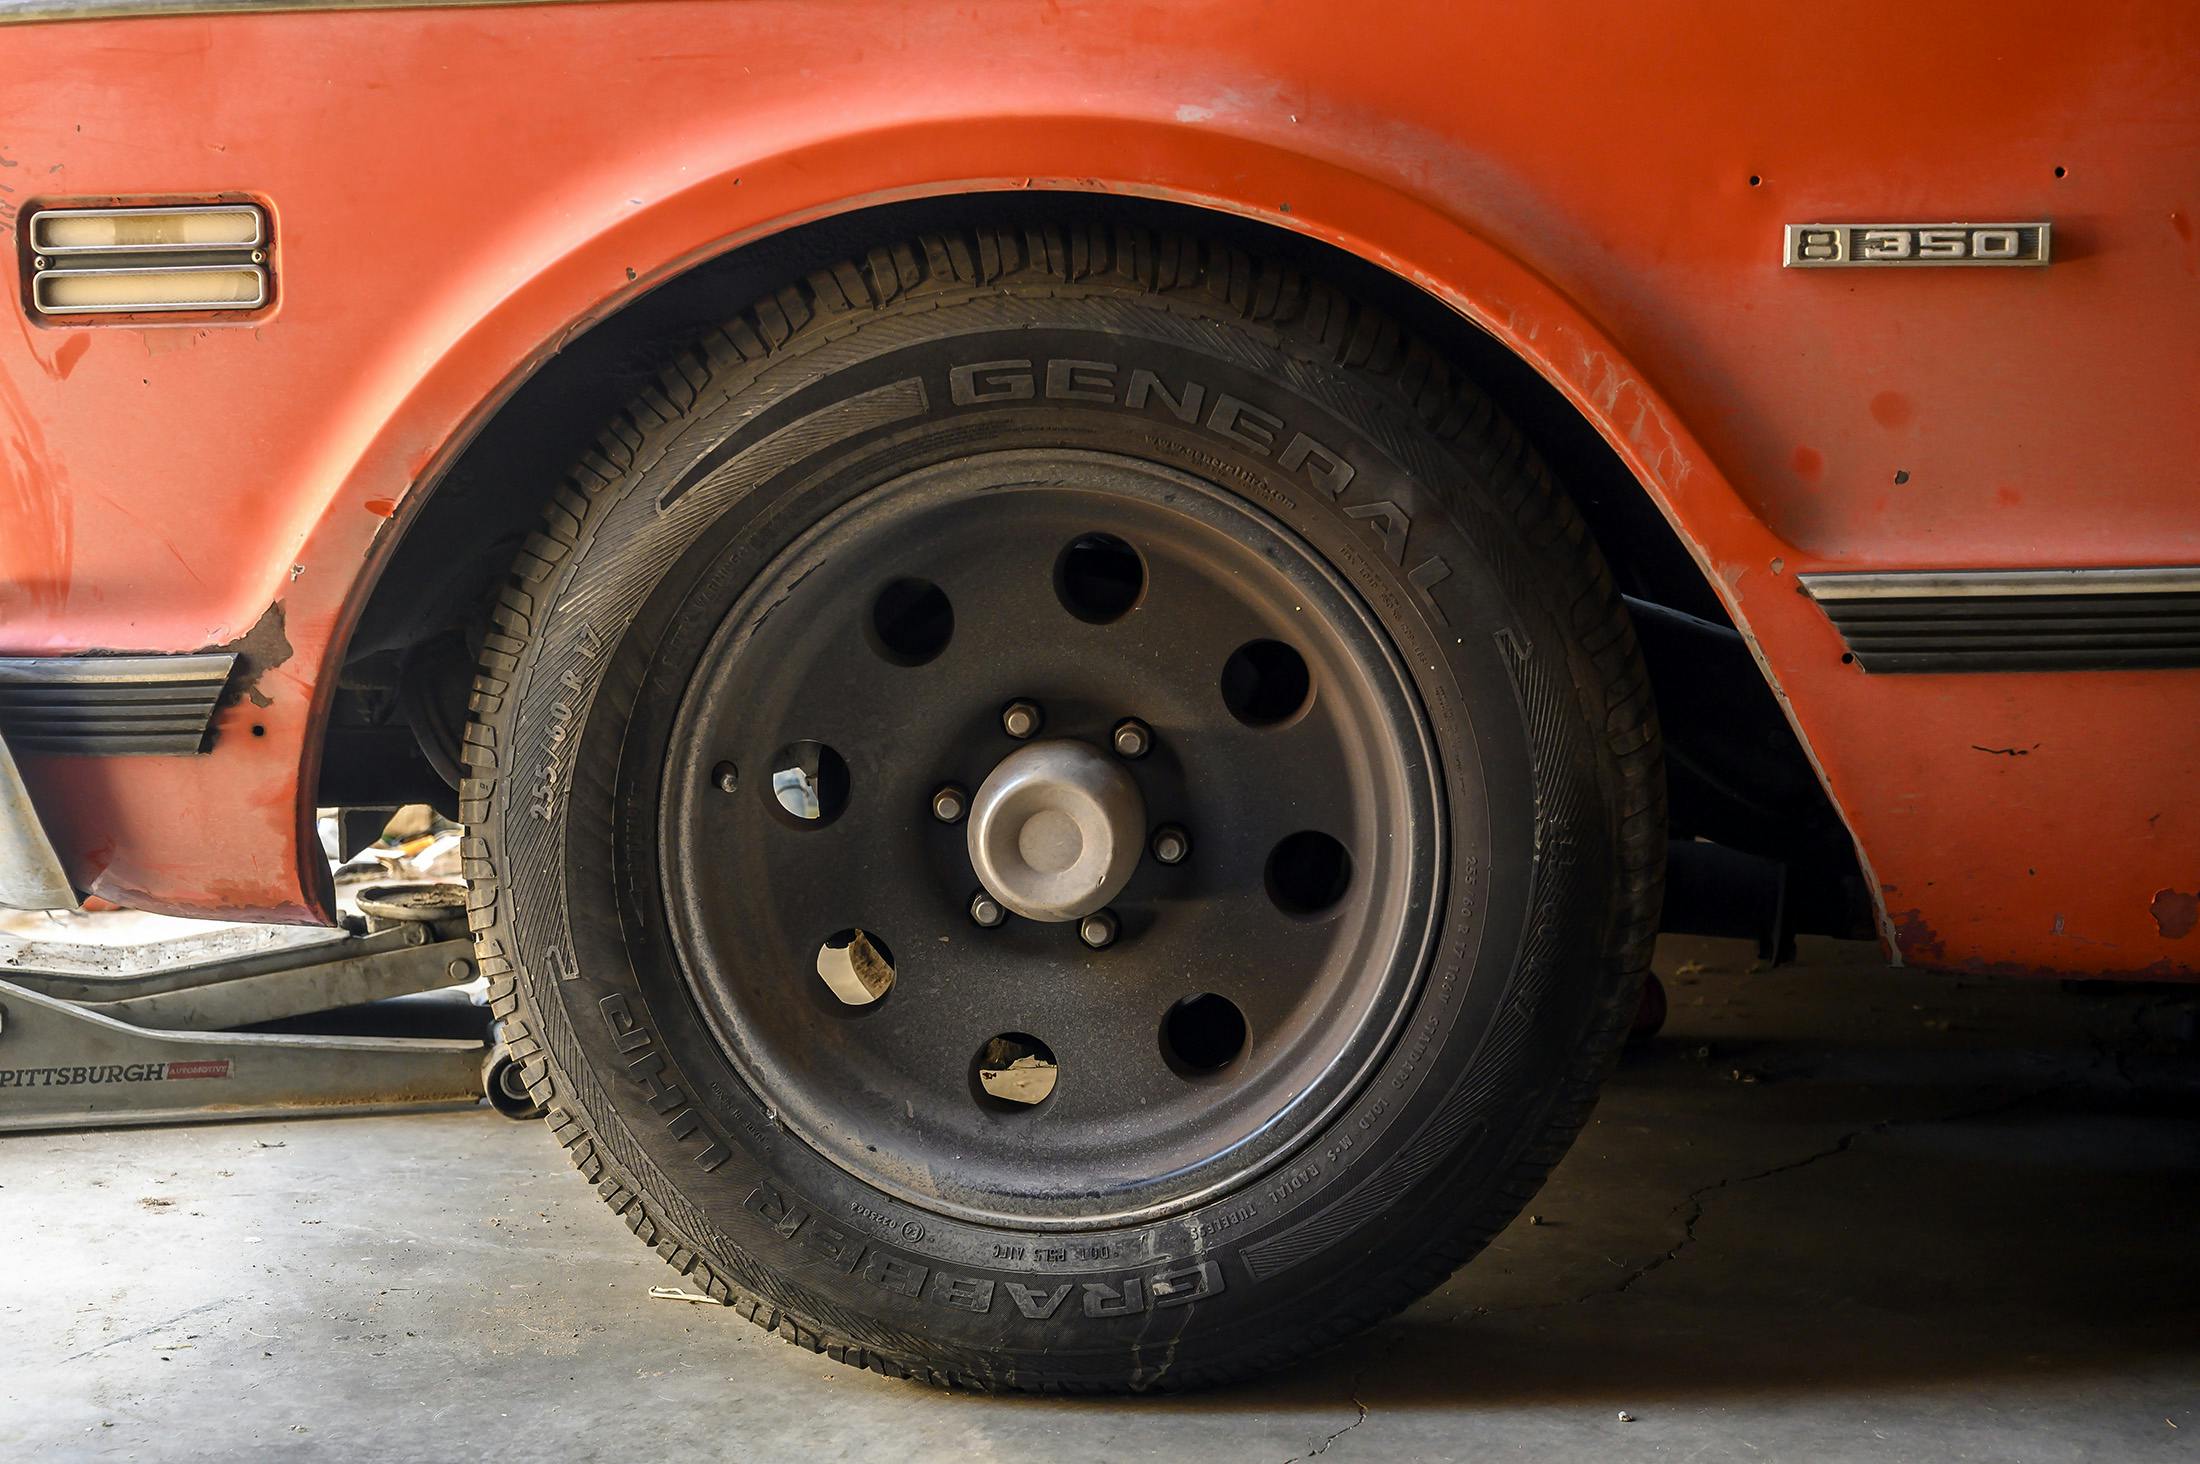
4. Having a friend here helps, but if you’re working alone, your best friend, duct tape, is always around. With your newly drawn guidelines sitting 180-degrees apart front-to-rear, take a measurement on each guideline, measuring the distance between the two. In our example, we have 65 inches in front and 64.75 inches in back.

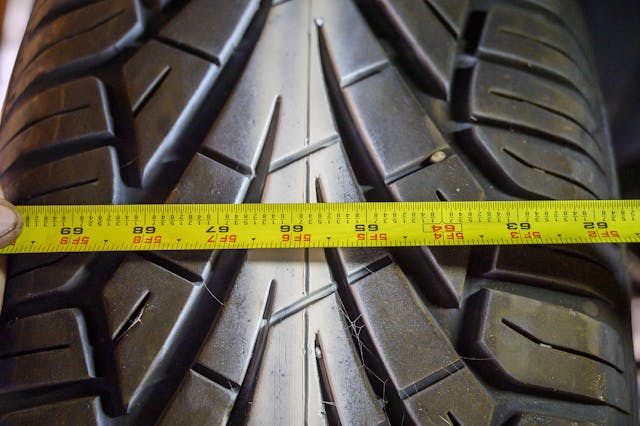
If you have a larger measurement in front than back, then there’s toe out—and vice-versa, if the rear measurement is larger, the wheels are toed-in. Since we’re just roughing in the alignment so that the vehicle drives predictably, we’ll aim for 0-degrees of toe, which will show up when we have an equal measurement front to back. Your vehicle may call for a specific toe measurement, but zeroing the toe will provide a safe alignment spec for normal driving.

This process is trial and error—if the tires were toed out, we’d shorten the tie rods an equal amount and remeasure until we got to an ideal toe angle. If the steering wheel is off-center, say to the left, shorten the right side and lengthen the left side equal amounts to center up the pitman arm or steering rack. Vice-versa if your steering wheel was off-center to the right.

