Wrenchin’ Wednesday: Homebrew threaded puller

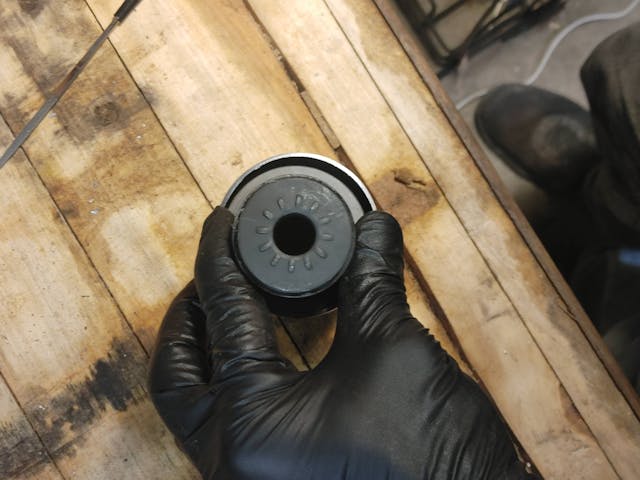
Many parts of our projects are held in by nothing other than a little friction. Those press-fit parts need a little help slipping in and out of their homes when it comes time to replace them, and sometimes the typical jawed puller is just not the right tool for the job. Our old friend, all-thread, comes into play as the basis for a quick and dirty bearing and bushing puller. This not only came in handy for replacing an upper control arm bushing, but I’ve used similar all-thread pullers in everything from BMW E30 wheel bearings to the spindle of my South Bend lathe.
You’ll need the largest diameter stick of all-thread that can still fit through the center of the part, nuts and washers to match, and something that’s just a tick larger in diameter than the part you’re trying to pull. In this case, I used a $3 exhaust reducer, but typically any stout, round object can suffice.
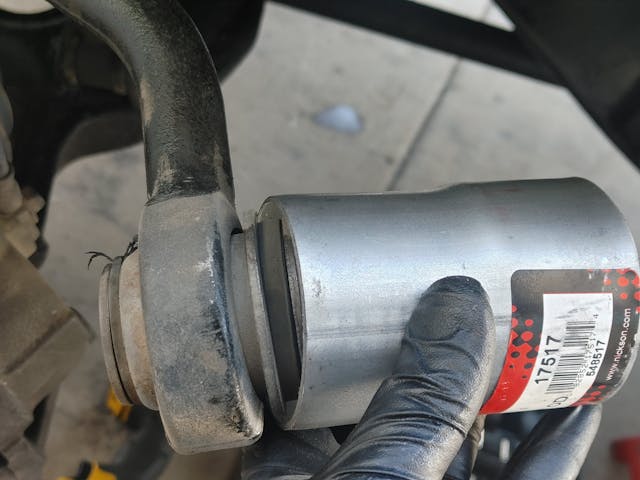
It needs to be able to slip over the part we’re extracting while still seating against the object we’re pulling it from, so make sure you don’t go too large.

The setup is like this, with our wood blocks providing a clamping surface against the bushing and the tubing that we’re pulling it into. By tightening the nuts at either end, drawing the two blocks together, the end that’s pressing against the part will begin to pull it through the hole in the control arm. If I had to make one upgrade to my redneck setup, it would’ve been to use 2x4s instead of these smaller off-cuts.

The rattle gun made this quick work, and the same tool was used to suck the new bushing into its home in the control arm. A little axle grease on the threads and on the washers helps everything spin easily while under tension, too, and can help the threads themselves survive repeated uses. And with all-thread coming in a myriad of lengths, you can tailor this custom tool to any number of lengths and diameters.

