When do-it-yourself isn’t the best way to go
We all embrace some automotive jobs with vigor and, for whatever reason, steer clear of others. Sometimes the deciding factor is early success or failure at the attempted repair. For example, a few years ago, I dyed some faded seats back to their original color. I found it easy and surprisingly satisfying, and I love the fact that I now have that arrow in my automotive repair quiver.
In contrast, more than 30 years ago I rebuilt some leaky rear-wheel brake cylinders. Before long they began leaking again. That was the last time I attempted to rebuild brake hydraulics. From that moment on, I’d just replace them with new or rebuilt components. Fortunately, over time, the price of calipers for my vintage BMWs has gone down, with repair houses like Centric rebuilding them and parts houses like Rockauto selling them for as little as $40 each, plus a rebuildable core. With my past failure, and with that low price, I’m perfectly content to pull an old caliper off, swap in a new one, and pat myself on the back. Plus, I really dislike the smell and feel of brake fluid. I get more than enough exposure to it replacing components and bleeding brakes. I guess I’m sort of like a doctor who doesn’t like blood. I’ll suture, but I’d rather not do open-heart surgery.
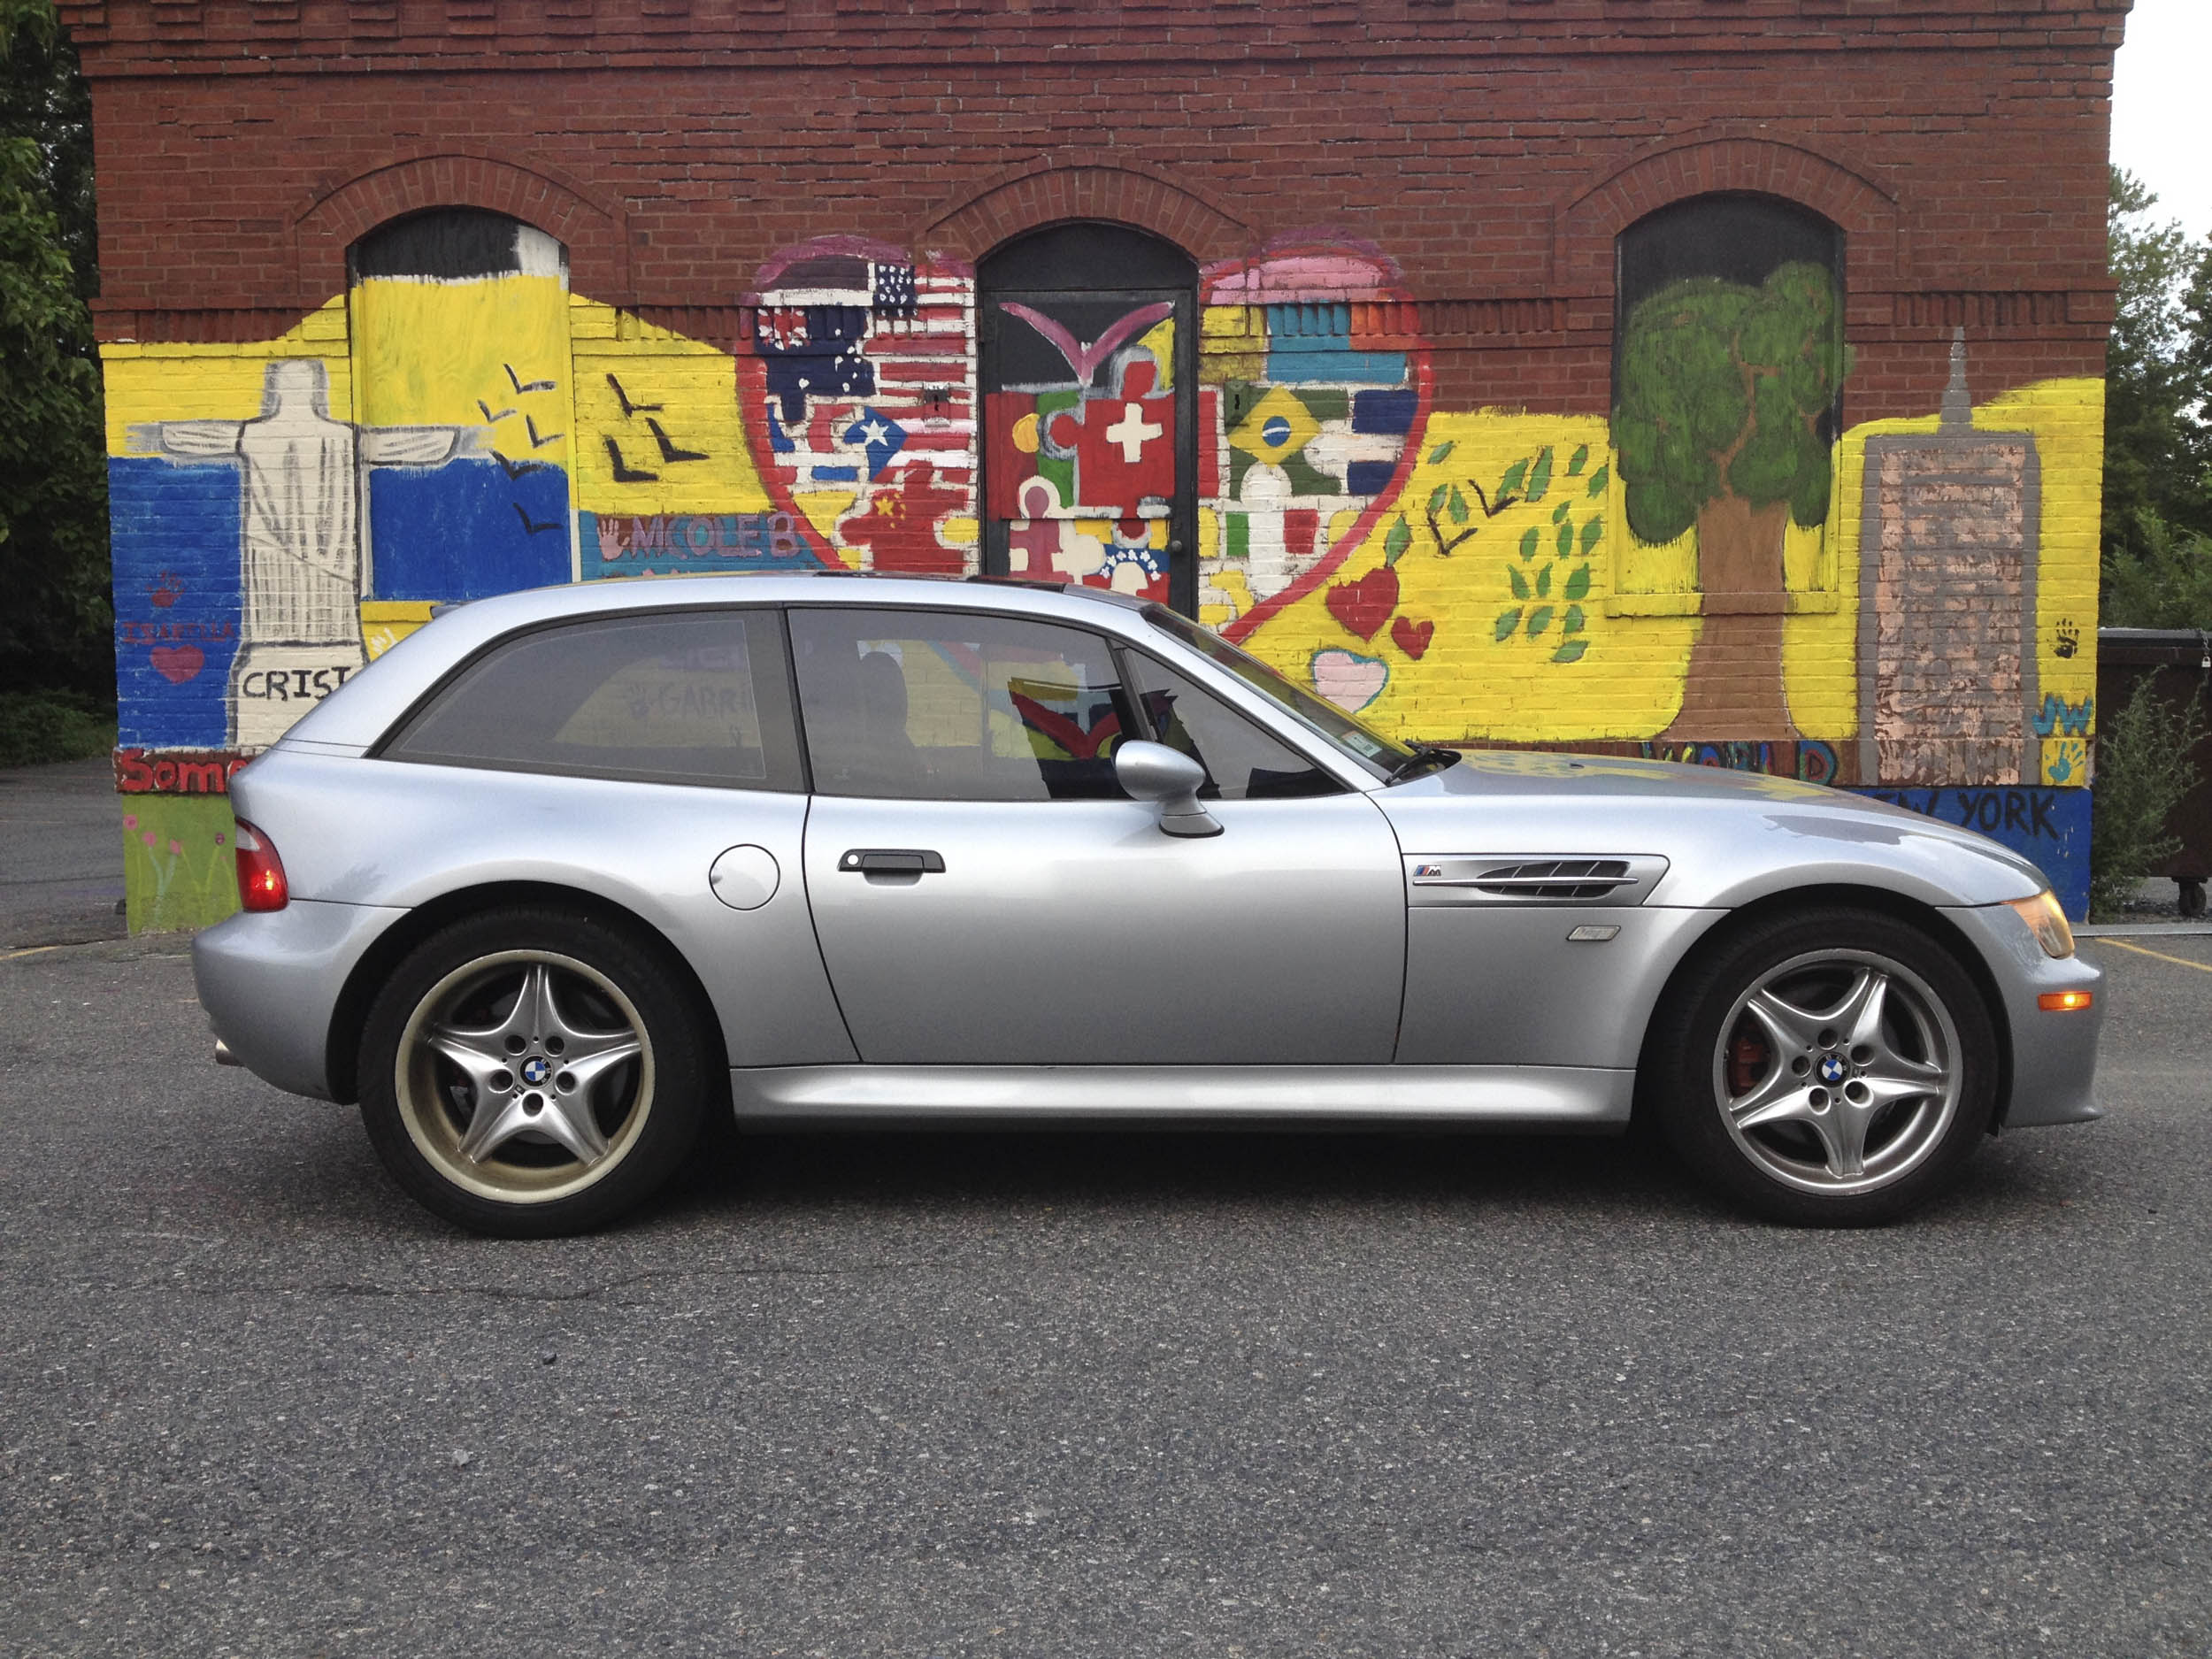
But recently I had an odd problem that made me wade into the brake fluid-filled waters of caliper rebuilding. I have a 1999 BMW Z3 M Coupe. The shooting brake version of the Z3 roadster with the 240-horsepower M3 engine and audaciously wide fender flares and rear rubber, it’s the nicest, newest, fastest car in my stable. I haven’t driven it much the past few years; I’m mainly letting it appreciate and trying not to break it. A few weeks ago, I was giving it some needed exercise, and I noticed that, on the highway, the front left wheel began to shimmy badly. At first, it happened only when I tapped the brakes, but then it began to do it all the time at any speed over 50 mph. I took the first exit, stopped, got out of the car, and expected to find that the tire was flat, or nearly so. Instead, I smelled hot brakes. I walked around and touched all four wheels. The left front one was very hot. Conclusion: The left front caliper was dragging and heating up the brake rotor.
Now, this can be caused by two things—the caliper seizing up, or the flexible brake hose swelling and not letting fluid pass back through it. You can usually tell which is which by unbolting the caliper and trying to squeeze the pistons back into it. If they don’t seem stuck, try replacing the brake hose (it’s wise to do all of them if they’ve never been replaced). I thought that this was the likely problem, since the car wasn’t pulling strongly to one side (the classic symptom of a seized front caliper), so without even checking the caliper, I replaced the flexible hose. It made no difference.
So, on to the caliper. I was delighted to find that, even for my somewhat exotic M Coupe, rebuilt calipers were as low as $45. But there was a hitch. Well, two hitches.
The first was that since the car is a BMW M car, the calipers each have a large embossed “M” on them. The calipers themselves are functionally identical with certain other non-M cars, but at the rebuild level, both M and non-M calipers are referenced by the same part number, so when you buy a rebuilt caliper, it would be sheer luck if you got an M-embossed one. The second issue was that a previous owner must’ve had Brembo envy, because all four stock calipers on my car were at some point repainted red. A rebuilt one certainly wouldn’t be red.

Now, owning 13 cars, I try to hold repair costs down to a bare minimum, but as appealing as it was to order a $45 rebuilt caliper, install it, and solve the car’s braking problem, I really wanted to keep the calipers matched. A few friends encouraged me that rebuilding my caliper was a piece of cake. So, with no clear inexpensive way to get my hands on a red M-embossed caliper, I spent the $15 for the rebuild kit and set about doing my first brake hydraulic rebuild in 30 years. Note that there are hydraulic component restoration shops to which you can send your caliper or other hydraulic component, and they will return it not only rebuilt but looking like new, but my requirements were “functional, M-embossed, red, inexpensive, and timely,” and a custom rebuild wouldn’t have satisfied the last two.
I was willing to try rebuilding the caliper because the Z3 M Coupe has modern single-piston calipers with brackets. This makes it very straightforward to unbolt the caliper from the bracket, pull the piston out, and perform the rebuild. (Well, sort of; see below.) You then have a straight shot at the cylinder bore. In contrast, the calipers on my ’70s-era cars are of the four-piston variety where I believe the halves of the caliper must be separated to disassemble and clean them.
The first step is to remove the piston. This is most easily done by using the car’s brake hydraulic system to push it out. With the caliper still attached to the brake hose, unbolt the caliper from the bracket, pull it off the rotor, and gently press the brake pedal. Be certain the piston doesn’t drop out and fall on the floor; either put a block of wood in place to stop it, or position the caliper over a soft landing zone for the piston. Brake fluid will, of course, gush out, so make sure to have a drain pan and plenty of rags. If the caliper is already off the car, you can instead use compressed air to push the piston out, with an air wand with a rubber tip inserted into the brake hose hole. If you do this, it is imperative that you put a block of wood in front of the piston so it doesn’t fly out. And do not try to blow the piston out and into your hand. As the air pressure builds up, the piston can easily shoot out with enough force to break your fingers.

In my case, this first step threatened to scotch the whole operation, as the piston appeared to be completely seized, a fact that surprised me since the car wasn’t pulling to one side. By taking a C-clamp and pushing the piston in, I was able to free it, and it then came out under hydraulic pressure.
The next step is to pull the rubber seals off. In a single-piston caliper, there are usually two—the square O-ring in the groove near the top of the cylinder, and the bellows-like dust boot on the piston.
Next, inspect and clean both the piston and the cylinder. Understand that if your caliper is seized or leaking, it’s virtually certain that the piston and/or cylinder are rusty. Clean them with a Scotch Brite pad or 320-or-finer-grit sandpaper. As with cleaning rust off other surfaces, once the surface rust has been taken off, it’s likely that a certain amount of pitting will remain. Ideally, you don’t want any surface imperfections that you can feel with a fingernail. Re-use of pitted pistons is a judgment call. If it’s a car that sees a lot of use and hard braking, err on the side of replacement, but on a lightly used and gently driven vehicle, you may be fine cleaning things up and reassembling.


While cleaning, pay close attention to the grooves in the cylinder and on the piston. Note that there are two grooves in the cylinder. The inner one holds the square O-ring that provides the pressurized hydraulic seal. The outer one, at the top of the cylinder, is less critical, as it holds the dust boot in place but is not technically a pressurized hydraulic seal. Clean the rust out of all of the grooves as completely as possible with a pick, a utility knife, or other tool. Flush everything with brake cleaner and compressed air.

Once the piston and cylinder bore are spotless, assembly can begin. There are dozens of videos online about caliper rebuilding and reassembly, and there’s a lot of disagreement between them on proper lubrication. Some say to use only brake fluid. Others call for caliper assembly paste. I’ve read that caliper paste is essentially just silicone. However, I’ve also read that you shouldn’t lather a cylinder bore in silicone unless you’re using silicone-based brake fluid. When in doubt, follow the instructions that come with your rebuild kit. In my case, I was able to get my caliper together using only brake fluid.
Coat the square seal and insert it into the inner cylinder groove. Note that some seals may have a preferential orientation; one edge of the lip may be higher than the other. If so, you want the higher edge of the lip to be positioned on the backside of the groove, down inside the cylinder. If it’s reversed, you may never be able to get the piston past it. Insert the lubricated seal, lightly coat the cylinder and piston, and test-fit the piston. If you can’t get it past the seal with hand pressure, try turning the seal around.
The biggest problem for many people is getting the bellows properly fitted in the groove in the caliper’s cylinder and the groove in the piston. I watched videos showing it done several different ways. What worked for me was:
1. Sliding the front of the bellows (with the seal that’s meant to go in the groove on the front of the piston) over the back of the piston just far enough that the bellows stayed on.
 over the back of the piston just far enough that the bellows stayed on.")
2. Inserting the seal on back of the bellows into the groove in the cylinder.

3. Carefully pushing the piston into the cylinder, being certain that the seal on the bellows isn’t being dislodged.

4. Once the piston is sufficiently far in the cylinder, seating the seal on the front of the bellows into the piston’s groove.

With the caliper rebuilt, reinstall it, bleed the brakes, test it with the car in the air and look for leakage, then drive the car, test for functionality, and re-check for leakage.
Given the choice between $15 for a rebuild kit and several hours of my time versus $45 for a rebuilt caliper, I think that, under most circumstances, I’d still go with the latter. But if one of the other three red M-embossed calipers on the Z3 M Coupe starts dragging, I’d try rebuilding it without hesitation. Yet another arrow in the automotive repair quiver. Cool.
But I still hate the smell and feel of brake fluid. (Note to self: Invent licorice-scented brake fluid. Or coffee-scented. That would help.)
***
Rob Siegel has been writing the column The Hack Mechanic™ for BMW CCA Roundel magazine for 30 years. His new book, Just Needs a Recharge: The Hack Mechanic™ Guide to Vintage Air Conditioning, is now available on Amazon. You can also order a personally inscribed copy here.

