Back to basics: Understanding the carburetor and fixing it yourself
One of the most problematic and least-understood parts of any classic car is its carburetor. Everything else can be functioning perfectly, but one little ailment from the carb spells poor drivability and a certain headache for whomever is behind the wheel. Not everyone can troubleshoot a carb—and fewer still have any inclination to work on one—but understanding how they work goes a long way toward easing frustration when problems arise.
Here are the basics:
- Air enters through the top of the carburetor (or the side, or the bottom, depending upon the carburetor’s design) on its way to the intake manifold and eventually the combustion chamber of each cylinder. The passage that air passes through is typically referred to as the carburetor’s throat, bore or barrel.
- A necked-down section of this passage – narrower in the middle and wider before and after – is called the venturi. As air rushes through this restriction, it speeds up. The change in speed as the air flows through causes the pressure to drop, which in turn draws gasoline through a tiny feed in the side of the venturi. The goal is to atomize the fuel into a fine mist, which mixes with the passing air and continues to the intake manifold.
- Once air and fuel move through the venturi, they encounter another obstacle called the throttle plate, which is a disc that opens and closes to control the amount of air that enters the engine. The throttle plate is the part that moves when you press your foot on the accelerator pedal. The carburetor does the rest with different tube sizes and the presence or absence of vacuum created by changes in pressure.
If everything is working the way it should, the ideal ratio of air-to-fuel for efficiency, by weight, is 14.7:1. Of course, the rate and ratio that fuel and air enter the engine depends upon what the driver wants from the engine. In other words, the carburetor’s job is to react to throttle input (from the driver) and engine vacuum, in order to supply the correct air-fuel mixture under any given condition. When the engine is idling, the throttle plate is nearly closed and not much air is flowing through the carburetor. On the other hand, when the driver flattens the accelerator pedal, the throttle plate opens all the way, allowing the engine to draw in more air and, along with it, more fuel.
OK, so it isn’t quite that simple. There are a number of variables that also come into play. For starters, when you snap the throttle plate open suddenly on a running engine, vacuum actually drops almost to nothing for an instant. This would cause the engine to stumble. To address this most carburetors employ what’s called an accelerator pump, which is essentially a gasoline squirt gun that shoots fuel into the throat of the carburetor to enrich the air-fuel mixture in the brief moment before engine vacuum returns.
The fuel supply system in a carburetor is basically a miniature version of the car’s fuel system. There’s a tank, some plumbing and an outlet. The tank is known as the bowl, and there’s usually a hinged float inside that moves up and down with the fuel level. When the fuel level in the bowl is low, the float sinks, opening a valve that allows more gasoline into the reservoir. From there, it passes through a metering orifice called a jet into the various fuel nozzles.
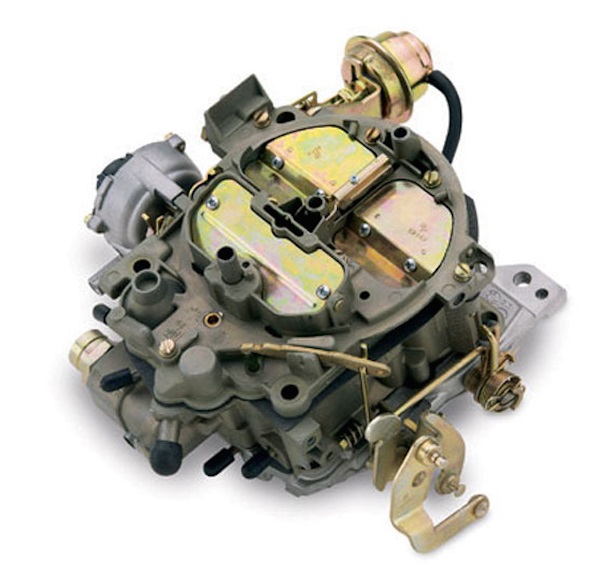
Carburetors could largely be classified into two groups, those that utilize a metering jet and moveable rod assembly—like the Rochester Quadrajet—and those like a Holley that employ a metering jet and power valve. The goal for both systems is the same, giving the carburetor the ability to adapt to the varying idle, off-idle transition, cruise, and wide open throttle conditions.
In the metering rod and jet system, the jet sits in a fixed location and will flow a given amount of fuel when unrestricted. The rod—which is very small and tapered—moves in and out of jet to vary the amount of fuel being delivered to the carburetors mixing systems. In carburetors that employ a power valve there is still a metering jet that controls the majority of the fuel control, however there is also a small valve that opens under wide open throttle conditions to deliver extra fuel for maximum power.
That’s a lot to absorb, but here are a few basic things to check if you think you’re having problems with your carburetor:
- Before you begin, make sure you have a fire extinguisher handy when you’re working with open fuel sources. Wear safely glasses and clothing made from natural fibers (which won’t melt to your skin if you should catch fire).
- Make sure you’re getting fuel and spark. To check fuel delivery, remove the fuel line where it enters the carburetor and use a length of rubber hose to direct the flow into bottle or similar container. Fuel should pulse out in strong spurts if your engine is equipped with a mechanical fuel pump (electric fuel pumps are more of a steady stream). Dispose of it in a flame-proof container when you’re done. To check for spark, crank the engine with a spark plug wire pulled and grounded to the engine block with a screw driver or a piece of metal. At a distance of 1/16 to 3/32 inches, you should be able to see a blue spark between the metal and the block. (Don’t touch the metal or you’ll feel an uncomfortable jolt.)
- Check for vacuum leaks. They’re invisible, and they’re the bane of anyone diagnosing a carburetor. First, look for cracked or disconnected hoses. With the engine running, spray starting fluid around the base of the carburetor and intake manifold. If the engine speeds up a little, you likely have a leak near the last place you sprayed the fluid, and will have to fix it. Cracks will need repairing, and if the base of the carburetor (where it mates with the intake manifold) is warped, it may be time for a new or professionally rebuilt one.
- Does the accelerator pump work? With the engine off, look into the throat of the carburetor and work the throttle linkage by hand. Does a fine spray fan out near the top of the throat? If so, the accelerator pump is probably doing what it’s supposed to be doing. If not—or if it drips or dribbles—the seals inside the pump may have deteriorated and will need of replacement.
Those are the basics. It isn’t impossible to rebuild a carburetor; it just takes patience, attention to detail, and plenty of research to learn which parts need to be replaced, how they should be cleaned, and how they all go back together. Don’t assume that a carburetor rebuild kit has all the parts you need, and don’t be afraid to do a practice run or two on a simple carburetor that you don’t plan on using on your engine. Rochester Monojets—simple one-barrel carbs used on GM four- and six-cylinder engines in the 1960s and ’70s—can be purchased for very little money and are a good introduction to carburetor rebuilding. Two- and four-barrel carburetors are more complicated, but they’re essentially pairs of attached one-barrel carburetors.
If you’re more inclined to take your carburetor to a professional for service or repair, that’s certainly an option. But consider this: carburetor technicians are a dying breed. Good ones have become much more difficult to find, and they are likely swamped with work. By becoming an expert on your particular carburetor, you can ensure that you’ll never have to spend time and money chasing down the solution to a problem. You can figure it out yourself.


I had a car that wouldnt start unless i squirted petrol into carb(standing well back ).I naturally thought the
carb was the problem but faulty spark plug rubber insulators were the issue(diagnosed and fixed by mechanic) .How did petrol squirt mask the problem?