Replacing the heater control valve in a Volvo 240 wagon
An overactive heater is usually a boon if you live in northern latitudes—Michigan, for instance. Or Sweden. When 80+ degree summers arrive, however, a heater that does nothing but heat becomes insufferable. Sensible, definitely-not-crazy owners of vehicles like the Volvo 240 are as a general rule undeterred by dysfunctional air conditioning, but one 1991 240 owner records that her heater blew 120-degree air. That’s a problem worth fixing.
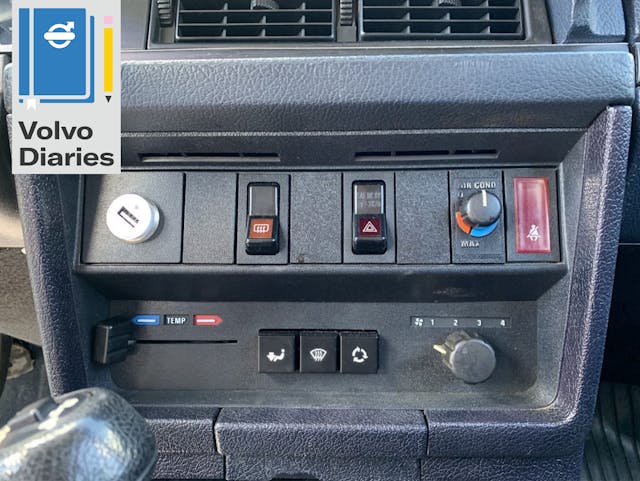
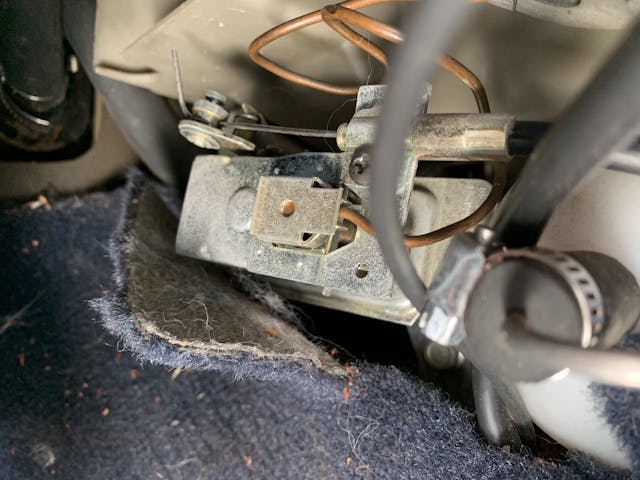
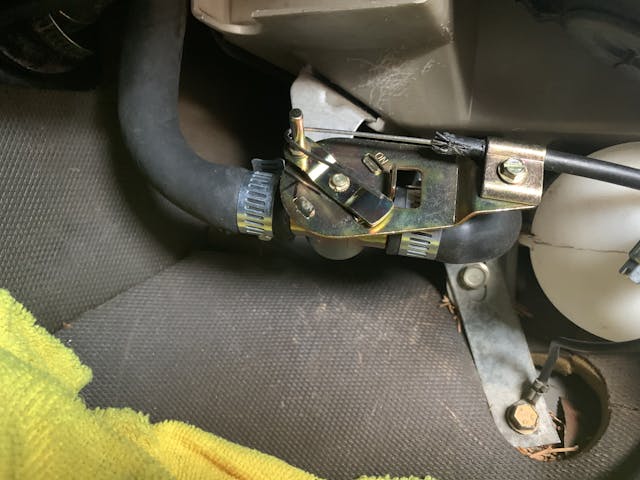
The culprit in many cases is the heater control valve, located on right side of the driver’s footwell behind a plastic panel. If you’re lucky, this panel is attached by a plastic fastener at the top corner, where it meets the center console, and at the bottom edge by a washer and bolt. Alternatively, the panel is just hanging there for dear life, held in mostly by the surrounding carpet. Remove this plastic bit, and you’ll have the access you need to replace the valve.
Choosing parts
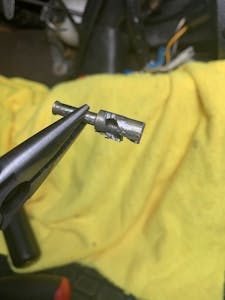
From 1973 to ’91, Volvo used a brass heater control valve (shown above) for its 240 line. Sedans, coupes, and wagons from ’92 and ’93 used a different valve design (shown here). Volvo has discontinued the original brass valve style, but IPD sells an aftermarket replacement for $145. If you fall into the ’92/’93 camp, you can attempt the “fairly complicated install” of this later-style, aftermarket replacement advertised by IPD for $49.
Or you could not. Unless you have a singular passion for stock-design valves on your 30+ year-old Volvo, don’t buy either of those. After consulting Stefan Lombard, Hagerty’s resident Senior Volvo Nut, I discovered a third, far simpler option for $59 from EuroPartsHouse. This valve replaces either the older brass valves (1348252) or the plastic units that succeeded them (9131998), and is easier both easier to install and to meter once in.
Removing old valve
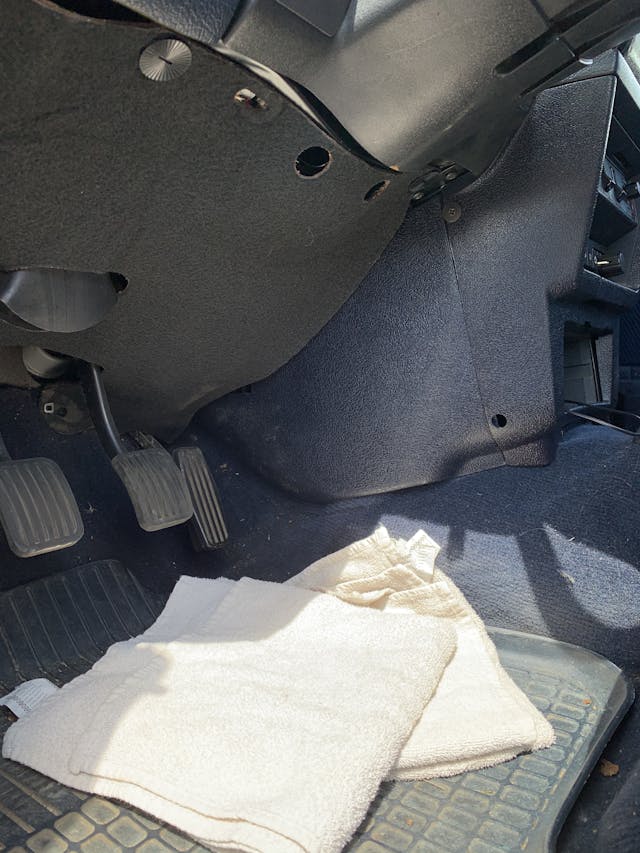
Before contorting yourself into the car’s footwell, consider whether you want to drain off the coolant in the system or devise plugs to shove in the hoses once you’ve removed them from the old valve. If you opt to drain the system, make sure you’ve got a funnel and bowl handy—a towel or two won’t cut it. Either way, cram some towels around the gas pedal area before you get to work.
Remove the clamps around the hoses, and hang onto the flathead screwdriver when you’re done to help pry off the hoses. (I bought a set of picks, since I didn’t have them, but the flathead proved sufficient.) Once the valve is free of the hoses, and you’ve controlled the waterfall of bright green fluid, cut the copper tubing that tethers the valve to the depths of the console. (Bonus step: Sweat about this decision for half an hour in quaking angst. In the end, I followed the example of Mr. Risen from EuroPartsHouse, who clearly cut this tubing in the process of replacing the valve, though he doesn’t explain why or what this copper line does. If anyone knows, please share in the comments!)
The next step is to remove the ferrule around the wire which mechanically operates the valve via the slider control on the console. (You’ll clamp the wire to the new valve, and the ferrule won’t fit in the bracket provided.)
A hacksaw, for those who may be wondering, is not sufficient. If you don’t already have one, you’ll want to buy a Dremel with a metal-cutting attachment. If you happen to be working in a parking lot, this $99 cordless 8220 Dremel is perfect. Grab some eye protection, slice into the ferrule, and pry it off with a screwdriver. This is the most involved step, so when you’re done, brandish the mangled ferrule at passers-by with unvarnished triumph. All must share in your victory.
Installing new valve
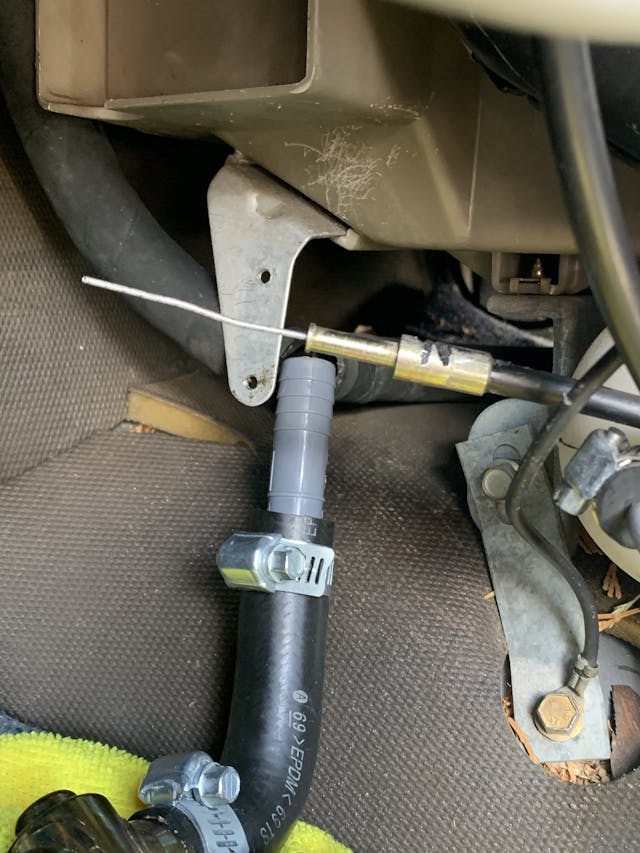
Installing the new valve is simple: Shove either end of your new valve into a hose, making sure the adjuster is facing toward you. Don’t tighten the clamps all the way, just in case something’s gone awry. The final steps are clamping the adjusting wire into the bracket and forming a loop in it that hooks onto the valve.
Before you loop the wire, this is a great time to tighten the hose clamps, clear out the footwell, and test that the valve works. Extract yourself from the footwell and go make sure there’s some coolant in the system. Once you’ve readjusted the seat, take a drive around the block. Be warned: The system does not respond immediately, even with the valve shut, and success isn’t possible to evaluate when parked. I spent several frustration-filled minutes with the wagon parked, hand over the vent, heater valve closed, and could detect no change.
Get driving, give the system a minute or two to adjust, and The Breath of Hades will cease. Activate the HVAC fan and, even if you don’t have air conditioning, you’ll be rewarded with ambient air.
Once you’ve verified that the valve works, you can return to your work station and connect the wire that allows you to open and close the valve via the console-mounted slider.
Take a second here, because the valve’s effectiveness hinges on your ability to wrangle some fairly heavy-gauge wire. If you don’t have an extra pair of needle-nose pliers, you may want to borrow some. As you force the wire into the loop, constantly fiddle with the slider to get a feeling for its range. If you form the loop too close to the console-mounted end of the wire, the valve will never fully close. Should you miscalculate and have to un-form and re-form the loop, you’ll cause further stress on the wire that will make it stiffer and risk breakage. I’d suggest grabbing a dowel or socket extension or screwdriver and form the wire around that, not the peg on the valve.
Once you’ve tied up the loop, replace the panel and enjoy your newly-achieved dominance over the mystical dark sorcery of Volvo 240 HVAC systems.


Hi,
The copper capillary tube is just for thermostat control. It coils up in front of the heater matrix and if incoming air gets warmer or colder, the heated tube adjusts the valve slightly.
It doesn’t really work that well.
I need the part number, Pictures for the heater control valve for my 1993 Volvo 240 Wagon
do you have the part number or a separate link for the heater control valve you used? the link provided leads to a defunct website.
Excellent article! I was able to successfully install in a 1983 Volvo 242 and its working great. I did have some suggestions for improving attaching the control wire to the valve, and have a post here outlining my experience ( includes parts list and tools used ):
https://seanwalden.substack.com/p/how-to-replace-1983-volvo-240-heater
Thanks again for your time and excellent article.