Installing Holley Sniper EFI on a daunting, odd-fire V-6: Part 1
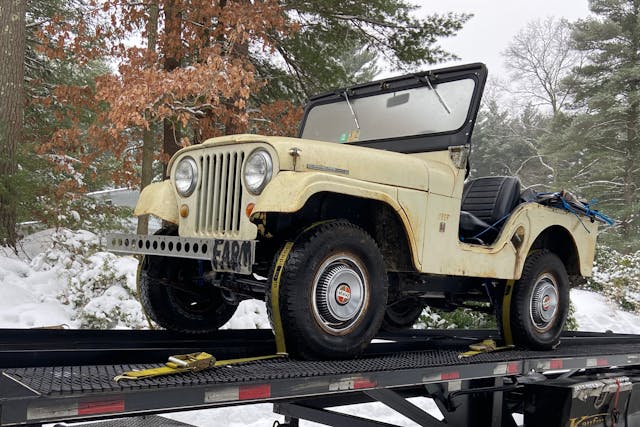
When I bought my 1966 Jeep CJ-5 Tuxedo Park IV back in December 2020, I wasn’t initially sold on the 225-cubic-inch V-6 it featured. Jeep people—and having owned a 1983 CJ-7, a 1982 J10, and a 2003 Jeep Wrangler X, I consider myself a “Jeep person”—are a weird bunch. There’s a hierarchy that puts CJ stuff at the top, and every successive generation looks down upon the generation that succeeds it, except for the YJ, which everybody seems to ignore universally.
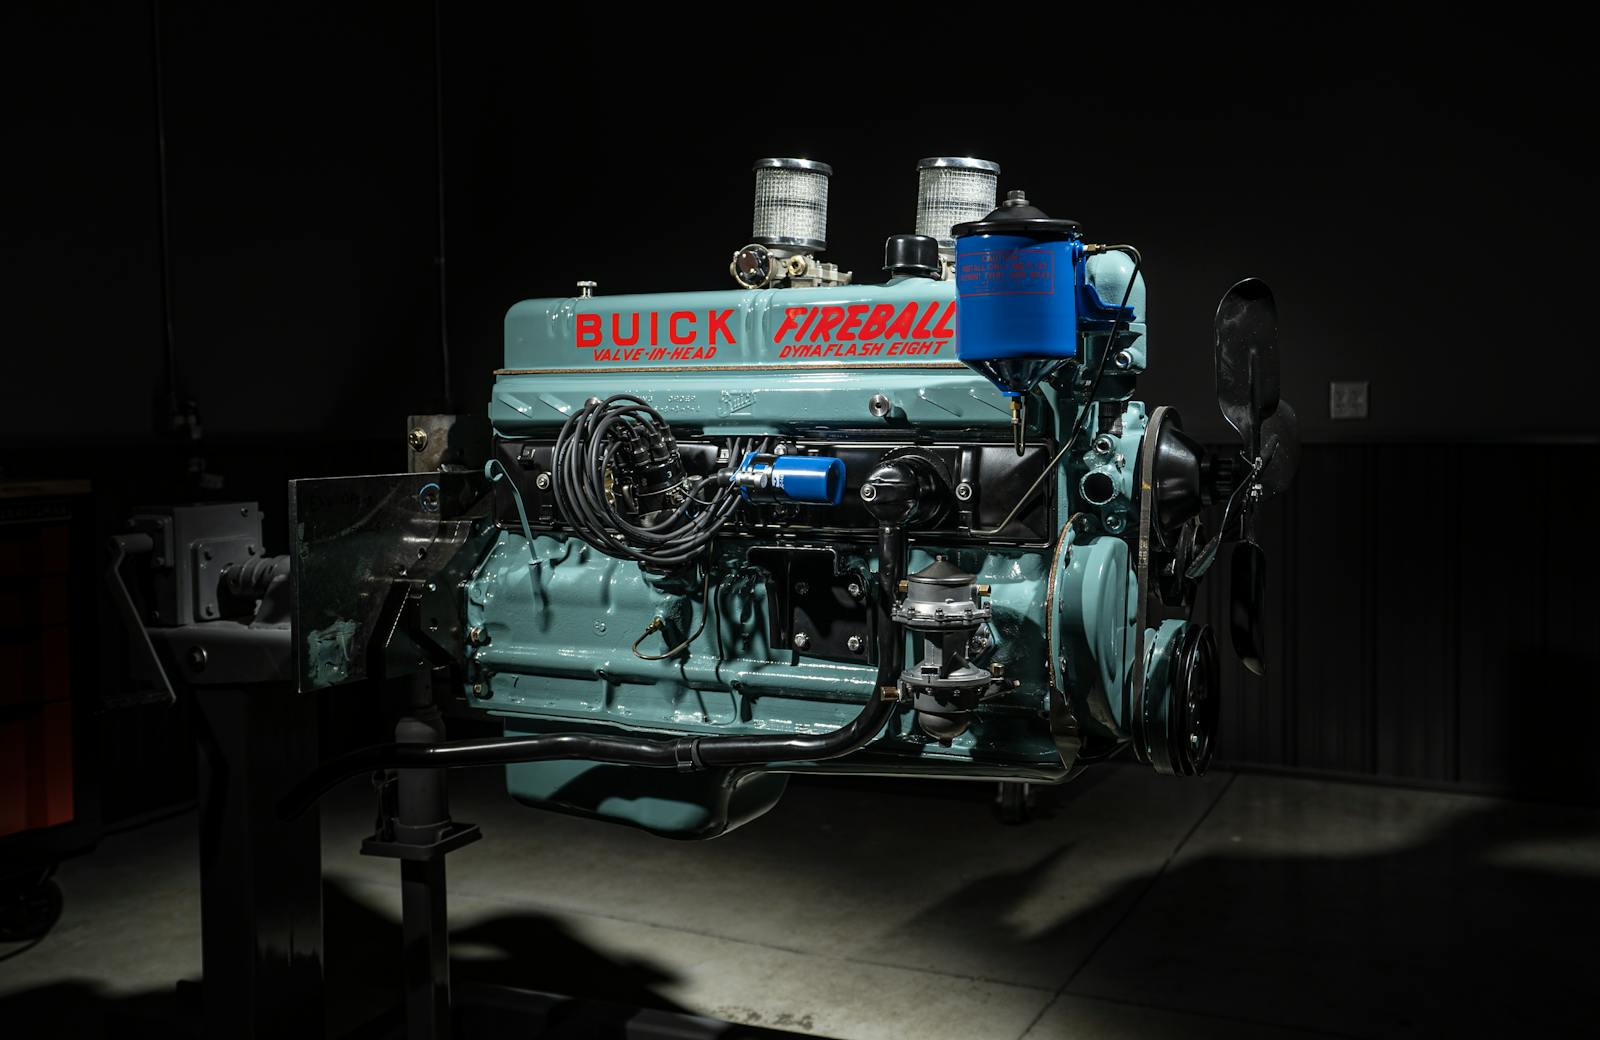
It’s the same with engines. The 258-cu-in inline six that people tend to look askance at anything but, while everybody thinks that the 225-cu-in V-6 Jeep used from 1966 to 1972 isn’t a “real Jeep engine.” That’s because it’s really not. It’s a Buick engine that Jeep purchased lock, stock, and barrel from GM to compete with the V-8 in the first-generation Ford Bronco, then sold back to Buick after it developed its own inline six.
Whether it’s a “real” Jeep engine or not, I’ve come to absolutely love everything about it. It offers more power than not only the 134-cu-in Willys Hurricane four-cylinder, but significantly more horsepower than the 258. It’s impossible to compare apples to apples, because the Dauntless 225’s horsepower was advertised as SAE gross, while the 258 was advertised as SAE net, but a few contemporary dyno results tell the story. The 258 generally dynos at 88 hp, which corresponds more closely with the 97-hp SAE net figures in the Jeep literature. A Dauntless 225 usually hits 120 hp on a dyno, which again sort of makes sense given the 160-hp SAE gross figure it was advertised with in 1966.
In stock form, the power delivery is smooth, and in a short wheelbase CJ-5 with no rear seat and no top, it feels like you’re sporting an LS motor under the hood. I fell in love with it as soon as I drove it, remembering the sluggish performance of my CJ-7.
What I didn’t love was the carburetor. The Dauntless 225 originally came with a Rochester 2GC two-barrel carb. In general, these are fine carburetors that have a lot to offer, but the one that was on my Jeep was terrible. It had some issue with the accelerator pump that neither I, nor my old-school Oldsmobile stalwart hot rod buddy Jim Crandall could reliably figure out. He took the carb apart twice, and both times it would run well for a bit and then resume bogging when I stepped on the throttle. I had to drive it around with the choke feathered all the time.
I got sick of messing with it and decided I wanted to learn more about electronic fuel injection for the reliability, the tunability, the slight power increase, and the potential fuel economy benefits. I’m not looking to make this a Prius by any means, but if I can burn fuel more efficiently, I’ll do it every time.
What follows is not only a story about why I chose the DIY EFI setup I did, but also how I installed it. There’s a second part about why it was such a challenge to make this particular engine run well, though it didn’t need to be that hard—if I’d been provided some documentation from the get-go.
DIY EFI
Whether you’ve been paying attention or not, the DIY EFI market has transformed itself over the last dozen years or so. Early on, Holley offered a TBI setup. I remember a mechanic at a garage that I worked at installing one on his 1983 Camaro circa 1993 and feeling like it was some kind of witchcraft he was messing with.
Thirty years later, you can buy an off-the-shelf DIY EFI setup from a number of suppliers. The revolution happened when a big portion of the vintage car community started messing with Megasquirt ECUs. People who never dreamed EFI was possible were suddenly installing it themselves on their Volvo B20 engines, and a lot of hobbyists watched over their shoulders. I looked into Megasquirt, but I had to be honest with myself. I’m no mechanic. I’m a pretty good parts changer, but I’ve never been great at the theory behind any of this stuff, and my talents with electronic gear are even more slim. I was looking more for an all-in-one setup.
Howell was the next logical choice. It sort of bridges the gap between extreme DIY and something out of a box that isn’t meant to be messed with too much. The Howell setup is compelling, because it does offer a lot of advantages. First off, it’s based on a GM 1227747 ECM. That doesn’t mean that Howell reverse engineered it; it uses that actual part number, which has reliably powered millions of GM vehicles for decades. It also uses a remanufactured 4.3-liter throttle body, so the components here are pretty bulletproof.

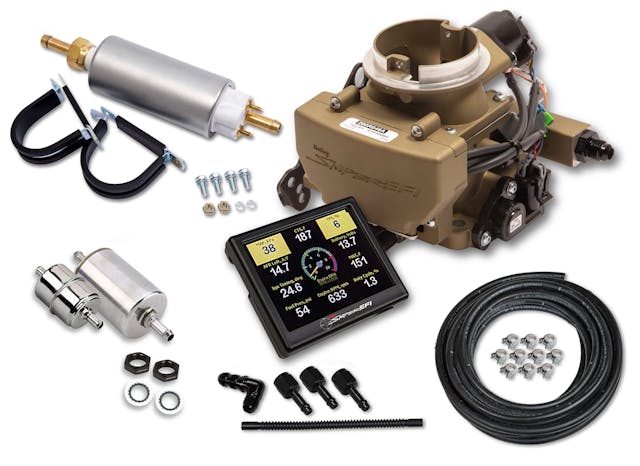
But the Holley Sniper EFI kit was compelling, too, mostly because it’s kind of designed for half-talented people like myself. I also liked the fact that instead of having to plug in a laptop every time I wanted to change anything, the Holley Sniper EFI had a simple touchscreen that I could mount to the dash and change things on the fly.
My decision to go the Holley Sniper EFI route was also influenced by Brian Rossini at BDR Automotive in Holliston, Massachusetts. He’d installed a Holley Sniper in a Land Rover Series III, which had been converted with a 250-cu-in Stovebolt Chevy engine, and he was thrilled with its performance. Over the last few years, he’s installed Sniper EFI on Grand Wagoneers and Chevrolet 350s, all with excellent results.
In the end, what helped me make the decision was that Brian allowed me to use his shop to do the conversion, which would help me out immensely as I ran into questions during the install. His experience with these systems would prove invaluable over the coming months, even as I did most of the installation myself.
The odd-fire wildcard
My biggest question in all of this would be whether or not I could use a Holley Sniper EFI setup with the odd-fire Dauntless 225 V-6. We could—and probably should—write a dissertation on how weird the odd-fire V-6 is, but this guy’s video does a way better job explaining it than we ever could. If you’ve got 40 minutes, watch every second of this, because it really helped me figure out what I actually drive:
If you don’t have 40 minutes, here’s the short story: The “odd-fire” V-6 gets its name because of its ignition timing. A 90-degree V-6 has three shared crankpins set 120 degrees apart. The opposing pistons share a crankpin the way they do in a V-8, but the fact that there are only three cylinders on each bank means that the plugs fire at 90-150-90-150-90-150 intervals. You’ll also notice that the firing order is 1-6-5-4-3-2. If that wasn’t weird enough, if you look at the poles on the distributor cap; they’re at uneven intervals, with some close together, and some with LOONG gaps between.
For most other popular engines, Holley sells a Hyperspark distributor that offers the added advantage of the Holley Sniper EFI ECU controlling ignition timing. However, Holley doesn’t sell the Hyperspark distributor the Dauntless 225, largely because there aren’t nearly as many of these engines around as there are 350s, and the timing is, frankly, weird.
“No problem,” I heard from both Holley AND EFI Systems Pro, where I eventually bought the Holley Sniper EFI. “You can even run a stock points distributor!” That’s true, but that’s really the end of the help I got from Holley or EFI Systems Pro.
We’ll get back to the ignition timing conundrum after we go through the Holley Sniper Install.
Installing Holley Sniper EFI
In very general terms, anyone who has some rudimentary mechanical knowledge and access to some basic hand tools can install a Holley Sniper EFI system. It’s not a lot more difficult than installing a carburetor.
I had a few minor things I needed to address with the fuel system anyway. The tank was exhibiting signs of rust inside, so I replaced it with a plastic tank, not wanting to add rust to the equation with a new fuel injection system.
There are also a number of ways to skin the fuel pump cat, but I opted for the Holley 19-360 RetroFit Fuel Tank Pump Module. It’s a returnless system pumping 340 liters per hour, and it sits inside a hole I had to cut in the top of the brand new fuel tank. Note that the system we use is returnless, meaning that the fuel is only flowing in one direction—to the throttle body. You can do that as long as your fuel cap is properly vented. If it’s not, you’ll need a return line, which is simple to plumb with the RetroFit in-tank module.
The first hurdle I ran into was that EFI Systems Pro sent me the wrong Holley Sniper EFI unit. That’s not entirely their fault: Holley makes two of these systems, a small bore and a large bore. I needed the small bore, and got the large bore. Easy enough mistake, but supply chain issues meant that even though I called the day after I got the delivery, getting the small bore that I needed was going to take another five weeks. I put in the original order on December 15. By the time I got the replacement, it was St. Patrick’s Day.
Brian let me keep the CJ-5 at his shop while I waited for the replacement. In the meantime, I installed the fuel tank and the fuel pump, removed the original fuel pump, and did what little wiring and fuel hose routing I could.
Once I got the right Sniper EFI, the entire installation took not even a full day. The instructions in the kit are explicit, and I followed them to the letter, which is where a ton of people seem to have problems.
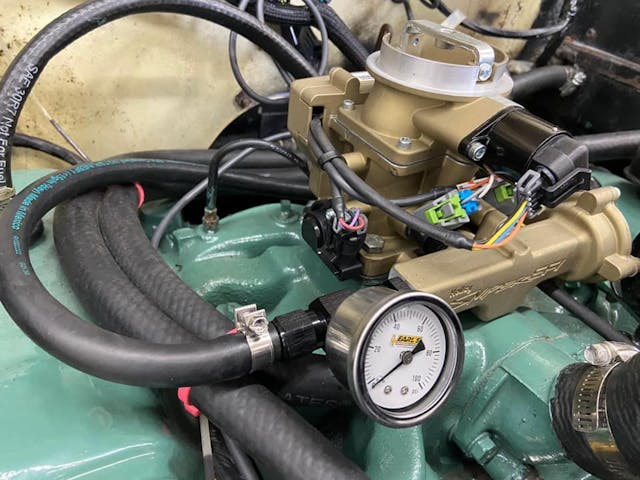
The throttle body simply bolts onto the manifold, just like a carburetor. The injectors are installed inside the throttle body, as is the ECU, so everything is ready to go pretty much out of the box, with the exception of the electrical connections.
Wiring a Holley Sniper

This is the part of the installation that’s a turnoff to a lot of people, and in online forums, message boards, and Facebook groups it seems to be the source of a lot of frustration and urban myths.
Holley has done a good job countering a lot of these issues by providing a very explicit set of instructions, plus a series of videos, along with a video on how NOT to do your wiring.
Where my install wasn’t going to control the timing of a Hyperspark distributor, it really couldn’t have been more simple. In total, I had six connections to make. If you’re running electric fans, A/C kickdowns, and the like, you’ll make more through a separate harness, but the main harness includes:
- A 12-volt connection directly to the battery, which contains a pre-installed fuse
- A ground connection directly to the battery
- A connection to the fuel pump with a pre-installed relay
- A connection to keyed switched power
- A connection to the coil for a tach signal (More on that later)
I also wanted the handheld monitor to be mounted somewhere on the dash. When I removed the carburetor’s choke knob, I had a hole in the dash with a grommet just the perfect size to run the wire for the handheld touchscreen. I ran the plug through the firewall and plugged it into the main harness.
Holley is EXCEEDINGLY specific on making sure you follow these instructions to the letter. Don’t run the power lead to anything but the battery, for example. They’re also very clear on what kinds of connections to make. If you’re using butt connectors at all, be sure to use quality weatherproof connectors, and buy a good crimper.
That helps alleviate a lot of issues that get blamed on “RF interference.” Sure, if you can hear the spark plugs through your radio, you’re going to want to deal with that ahead of time, but otherwise, this installation is very straightforward, to the point that a person like me can do it easily.

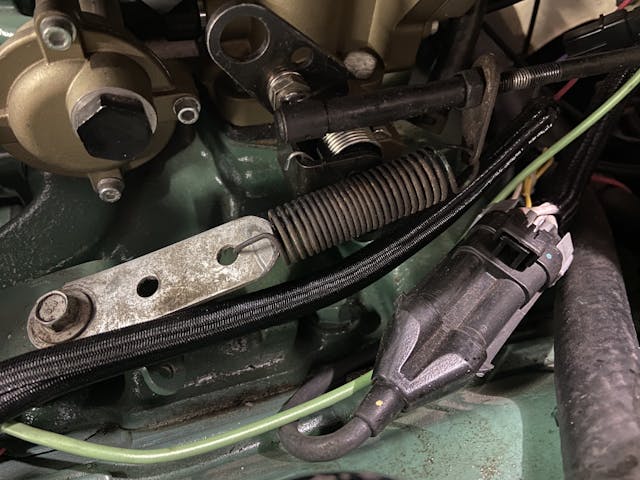
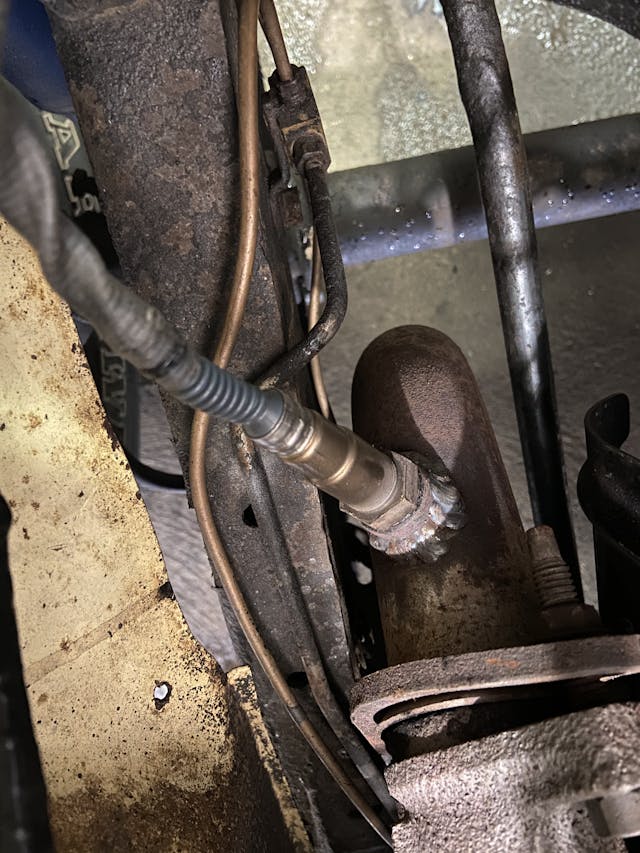
One of two things I needed help with on the initial installation was welding an O2 sensor bung in the exhaust pipe. You can use the supplied clamp-on bung in the installation kit, but don’t. It’s a source of exhaust leaks. I also needed help welding the throttle actuation rod on the CJ5, in order to make it short enough to provide a full swing of the throttle, from closed to wide open. You can come up with other creative solutions for this, but by cutting a piece out of the rod about an inch long and then welding the end back on, I was able to make it work without having to buy another bracket.
With the throttle body in place, the O2 bung threaded in, and all the electrical connections made, we put some gas in it and started to initialize the system. The Holley Sniper EFI handheld has a Startup Wizard that walks you through the entire process. It’s self-explanatory, asking which Sniper EFI model you’re using, the displacement of the engine, the target RPM, where your RPM signal is coming from, and whether you’re using electric fans and A/C kickdowns.
Once all of your data is in place, you finish the Startup Wizard and cycle the key. At that point, you’re ready to start the vehicle.
First startup
At first, and even now, I turn the key to the ON position and let the fuel pump deliver some fuel pressure to the throttle body. It’s not entirely necessary, but I do it anyway. It gives me 30 seconds to buckle my seatbelt.
On the first crank, the engine fired and ran. Keep a close eye on any fuel leaks. I had to tighten the hold-down clamps for the in-tank fuel pump. Other than that, though, we’d achieved some measure of success.
I say “some measure,” because I wasn’t happy with the idle. The Holley Sniper EFI has an Idle Air Control (IAC) valve, which basically works like a choke, figuring out whether you need more or less fuel/air mixture on the fly. The IAC was in constant motion, first feeding fuel, then not, dozens of times a minute.
I took it out for a first drive, and at speed the system worked beautifully, providing ample power, no bogging, and great throttle response. But at idle, it was a mess. I drove it around for a few days, learning more about its reliability as I went. Every time I’d leave the driveway cold, I’d get to the end of my street and the engine would die entirely. It would start right back up again, but something definitely wasn’t right.
It took me several months of messing around to really make it work. In the second part of this story, we’ll get into my 90-day adventure in understanding how both an odd-fire V-6 and electronic fuel injection works.
Check out the Hagerty Media homepage so you don’t miss a single story, or better yet, bookmark us.

I’m surprised there isn’t much support for the odd-fired V6. Buick made millions of them
All you people out there help these kids out.They needus.
Good morning Hagerty. Do you know of a mechanic for a 73 jaguar XKE v12? There is not a mechanic for this car anywhere near me. I am in West Monroe Louisiana USA. My carburetors need work are rebuilt. I did find a Drag racing car mechanic that is very good. He’s never worked on a car like this. My mechanic would like to contact a real Jaguar mechanic to get information about the carburetors. If you can help thank you. Sincerely danny burton
Hi sorry I didn’t know that you didn’t know that you were going to teach me anything but you have !I read your post an I like what you said about the witchcraft motor anyway I have to write fast to you because. My post will disappear to again. Okay Jeff and how to calm up in Oregon had years and he brought several years ago he had to pay somebody for it , a long story short ! And and when he found out about high sniper about the Holly snlper motor carburetor and whatever it’s called anyway he was working a lot at the time he couldn’t do it because he didn’t know how to do I so I had a friend I knew my friend said he knew , and took the car to him ! I hate hired now for a couple of years he’s drove it and since then when he got it back he loved it !, Ran perfect and about a couple years ago and not wanting to I start ? He’s been disabled all the sudden about a year and a half two years !!??🙁🙃 I’m wearing them and maybe you can help us out ! Like I said we live in Alaska , and seem like a level headed man ! He has watched videos but he’s too depressed and come out here and really put his heart into if you can do anything to help us help him and get him back into back maybe wanting to get back into his car again, I would really appreciate it my name is Ruth and I really like your post which I don’t do I’m very often on my phone !! He’s done a couple things through and get a new carburetor and he’s mechanicall wise , plus he doesn’t have friends anymore after he got you know ! Thank you Ruth