Installing a Spoiler
Spoilers first started appearing on the rear deck lid of American cars in the 1960s. Also called air foils or wings, spoilers served a functional purpose on racing cars, creating a down force on the rear end to help tires grab better and make the car more stable at high speeds. They were most often used on production cars to give them a sporty and racy look.
Many aftermarket spoilers are available from sources such as JC Whitney (www.jcwhitney.com) for $150 to $300. These come with ready-to-paint primer finish, so painting them to match your car can cost an additional $100–$200. Some aftermarket spoilers may have a “stock” look, but they’re not going to exactly match the O.E.M. appearance if you want an authentic car.
You can find aftermarket spoilers and factory-style spoilers on the Internet. While fixing up red 1991 Sunbird convertibles for my three granddaughters, I bought three spoilers on eBay and found a fourth in a salvage yard. I paid $10 for the spoiler I bought from the yard, an excellent value. I paid $25 and $20 for the two from eBay (www.ebaymotors.com). Ironically, the silver one was the most expensive. With shipping, it cost over $50. However, it’s still a fraction of the cost of a new spoiler.
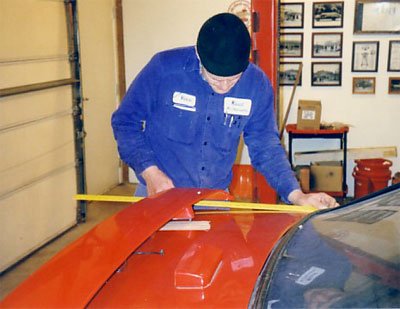
Installing a spoiler isn’t difficult. Most have mounting pedestals. Use a yardstick or tape measure to determine the distance between the pedestals. Use the same tool to measure the width of the trunk lid from crease to crease. Half of each measurement is the center point. The center point of the spoiler should line up with the center point of the trunk lid. After lining up the center points, you’ll know where the pedestals go.
Put several strands of masking tape on the trunk lid where the pedestals go. Now measure the width and length of the trunk lid. Your pedestal marks should be equal distances in from the sides of the trunk, and in from the rear edge of the trunk. Following the old rule “measure twice – cut once,” recheck all measurements carefully. When you are sure you have the pedestal locations properly marked, you will need to drill holes for the studs on the bottom of the pedestal.
Use a drill with a bubble-type level gauge to drill straight down. The diameter of the studs will determine which size drill bit to use. A snug (not tight) fit is better than a loose fit. Now, drill your holes – one for each stud – with a sharp bit suitable for drilling through sheet metal.
After drilling the holes, the edges will be bare metal. Make sure you cover them with primer and topcoat with touch-up paint to keep the bare spots from developing rust. Use a magnetized pick-up tool to remove metal drill shavings from the trunk. Test fit the studs through the holes. They should line up and fit snug.
On older cars, you may be able to attach a spoiler with regular nuts and washers. On newer cars, you’ll need the proper size self-threading speed nuts. You should be able to find at least one body shop in your town that carries a variety of these at a few dollars each. Tighten them with a socket, and you’ll be ready to cruise the town in a sportier looking car.
John “Gunner” Gunnell is the automotive books editor at Krause Publications in Iola, Wis., and former editor of Old Cars Weekly and Old Cars Price Guide.

