Upgrading my ’87 Grand Wagoneer’s headliner was a mixed success
Aging headliners are the bane of any classic car owner’s existence. Unlike leather upholstery or chrome dash trim, which ask no more than a swipe of conditioner or polish, there’s no combination of glue, foam, and fabric that won’t eventually demand to be replaced. At some point, the headliner will separate and sag, gently brushing against your head, reminding you that your interior is starting to look more than a little tired.
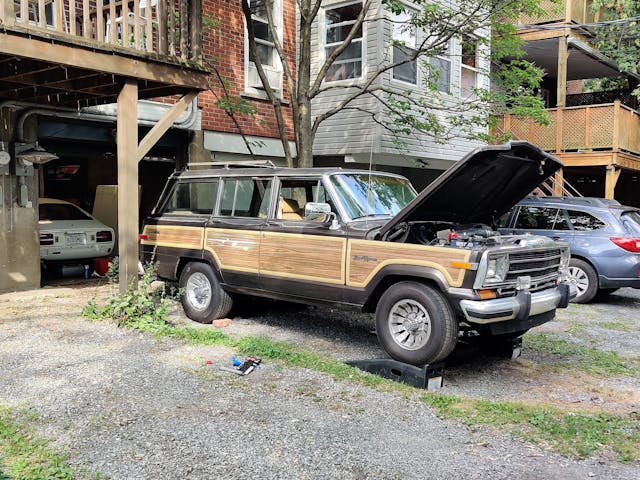
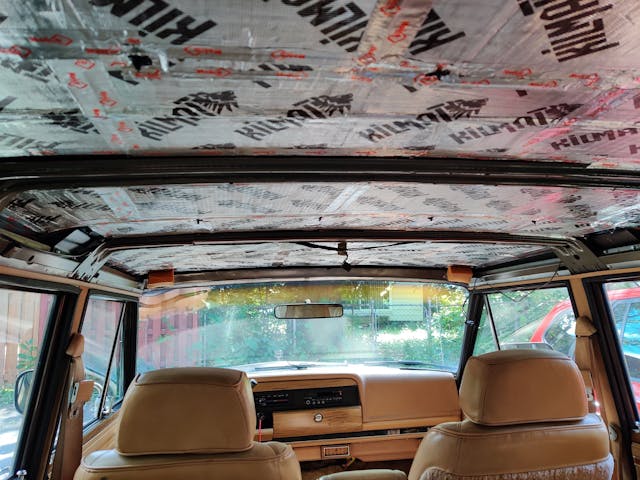
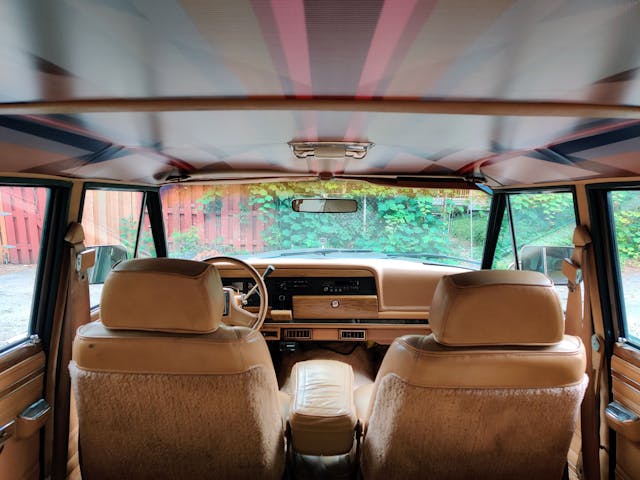
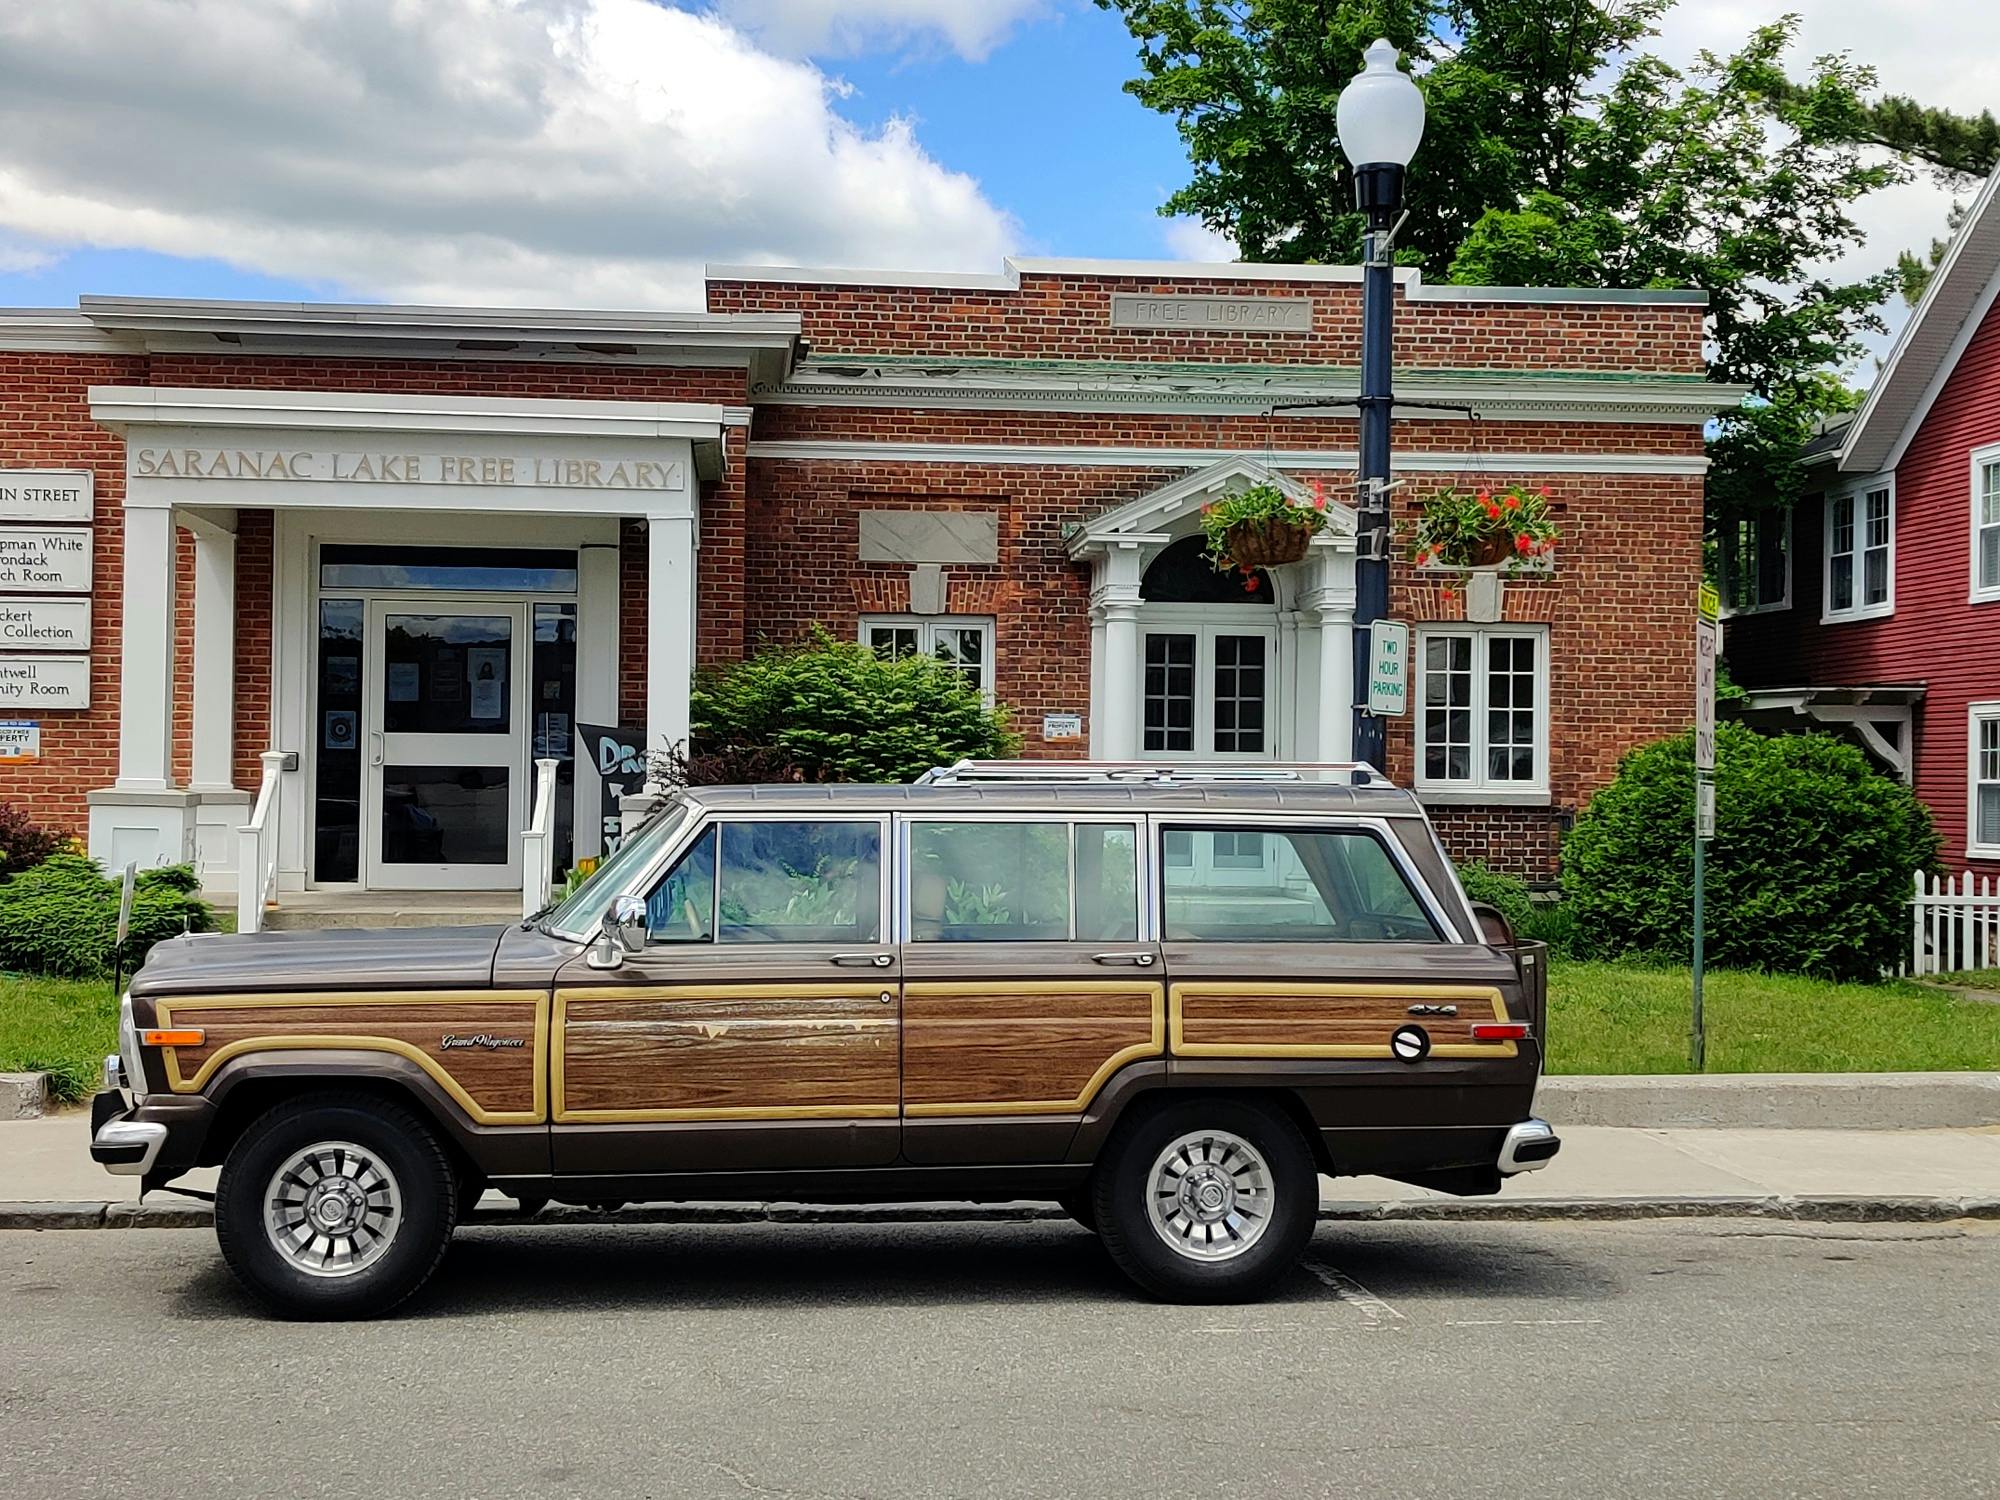
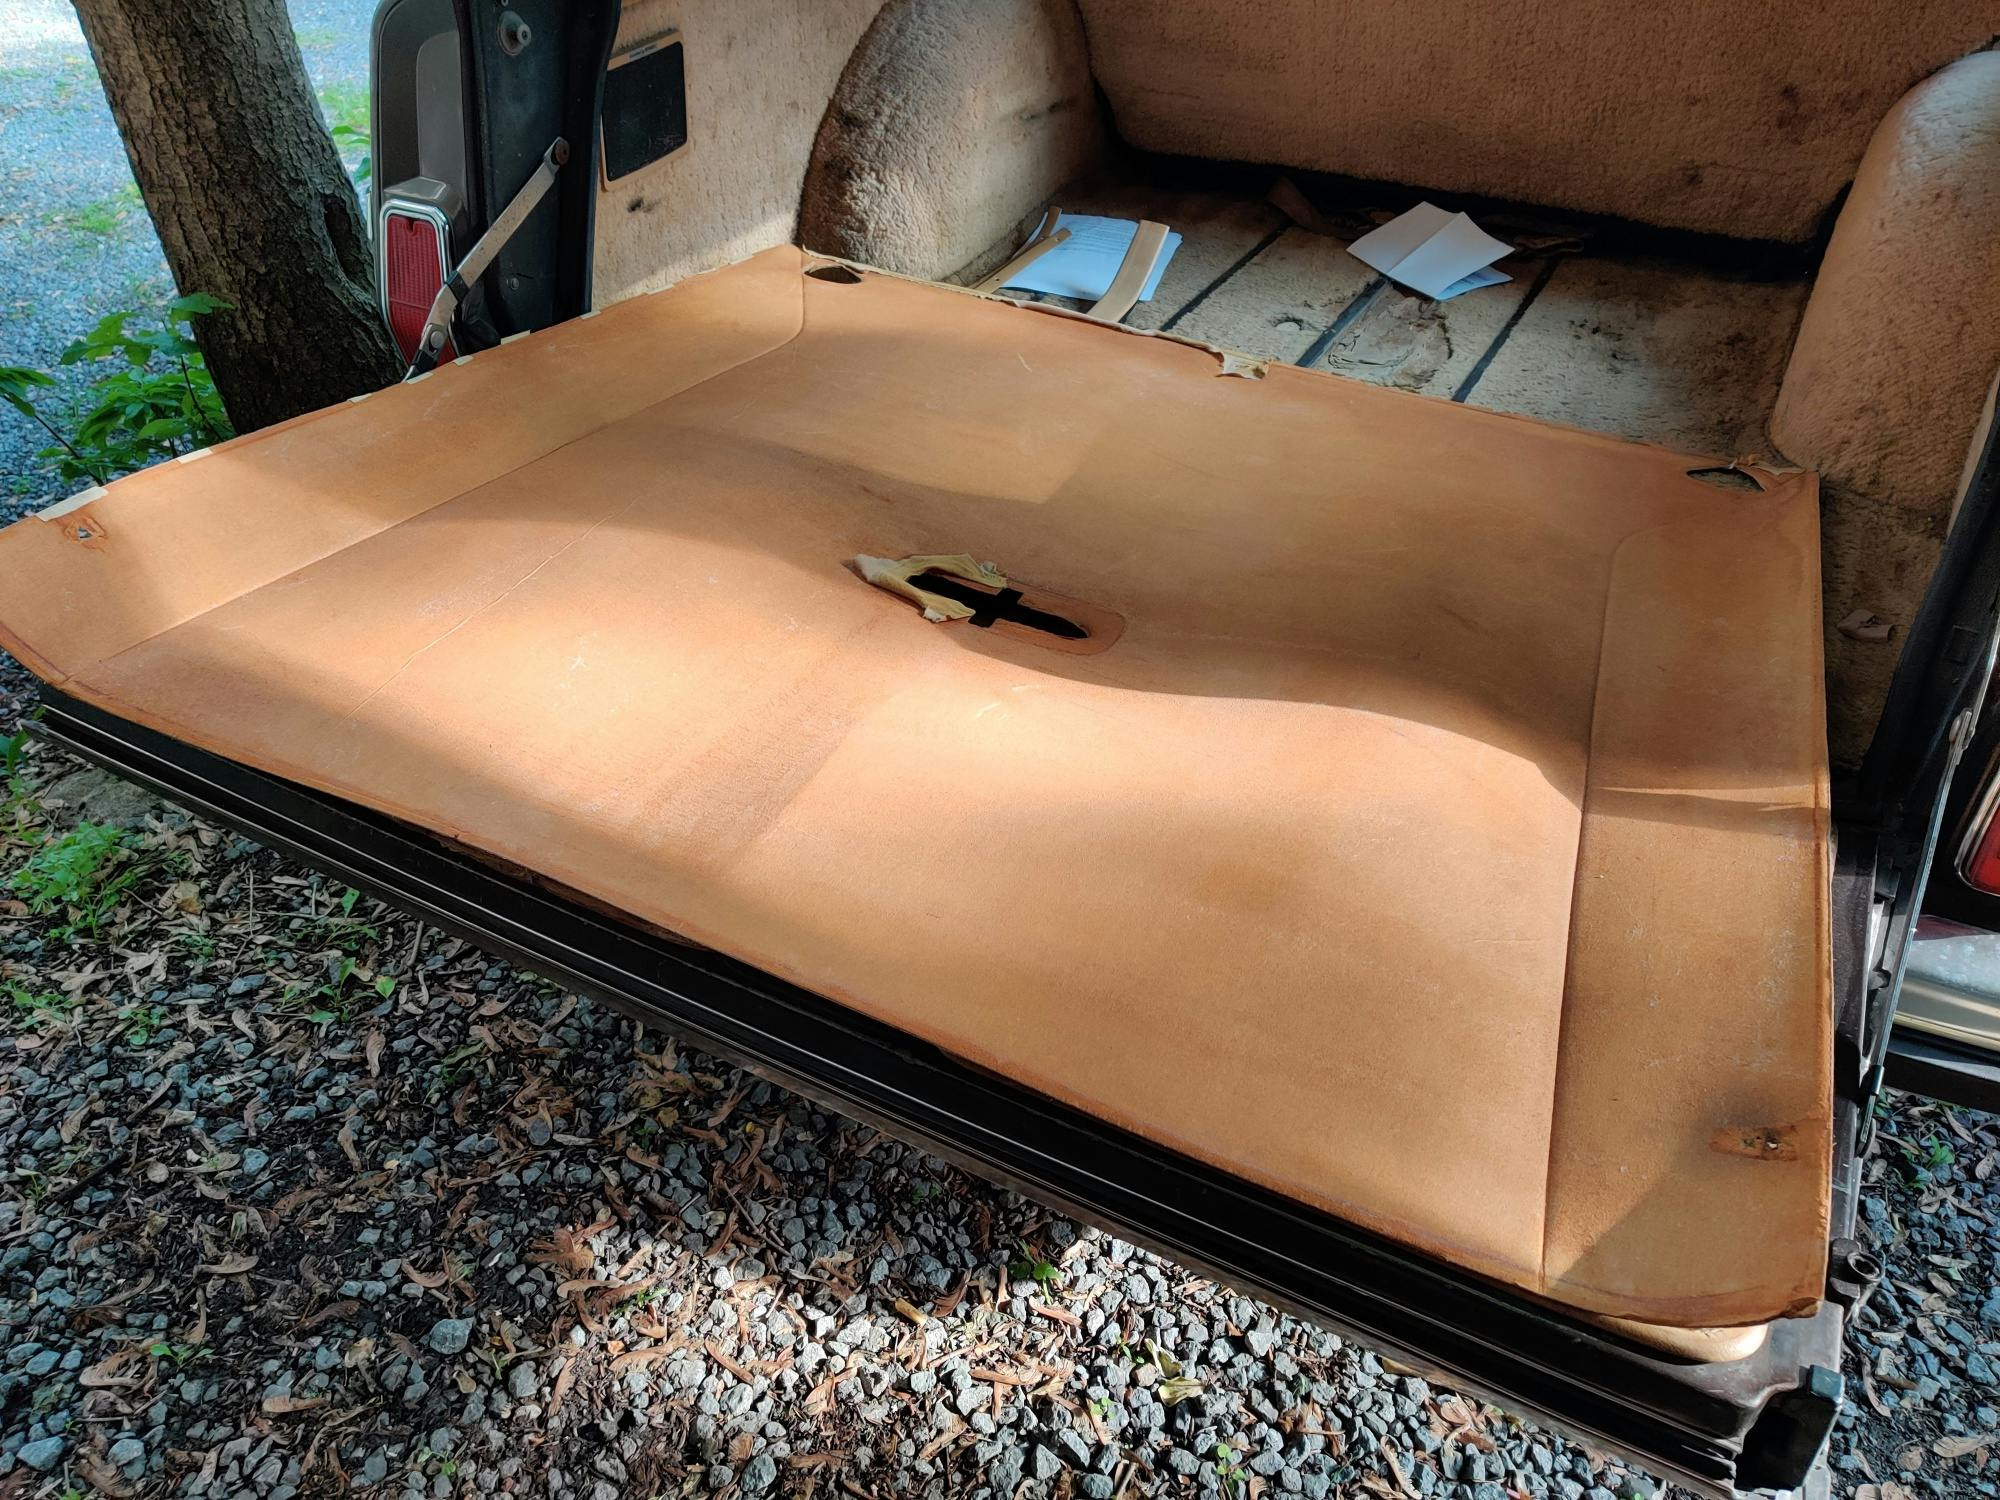
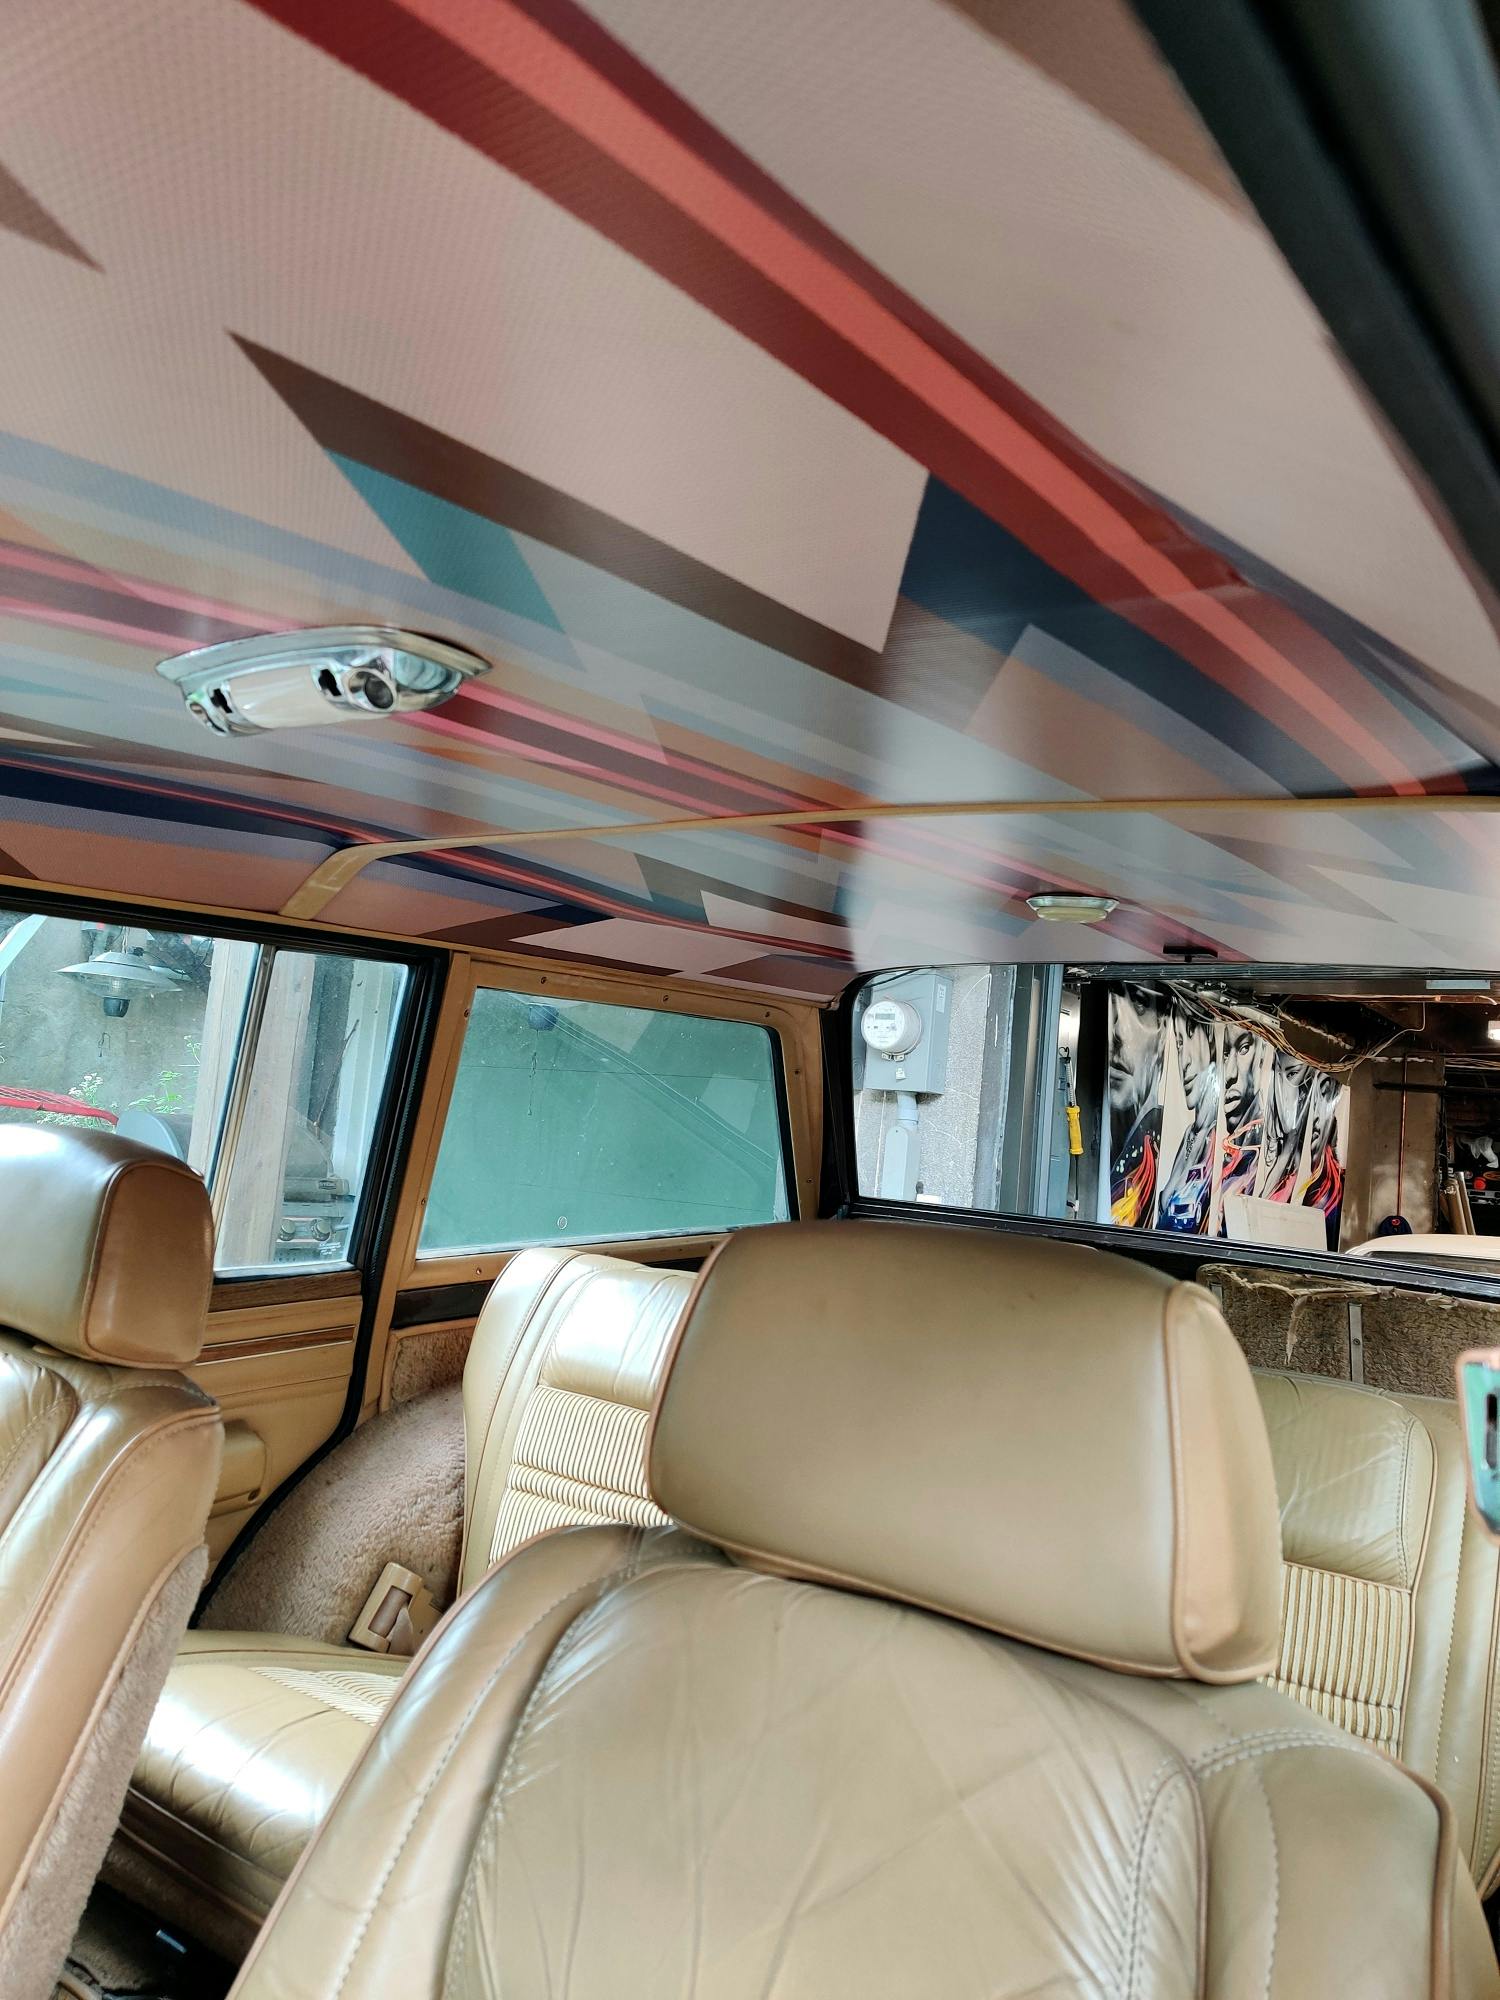
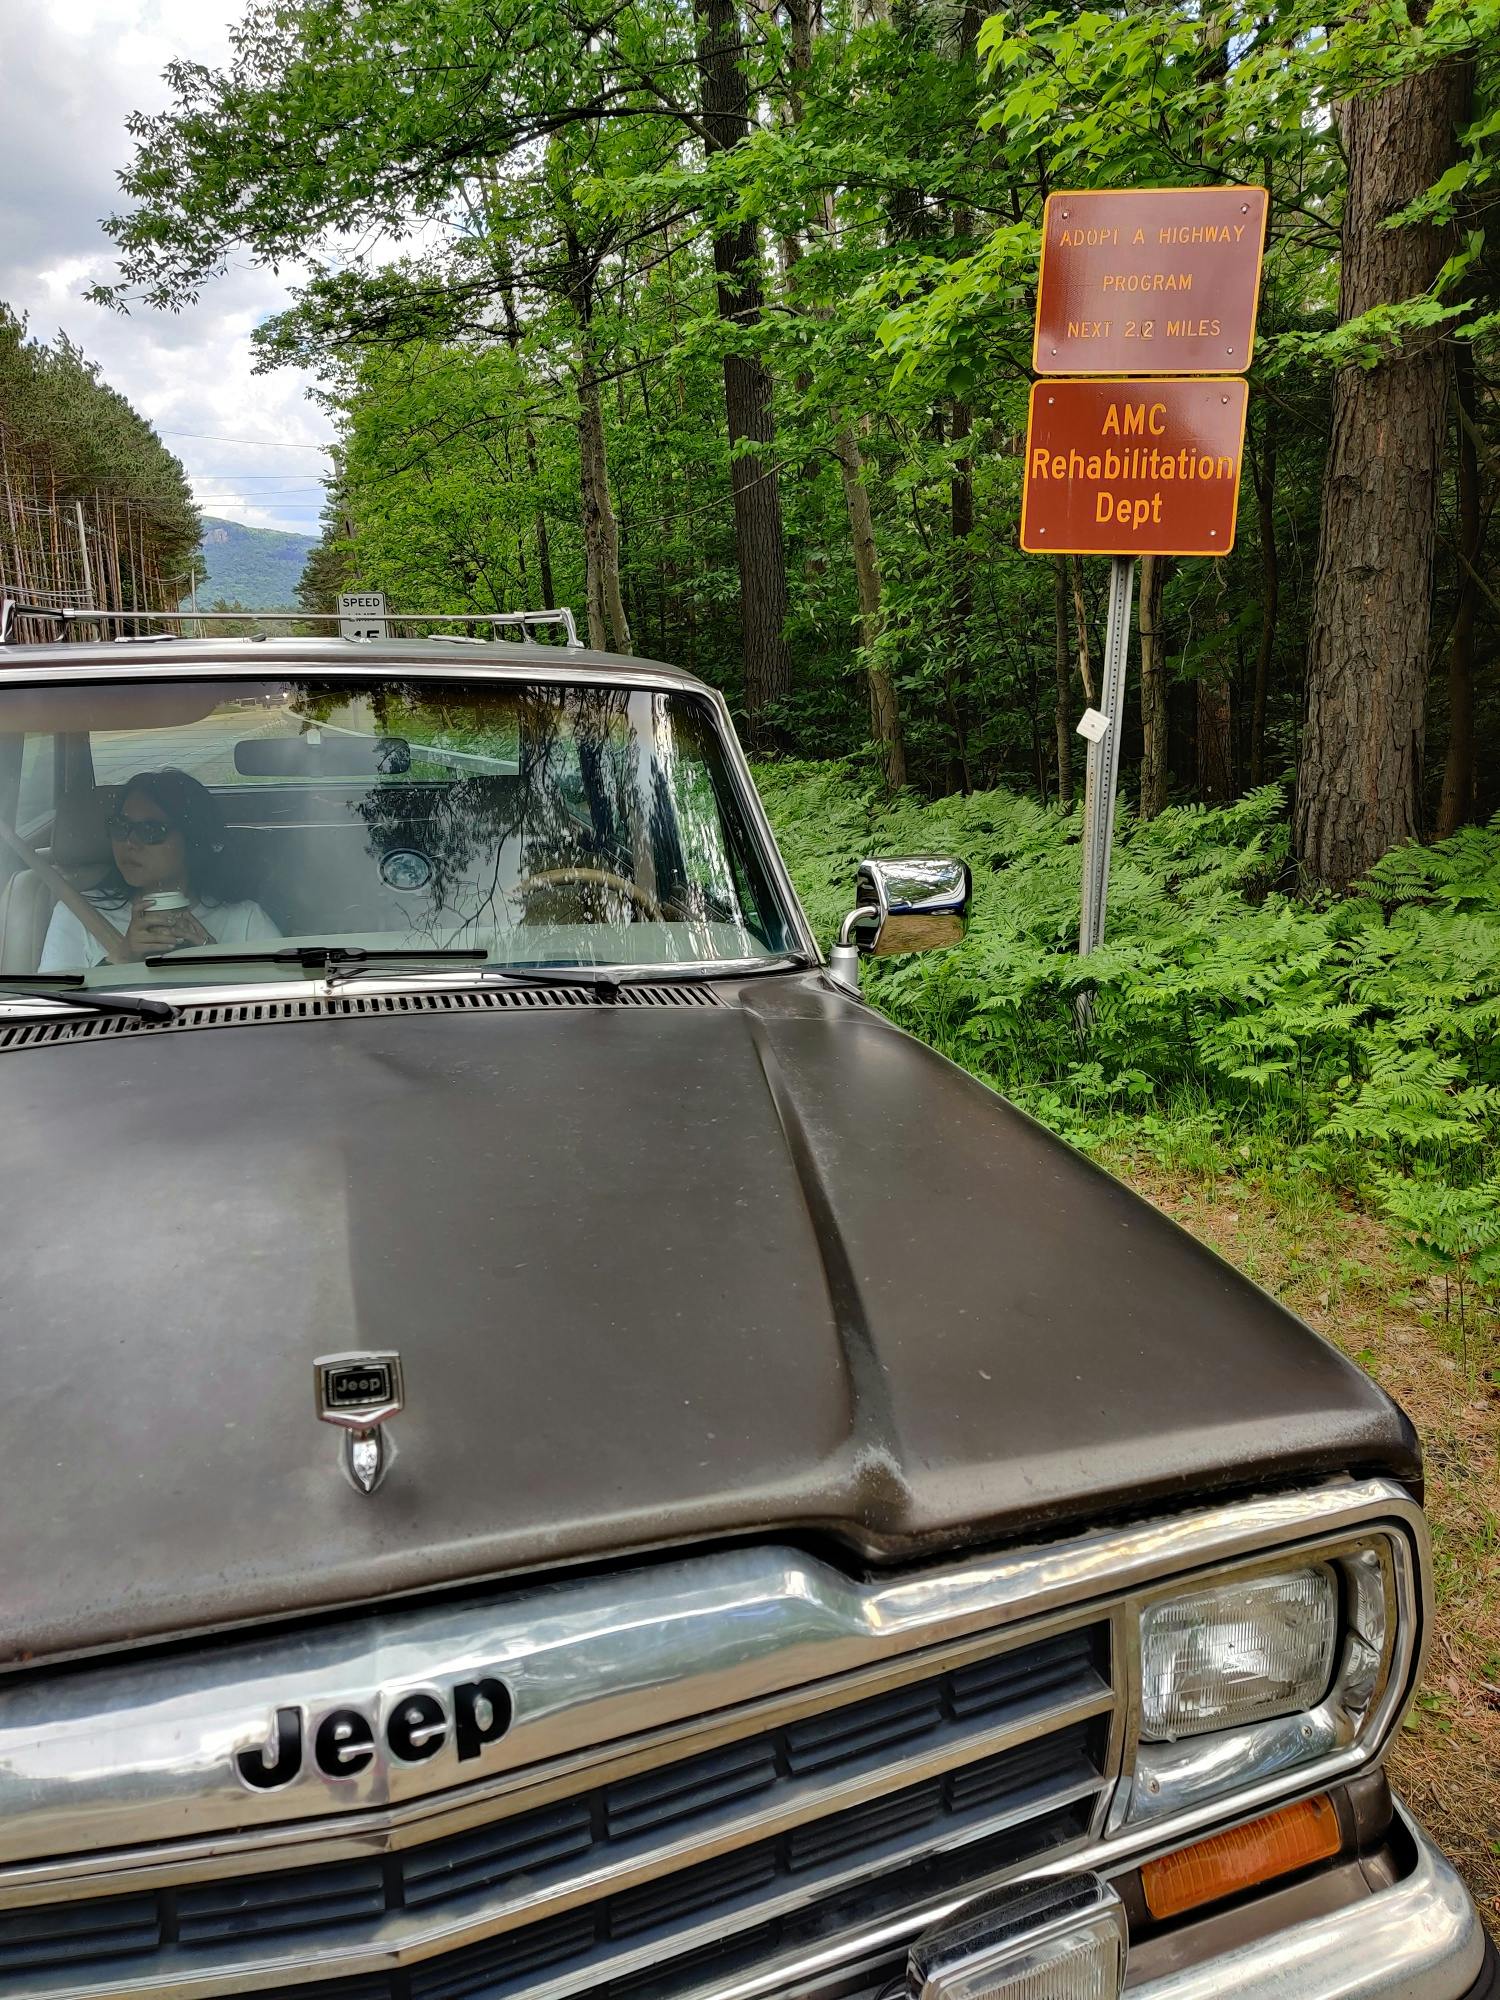
So it was with my 1987 Jeep Grand Wagoneer, whose own headliner’s demise was hastened by the water infiltration occasioned by AMC’s relaxed approach to weatherproofing the rack bolted to its roof. The paper backing board had long since morphed from its original mold into some grotesque, bulging parody of stock fit. Dangling strips of light tan (or ‘doeskin’ in Jeep parlance) material blocked my view out the rear-facing mirror and tickled the necks of rear-seat riders.
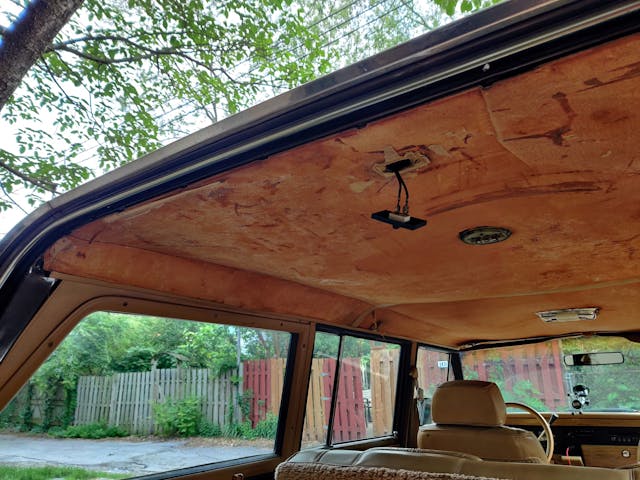
At the beginning of the summer I simply couldn’t take it anymore. I tore the fabric free, exposing the bare board. Finally, I no longer had to deal with a faded brown sail billowing behind me on the highway—but the ugly, yellowed cardboard that remained prompted me to improve my interior sooner rather than later.
A headliner replacement seemed like a simple-enough DIY project: Remove the trim pieces that were (barely) securing my factory board, toss the panels in the trash, and then replace them with new ones. At the same time, I could take care of several smaller issues associated with the Jeep’s cargo rack and roof before buttoning everything up. As I dove deeper into my replacement headliner options, I even discovered a high-tech solution that seemed like a significant upgrade over the factory panel, available at a more affordable price.
I was about to discover what happens when early-adopter instincts combine with overconfidence. Here’s what I learned when tackling a novel task never before tried in a vehicle built with the most casual attitude towards quality and uniformity.
Paper or plastic?
In addition to local upholstery shops across the country, many of which will custom-built panels, a number of aftermarket companies specialize in the reproduction of Jeep Grand Wagoneer headliners. Most of their options replicate the standard paper/foam/fabric trinity that had been rain-soaked and then sun-baked into oblivion in my own truck. Though some also offer additional weather protection via Tyvex backing, I was curious whether any panels were made of more modern, durable materials.
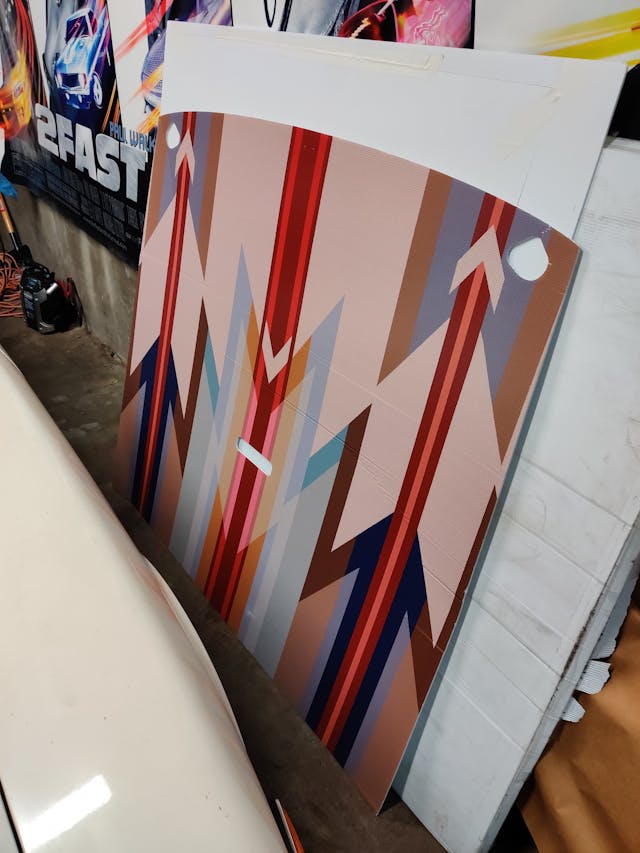
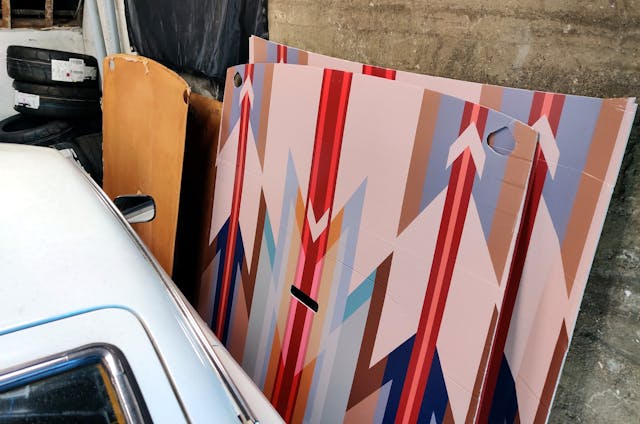
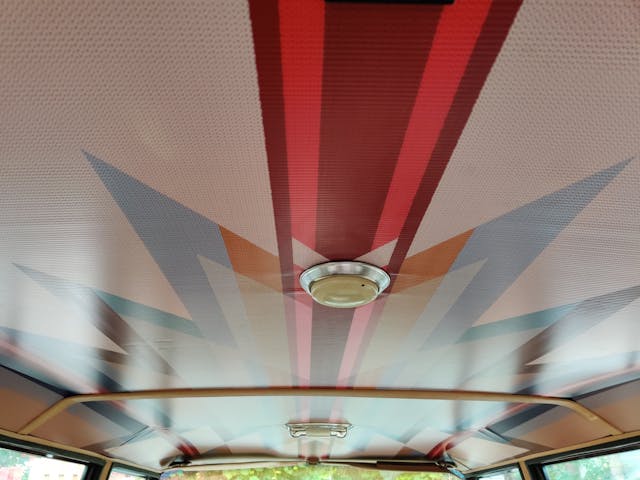
I struck pay dirt in one of my full-size Jeep Facebook groups. A fellow member had just begun to produce a set of headliner panels laser-cut from corrugated plastic. This caught my attention for two reasons: First, plastic promised to stand the tests of time, temperature, and humidity far better than traditional foam and fabric. Second, almost design could be printed directly onto the panel, which opened up a world of possibilities beyond my Grand Wagoneer’s stock, single-tone colors.
Priced at $400, shipping included, this plastic panel was much less expensive than any other headliner kit I had seen for sale. Throw in another $50 for a custom pattern (I chose a New Mexico-inspired Aztec design), and it was still $100 cheaper than the next-closest option. I placed my order.
Keeping my head dry
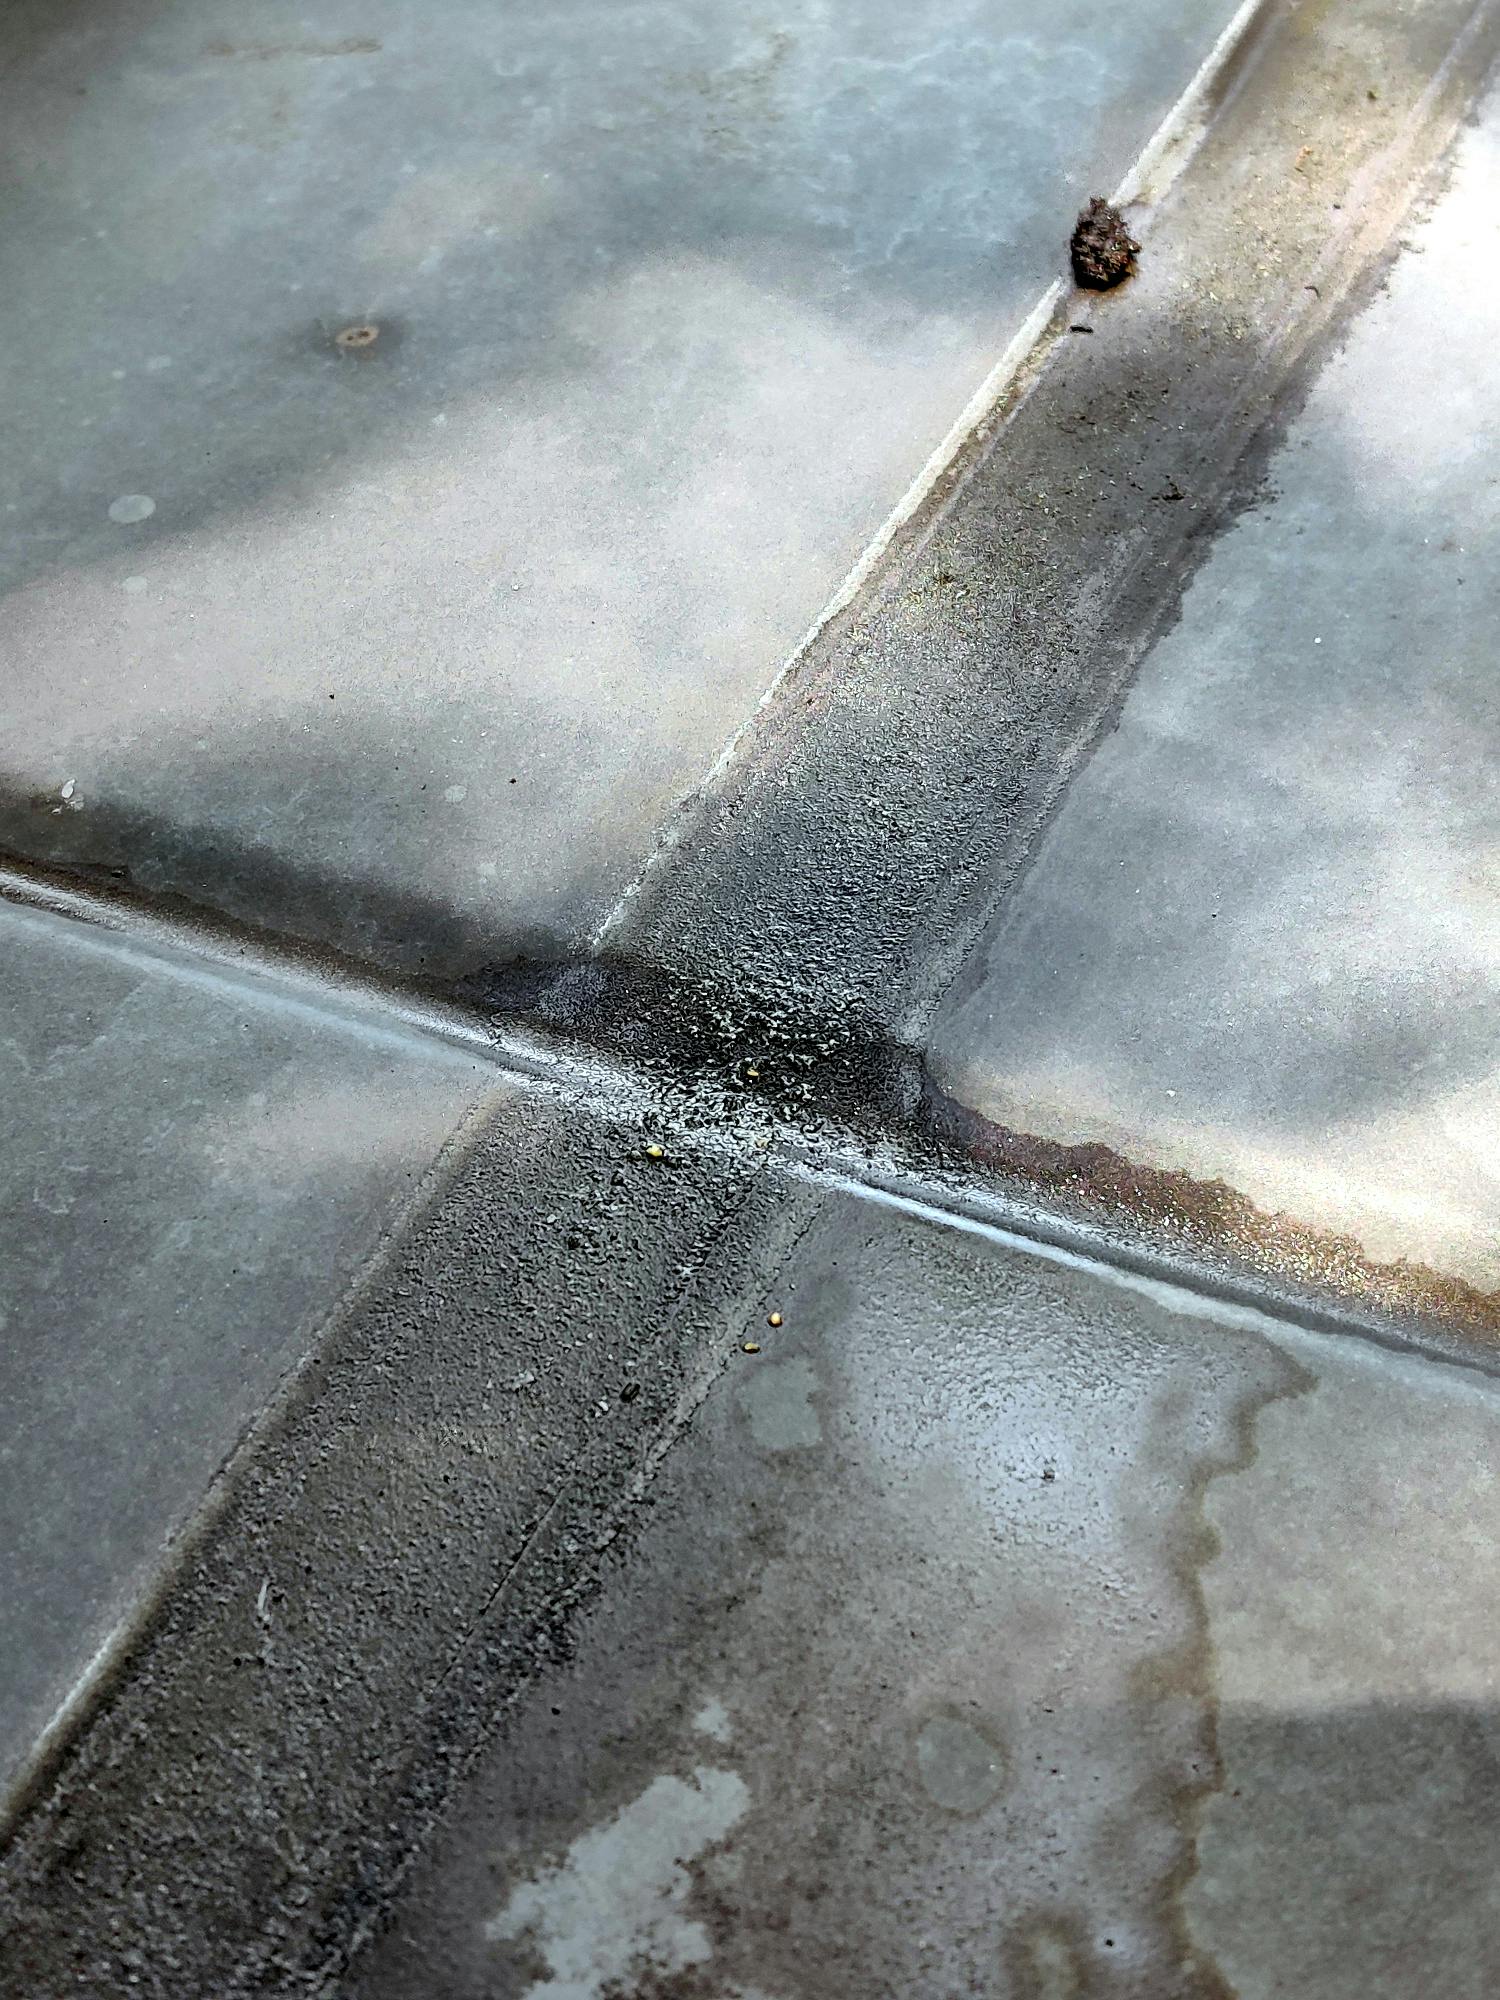
Before I could install the new headliner in my Jeep, a few other things needed attention. Water had found its way into my Grand Wagoneer through the many entry points so generously provided by the factory; it was well beyond time to tear out the old panel and address what AMC’s assembly line had so readily ignored.
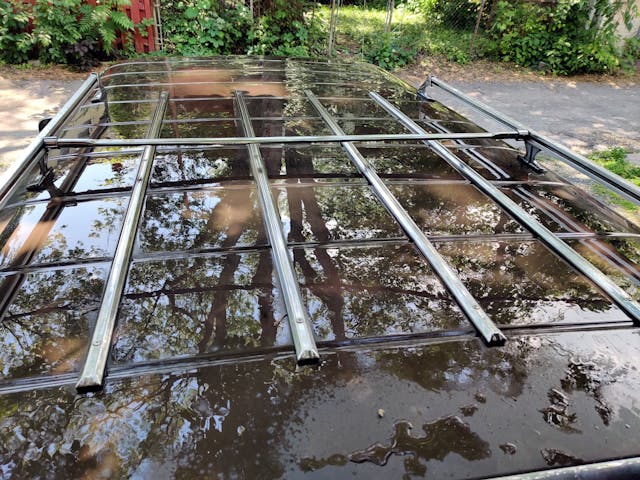
The primary pinpricks centered around the SUV’s roof rack, along with the set of metallic cargo slats underneath it. The latter pulled double duty, protecting the Jeep’s faded paint from scratches while adding structural integrity to what was essentially one long, thin slab of sheetmetal.
The first order of business was to push out the two major dents in the roof that had been gifted to me by the previous owner. After meticulously researching best bodywork practices, and after a few ineffective bangs of a rubber mallet, I discovered the most effective process. I lay on my back and used the heretofore untapped power of my quads to push against the bowed, metal support ribs spaced across the roof’s interior. This proved remarkably effective in removing the dual valleys, and I muscled each crossmember nearly straight—leaving only a small gap between rib and roof that would come back to haunt me.
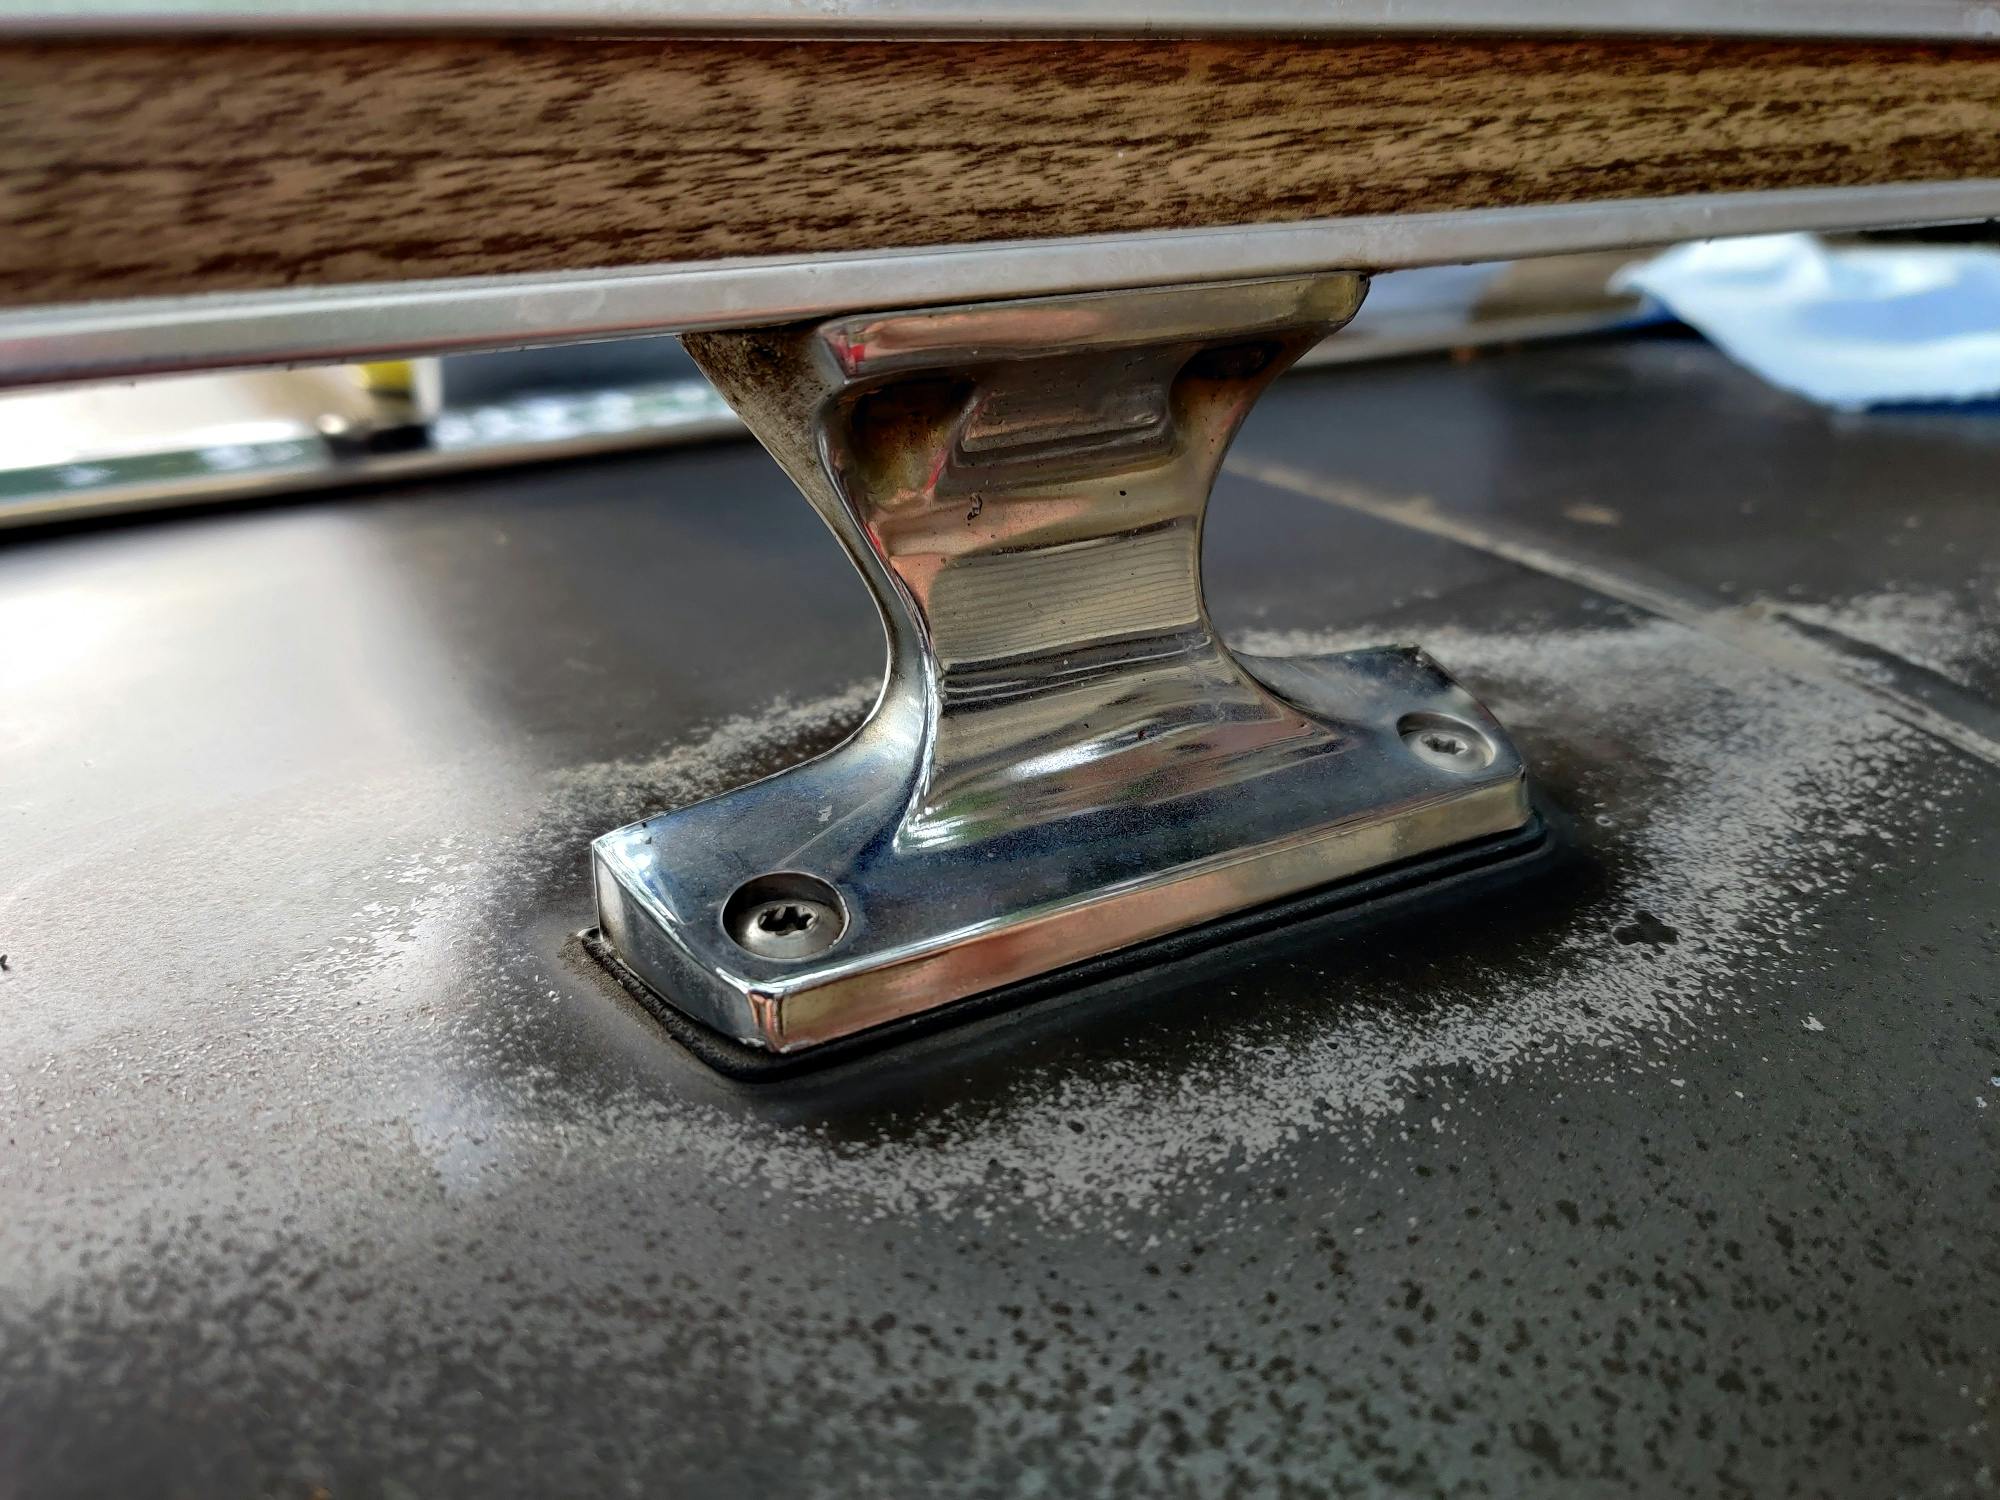
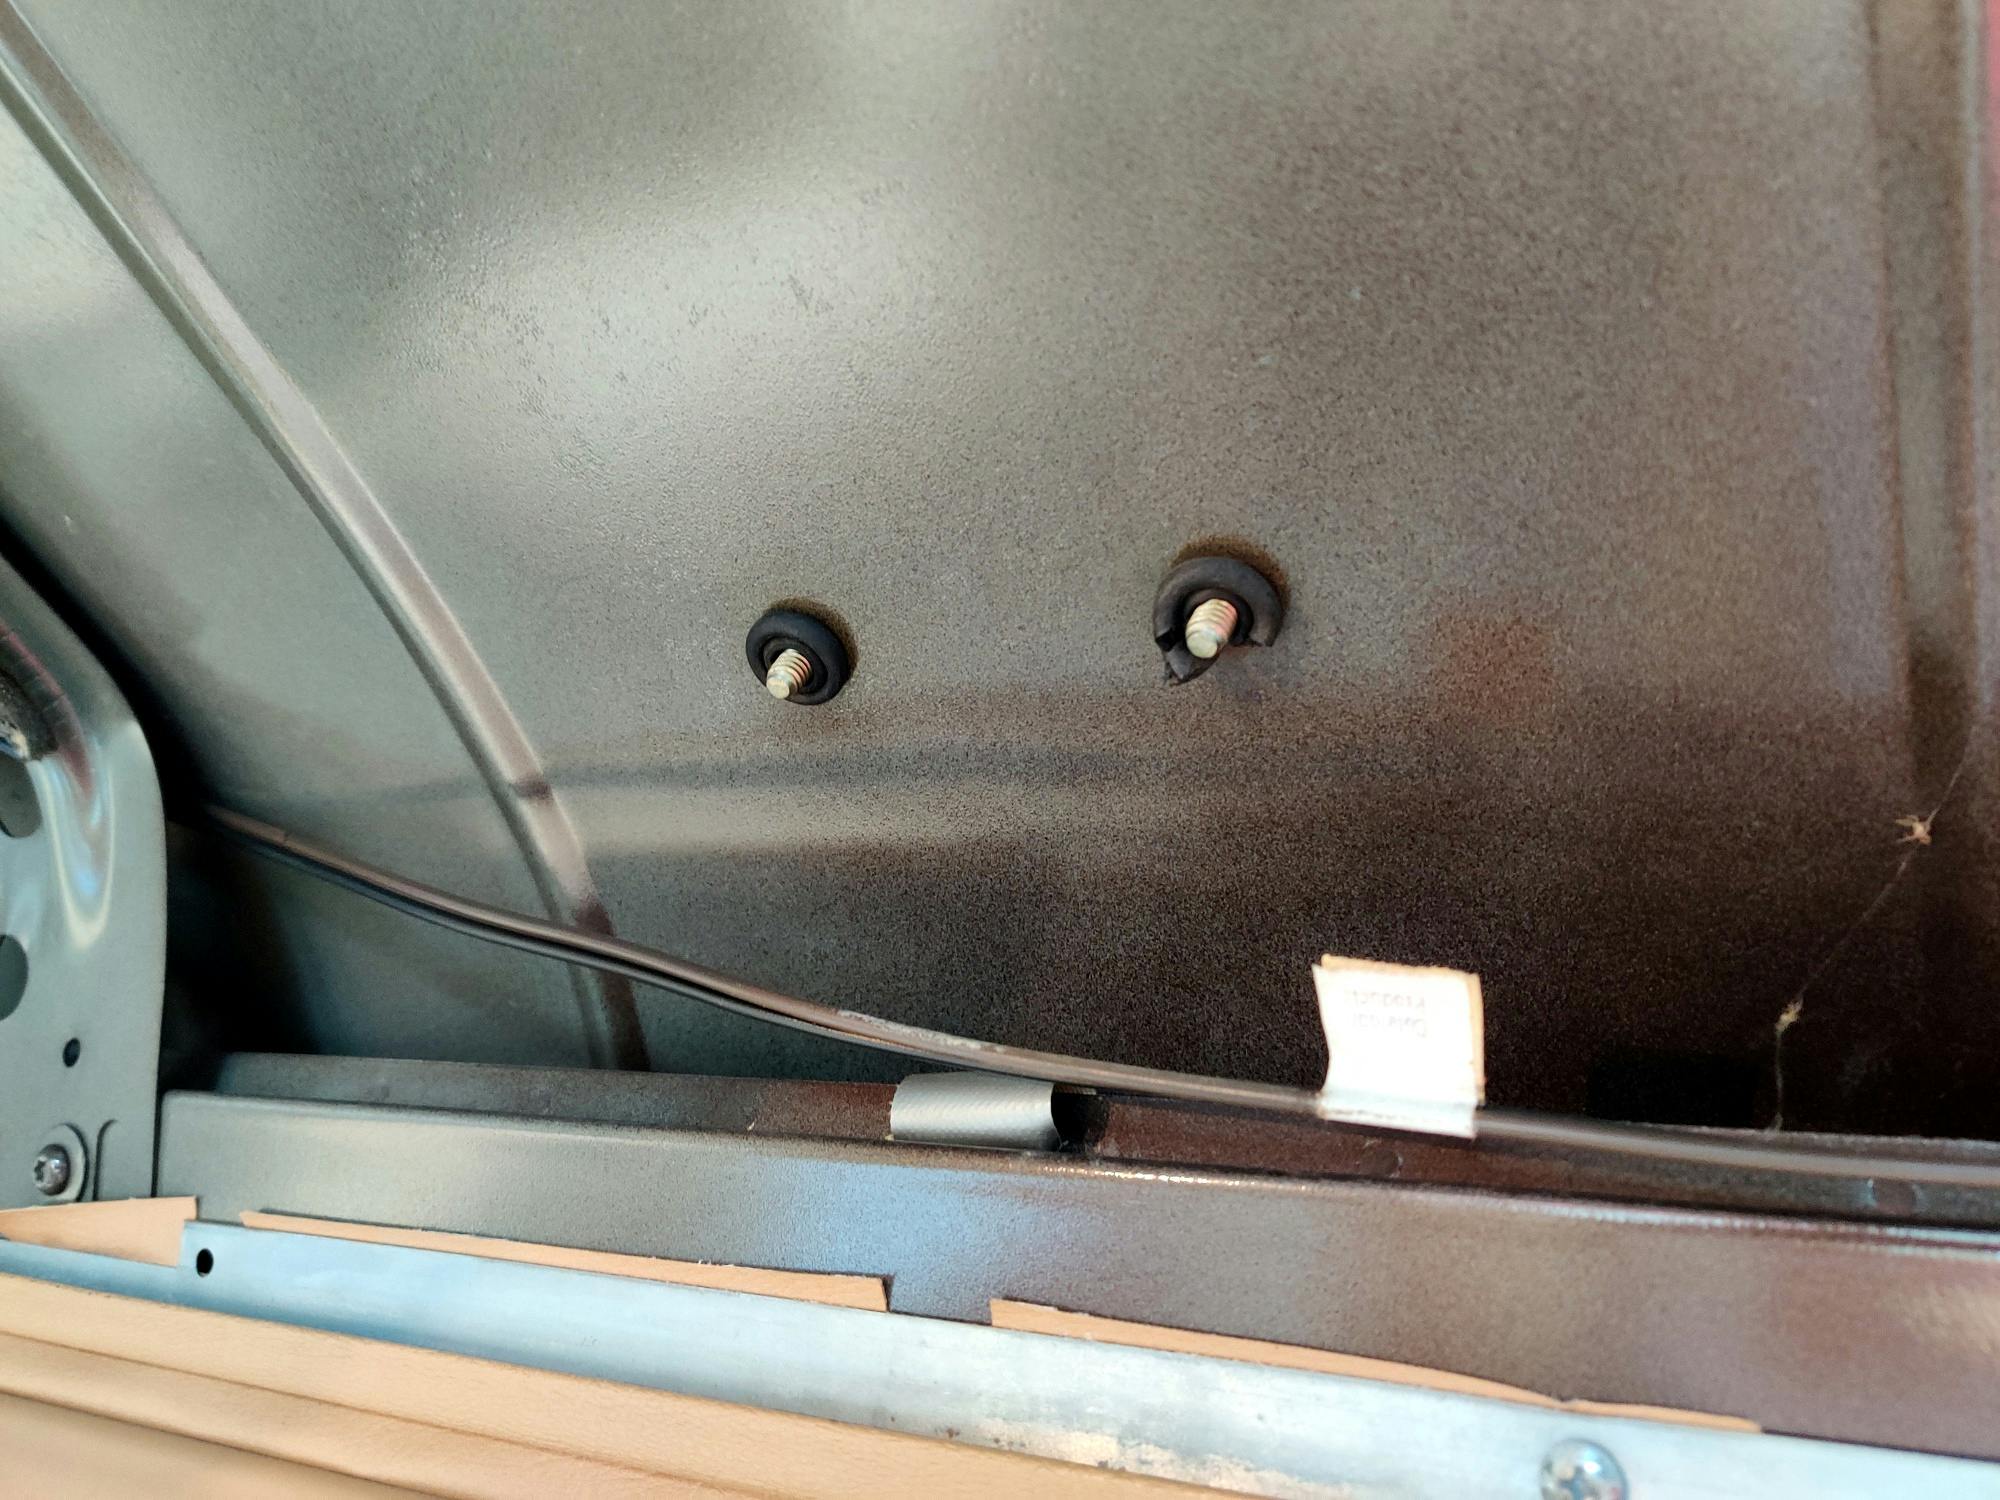
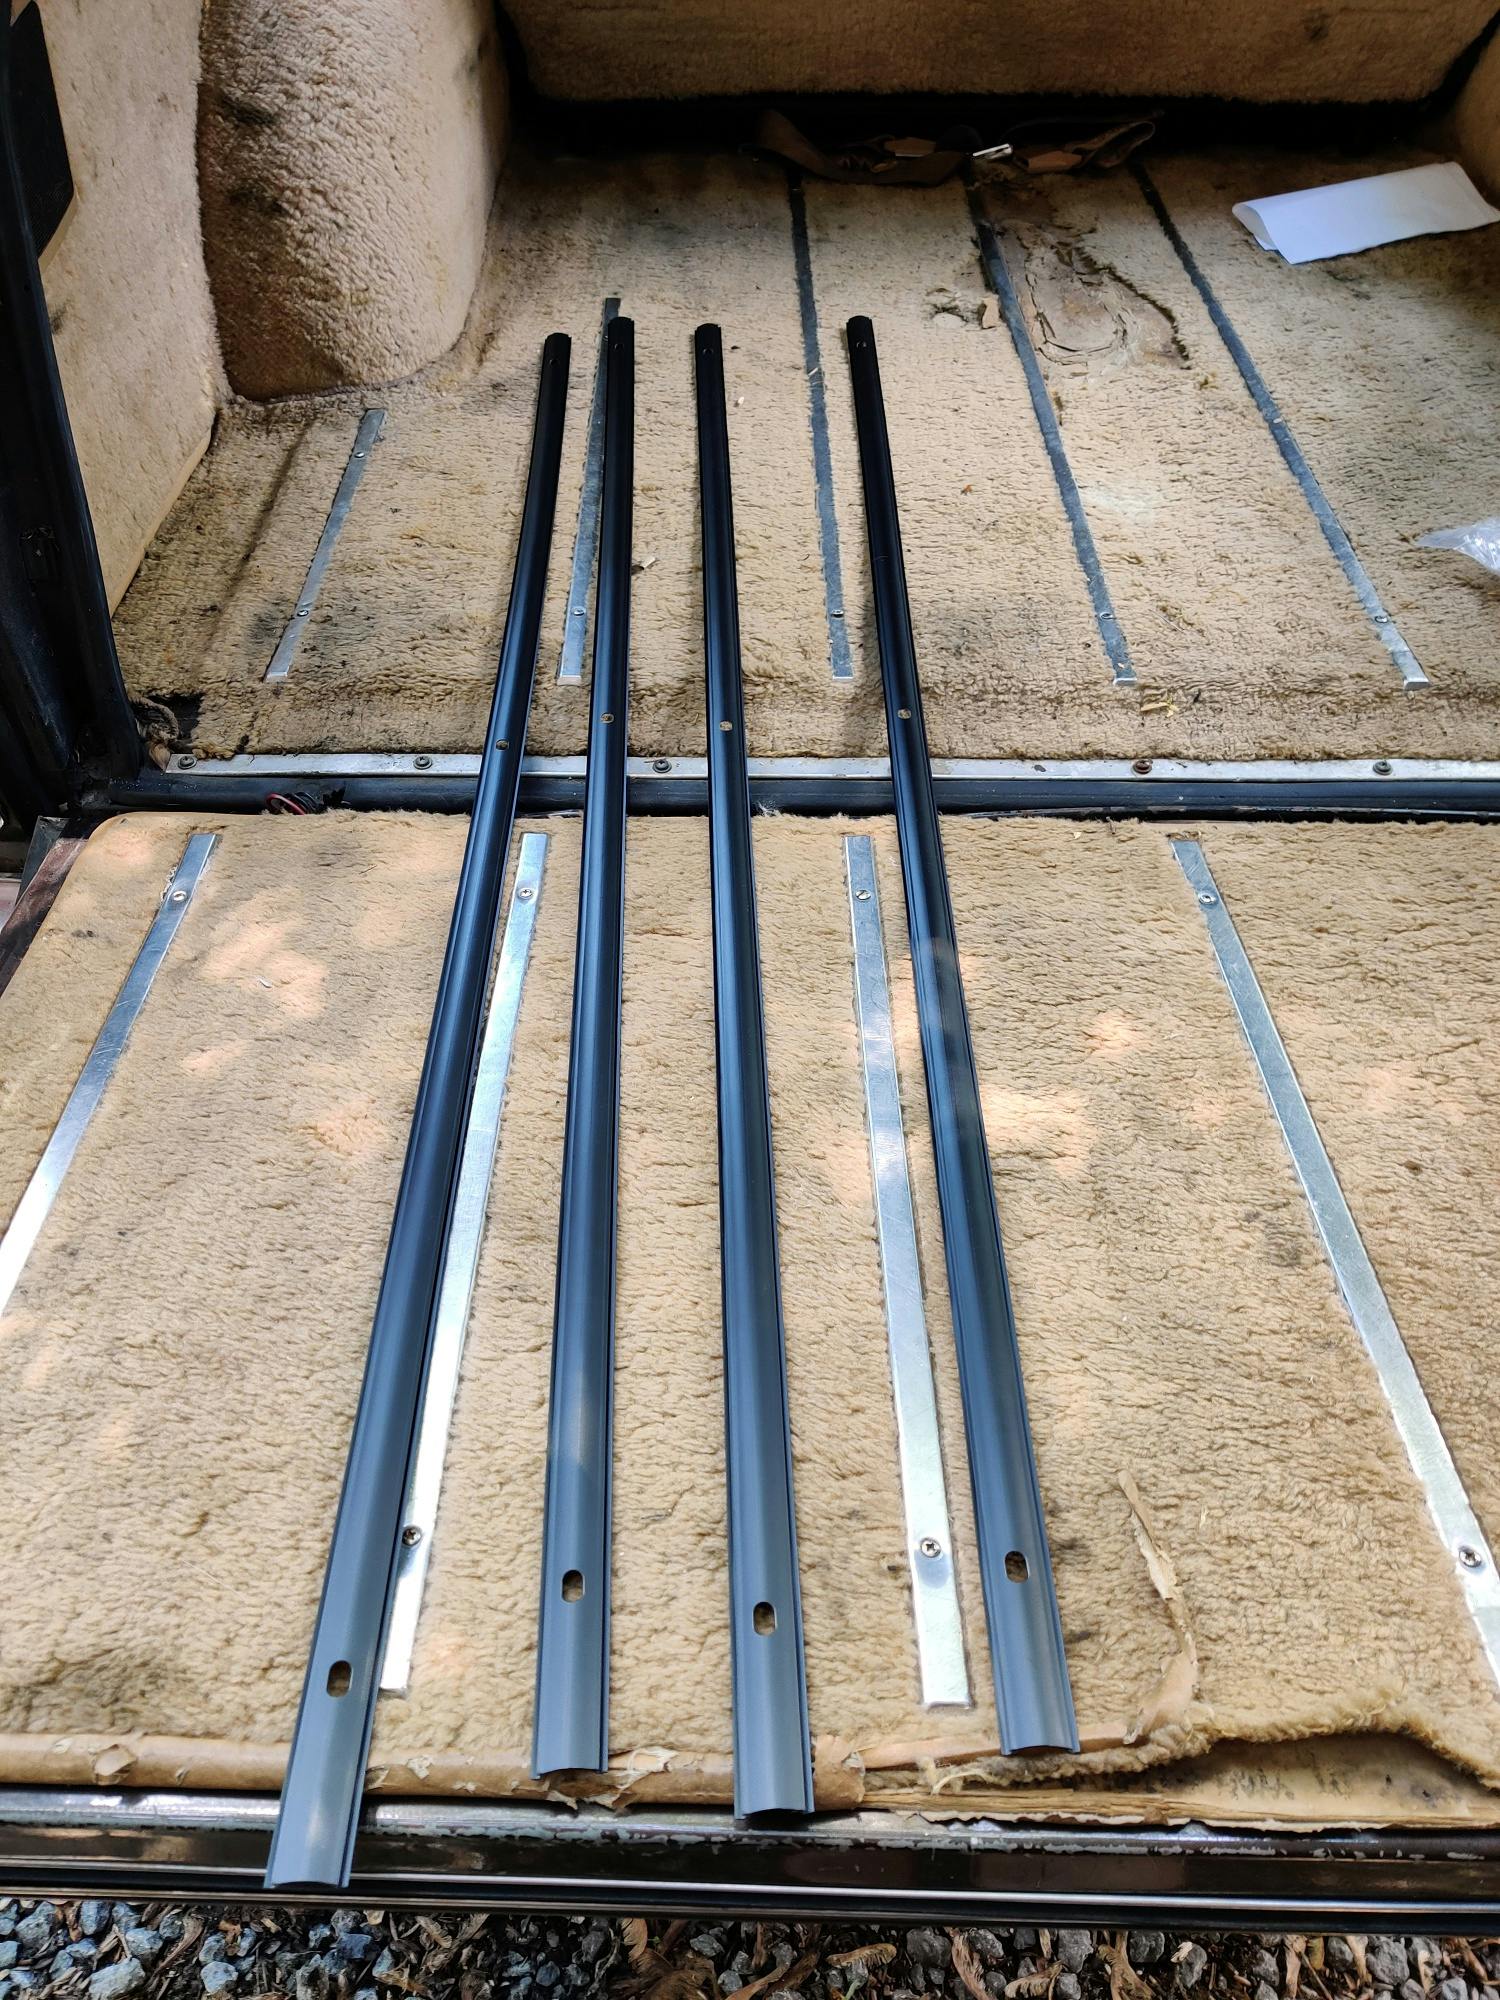
That done, I turned my attention to the roof-rack supports. Despite the model’s reputation as a do-anything utility vehicle, the roof rack will give any Grand Wagoneer owner a bad time. Each of its six “anchor points” are secured using a simple screw that passes through a rubber grommet into a single layer of metal. Stories abound of owners chasing the remnants of their rack into ditches after winds generated at highway speeds caught the roof-stowed luggage and ripped the fasteners straight out of the truck.
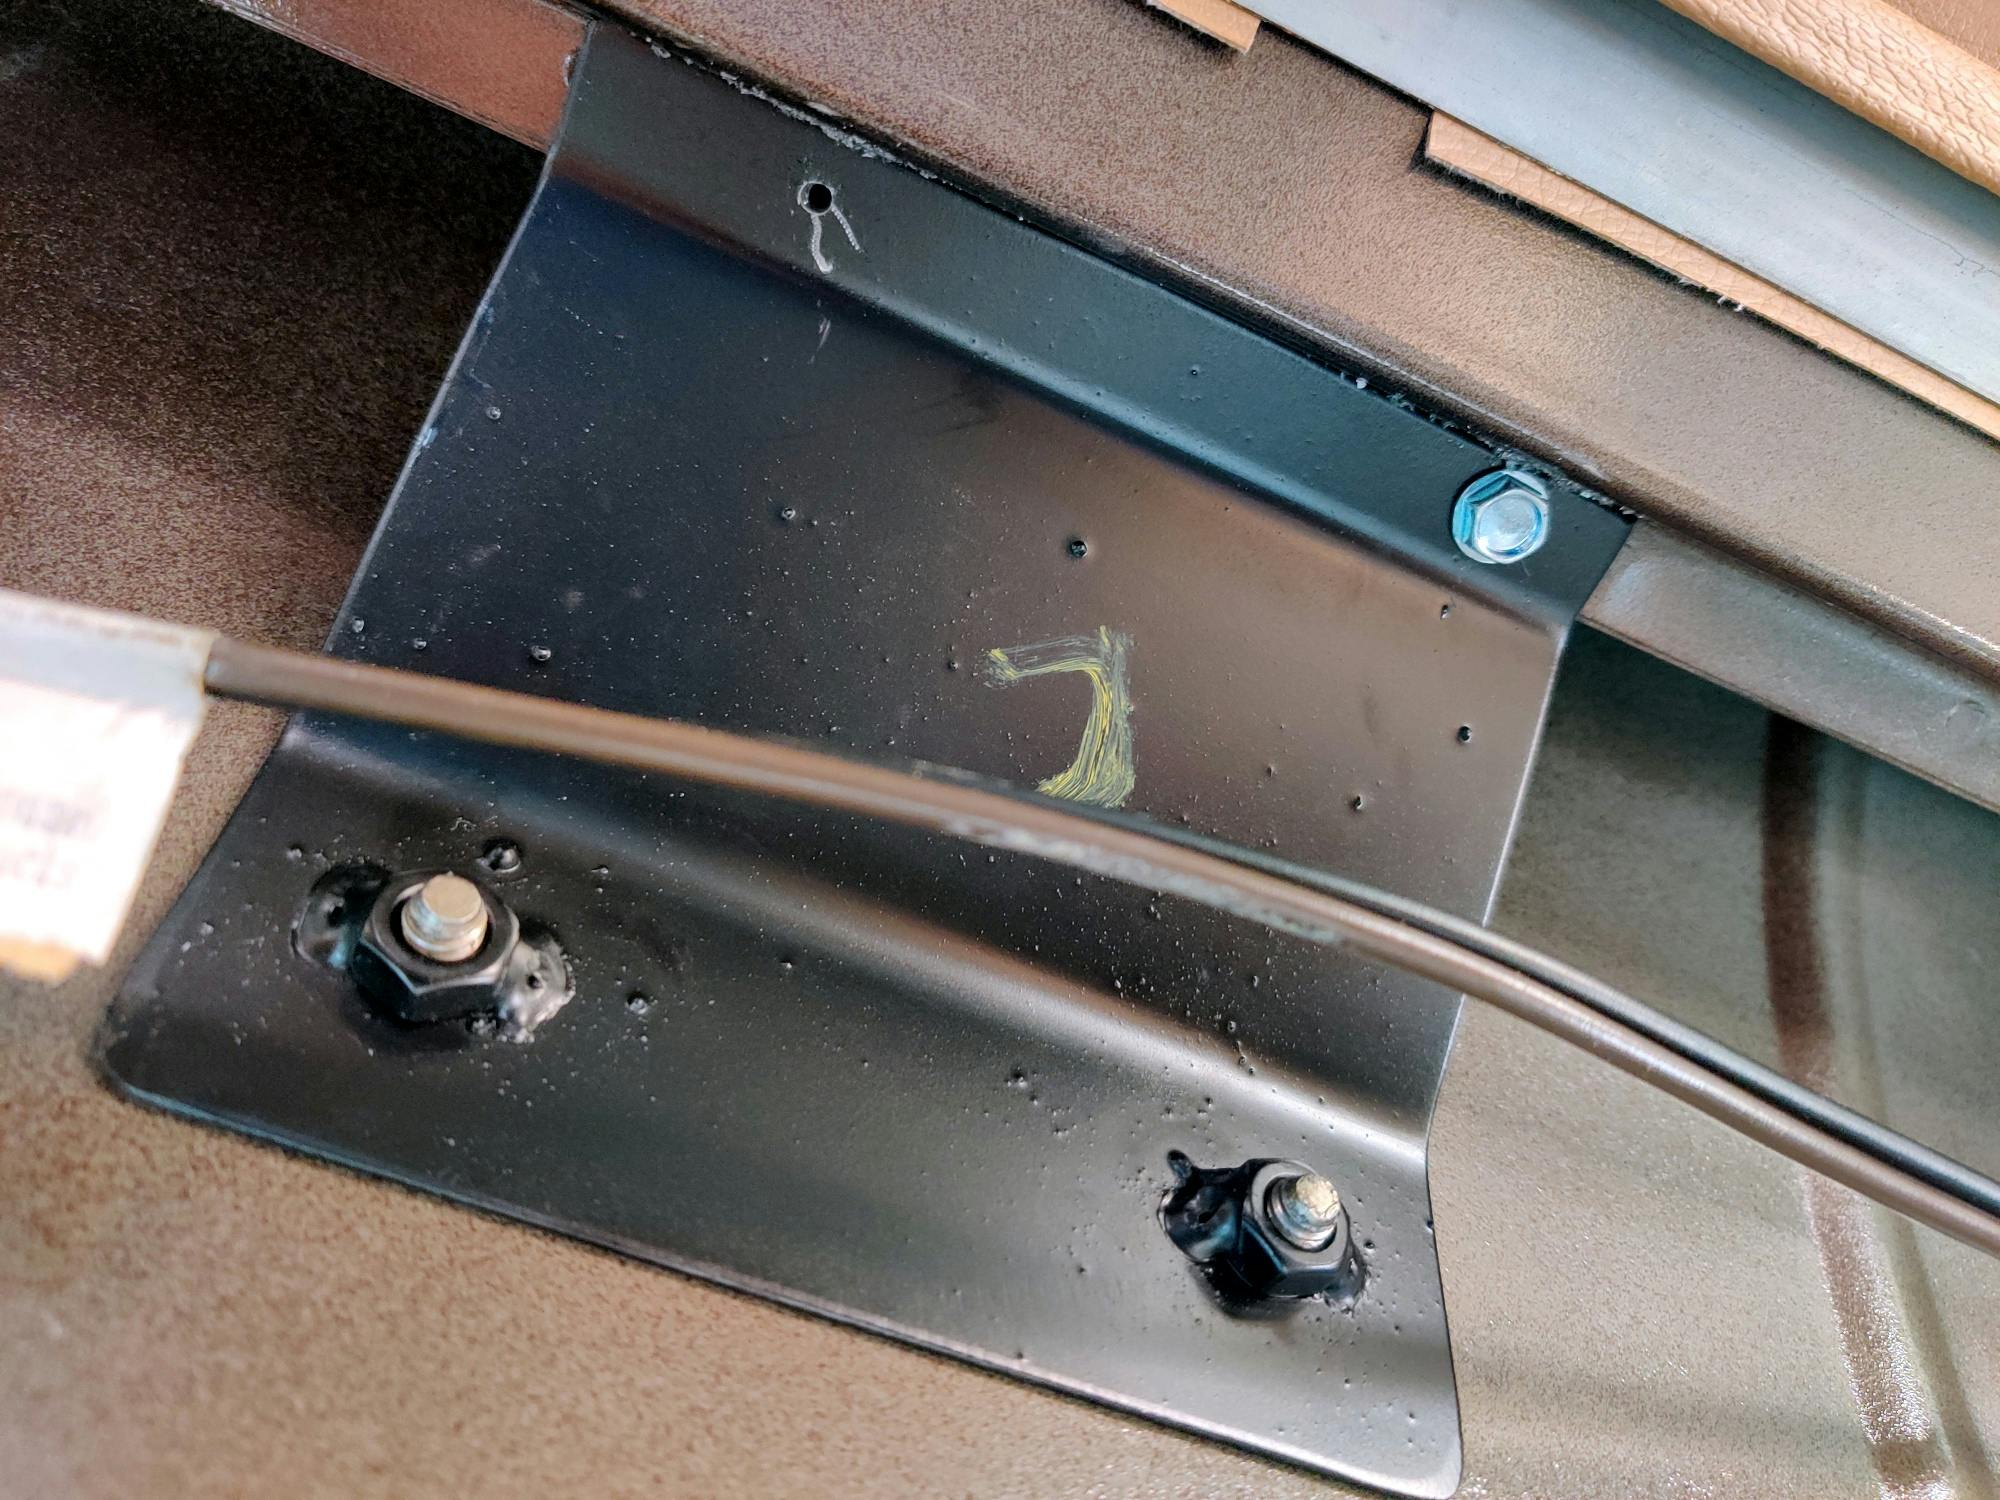
Fortunately, there is a solution. BJ’s Off-Road markets a set of “heavy-duty” support brackets that replace the grommets and brace the entire rack against the interior via solid steel mounts. With a dab of silicone on the factory screws (which are retained), the setup is also completely waterproof. Aside from the challenge of holding each bracket in place while simultaneously threading a screw through the roof, installation is relatively straightforward.
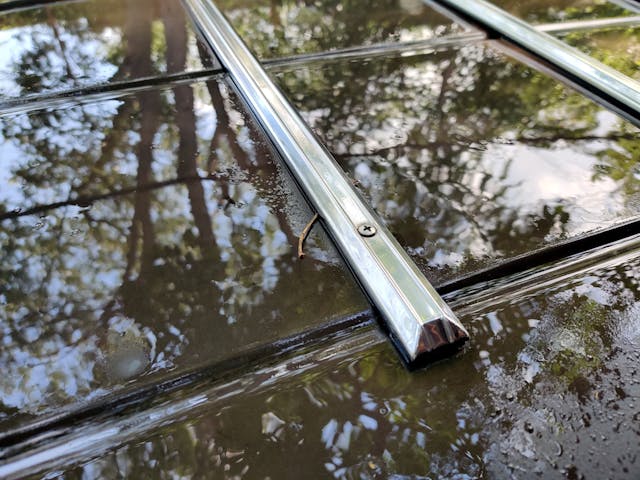
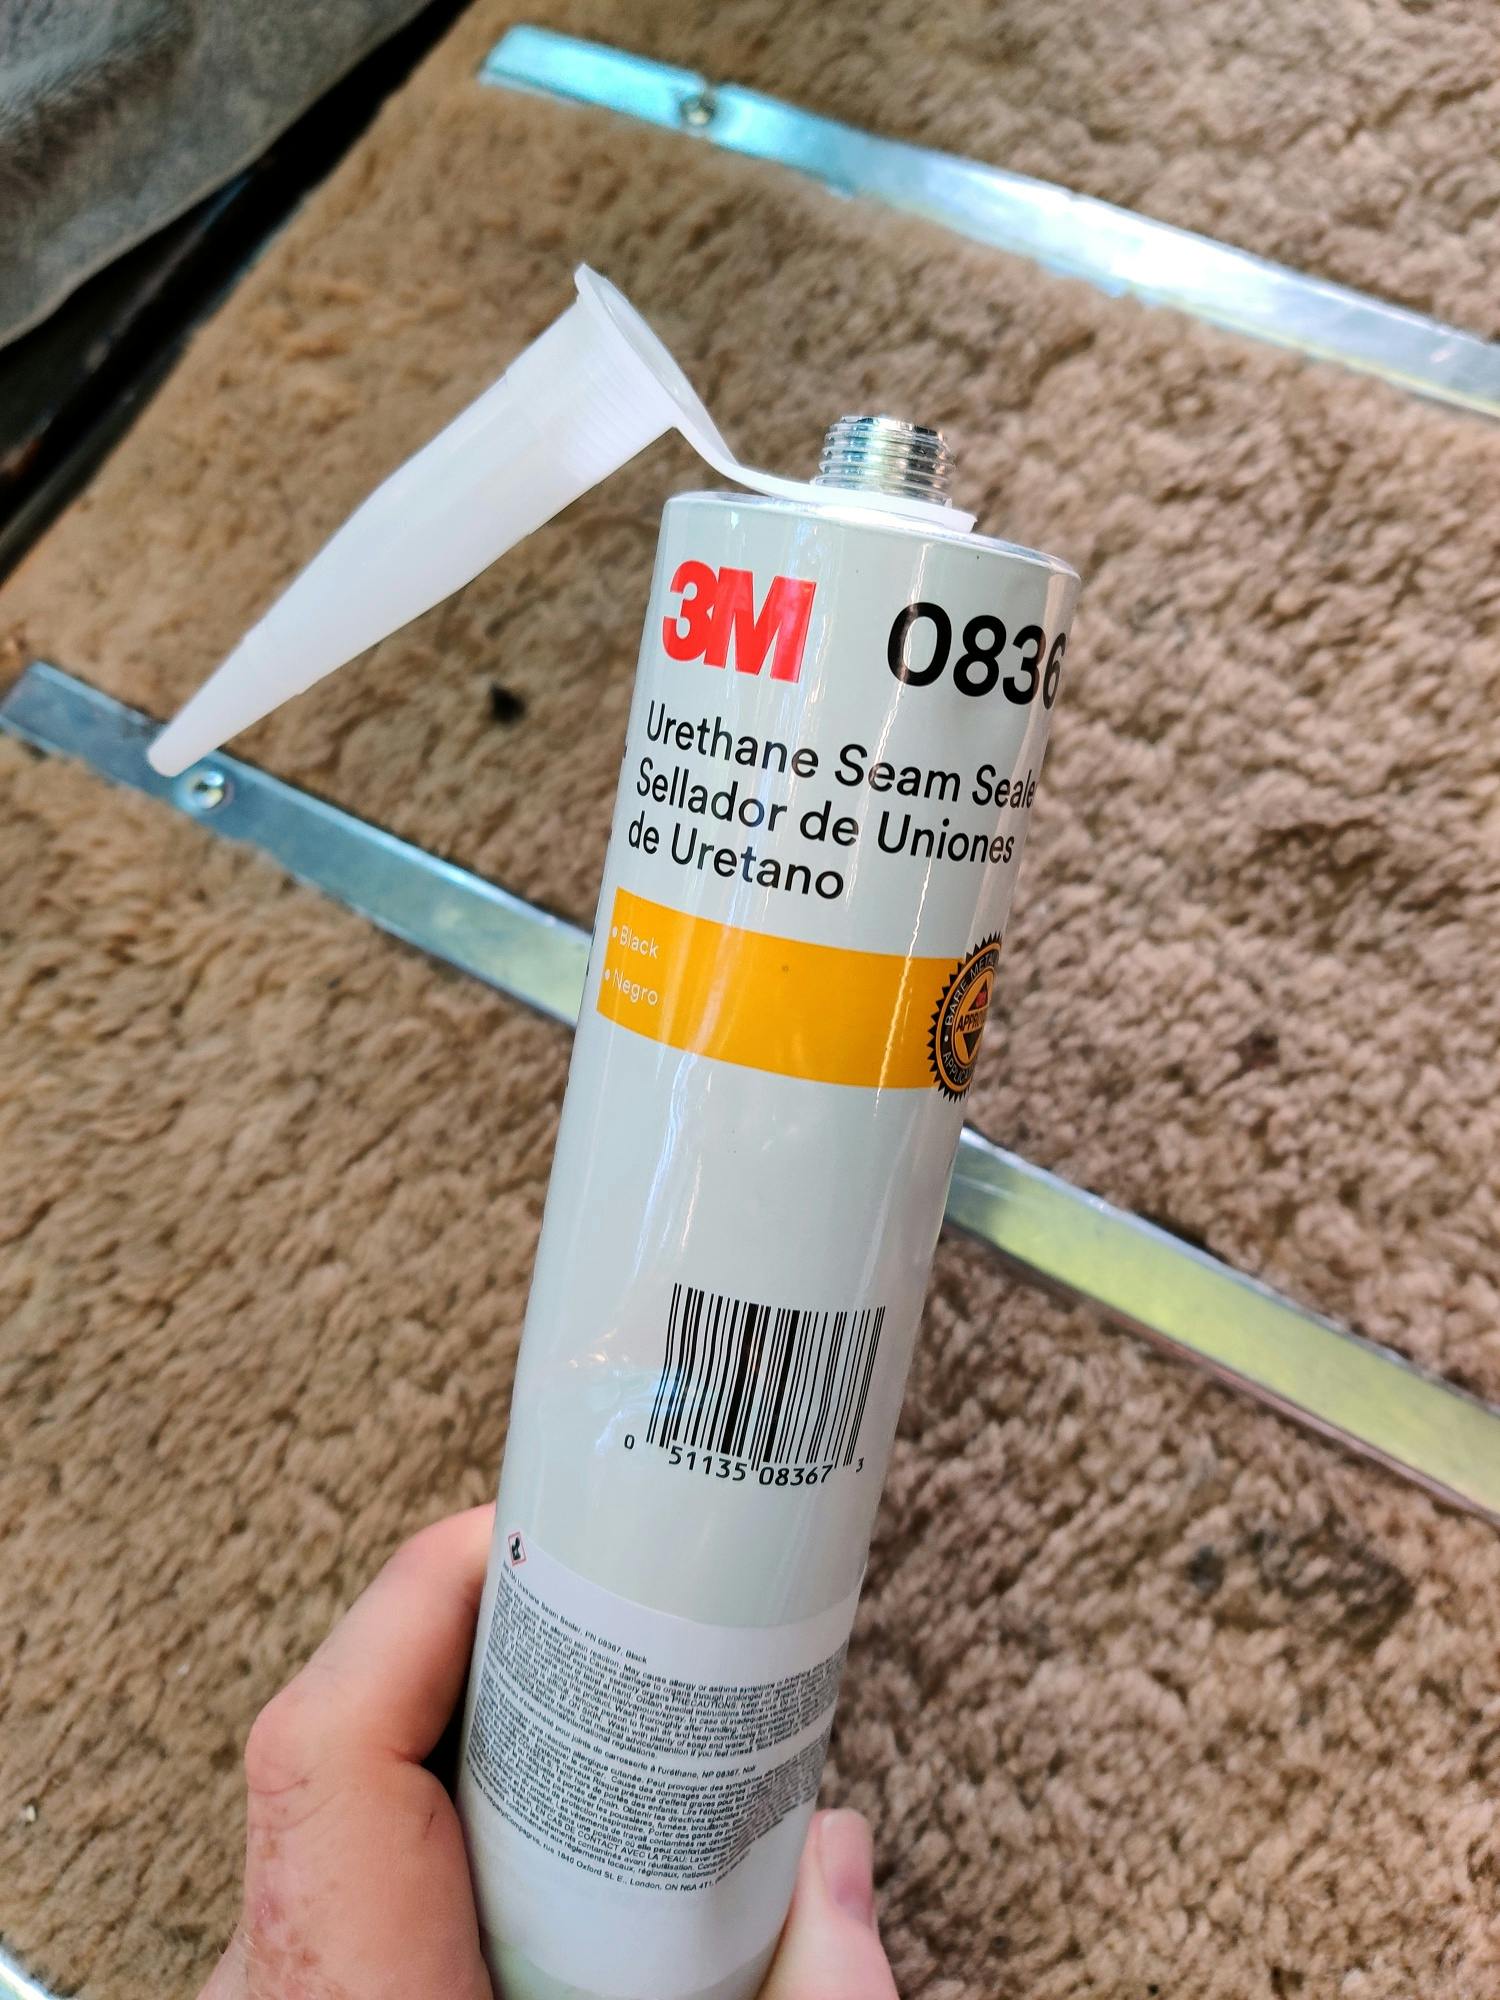
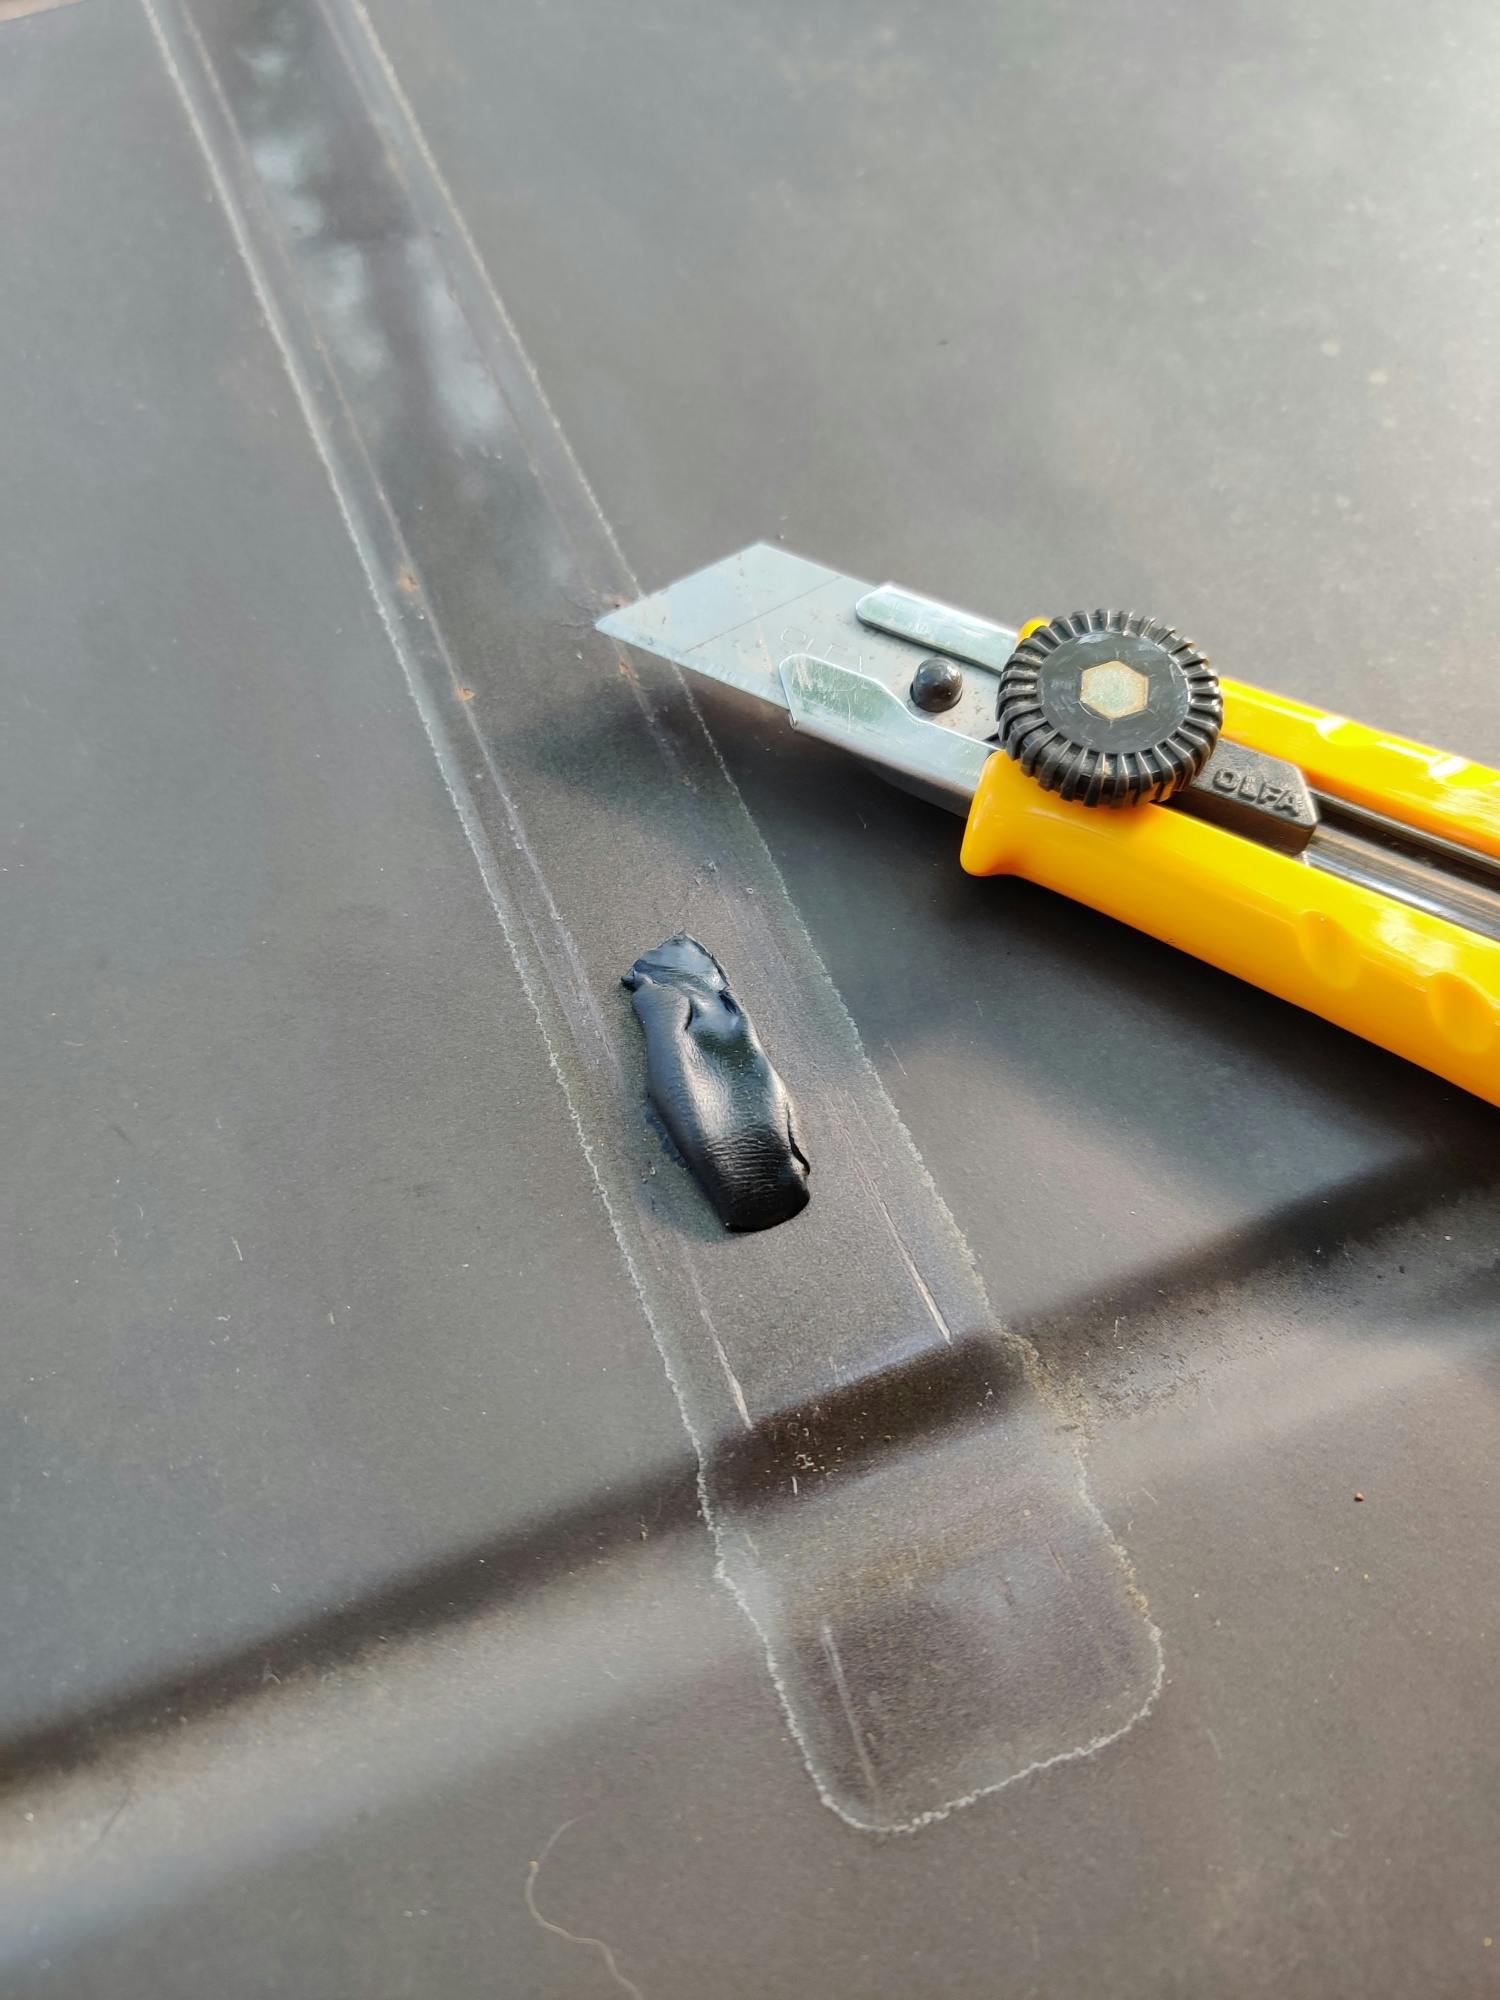
I also ordered a set of replacement gaskets to slide underneath the metal roof slats. I took the time to remove the gunk that had accumulated in slopes and valleys of the dented metal. Facing yet another screws-directly-into-sheetmetal situation, I assumed I could simply repeat the silicone strategy. Only after installation was I counseled that the sealant wouldn’t last long due to the movement of the roof and the temperatures to which it would be exposed. A tedious removal and cleaning process ensued, followed by the internal application of a 3M urethane body sealant and a glob of butyl rubber through which I could run the screw threads on the outside.
Keep quiet
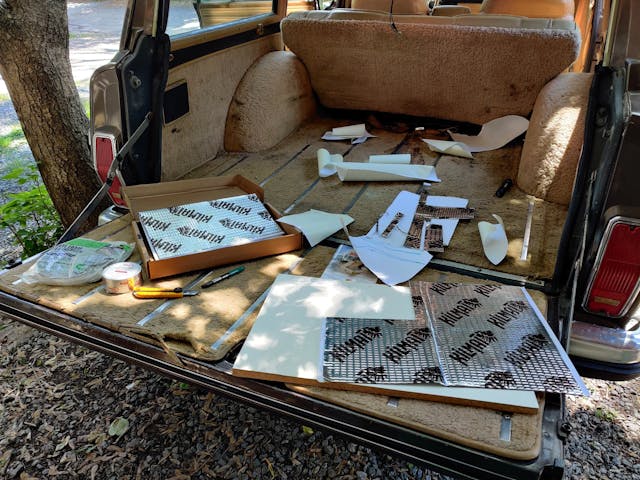
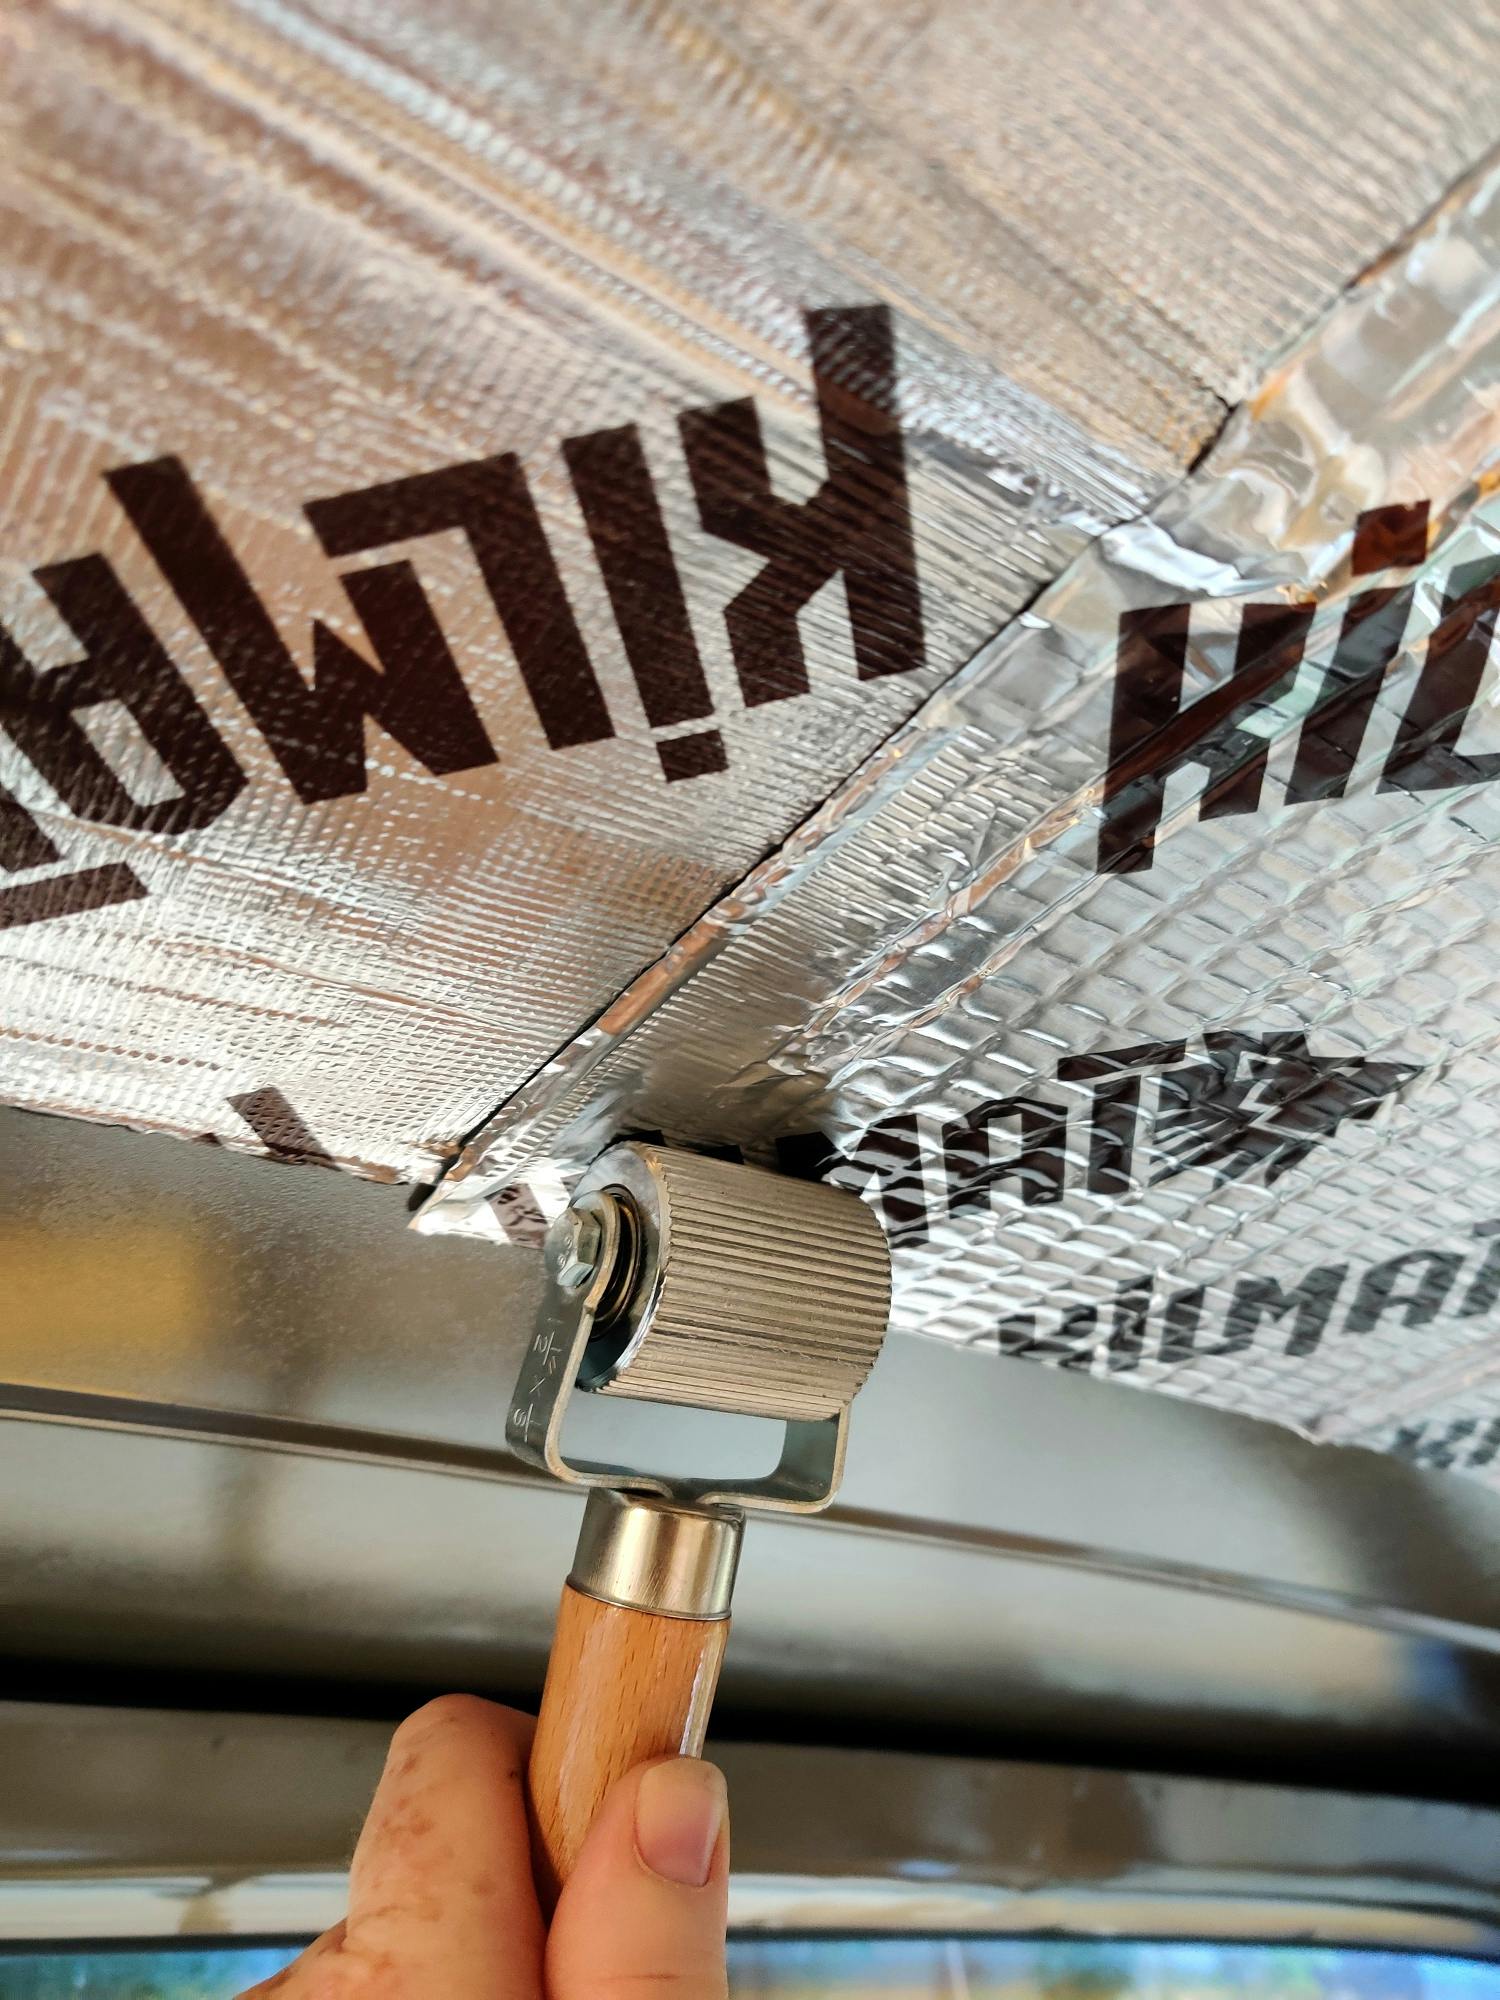
Once waterproofed, the final step prior to popping the headline in was to add sound and heat protection to the bare metal. I went with Kilmat, a butyl-based, self-sticking sound deadener 0.08 inches thick that is backed with heat-reflective foil. Slathering my roof with Kilmat added structural rigidity to the steel panel, thus reducing vibrations and booming at speed, and stopped the roof from contorting under the support slats.
You don’t need to cover more than 35 percent of a given panel with the product to achieve sound deadening, but I also wanted to keep the sun from heating the cabin, so I aimed for near-total coverage. Installation was relatively simple (cut, stick, and then roll as flat as possible with a simple tool), though in retrospect I should have removed the roof supports rather than cut the Kilmat to fit around them.
Road noise was immediately improved, but making the roof more rigid had the unexpected side effect of creating a gap between the rear-most support ribs and the roof itself, which produced a high-pitched creaking when cruising with the windows down. I consoled myself that, with the headliner in place, there’d be less wind to vibrate the panel.
Too-flat blues
Of course, that gambit relied on my ability to get the headliner installed.
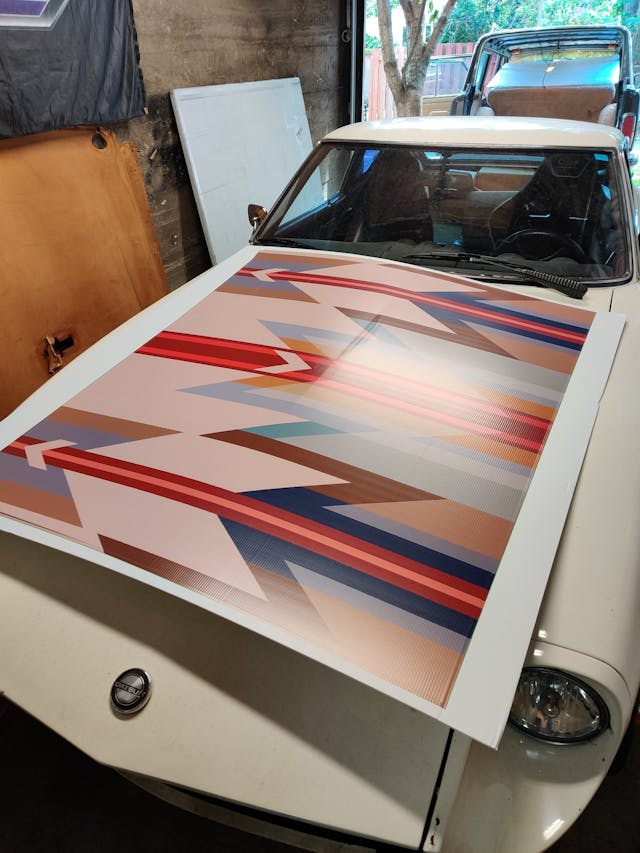
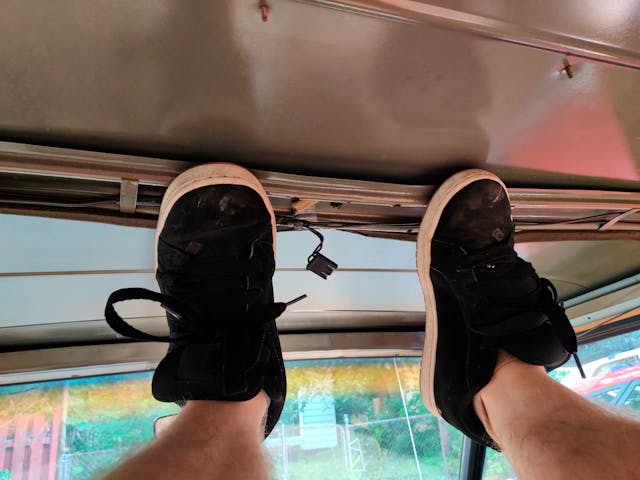
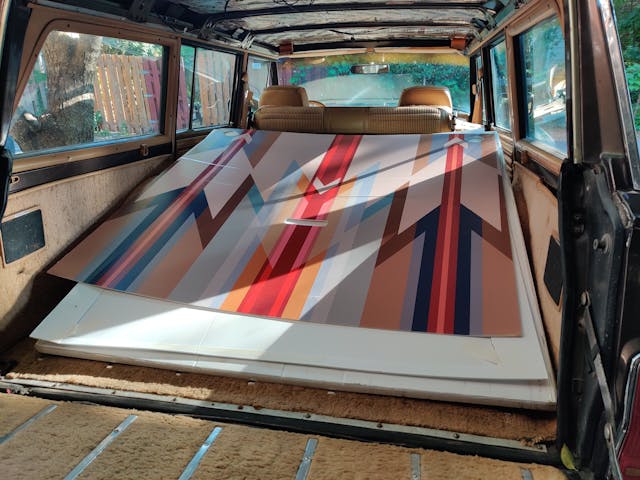
It was here that my DIY plans started to disintegrate. The first set of printed plastic panels had been damaged in shipping—thanks for the footprints all over the box, whoever you are—which meant testing fitment with a creased, dented headliner. The instructions provided by the fabricator suggested sliding the front half along the channels on either side of the cabin, then securing it using the trim piece above the windshield. It hung loosely, waiting to clamp the flat plastic.
Almost immediately, there was trouble. Try as I might, I couldn’t get the headliner to slide the final inch or so at the front of the Jeep. Even after I recruited a second set of hands, any attempts at forward motion produced creases and bends in the panel. I contacted the seller—who was, to their credit, available to answer questions throughout the entire process—and he suggested thinning the rear edges of the headliner. Perhaps they were getting caught in the roof channels.
At this point, I realized I was in over my … head. Wary of damaging the pristine replacement that had by now been shipped to me, I asked around for an interior specialist familiar with classics. I settled on Duluth Auto Glass, which was conveniently located only a few blocks from my home in Montreal. Having seen the shop’s work, and impressed by the openness towards the project from owner Jack and his colleague Carl, I dropped off Grand Wagoneer and headliner on a Monday morning. I expected it to be ready to go in a day or two.
Little did I know that the experts at Duluth were about to encounter many of the same problems that had flummoxed me, plus a crop of new pain points intrinsic to the design of the plastic headliner.
The slide method for the front half of the headliner was completely unworkable, because roof channels caught on the edge of the headliner. After two full days of work, Jack and Carl devised a method that required popping the plastic into one channel and, in one single motion, angling it precisely to catch the other.
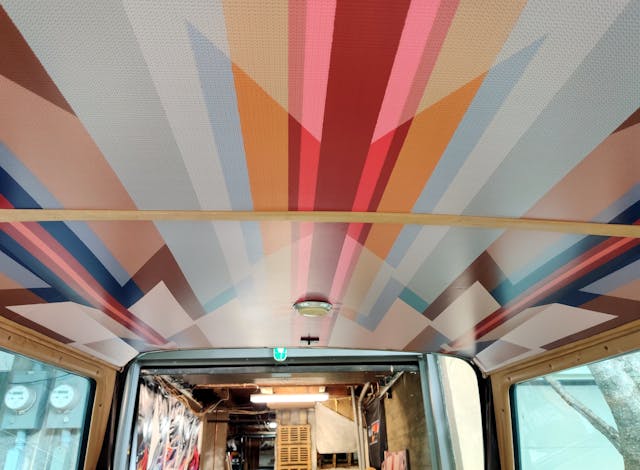
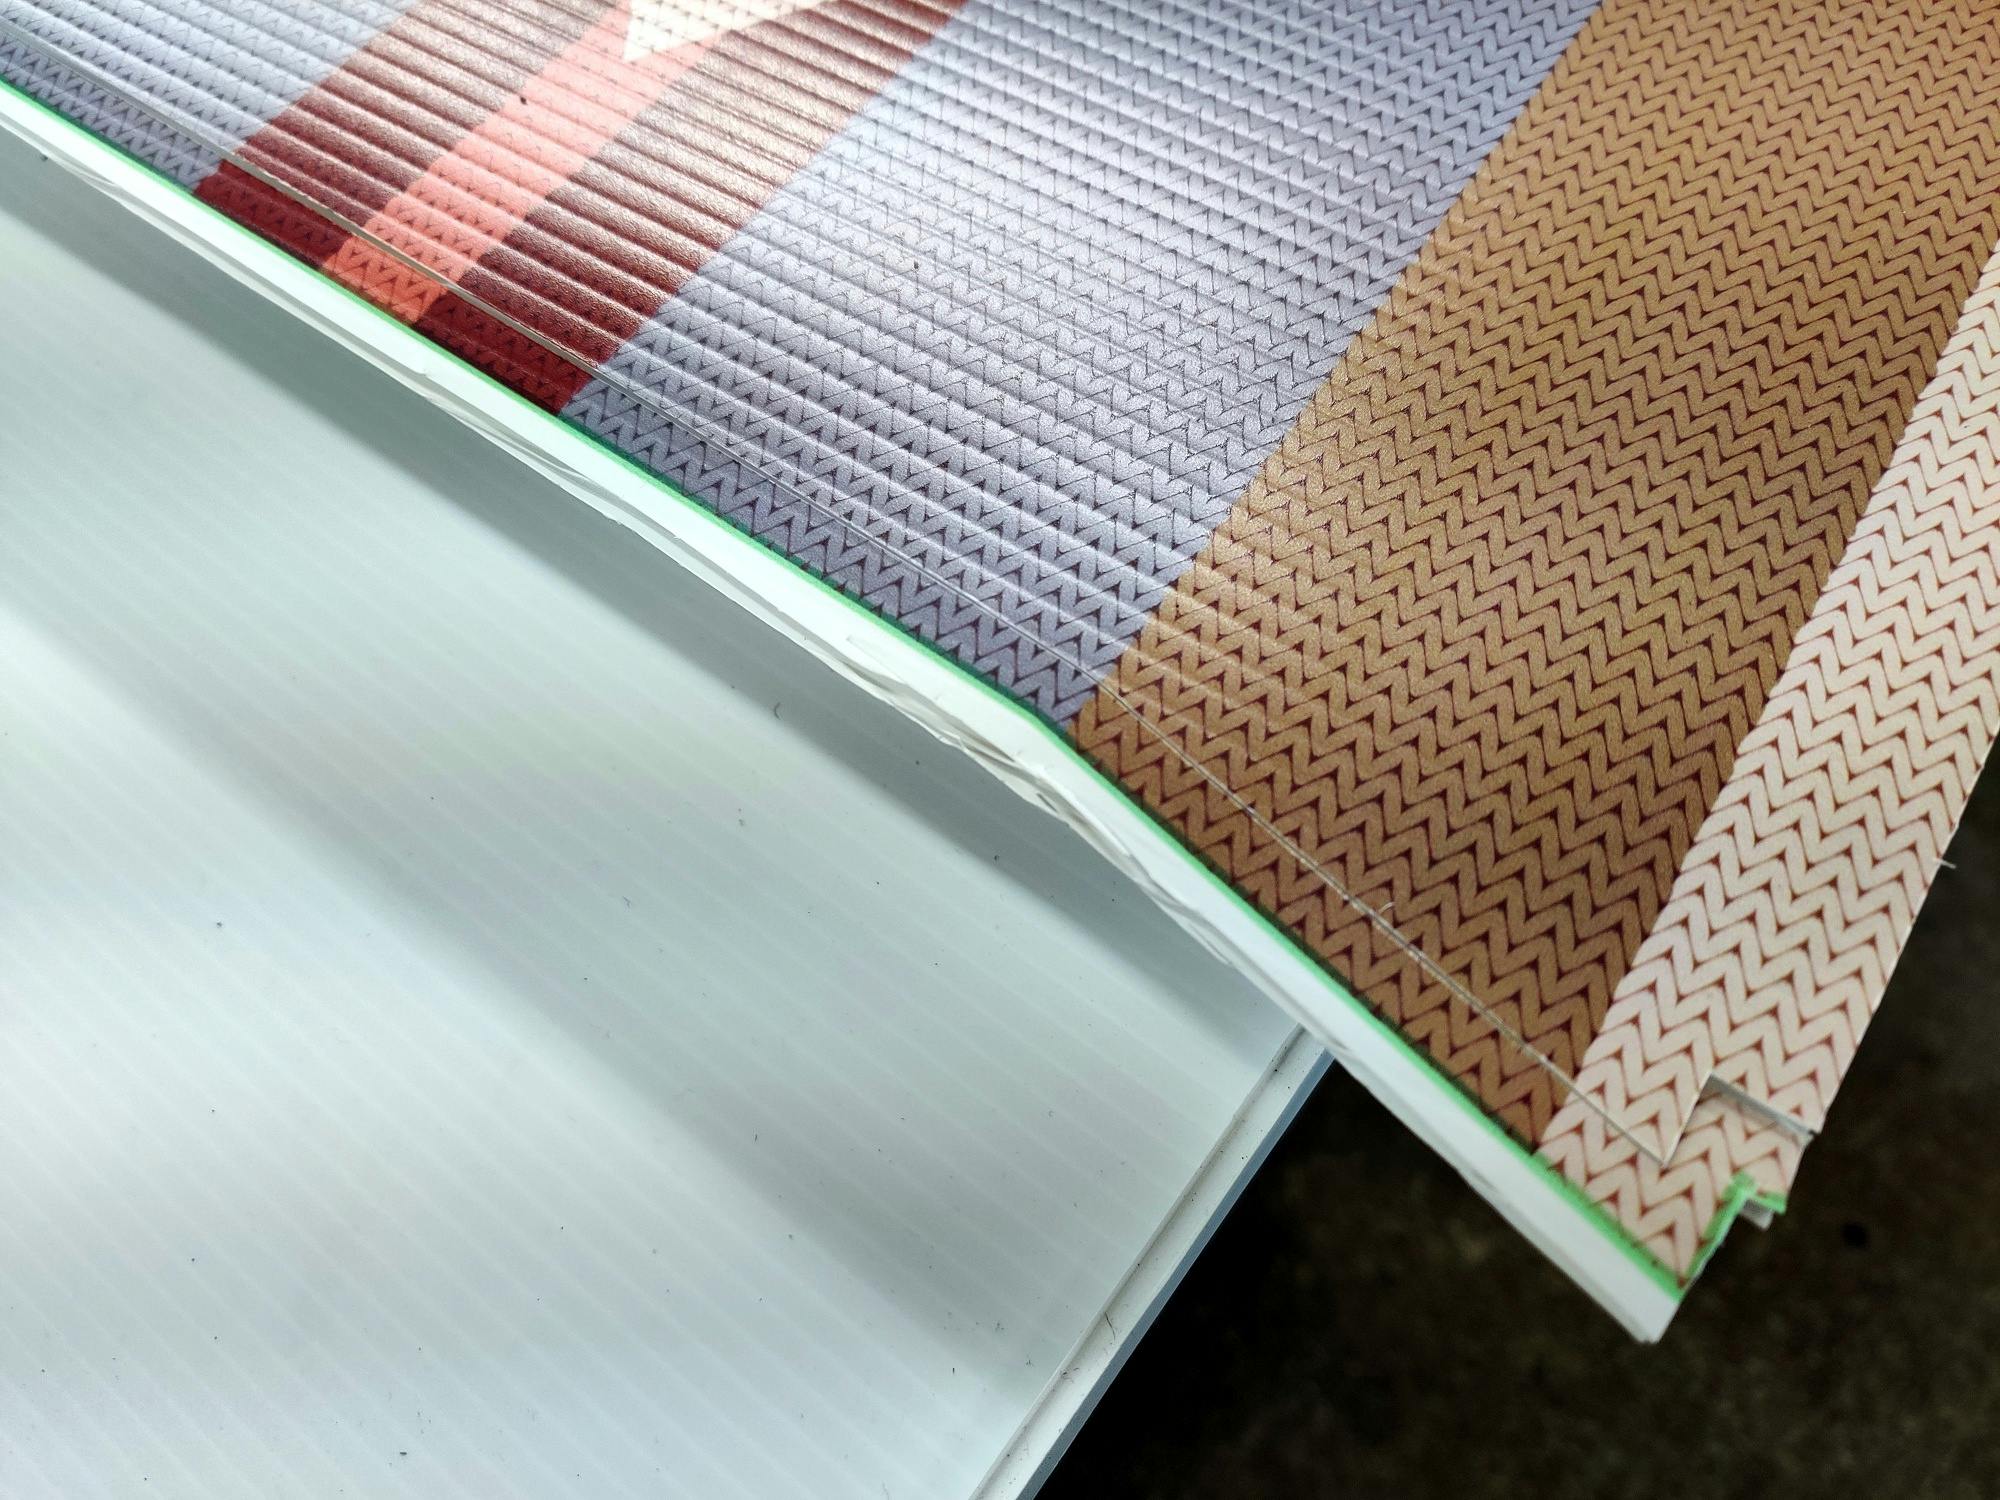
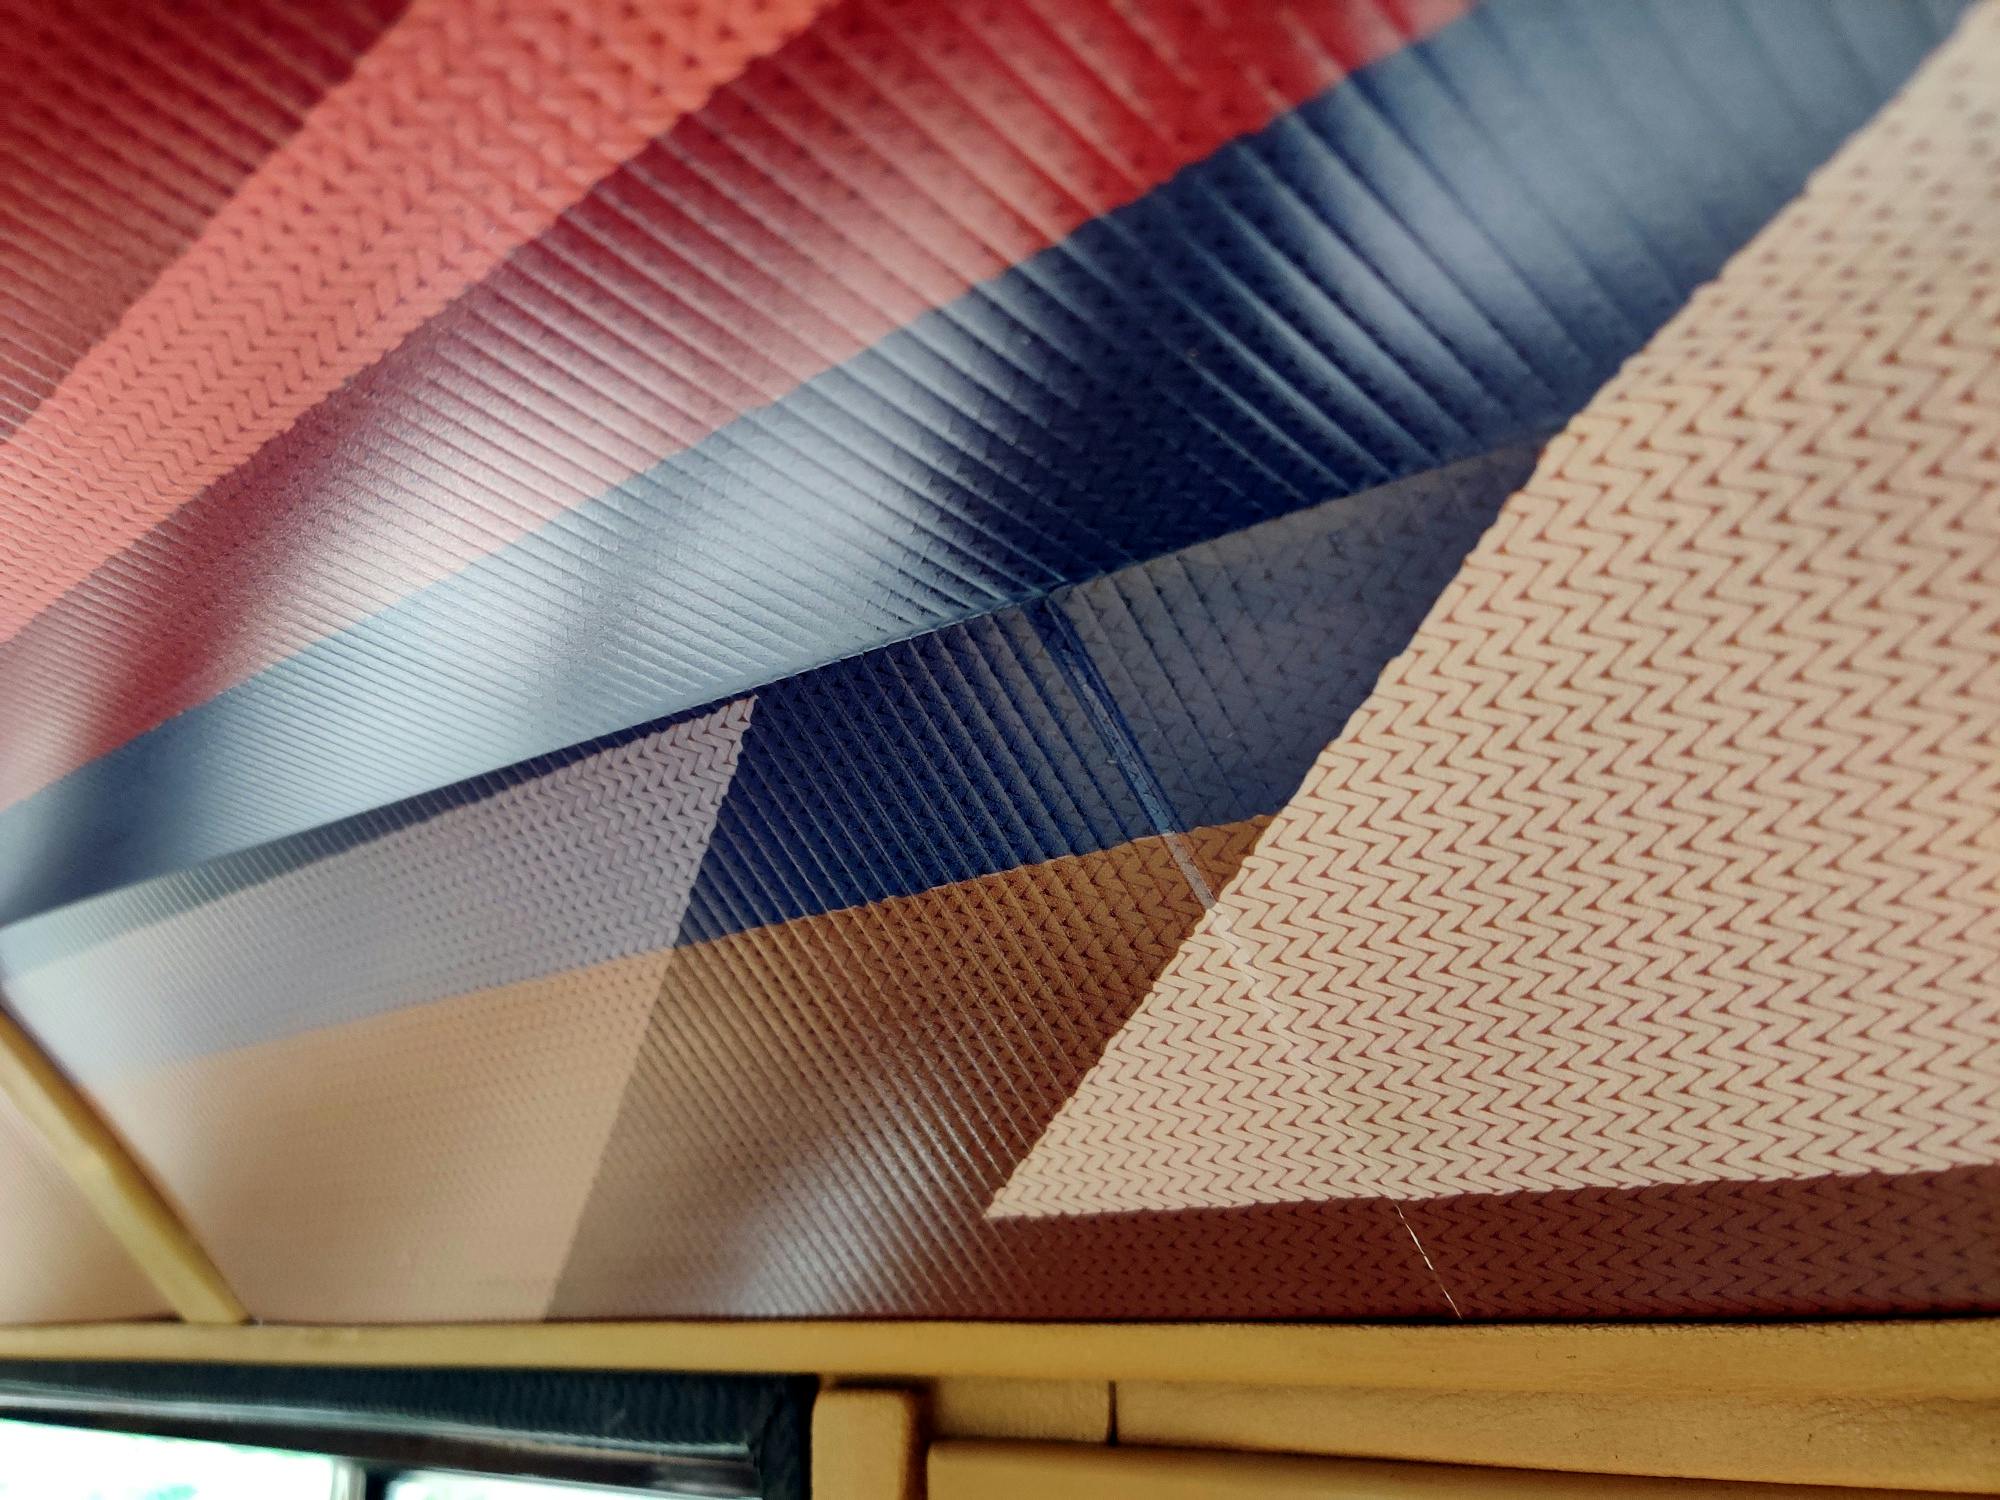
Why the intricate ballet of panel and manpower? The replacement headliner was exactly as wide as the roof, channel to channel. Even worse, the corrugated plastic was completely flat, unlike the molded headliner I had removed. While it did have diagonal creases intended to match the natural bend lines of the roof, the plastic relentlessly tried to return to its original flat state, pulling the edges out of their mounting spots on either side.
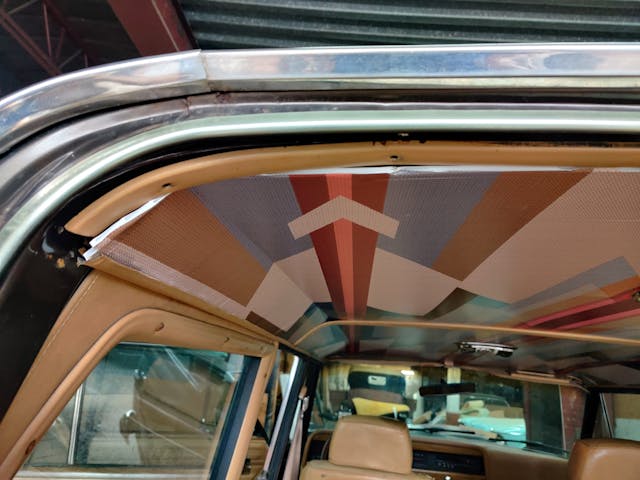
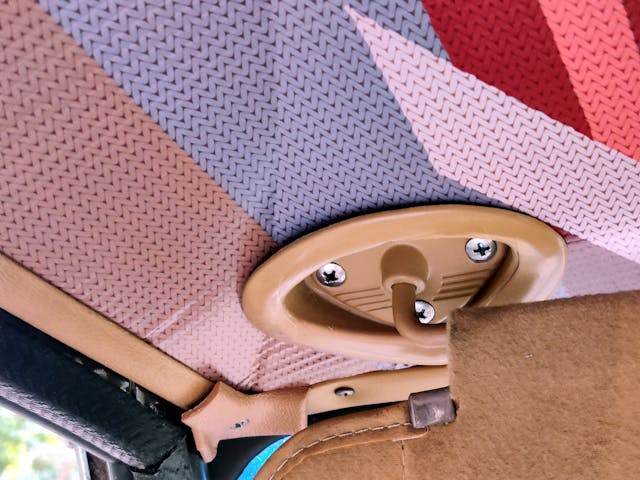
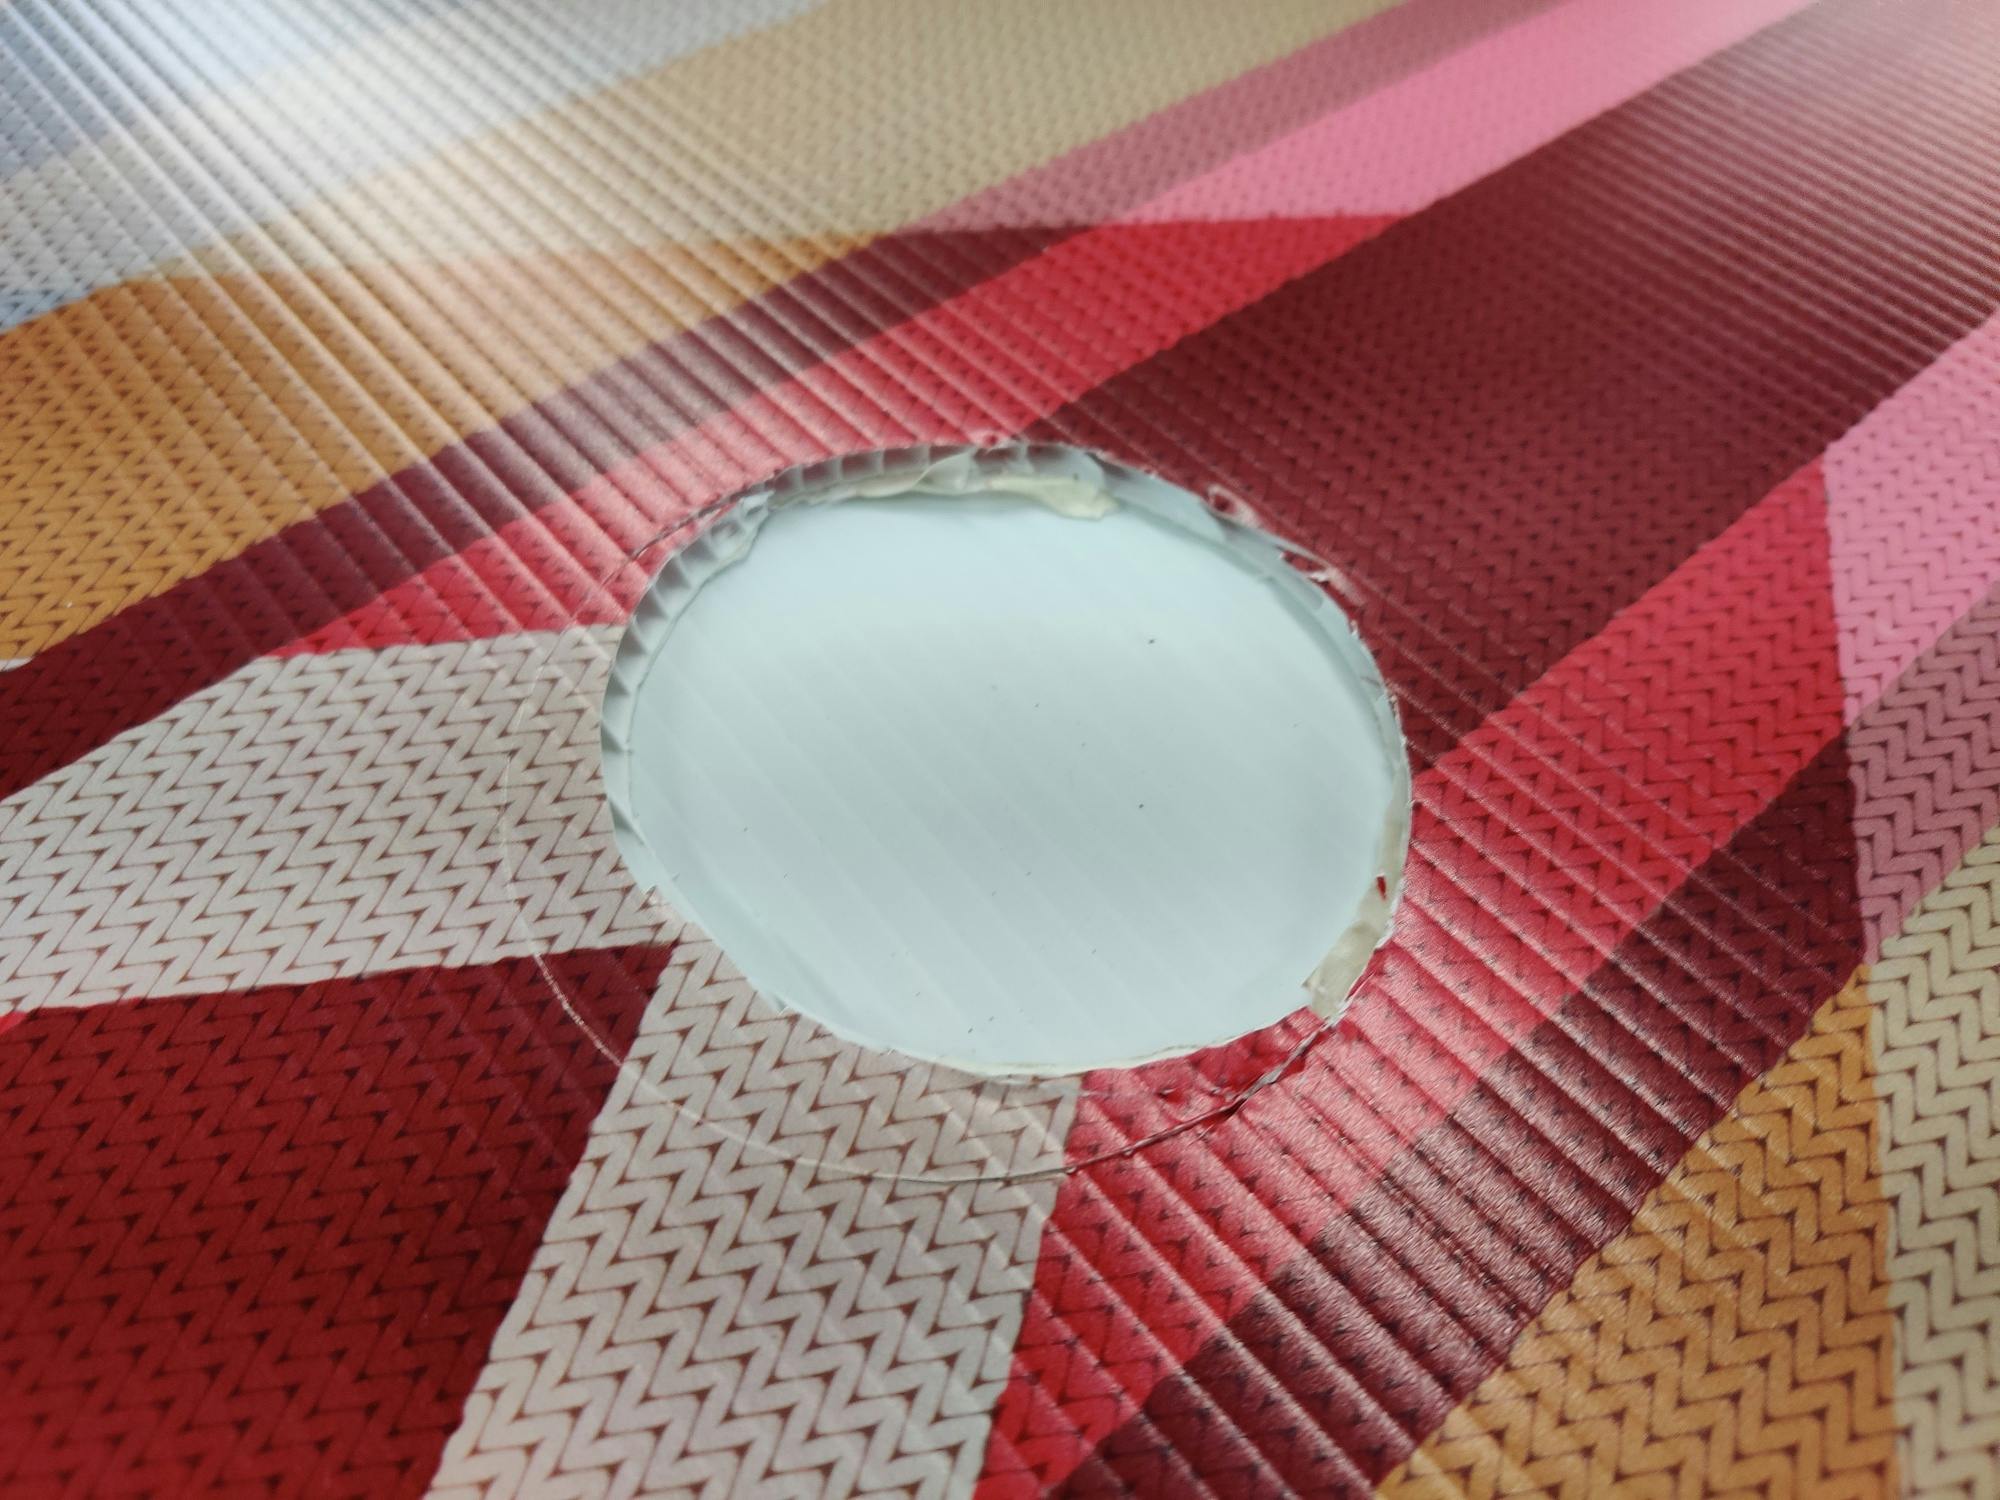
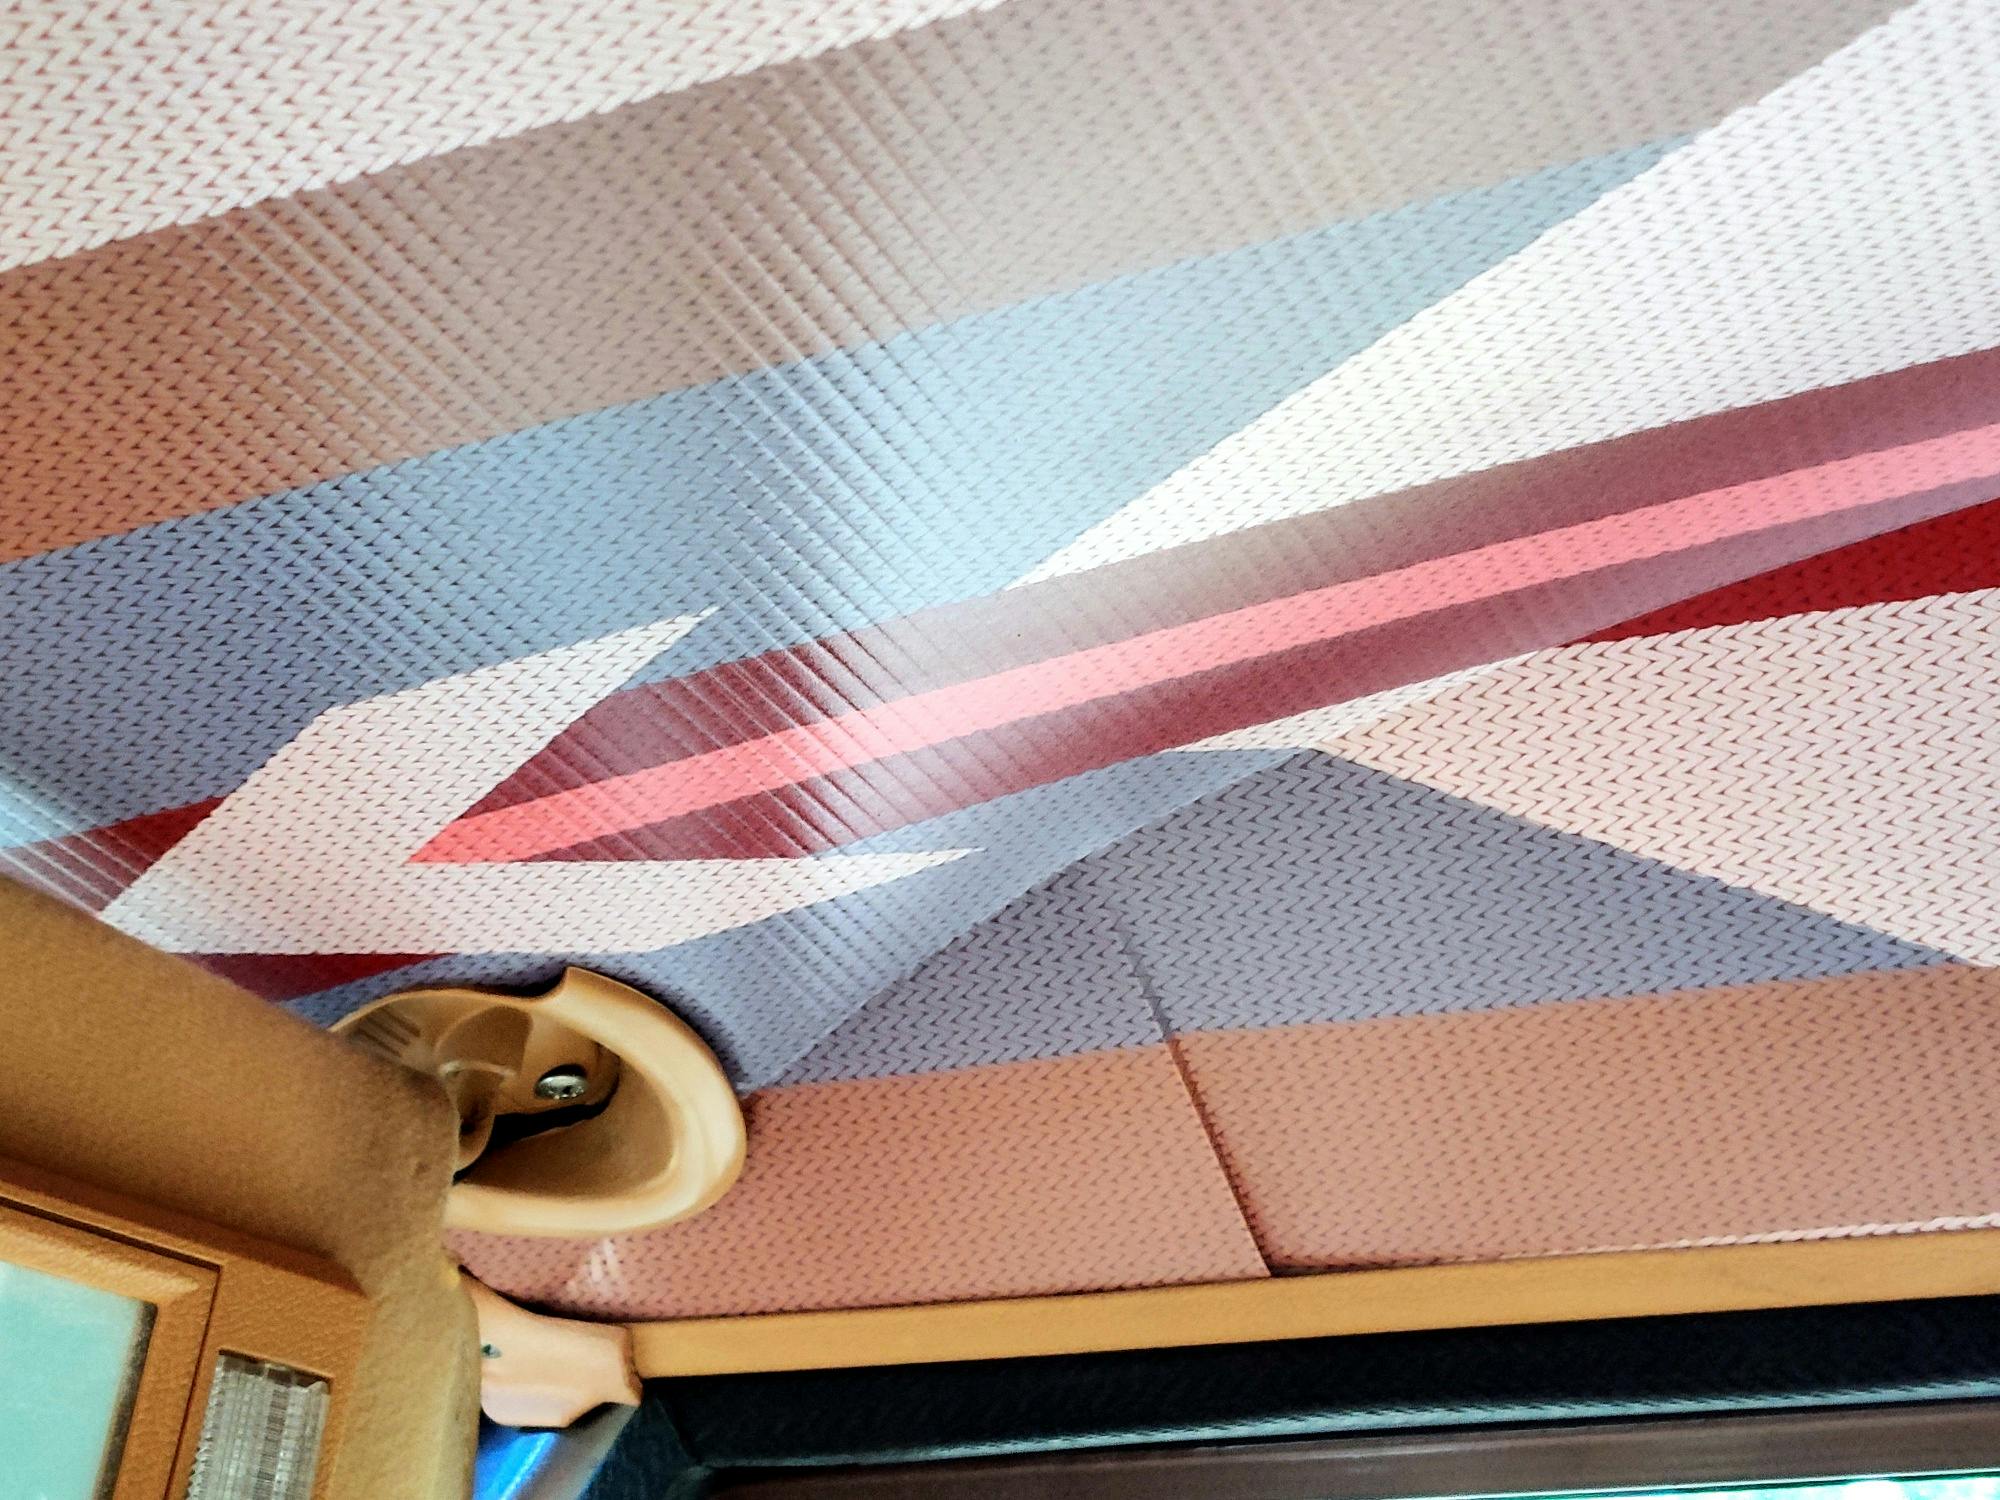
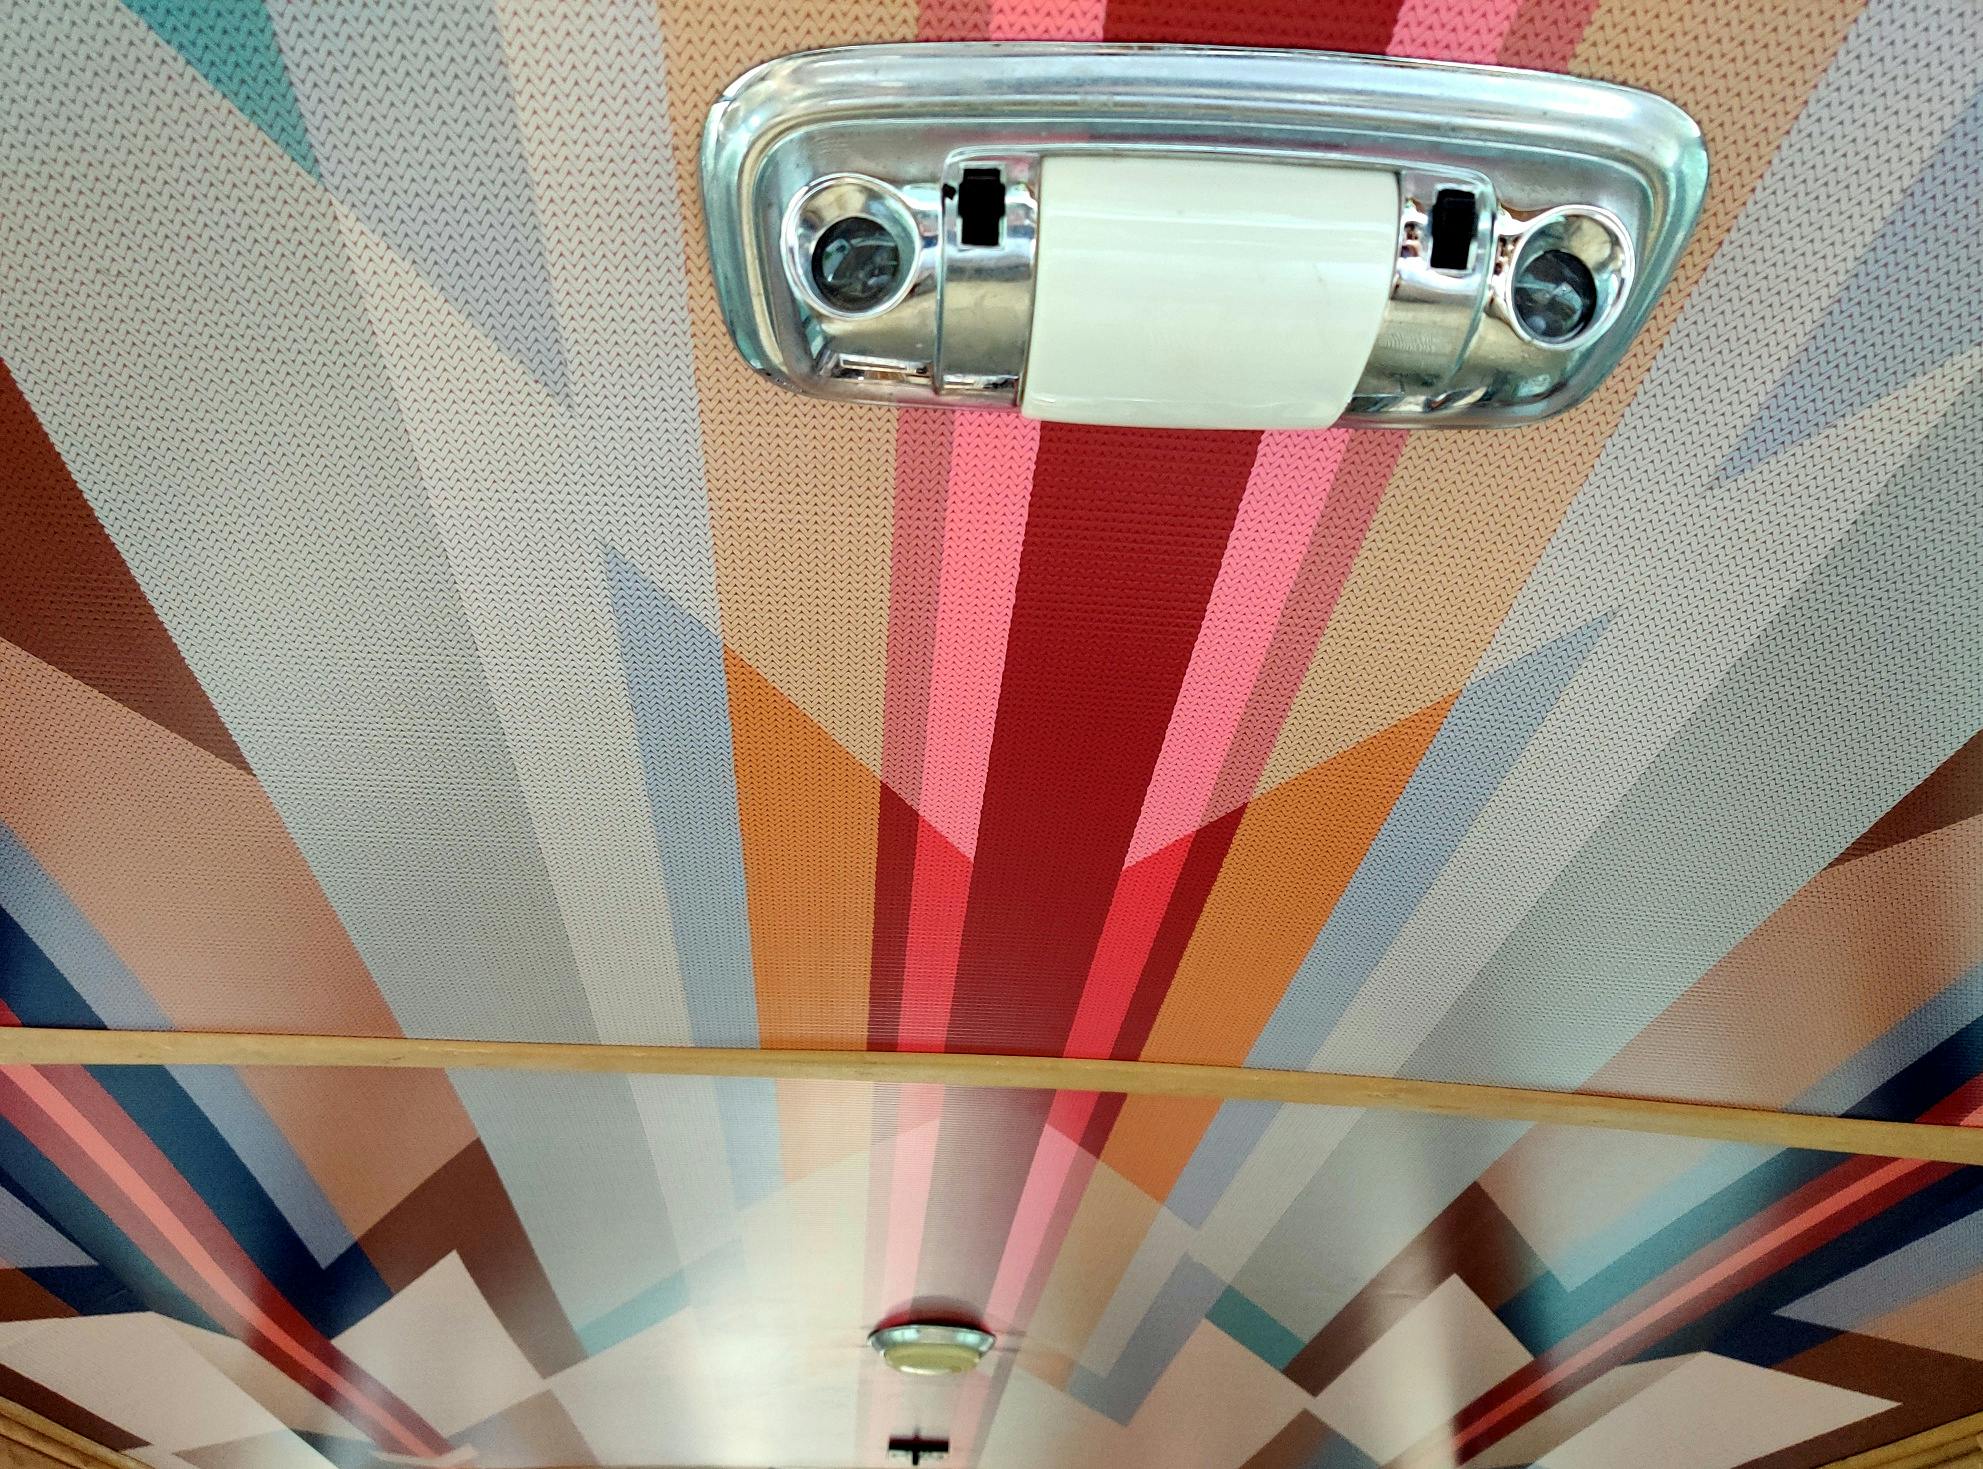
This issue was even more pronounced in the rear, where the shop had to install foam behind the headliner to keep enough downward force on the larger, back panel to prevent pop-out. This solution created a pair of tiny humps in the finished ceiling, but these were far from the worst issue. The panel was itself half an inch too short, with a misaligned cut-out for the dome light. With the light in place—even using a single screw to rotate and extend it as far from its crossmember mount as possible—there was still an air gap between the edge of the headliner and the rear trim.
Luckily, the shop discovered this using the damaged, test-fitment panel. The virgin headliner section had yet to be removed from its plastic border, so Jack and Carl recut at the edge of the printed bleed lines, reinforced the edges and the original cut crease, and built a bracket to attach to the crossmember and align the dome light with the headliner cutout. They added felt inserts between each crossmember and the roof, fully solving my earlier vibration-at-speed issue.
A day’s work stretched into a full week of trial-and-error fitment and fabrication. Even after all the extra effort, it was discovered that the back half of the Jeep’s mount channels weren’t level, which meant that my roof’s Aztec lines were subtly misaligned front to rear. Due to the flat, unmolded design of the headliner, some creases were unavoidable, and the shiny natural of the corrugated plastic’s surface made them easy to spot for anyone with a critical eye.
When it comes to Jeep, one size fits none
I took several lessons away from this excursion into experimental cabin design. For vehicles like the Jeep Grand Wagoneer (which by the mid-’80s was famously assembled by a manufacturer staggering towards bankruptcy, using quarter century-old tooling), the idea of a “universal fit” is probably wishful thinking, especially for components as tolerance-sensitive as interior panels. I have no doubt that the headliner I was shipped probably fit someone else’s full-size Jeep—just not mine, given the quirks of the production line.
The creases, bumps, and occasional dents associated with installation would also have been far more acceptable were they covered in foam and fabric, soft materials that obscure folds and bunching. It makes me question whether a plastic, regardless of how cool its printed pattern, is the best material to covering the large expanse of an automobile’s roof.
The flatness of the corrugated plastic proved to be its biggest liability. If the panel had been molded into the shape of the Grand Wagoneer’s interior from the outset, almost all of the issues we ran into during installation could have been avoided. It’s definitely worth paying the extra $100 to $200 for a molded insert.
I don’t necessarily regret taking a chance on a new, community-sourced component for my Jeep. Yes, the entire installation process was a hassle. However, the new headliner is light years ahead of the worn-out stock setup. Duluth Auto Glass did excellent work even after I showed up at its shop with a product that clearly wasn’t ready for prime time. If I should tire of the panel’s imperfections, I can still use it as a backing board for a traditional fabric installation.
The reality is, even from the factory, many parts of this Jeep were poorly designed or cobbled together using whatever AMC could afford to ship down the line before the accountants caught up with them. Each and every owner of a old-school Jeep has to deal with their own particular variation on the mediocre quality-control of the era. While they may not hit the mark every time, I’m always encouraged to see members of the classic car community step up and take a shot at making life easier for their fellow owners.


Check out the Hagerty Media homepage so you don’t miss a single story, or better yet, bookmark us.


Great article. Can you share where to find the plastic board??
Hi Lars – the manufacturer asked me to keep their name out of the story, which I did as a courtesy due to how willing they were to work with me on making the piece fit. But if you search any of the Facebook full-size Jeep / Grand Wagoneer groups, you’ll have no trouble finding them.