How to care for drum brakes
Brakes on classic cars of a certain age can be pretty ropey even when they’re in perfect condition. When they’re out of adjustment, corroding, or just plain worn out from doing their job, they can be positively scary. This is why it can’t be overstated how important it is to go beyond a simple service and treat brakes to a general round of preventative maintenance every now and then.
Jaguar and Dunlop put disc brakes on the map by winning the 1953 24 Hours of Le Mans with them, but it was a long time before they filtered down to more common cars as standard equipment. In the ’60s, the Mini had a single leading shoe on the rear (one wheel cylinder) and a twin leading shoe (two wheel cylinders) on the front. They were pretty useless by modern standards and needed far more adjustment than they were ever going to get. Earlier Minis didn’t have automatic adjusters on the shoes and it was anybody’s guess which way they were going to tug the steering when you jumped on the brakes. Nowadays, you can upgrade your Mini with disc brakes and hubs from a later Cooper, but there are also superior third-party alternatives for various cars including the Mini and Jaguar E-Type.
For motorsport use, the world is your oyster. For example, on the Group 4 Mk2 Escort rally car I used to run a few years ago, maximizing the stopping power was as important as the going power. The car only weighed 900kg (1984 lbs), was powered by a 310-hp Millington Diamond engine, and could get going very quickly in a short distance. The AP Racing competition calipers and discs that I installed would stop it on a sixpence though, and those brakes shrug off fade as if it didn’t exist.
There are historic solutions as well, such as the Alfin finned brake drums in cast alloy with steel inserts, which were available for many British cars in-period. I’ve not had the pleasure of trying them out, but they should make a difference in braking performance by dissipating the heat generated from repeated stops.
But if you prefer to keep things the way they were and get the original experience, however flawed it might be, all you can do is make sure the brakes are in perfect condition. That means lavishing more attention on them than an original service schedule would have.
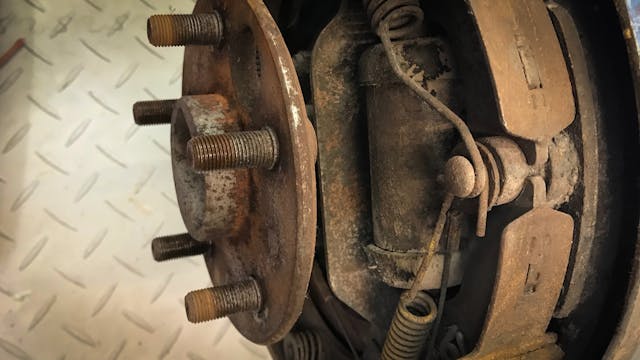
Wheel cylinders on the old drum setups were prone to seizing through internal corrosion, so keeping an eye on whether they are free or not by safely jacking up the car, removing the cylinder, and getting a helper to very slightly depress the brake pedal, is worthwhile.
Be careful that pistons don’t pop right out while doing this, then make a good visual check on the condition of the cylinder. While you’re down there, check the adjustment of the brakes if the adjustment is manual only. The adjusters themselves, which screw into the back plates, are notorious for seizing up so an occasional cleaning from the outside is a good idea, as is wiping over a squirt of WD-40 or similar lubricant. If adjusters are automatic, check that they’re working, free, and taking up the slack as they should.
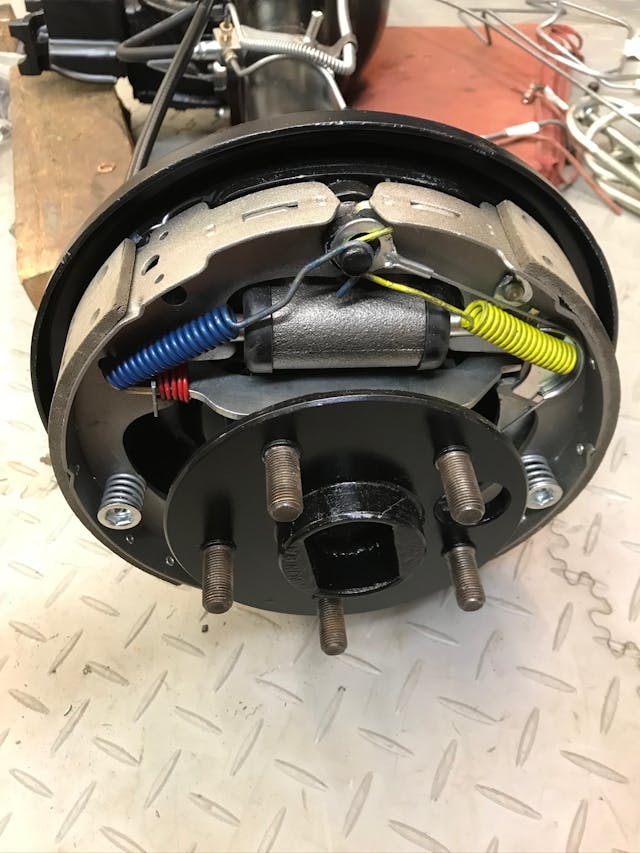
Chances are, if you own an older classic you’ll want to spend time fettling anyway, and that’s where sparing a thought for what the brakes are actually doing pays off. They’re essentially energy converters, using friction to change the kinetic energy from a moving car into heat. When brake drums came off the parts shelves at the factory they might well have had a coat of black paint (nothing fancy, just a black enamel straight onto the metal), so a gentle cleaning and re-application of paint will help that process.
I usually use Hammerite satin smooth for that task because it doesn’t require primer, it’s tough enough to stay put over repeated use, and the black color helps dissipate heat. The smooth finish also helps prevent the build-up of muck, which can smother heat dissipation.
These tasks are vital to ensuring the health of your drum brakes. Let’s face it, on older braking systems you want every bit of stopping power you can squeeze out of them.
***
Check out the Hagerty Media homepage so you don’t miss a single story, or better yet, bookmark it. To get our best stories delivered right to your inbox, subscribe to our newsletters.
Via Hagerty UK


A good start to taking care of your drum brakes, though there is much, much more to them.
The arc of the shoe must match the arc of the drum. Good luck finding someone with a brake shoe arcing machine, most of the machine owners have passed from breathing asbestos.
Adjust them so they drag, drive it and adjust them again so they drag slightly.
Always rebuild or replace wheel cylinders anytime you have cause to remove the shoes, it’s cheap insurance.
Oil is really bad for drum brakes, whether from a front hub seal that leaks or a rear axle seal that leaks, it will cause them to prematurely lock up. It takes gallons of brake clean to even start to remove 80-90 from shoes.
The short shoe always goes to the front.
Always replace the hardware if it shows any sign of wear, especially the auto adjust cable, they’re prone to corrosion.
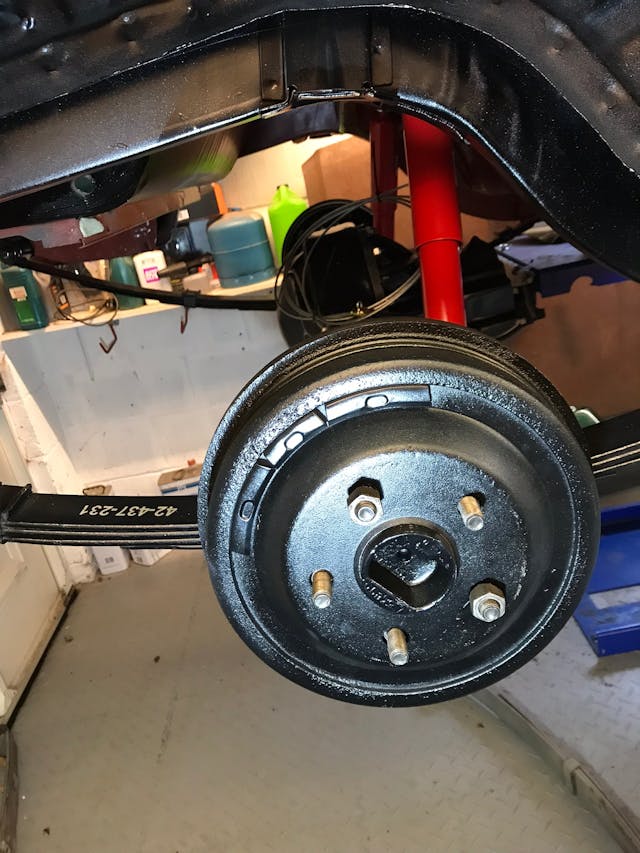
The last photo looks to be an early vintage mustang with a 9” rear end
Great points Dave! I would also add to inspect the shoe contacts pads on the backing plate. It they are gouged or grooved the shoes could get hung up and not make contact with the drum correctly making for steering pull while braking.
While I enjoyed the authors article, he should of had more information on how to rebuild and maintain these systems.
I would probably do a disk brake conversion myself. Easier for me to deal with.
FYI the first inexpensive sedan to have 4 wheel disk brakes was the Renault R8, which debuted in late 1962 as a ’63 model and sold in the US for about $1800. It also had one of the first, if not the first sealed cooling system, where the radiator was filled to the top with coolant, which was fed into an expansion tank as it expanded, then pulled back into the radiator as the coolant cooled down.
When I was in college, I was given a ’74 AMC Matador with a 401 CID V8 police package that included aluminum drum brakes in the front (strangely not power). On a monthly basis, I would jack up one side with a bottle jack and adjust the shoes on the opposite side of the car that was pulling when I braked. I did it so often I got it down to 15 minutes, whether in humid summers or lying in slush in the winter. Years later, I still have the adjusting tool. It brings back bittersweet memories of that car.
Now there’s a classic AMC story. One of the early adopters of aluminum, but they did it on a drum brake system, instead of going to disc brakes. My family was an AMC family for a LONG time then moved on when AMC went under.