How to get a wet blasting cabinet without the $3000 check
There are a lot of fun tools that get left to the professionals for no other reason than acquisition cost. The latest such tool for me has been a wet blasting cabinet, also known as a vapor hone. Wet blasting or vapor honing is a variation of the well-known “sand blasting” technique, where you force a fine blast media such as sand or silica dust through an air hose at an object. The fine media acts as sandpaper, stripping the gunk, rust, paint, and sometimes more off of the component. They’re brilliant tools, but also quite cost-prohibitive. But now maybe I can finally have one of my own now thanks to Victor Bared on YouTube, who outlined exactly how he created his own setup that rivals the big-money kits.
The core of the system is the cabinet itself, which is a modified dry blasting cabinet. Although the common term for dry blasting is sand blasting, it’s pretty rare to actually use sand these days. Usually, the media of choice would be walnut shell or aluminum oxide in various grit sizes, depending on what kind of material and surface finish you desire.
The modifications start with opening the lower chute that typically serves as access to change out the blast media. Then, with the hatch removed, the bottom of the cabinet becomes a funnel that feeds the water and glass beads used for wet blasting into a five-gallon bucket which contains a massive pump to push the glass beads and water up to the nozzle where it gets an extra push from compressed air as it exits the nozzle and heads toward the piece you’re working on.
There are a couple of interesting modifications that someone doing this at home for the first time might try and foolishly skip. The first is the vacuum connection and fresh air vent. While it seems counterintuitive to leave an open hole in the cabinet and draw air through using another port and a shop vac, it is quite important to do so as it significantly helps visibility. You are already fighting water and glass beads partially sticking to the glass window you are looking through, and allowing a “fog” to build up inside will only make working that much more annoying.
This home-brew setup holds less water and media—only about 2.5 gallons of water and three-ish cups of glass bead—than a commercial-grade cabinet, so you will likely have to change out media more often to keep the cabinet effective and in tip-top condition. However, the bucket setup to receive the water and media is easily grabbed and dumped, so raw material changing likely won’t be as big a deal for someone working in a home shop.
The only real catch here is that even a simple setup like this requires a lot of air. A large compressor is the only way to have a cabinet like this without resulting in pure frustration. That means that while building this cabinet might seem relatively affordable, actually following through with it only makes sense if you already have shop air or were planning on installing it. (In which case, the blast cabinet is yet another reason to do so!)
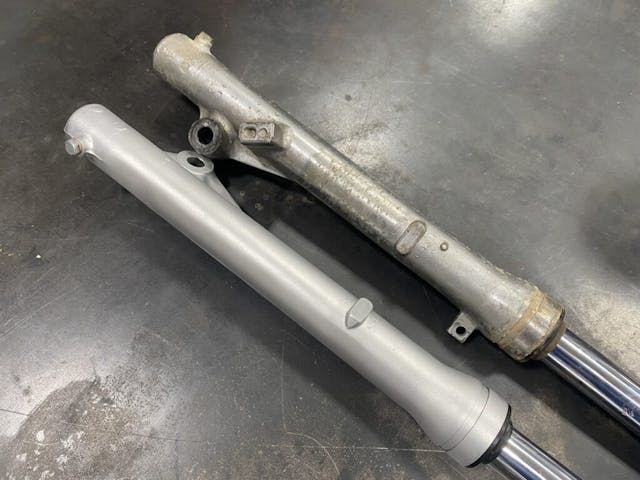
There are drawbacks to a setup like this, but for someone who would likely use this a few times a month rather than a few times a day, this is a great solution to restoring aluminum or other delicate parts. The glass bead is less aggressive, which means you can quickly and safely clean up parts that would be destroyed in a dry blasting cabinet. There is more to clean up though. You need to be sure to get all of the glass bead media out of the nooks and crannies of your workpiece so that the material doesn’t continue to create premature wear.
In all, it might be a project that can save you time and effort compared to hand-cleaning parts, but obviously, there are a few things you must already have or be willing to spend the money on. I absolutely love having access to a vapor honing cabinet and once a larger compressor becomes part of my shop setup, I’ll be building something like this. It’s a luxury worth having if you are doing any amount of restoration or repairs.


My biggest hurdle isn’t cost or the compressor, it’s dedicating the floor space.
I think the winter tire storage should move outside, then I’d have space for a cabinet and a lathe.