How to make your classic car’s ignition system dependable
Last week, I introduced the idea that, when a vintage car dies while under power, most of the time the cause isn’t some random lightning bolt from the blue. It is instead one of The Big Six (ignition, fuel delivery, cooling, charging, belts, ball joints). In the next six installments, we’ll drill down into each one. Let’s begin with the ignition.
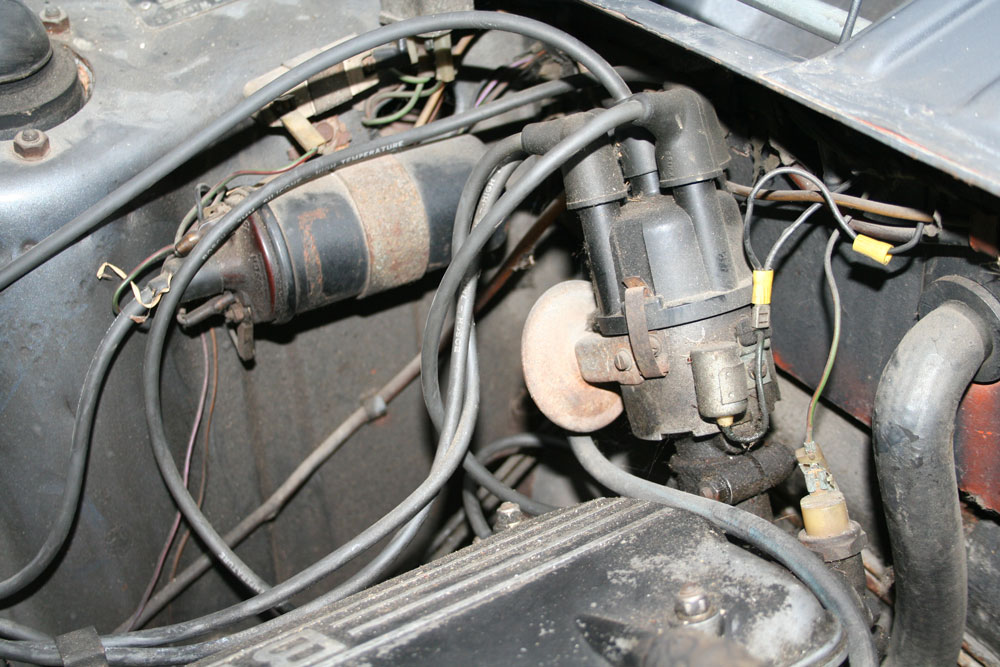
On just about every car from the 1920s through the mid-’70s, the ignition system consists of the distributor (the housing and shaft that rotates inside it, along with the stuff that’s attached to it – the cap, rotor, points, and condenser), plus the ignition coil, ballast resistor if there is one, spark plugs, plug wires, and the voltage supply to the whole thing.

Distributor and coil on a 1973 BMW 2002tii.
Here’s how it works. The points have two spring-loaded faces that are pulled closed against each other, but are forced open by a little nylon block that rides on the lobes of the distributor shaft. Current flows through a set of primary windings in the ignition coil, through the closed points, to the condenser, and then to ground. This sets up a magnetic field inside the coil. As the engine turns, it spins the shaft, whose lobes push against the nylon block, forcing the points open. When that happens, the current is abruptly shut off. The field collapses, creating a voltage in the coil’s secondary windings that’s high enough to jump across the gap in the spark plugs. This current then flows out the center of the coil, to the center of the distributor cap, where the spinning rotor distributes the current to each of the spark plugs. As the shaft spins faster, springs and weights cause the spark to advance (to occur sooner).
While part of the reason we love vintage cars is their simplicity, this quaint, almost Victorian, reliance on mechanical triggering—the opening and closing of points—is in fact a major source of unreliability. The faces of the points get burned and pitted, and the nylon block that rides on the shaft lobes wears down, both of which cause the point gap to shrink. One day, the gap becomes so small that the points no longer open, the coil no longer fires, the car dies, and you sing the little John Hartford song I mentioned last week.

Those pesky points.
Another thing that can happen is that the little nylon block can crack, or the glue holding it to the points can fail. In either case, suddenly there’s nothing for the shaft lobes to push against, and… dead car.

Close-up of points with rotor removed. Note how the nylon block is on the high point of one of the shaft lobes, and how this forces the points open. Now, imagine what happens when that nylon block wears or breaks off.
Coils can sometimes fail, but make no mistake about it – suspect the points first.
Before a road trip, you should do three things. First, visually inspect the points, then check the dwell. Dwell is the number of degrees out of 360 that the points are closed (that they “dwell” together). You measure dwell with a dwell meter. You should look up the spec for your car, it’s about 60, 40, and 30 degrees for four, six, and eight cylinder engines, respectively. Remember that dwell goes opposite from point gap. If the dwell is too big, you need to make the point gap wider. If the dwell too small, you need to make the point gap narrower. Sure, if the points are obviously burned and pitted, replace them, but it’s really the dwell that’s important. If you measure the dwell and it’s is really big, it means the points are barely opening, and it’s likely your car will soon die. Adjust the point gap to properly set the dwell before it does.
Because dealing with points can be a pain, many folks who road-trip their vintage cars replace the points and condenser with a small electronic triggering module. This eliminates the need to check dwell, set point gap, and worry about that nylon block flying off on while you’re crossing the Tappan Zee Bridge.
Next, check the connections to the distributor, coil, and ballast resistor. These are usually push-on spade connectors, and heat, oil, and vibration take their toll on them. If the spade connectors slide loosely onto their tabs, squeeze them gently with pliers to get them to bite. If the wire going into the connector is badly frayed, cut the connector off and crimp on a new one. And be sure the condenser is screwed tightly to the distributor. That’s its ground connection. If it’s loose, the car will misfire like mad.
Lastly, inspect the plugs, plug wires, and distributor cap. If the plugs are corroded or fouled, replace them. If the plug wires are cracked or missing their rubber insulating boots, the spark can arc to ground instead of going through the plug. Make sure the distributor cap isn’t cracked or has carbon tracks along the inside.
Do these things, and you’ll spark happily on down the road.
(Next week: The fuel delivery system.)
Rob Siegel has been writing the column The Hack Mechanic™ for BMW CCA Roundel Magazine for 30 years. He is the author of Memoirs of a Hack Mechanic and The Hack Mechanic™ Guide to European Automotive Electrical Systems. Both are available from Bentley Publishers and Amazon. Or you can order personally inscribed copies through Rob’s website: www.robsiegel.com.

