Building a wiring harness is all about patience and planning
When I heard the electrical class was not required for my bachelor’s degree in Automotive Restoration from McPherson College, I avoided the class like the plague. If only I had known how much good it would do me in the real world. Now I’m attempting to build a wiring harness from scratch, and it’s a learning experience.
The 1972 Honda SL125 I brought home from the Barber Vintage Festival looked like a super cool commuter. Only problem is, the bike had all of its lights and street-legal bits yanked off at some point. That meant I had two options for putting it back on the street: source all the correct bits and pieces, or piece together my own custom setup.

The bike has already been modified, though not extensively. That, combined with the fact I’m cheap, made me choose the DIY plan. I’ve also always wanted to create a wiring harness from scratch. I had a lot to learn.
The design
The first step was deciding what I wanted. This meant researching what is required for the bike to be considered street legal in the State of Michigan (where it will be registered), and then stare at the bike until I decided what I wanted to add and come up with some idea of how. My final decision was a headlight with high and low beam, tail/brake light, horn, and keyed ignition with a handlebar mounted kill switch.
From there I started to mentally lay out the harness that I would be making. It is so tempting to buy a spool of wire, mount everything to the bike, and start connecting things—but don’t do that. For a professional result, this is the time to slow down. Rather than jump straight from imagination to wiring the bike, it was time to lay it out on paper.

Pencil before solder
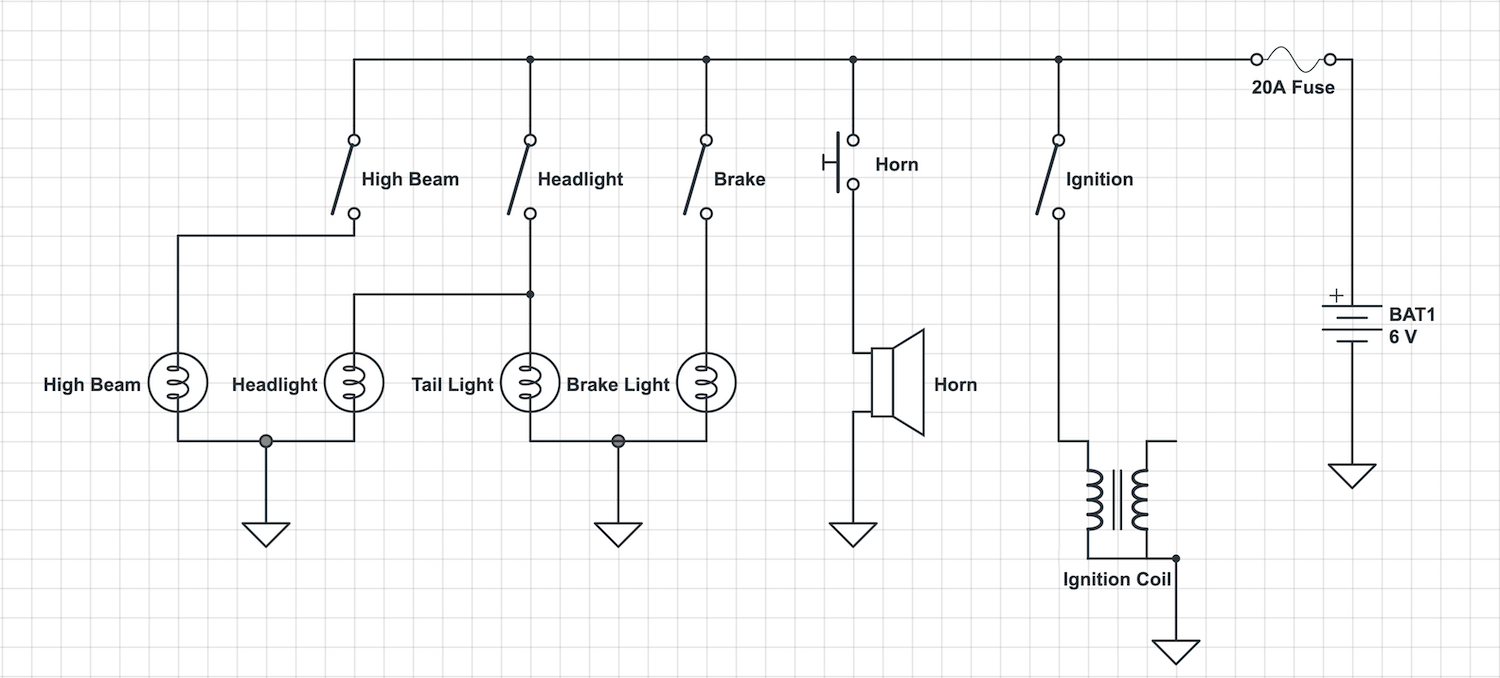
That meant doing research and drawing a proper schematic. Think of this as the blueprint for what you’ll be building. A proper schematic has saved my butt on more than one occasion. They’re all but essential when it comes to diagnosing any electrical issues and are the most-used part of many of my service manuals.
I started by grabbing a pen and a blank sheet of paper, which ended up looking like a spilled pot of half-cooked spaghetti noodles. Fortunately, there are websites available online which cater to DIY’ers like me and help draw proper schematics. I also consulted Matt Lewis, who runs some of Hagerty’s social media channels and has shared his electrical knowledge for multiple DIY videos on the topic. He helped me lay out a schematic that was not only less of a fire hazard than my initial drawings, but also would be easier to assemble.
My harness would have worked, but with the input of someone more knowledgeable I learned a couple of best practices that will simplify the system and ensure I’ll be safe riding it. We doubled the fuse count from the traditional one and set them so the ignition has its own fuse—meaning if the lights short out or cause issue enough to blow the fuse, the bike will keep running. Having owned classic bikes in the past, a one-fuse harness can be a real pain in the neck.

Matt also recommended that I put in a relay for the high-beam headlight. This relay switches off the low beam whenever the high is activated. Relays are awesome and ensure switches and circuits are not overloaded, but they still allow you to run light gauge wire to the switch. The high-beam relay is something I’m going to set the harness up for, but I will not be setting it up right away. Currently I don’t intend to ride this bike at night, and therefore the low beam headlight is enough to be seen. Should my use of the bike change and I need the additional light to see rather than be seen, I’ll thank myself for having the wires already built into the harness.
Once I had the layout complete, I went about ordering the switches, connections, wire, and fuses that I will need to build the harness. There’s much more to learn, so next week I’ll be back to share how it all went down (hopefully not in flames).

