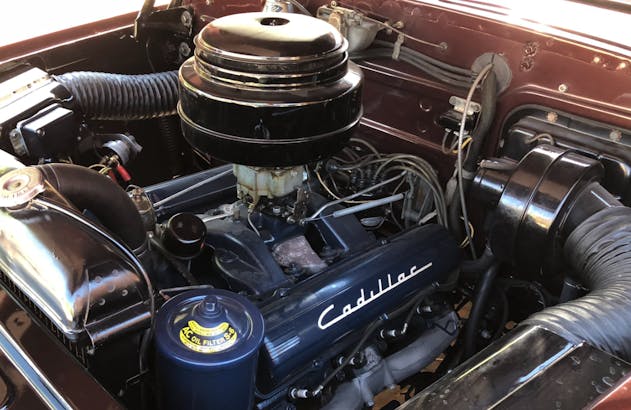
8 oil change dos and don’ts

It’s a small job that somehow became a rite of passage for gearheads: Oil changes. The draining and refilling of engine oil is the first task that many budding wrench-turners undertake, and its certainly an important one. Like any other task in the automotive world, there are some pieces of institutional knowledge that comprise the key dos and don’ts for a smooth oil change. So let’s put these lessons learned out in the open, with the mission of shortening the process for newbies. And perhaps to reinforce some best practices for you veteran mechanics?
Don’t go crazy with warm-up
Modern oils are pretty amazing at suspending particles and contaminants, but there is still some junk that sinks down to the bottom of the pan. It needs to be stirred up to ensure it escapes when you pull the drain plug. Starting the engine and letting it idle for a minute or two is perfect for that final circulation. Run it any longer and you’re rewarded with nothing more than scalding hot oil that does nothing more than burn you. Before you pull that (drain) plug, give the engine a minute after shutting down, allowing the oil to drain to the pan from the nooks and crannies higher in the engine. But before you get underneath the vehicle to do the deed, remember you must…
Wear disposable gloves
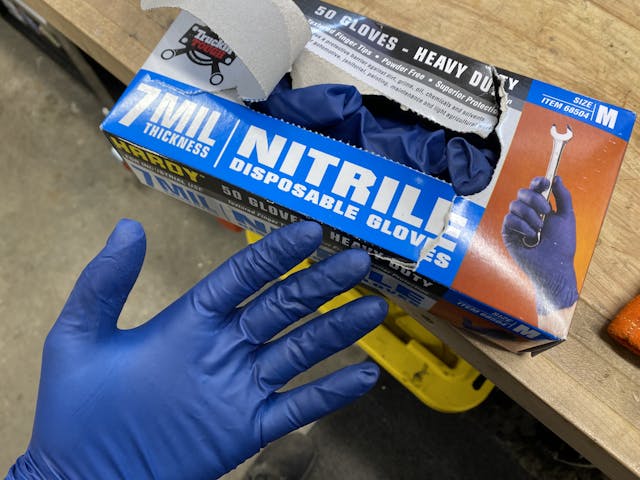
Nitrile gloves keep you from soaking up solvents and oils into your skin. I’ve found 7mil thick to be a nice sweet spot of durable and affordable.
We all know the guy at the auto parts counter who has seriously gnarly hands from all the years being soaked in oil over decades of engine builds. That’s the visible damage. The invisible damage is sitting in your internal organs. All the hydrocarbons that get absorbed through the skin and are processed in our gut where they can’t be broken down. They end up accumulating in our body, which can cause serious health complications after years and years of chemical exposure. Preventing those issues is easy as putting on a pair of nitrile gloves. Use them even if it’s only for pulling the filter and drain plug, which you can do efficiently with…
The drain plug trick

It’s not groundbreaking, but nothing feels better than the perfect pull on a drain plug to ensure you don’t get any oil on your hand. The trick is pressure, not pulling. As you unthread the plug by hand, push in–against the bolt as in comes out–so the threads act as a seal with the outer edge. With a little practice you can get the pressure right (while not rocking the plug in the threads) and can spin the plug a full turn to feel for the “click.” That click means the bolt overlapped the last thread. With a swift motion away from the direction of oil flow, remove that now-loose plug. Presto! This can make thin viscosity oil changes much cleaner, and thick stuff like 20-50 can sometimes be spotless. In your excitement of not having a mess to clean up after draining, make sure you…
Don’t over tighten the drain plug or filter
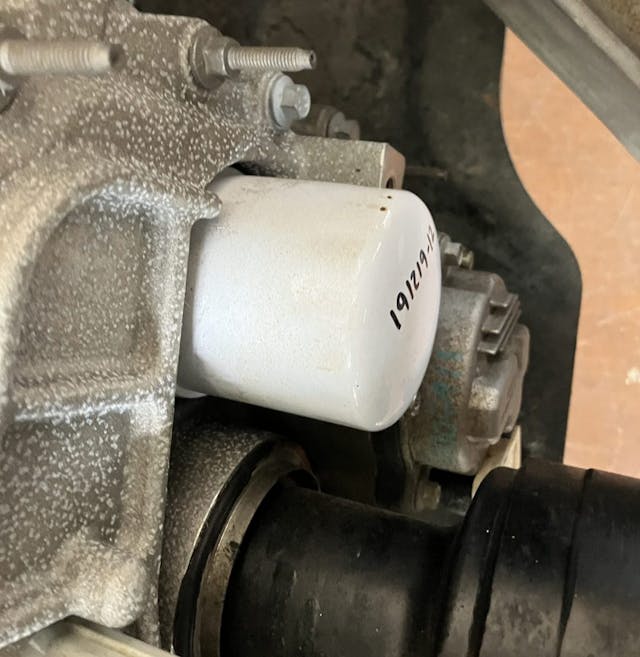
It’s come to the point where stuck filters and stripped drain plugs are no longer a joke. Neither the filter nor plug require any real torque when installed properly. Use a small amount of oil to lube the filter’s rubber seal, then spin it into place. After the gasket seats on the housing, turn it only about three-quarter of an additional turn. Some applications might call for a full turn, but that is usually reserved for heavy duty equipment. Any tighter than what the filter manufacturers call for and you run the risk of deforming that rubber seal, which could cause oil to leak past the seal. That’s bad news. Any oil spillage is bad, so when you are filling…
Just use a funnel
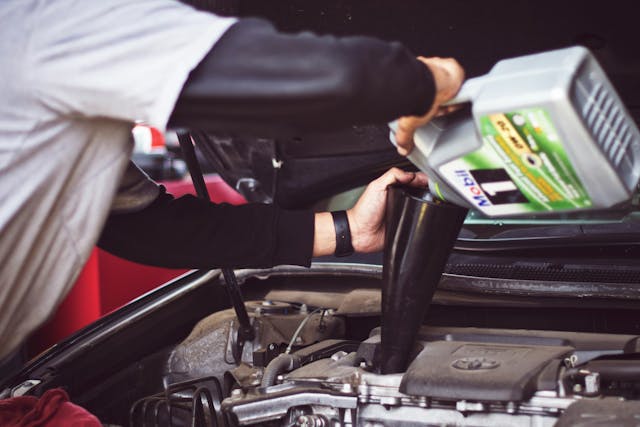
The oil fill port on most engines is in that perfect spot where it looks like you could pour directly into it, except that’s a lie. They seem to be ideally located, but cleaning up if you miss (by even the smallest margin) can be a major pain. Are we really going to work so hard to spot and address leaks, to keep our engines clean, and just ruin it while doing routine maintenance?
I’m not. A funnel all but guarantees I won’t have to do any clean up after filling, even if I’m distracted or letting my 7 year-old niece do the filling. Putting in that fresh oil feels good, but be careful and…
Don’t overfill
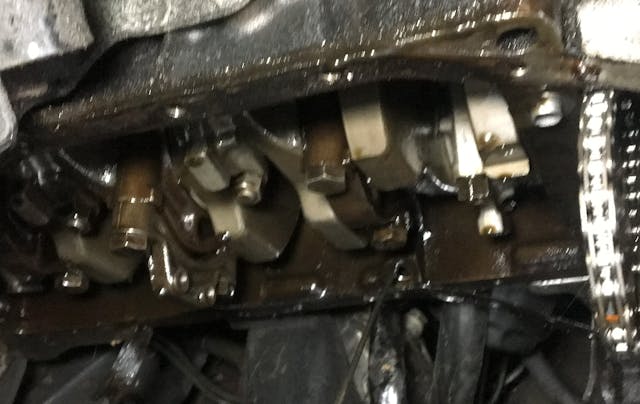
This shows the rotating assembly without the oil pan and it’s easy to tell how oil at too high of a level would be bad.
Too much oil is just as bad as not enough. Seriously. The oil level in a wet-sump engine is carefully calculated to keep the rotating assembly from whipping through the oil. That action causes foaming, and oil foam pushed through the oiling system is the same as not having oil at all. I don’t need to tell you how bad that can be, so check the service or owners manual for the proper fill level. When done, look at the dipstick as a double check. Luckily, the empty oil containers you now have at this point are are perfect to…
Recycle your used oil

It’s never been easier to properly recycle used oil, so there is no excuse to do otherwise. Just about any auto parts store takes it, so they should be your first trip in your freshly serviced vehicle to “return” your oil. Be sure to capture oil in a non-contaminated pan so that the oil can actually be recycled. Coolant is the main enemy here, so be sure to flush your drain pan before the oil change. Luckily you don’t have to worry about how dusty or dirty the pan is, but other fluids can defeat the purpose of recycling. But before you make the trip to recycle the oil, be sure to…
Reset the computer (or write down your service date)

Modern cars have an oil life monitoring system. Whether you trust it is a personal preference, but for the sake of eliminating confusion, go ahead and reset it now. Most reset procedures involves cycling the ignition key and pressing the throttle pedal a certain number of times. The service manual will outline it, or a quick search to an online make/model specific forum will have the instructions. If your vehicles are of the manual variety, write down the oil change date in a log book. Or consider service tracker kept in the car or garage, as it keeps you from forgetting what’s been done. Not to mention thisa paper trail shows good stewardship to a potential next owner, which can mean an easier sale for more money.
In all, oil changes can be simple and rewarding for newbies and DIY enthusiasts alike. Following these best practices will not only keep your vehicle happy, but also make the experience better for you each time. Do you have something specific you add to this process? Let us know about it in the comments below.
***
Check out the Hagerty Media homepage so you don’t miss a single story, or better yet, bookmark it. To get our best stories delivered right to your inbox, subscribe to our newsletters.


1. If you have a remote starter, make sure no one has access to it while the pan is empty!
2. If you have a metal canister oil filter, fill it all the way with oil (if it’s a vertical mount), or partial fill (horizontal mount) before installing it.
3. Tip the oil in the drain pan from side to side to see if there is any shavings in it.
4. If your vehicle has an oil filter that gushes and soaks oil everywhere when you loosen it, you can punch a hole in it with an awl to drain it instead.
5. Used oil can be re-purposed as bar oil in a chainsaw, or burned in an oil heater.
6. Zip lock bags can be helpful to extract ignorant oil filters without messing up your frame or yourself. Zip lock bags are also the cleanest way to store used filters.
7. Always check underneath for leaks immediately after the first start up. The old oil filter seal can sometimes stick to the engine side. It’s easy to overlook this and will cause a leak with the new filter.
8. 3000 mile oil changes are a thing for old cars running 3500rpm without overdrive transmissions. On newer cars, trust your engine oil life monitor as it uses rpm and engine hours to calculate when the oil needs to be dropped. 6000 plus miles is the new normal: get used to it and save some money in the process.
If you are changing the oil on an air-cooled VW, be cautious when tightening the 10mm acorn nuts. One of the drain plate studs reaches into the engine case and if it is stripped, it is a challenge to properly repair. It’s much easier to reach under the car and re-tighten if you have a small drip of oil.
I have a number of classic cars that have had engine rebuilds over the years, but this is something that is not a bad idea for newer ones as well. All of my car (new & old) have a “rare earth magnet” I have put in the drain plugs for both oil & transmissions. I inspect them every change for any fragments. You can get them from Amazon that are small enought to fit in the plug. As for recycling my old oil I have a friend that uses it to heat his garage so I take it to him. (My garage is radiant heat in the floor from an electric hot water heater so I can use it.)
So the oil is drained, the new filter is screwed tight, you’re out from under the car and then……your phone rings, or you go inside to get a drink, or you suddenly have to pinch a loaf, or your wife pisses you off, or…..a million other distractions happen. You march out to your care and start it up and go for a spin, when actually pretty soon the only thing spinning are your main bearings because you never added the new oil. Yeah, it happens all the time even though we all think we could never be so stupid. So……please do something to remind you to add the new oil!! Like put the car keys on top of the oil filler, or air cleaner, or whatever. Sh*t happens, we all forget.
My whole house generator has an oil pressure switch that won’t allow it to run without oil in the crankcase.
I use a Sharpie to mark mileage/date in the corner of the windshield. Easy on, easy off!
That’s really stretching it for material to write.
2 other suggestions for the oil change. try to get the drain plug to the lowest point and let the oil drain for at last 15 to 20 minutes to get as much of the old oil out as
Remember, some cars ie, Mini & Dodge as examples have invereted filters. No prefilling.
Thank you Captain Obvious.
I have an oil-change dry-erase board in the garage with all my cars listed. Mileage, date, oil filter #, oil type & qty, along with drain plug & other fastener sizes needed. Take a quick pic before buying supplies for 1 car so you know what else is coming up, and you can take all necessary tools underneath the 1st trip…
Let me add TIP # 10 — Please, PLEASE always use safety glasses (or just plain spectacles if you must). I can’t remember how many eye injuries I’ve had to handle over the years when even seasoned mechanics fail to take this elementary precaution but the number must be over a hundred cases. If you take note of the tip about wearing gloves when doing this task then imagine what hot oil in your eyes will do !
I’m really disappointed that you used a picture with a person not wearing any eye protection.
Drain the oil *COLD* so you get as much of it as possible.
There won’t be particulate matter on the pan bottom because the filter catches it. Draining the most volume means draining the most of the acids, other liquid contaminants (gasoline, emulsified water vapor, spent additives, etc…) and replacing with fresh oil.
Clean oil is the key to engine life.
On my new 1970 Datsun pickup, I drove 20k per year and changed my oil every 3k miles. When I changed oil, I ran one quart of 10- minute crankcase flush. The oil never got dirty. Put 110k on it and had even 150 lbs. compression in all cylinders when I sold it to a friend .
The shade tree wisdom of the time said you could not do that with an old engine: “The cleaner would loosen all the sludge and plug the oil passages”.
I married a 1973 Chevy with 307 V8 which had normal (for the time) 6,000 mile oil changes for the first 50k miles. I began changing her oil and flushing every 3k miles since the Datsun oil changes worked so well. We got 140,000 miles out of that car. It had so much pep, the new owner pushed her too hard and snapped the timing chain. Pulling the heads, mechanic found there was zero ridge in the cylinder walls, no sludge in the crankcase and plenty of oil pressure.
With the new engines today, I don’t know if the 10-minute crankcase flush is good to use. We change our daily driver oil every 3,000 to 4,000 miles or once a year whichever comes first.
I drive 3000 miles MONTHLY , oil changes are done every 30 days.
87,000 miles in the last three years, on a GM 3800 V6 that still averages 24 mpg , 29 at 75mph.
Can’t say that my good fortune is due to oil changes but I’ll continue my routine as this car now has 200,000 miles on it…..
Use a 🧲 magnet tipped flex shaft tool especially made to remove the drain plug without getting oil on your hands.
These tools are made with a screwdriver 🪛 handle on a thin flexible shaft so you can first crack the plug loose with your regular wrench 🔧 and then attach the magnetic 🧲 end of the tool to the head of the drain bolt. This allows you to keep 100% clear of the stream of dirty oil as it gushes out.
They cost between $5 and $20.
Specially-made oil filling funnels are available that screw into the oil fill port just like the oil fill cap does. They keep the funnel secure in one place as you get that big jug of fresh oil into position to pour. Very helpful on V6 and V8 engines that have the valve cover on an angle.
Cost is anywhere between $30 and $60.
It sounds simple enough, but many people don’t use the dipstick to check the oil level when re-filling.
The dipstick is your golden reference.
Forget about guessing how much oil to pour into the engine. The dipstick tells you exactly how much you have in there, so you just have to gradually top it up after pouring in the initial few litres.
I miss dipsticks! My Cayman and X1 don’t have one. I have to check the oil level on the electronic dash display (after warmup an sitting on level surface) pre-oil change, and then measure the oil that comes out so the same amount goes in, so as not to overfill.
As long as you are certain that the dipstick is correct to start with. On older cars, the sticks may have been changed (for various reasons, but, for instance, ever see the aftermarket sticks with fancy knobs hanging in the stores?). But, even in OEM installs, mistakes have been made. So don’t just trust the marks on your dipstick without verification (i.e. – fill an empty engine with the exact specified amount of oil, then check where it lines up with the marks). I’ve seen sticks where someone filed new lines on them – sometimes as much as 1/4″ away from the existing mark!