8 easy car projects for DIY beginners
If you want to work on your own car, and have asked around for the best projects to start with, you’ve probably been given bad advice.
The most popular suggestions are often changing your oil and replacing your brake pads and/or rotors—in other words, high-consequence projects. If you are mechanically inclined, have a knowledgable supervisor, or are not as new to DIY as you say you are, these aren’t the worst ideas. For a true newcomer, however, oil- and brake changes are two of the riskiest places to start.
The first bolt you tighten shouldn’t be one as delicate as the oil drain plug; it’s too easy to over-torque, causing the threads to strip and the oil to leak. We want you to enjoy a long life of working on cars, not turn your engine to scrap metal after it drains all its oil. We certainly don’t want you to get in a collision because your brakes failed: Brakes are a safety requirement, and should never be disassembled and reassembled by a newbie alone.
The good news? There is lower-hanging fruit on the DIY tree. These eight projects might not be sexy, but each is a great way to learn how your car works. Better yet, your car will be safe to drive the entire time.
A good chassis lubin’
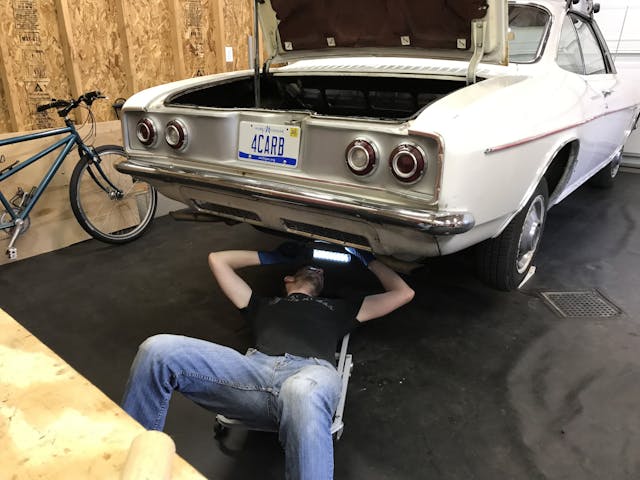
The chassis of a vintage car is peppered with grease zerks that allow a mechanic to push fresh lubricant into critical junctions and pivots—think suspension bushings and steering joints. (If you have a modern car, skip this one: Due to cost cutting and planned obsolescence, zerks are no more.)
Often, lubing a chassis can be accomplished without lifting the car. Squeezing in new lubricant from a grease gun is as simple as attaching the coupler and pumping grease into the fitting until you feel light resistance on the handle or see a small bit of grease push past the seals of the component you are working on. Take this opportunity to try and wiggle the part you are greasing. There will be a little movement, but nothing should feel sloppy or loose. If it does, congrats—you may have found your next project.
Flush away your (coolant) problems

Read any shop manual and you will find that a vehicle’s coolant should be changed on a relatively short interval. Since that coolant exists in a closed loop (we can’t see or touch it) and the temperature gauge behaves like it should, your car’s coolant is probably fine, right? Sort of.
Aging coolant—or improper coolant, since you never know what the previous owner put in—can cause lots of damage to an engine and to the heater core. Flushing coolant is simple and rarely requires special tools. (When it does, the tools are affordable.) Any problems will be signaled by the temp gauge on your car’s dash. After a coolant flush, overheating is common, usually due to an air bubble left in the system—another issue that is easily dealt with on vintage cars. Newer models, less so.
Take a brake … to inspect

To be clear: We are not telling you to work on your brakes; we’re telling you to inspect them.
This project might be the first time you put a car up on jack stands, thus giving you a chance to learn the proper jack points and technique before removing the car’s wheels and visually looking over its brakes.
What are you looking for? Pad thickness and rotor condition on disc-brake systems, drum condition and shoe life on drum setups. Keep an eye out for any fluid leaks: There should be no grease buildup or oil film on anything brake-related. If there is, talk to a pro. In the meantime, put the wheels and tires back on, and practice getting the car back on the ground before fully torquing the lug nuts.
Polish it off

Ever since detailing became all the rage a few years ago so, there is no shortage of how-to advice and guidance for cleaning your car—no matter what model year it is. Polishing your car’s paint requires you to get familiar with the vehicle and to understand the various processes, techniques, and tools of the detailing trade. Here are a few places to start, whether you’re washing off the first coat of dirt, trying clay for the first time, or simply trying to avoid the biggest mistakes.
Changing fluid, with no filter
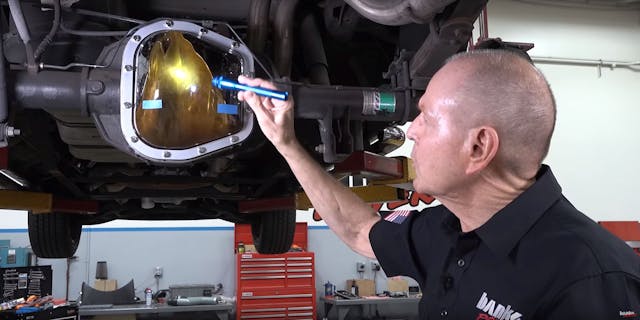
Yeah, we said no oil changes earlier, too, but differential fluid changes are far easier. First off, differentials don’t run their fluid through a filter, and their housings are often more stout than those of oil pans.
The key tip here is to remove the fill plug first, not the drain plug. (Both are likely threaded.) If you succeed in getting the drain plug out only to find the fill is stuck or stripped, you are up a creek.
Let this be a lesson for future jobs: Think about the totality of the project. Anticipate which problems might appear, and plan for how things might change to the best of your ability.
Weather to strip, or not to strip …
Who doesn’t love watertight cars—or quiet ones? Weather-stripping helps to muffle noise coming into the cabin, whether from the road or the engine or from the air, making for a more enjoyable driving experience.
However, the foam rubber typically used for weather stripping will age like tires do: When a car is parked outside—as most project cars are at some point, even if not by you—UV light and fluctuating temperatures can its weather-stripping into a crumbling mess in short order. Cleaning and properly installing weather stripping is affordable, rewarding, and a real improvement for your car. Perfect starter project.
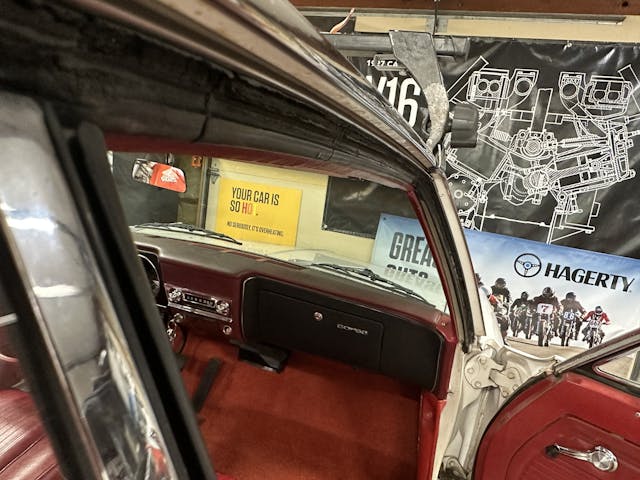
Get on the right track
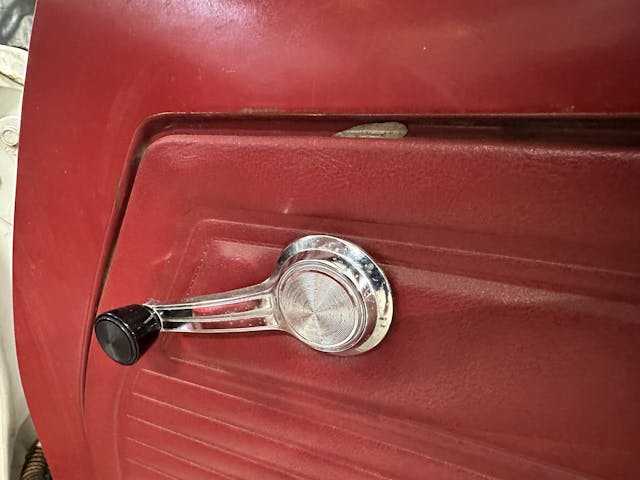
Little things, like easy-to-use windows, go a long way to making an old car feel nicer than it is. A common pain point in vintage cars are windows—specifically, sticky regulators or jammed-up tracks. Either makes the task of cranking windows up or down difficult. Removing the door panel to get access to the mechanism for the windows is a fairly low-stakes operation. Once everything is properly greased and aligned, the result is something that a passenger will notice.
Wheel touch-ups
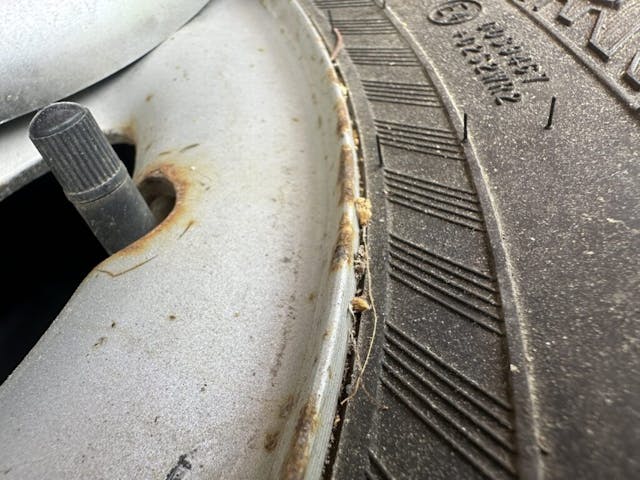
Paint work is complicated and time-consuming, and a good result requires tons of preparation. That is why few people’s first project cars ever see a fresh paint job. Instead, focus on the wheels—removing curb rash or spiffing up your rims’ finish can be a lot easier and cheaper.
If painting your wheels, use the “deck of cards” trick to save the annoyance of removing the tire: Wedge a line of cards between the rim of the wheel and the bead of the tire to keep the paint where it should be. Voilà—easy cleanup and good results, with no tape required. It almost never sticks to rubber, either.
***
Check out the Hagerty Media homepage so you don’t miss a single story, or better yet, bookmark it. To get our best stories delivered right to your inbox, subscribe to our newsletters.
A couple of insights here . You might want to get a grease fitting attachment that clips on to tighten since the fitting on my indestructible Simplicity Broadmoor lawn tractor arbor grease fitting broke off when removing the grease gun when greasing up the spindles .
And be very careful when changing the coolant from a used vehicle that you don’t know the history of . Case in point my 1994 6 cylinder Toyota SR5 pickup which literally poured oil after a coolant change after owning that truck almost 6 years . The previous owner must have done something to hide the cracked block that it was eventually diagnosed with . Bought for 12K in Jan 2001 , sold for 3500 in Dec 2006 with only 76K on the clock – buyer beware and live and learn from life’s mistakes .
Good point on the grease gun. The locking grease gun tips do look like quite the luxury, and I need to get on buying one for myself.
Regarding the coolant change over, those two seem unrelated in your pickup case. Not familiar with how that engine is/was built though. Is there a water connection that gets undone that also flows oil?
I’m guessing whatever flushing chemical the mechanic used to flush the system undid a block sealer treatment used in the radiator . It did overheat in the past and had head gaskets done as the Toyota dealer found out by researching the VIN . On the plus side when my 06 bought new 8 year old Tacoma needed a frame replacement Toyota replaced the frame , brake lines , 3 wiring harnesses , and leaf springs at no cost(almost 17K) under recall plus paid for an Enterprise rental truck for 6 months . So the scales evened out a bit there .
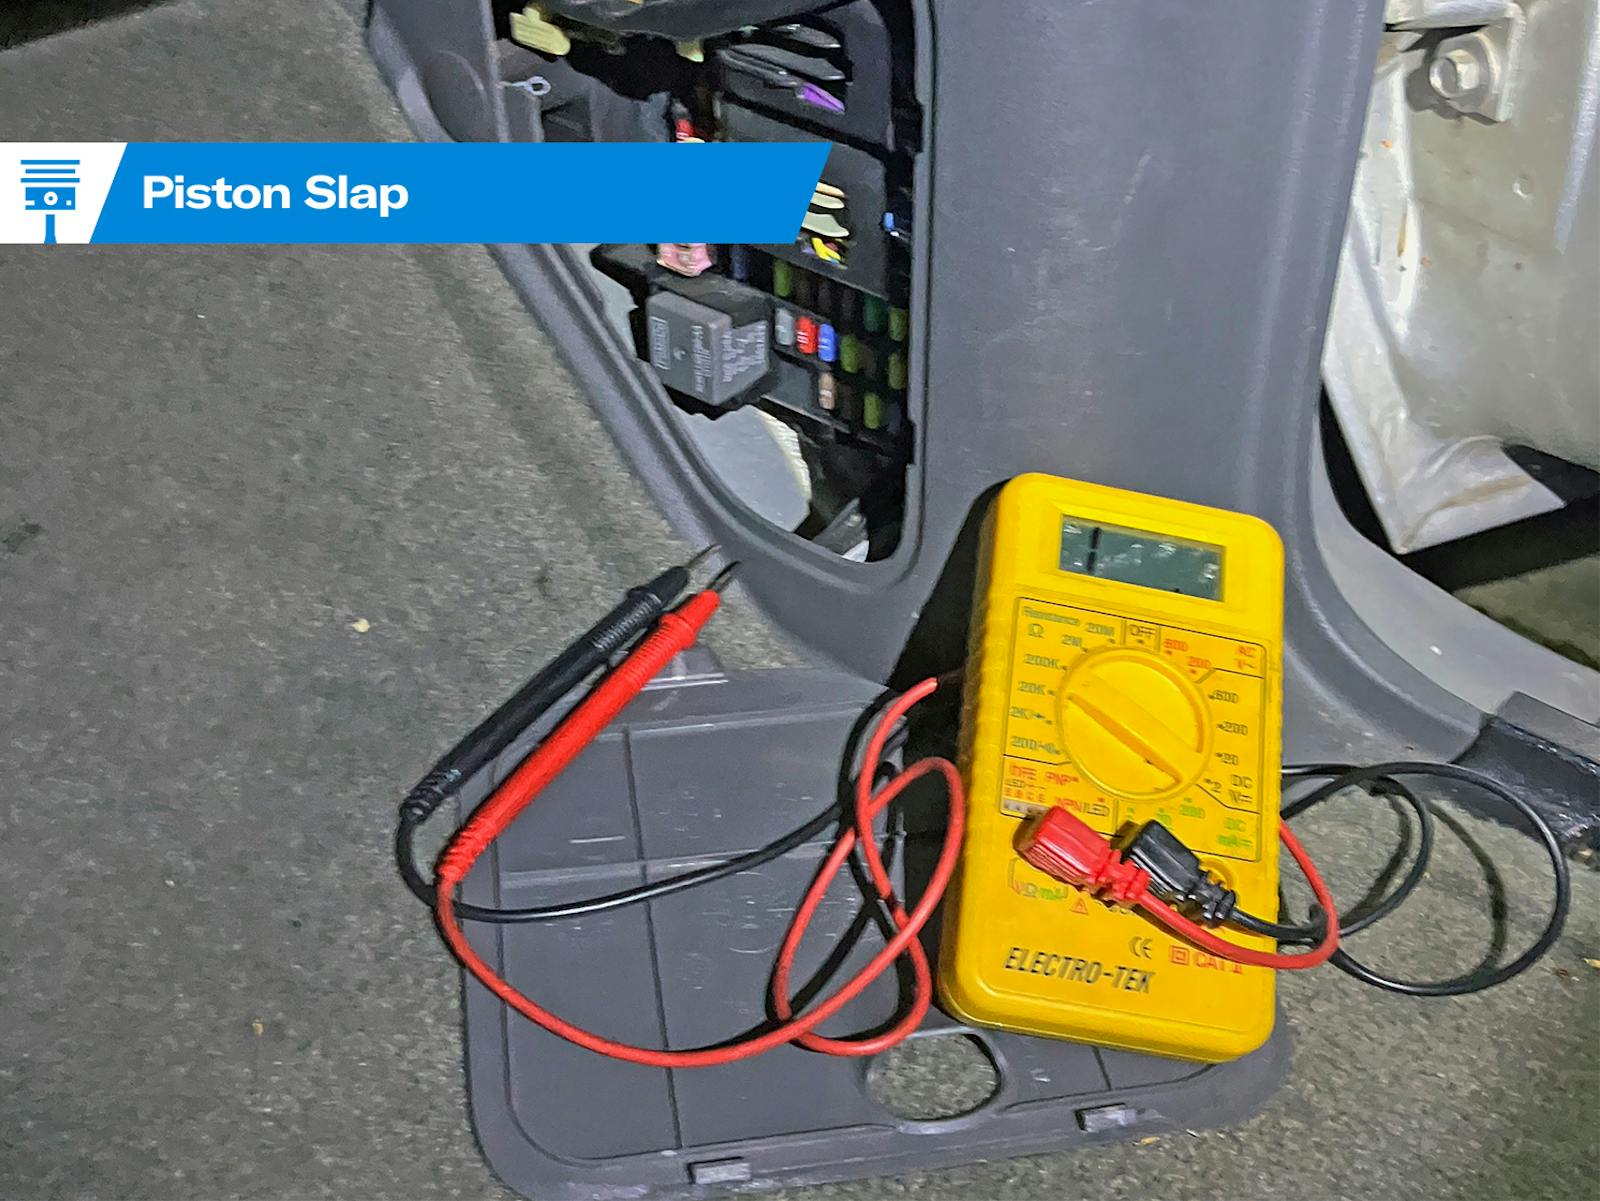
Antifreeze wears out. Use your multimeter to measure from a good solid ground point and put the other lead in the antifreeze. If it measutes more tha .03 of a volt, it is acidic and will be eating any aluminum parts in your engine, including the radiator, engine block and head (if they are aluminum), water pump, anything that is aluminum and is touched by the antifreeze.
Great article! Who knows how many people gave up working on their own car after something expensive such as an oil change or brake job gone wrong happened to them or someone they know.
Changing your own coolant can be something you may butt heads with the EPA. That’s why coolant exchanges are so common now. Nobody wants coolant in to our water systems. Do not drain in on the driveway or ground. An oil container is good to have instead but check with the local recyclers. If the coolant is contaminated by oil, they may not accept the recycle. Same for oil, if it has water on it, it will be rejected.
I don’t understand why they do this. Just encourages people to dump where they probably shouldn’t.
If you’re connected to a municipal sewer system, just flush it down the toilet. The enzymes at the water treatment plant will happily gobble it up.
Please don’t do that!
I ran a sewage treatment plant for 30 years please don’t be telling people to put anything but sewage down their pipes. It can throw the whole system out of kilter and takes a while to get it back in shape. A sewage system is a lot like your stomach. You wouldn’t put anti freeze in your stomach would you 🙂
what do you think the auto dealerships do ?????
HUGE fine in every jurisdiction that I am aware of. I have NEVER seen it done or even mentioned in conversation with other gearheads or mechanics. I am sure some idiots do it.
A dealership caught doing this would be out of business in no time.
As a technician for 25 years, they absolutely DO NOT flush it down drains. It is hazardous waste and should be treated as such
There’s only two “substances” that should be flushed down you toilet…I think we know what those are.
Coolant/anti-freeze is poisonous to dogs and cats who LOVE the taste. DIY ONLY if you have the proper facilities to capture used fluid and properly dispose of it.
What?
Much of this is great for the older cars and new car fans.
But a word of caution to many if you plan to do these on a new car is is not always as simple as it used to be.
Antifreeze changes on older cars were easy accept for a mid engine unless you know some tricks. On new cars it can be more complex getting the air out of the system.
Most new cars have no grease fittings or rear diffs for oil changes.
I did find it funny about the antifreeze change with a Corvair pictured. Just a good chuckle.
Also with Polishing a little reading and learning is recommended. It can be a little different based on what you are working on.
Did ya ever try to find a radiator for your Corvair? 🙂
I recommend using hand tools – not power tools – for introductory projects; get a feel for fastener torque, which on many fasteners isn’t as tight as you may think. Generally, the first tasks for even the most successful race mechanics were cleaning and observing how things are put together and taken apart: the purpose of that is to acquire understanding before getting into the serious stuff.
I understood the article focus on ‘baby steps’ for newbies. But regarding ‘inspect only’ – point out what to look for with brakes. It’s not just how thick the pads are, but more are they wearing evenly. Four pads half worn – no big deal. One pad unworn or worn out – big deal – you need to next determine why. And using test strips for anti-freeze and brake fluid can be very informative.
Always take pictures of what you are working on before taking things apart as a reference. Also, if you are not sure on how to do something, always do your research to avoid costly mistakes.
Hey Kyle, explain how you change tranny fluid on a Corvair….simple?
Cell phones are your best friend. I always take pics no matter how simple the task is. It seems there is always that one electrical connection or vacuum line that I don’t remember where it went 🙂
Fantastic article!
Some good tips but a couple of nits to pick.
Zerk fittings were not eliminated as a cost saving or to increase obsolescence but through the vast improvement in materials and the drive for reduced cost of maintenance. Older components used a lot of metal to metal joints with seals that were not very effective so there was a greater need to push in grease to push out the contaminants.
Your photo accompanying the window crank is from your Corvair. That crank (as with all GM cars at the time) requires a special tool to release it from its shaft. I defy you to get it off without damaging the door panel if you do not have that tool.
Agree on the window crank – even though I did not recognize the car. My career has been 95% spent on the same make of car, but every model has a different method of attachment All simple – once done wrong the first time.
A red shop rag works every time. Never needed a clip release tool. Try and see
I’m with BRUCE K on the grease gun fitting danger/ inconvenience. I was greasing the king pins on an early vw and for the life of me I couldn’t get the tip off the zirk well, until the nipple snapped. I had to take the whole assembly apart to get the broken zirk out and I still couldn’t get the tip out of the gun. Then someone told me about a lube gun tip that locks onto the zirk with an expandable jaw. It was $20 but worth every penny after that experience. The thing works amazingly well and I don’t have to struggle to get it off. You can also get a set of nipples for all kinds of situations. I like it so much I bought several of them as thank yous for those few car savvy people who heed the call when you need a hand in the garage
I completely disagree about the oil change. What it takes to do it right is essentially the same process as doing anything else on your car. Research, correct tools, patience and double checking. What is the right oil and filter? Do you have a torque wrench? What is the torque setting for the drain plug? Oil filter wrench. Process for removing and replacing the filter. I agree there is a consequence to doing it incorrectly but really there is always a consequence so if you want to be a DIYer then learn the process and you will be able to tackle more and more complicated projects.
Oil changes and other fluid changes are the easiest point to start off at.
I agree. If you don’t have the means to know how to properly tighten a drain plug bolt, I probably wouldn’t recommend much else. Maybe purchasing a torque wrench would be a good place to start.
I get full sythetic oil changes on both my 4 Qt Accord and 5 Qt Cougar w/ oil filters for $20 – 34$ with readily available coupons and Groupons from at least 6 independent and chain repair shops. I have changed the oil in cars 1,000 times in my life. There is no reason to DIY these days. You have disposal issues, need a lift or be able to get under a car etc.
Just had full synthetic oil change at 200k on a 2003 Accord w/ filter, while I watched with a fluid top off for 34$. Mobil 1 synthetic – one gallon w/o tax is about 28$ and an oil filter runs 6 -8 $No reason to DIY
All absolutely true, except, a person doing their own service doesn’t save money. It simply uses your tv time to inspect, learn, be aware of your car. That way no one can fool you with the “you need brakes” even though there is 40% pad life
Mr West is spot on. I use oil change time to check ball-joint/suspension/steering play, engine bay leak checks, exhaust system condition, chassis greasing, tire wear and puncture, corrosion issues. It’s the perfect time to get intimate with your car and line up future projects and schedule repairs before they become “unexpected”.
if you like working on your car a lot . get a corvair will keep you very busy, and like a ford it will leave you on the side of the road quite a bit.
I think a Triumph will beat out a Corvair for being needy. I have 9 cars. Three are Jaguars. The Triumph has required more repairs than all three Jags put together, and everything else for that matter.
I have to agree. I had an 80 Spitfire that had a personality. And it hated me!
I have regularly driven my 62 Corvair pick-up for the 41 years that I have owned it, including driving the ALCAN and CASSIAR highways to Homer, Alaska, in February, without any problems. If properly maintained, they require no more maintenance than any other 61 year old car. You only have to learn two things when working on Corvairs, how to use a torque wrench and how to properly adjust the fan belt.
I had a ’62 Corvair back in the day and I followed it up with a ’64 Falcon Sprint. Neither car ever left me sitting on the side of the road.
Back in the day as a kid, we would be able to go down to Smitty’s gas station and watch and talk to the mechanic as he worked on cars. He would take the time to show us how to do a hot patch, how to pack a wheel bearing, how to remove and replace brake shoes and rebuild brake cylinders by honing and new seals and pistons, etc. It was a fun place to stop by. Fast forward to today. You can’t do that anymore. Insurance companies bar customers from the work area so you will see chains across the door to the shop and a keep out sign. Also I was raised by a dad who could do anything. I do not remember him ever taking a car to a repair shop. He overhauled the engine on his 56 Chrysler and boiled the lifters and other parts on mom’s stove to her delight, not, but he got it done. I still have his repair manual, a Glenn’s. When I got my first car, I was ready to wrench, I did everything to it except leave it alone. Today, with YouTube, you can learn how to do most everything on a car.
To the person who has never turned a wrench, any service can seem intimidating, and you’re right that oil and brakes are the easiest thing to do and are the most consequential. Coolant, brake and other fluids are right behind. The number one tool to get is a torque wrench until you get a feel for how tight something should be (in addition to the usual socket and combination wrench set). Those tools plus the ability to type (youtube or google) is all you need. It’s never been easier to learn how to do the things your car needs and way easier when I was younger and all I had was an old Haynes or a factory service manual (if i could find one).
Take what you see on Google search results and on YouTube with a grain of salt. Some information is wrong and/or dangerous.
You are right about some advice on You Tube but for the most part it is a wealth of information on Auto/Home repairs. I have saved a ton of money using it. One time my Clothes washer quit. I google it and found out I only needed a $5 part and the instructions even had a link to the source for the part. Saved me from buying a new washer 🙂
When using google or You tube ALWAYs look at several. Usually one person will leave out a critical piece of information that someone else will mention.
Exactly! If two videos have conflicting info, at least one is wrong.
I earned pocket money when I was in college working in gas stations. I had never taken auto shop in high school, but how tough is it to tighten a drain plug after an oil change? I can relate that I tried to do an oil change on my 2009 Corvette that I bought used from a Chevy dealer and realized that some gorilla had “torqued” the drain plug so tight that I had to use a breaker bar to get it off. If you have a good gasket on the plug and you snug it up, it doesn’t leak and you can get it off again later.
The same thing happened to me on my wife’s 2013 Camry when I was going to change the oil and filter for her. I bought the proper filter wrench for local shop but when I tried to loosen the filter cover, it wouldnt’ budge. So I got out my impact tool and used that with just a millisecond of trigger pull, I managed to snap off a piece of the plastic filter housing. So then I had to call a tow truck and get it towed to a local shop and they told me that it took a 3 foot breaker bar and 3 techs on the end of it to remove the filter housing which was replaced with a metal one. Simpe job turned into a major repair bill of $187.00!
Prep to do anything is most of the job. That includes getting the right information and educating yourself by researching the right way to perform a maintenance task or repair.
Some vehicle owner manuals still provide sufficient details to start with. Getting the service manual for your specific vehicle year and model and reviewing it before the work always pays off.
The very first car project for me was changing the spark plugs on a 1950 Dodge Coronet, flathead 6. I had to sit inside the engine bay so I could reach them. My dad only shared the tip to make sure the plug wells are clean so that nothing would fall in the cylinders. Cleaning the rust from around them was the most time consuming part. It was so rewarding for my 12 year old self to crank it up and it would actually run better. It was an oil burner, so it made a huge difference. The Fluid Drive made it the easiest three on the tree to learn how to drive. You couldn’t hurt it.
A coolant change done wrong can be just as detrimental as an oil change done wrong. And some cars don’t have gauges for either oil or temperature, so if you don’t stop it immediately when light comes on, the damage can be catastrophic for either job. I will never use the coolant “flush” chemicals again. I used the popular brand on my 3.1 V6 in a 92 Cutlass Supreme SL when it had about 115K miles. I bought the car new and had changed the coolant once before, but this time I wanted to clean it too. Big mistake. When doing the rinse cycle it started leaking in at least a couple of places. I did not have the place, time or money to have it fixed properly, so I just had to use a bottle of stop leak. It worked, but I hated to have to do that. So, no more flush chemicals. Drain and fill only.
I was thinking the same thing about that particular window crank. I didn’t run out and buy the proper tool, but it took two pocket screwdrivers to push the clip off. I got lucky and didn’t damage the door panel. You can also pull off the clip with hemostats.
Going for simple in the detailing department…I suggest doing a thorough vacuum and carpet shampoo. I see so many for sale that looks like the outside was given all the attention and they forgot about the carpet.