It’s not nice having to repair something twice

There are few things more frustrating than, after putting time and sweat into a repair, having to redo it because for some reason you got it wrong. I just suffered through a doozy.
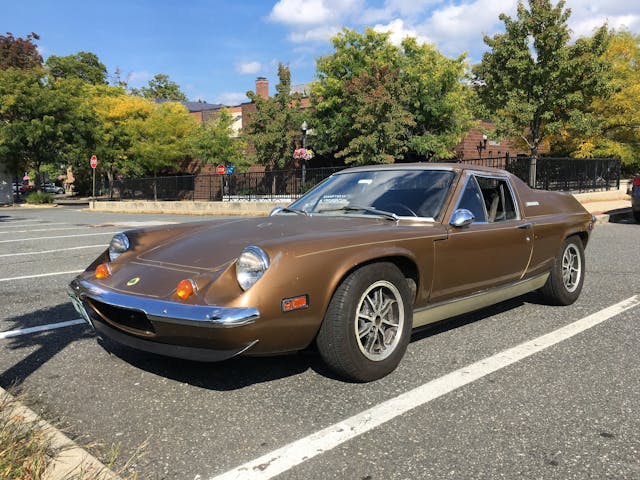
Two years ago, I wrote about replacing a leaky side seal on my Lotus Europa’s transaxle. The car is a feather-light, low-production, mid-engine, fiberglass-bodied British vehicle with a Lotus-Ford engine and a Renault transaxle, so I’ve learned to accept the fact that a) everything on it is weird, and b) almost nothing goes according to plan. Fortunately, I love the twitchy little thing in ways that would require months of psychoanalysis to resolve, so I don’t mind most of the abuse it dishes out. However, the transaxle incident has been, shall we say, a trying little irritant in our relationship.
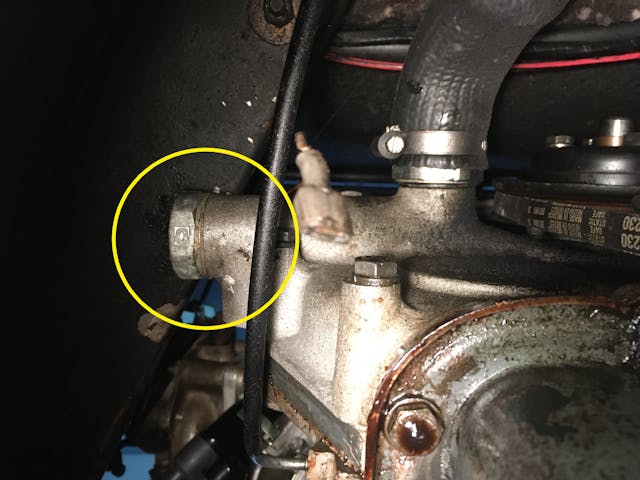
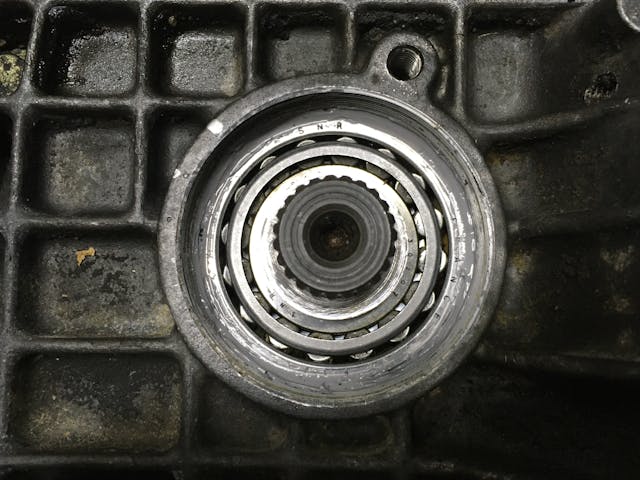
To replace the side seals, you need to undo the large, finned side nuts that they’re pressed into, and to get those off, you need a special tool. Complicating matters is the fact that the positions of the side nuts are used to set both the play in the transaxle’s ring gear as well as the preload of the bearings on the output shafts, so the procedure is to mark one of the fins and a location on the case, then count the exact number of turns required to remove the nut so you can put it back exactly as tight as it was. If you get this wrong, you need to remove the transaxle, remove the bellhousing, manually measure the ring gear play with a dial indicator, and measure the bearing pre-load with—and I swear I’m not making this up—a little scale and a piece of string. I’d say, “How British,” except that the transaxle is actually French.
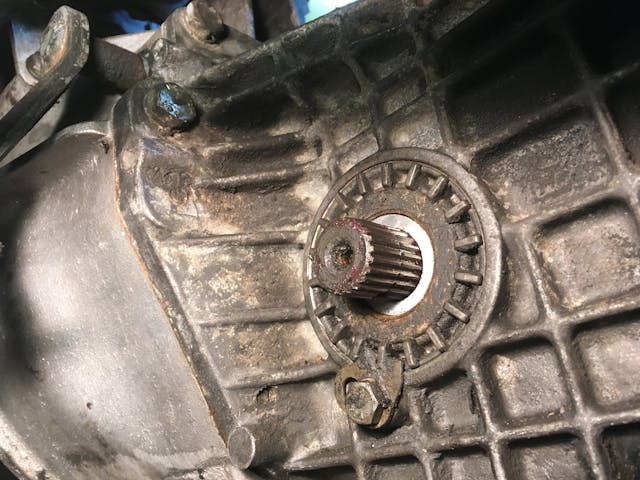
But to remove the finned nuts, you first need to remove the half-axles, and those are coupled to the side-facing output shafts with spiral pins that you have to knock out with a punch. And behind the inner yoke of the U-joints on the end of the half-axles are a series of flat, ring-shaped shims whose number and width are selected to put the bearing under tension, so it takes the load, not the gears, in the transaxle. Got all that?
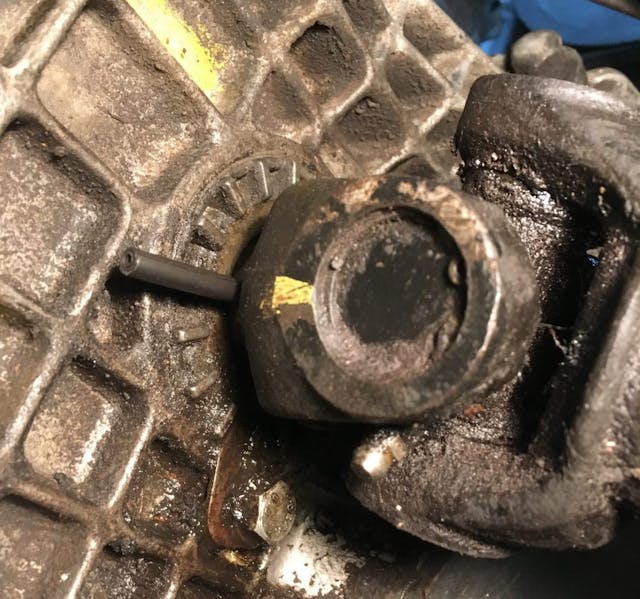
Lastly, in addition to the outer seal in the finned nut, there’s an inner seal—an o-ring that sits in a groove inside a cylindrical spacer—which in turn presses and spins against the rubber lip of the outer seal. Europa owners complain how difficult it is to slide this spacer over the inner seal. However, when I did it two years ago, for some reason I had no problem.
So, in early 2020, I did all this, attacking the badly leaking right-side seal first.
Unfortunately, it wasn’t clear to me which way I should press the outer seal out of the finned nut; it wasn’t like the oil seals I’m used to, where it sits in a cavity with a flat step on the bottom and zero ambiguity about which way it goes and how far it goes in. I got it wrong, pressed the seal out the wrong way, and cracked the finned nut, which at the time was a difficult part to find. I located one at an online Renault shop in Denmark, but the number of turns it required to contact the bearing wasn’t the same as the original nut. Not wanting to remove and partially disassemble the transaxle simply to get the nut tightness correct, I did it by feel, re-shimmed the half-axle yoke, reassembled everything, passed on doing the left side since it wasn’t leaking anyway, and hoped for the best.
Two things went wrong with that repair. I noticed the first one as soon as I began driving the car—the right side leaked like a sieve. It was far worse than before I tried to fix it. I should’ve just left it alone.
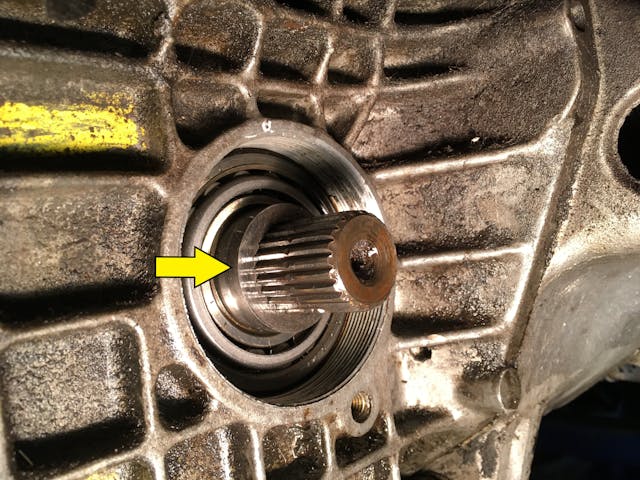
The second thing I noticed two years later when I was installing the adjustable rear links I’d just built. When I grabbed the rear wheels at 6 and 12 o’clock and wiggled them, there was a lot of play, but none at 3 and 9 o’clock like there’d be if it was due to a wheel bearing. The play turned out to be coming from the transaxle’s output shafts. They could clearly be seen moving side-to-side inside the case. This was not good.
I did a lot of reading on the Europa forums and posted the video to one of them. The consensus was that something was very wrong, and in order to know what it was, I needed to pull the transaxle, remove the bellhousing, and get eyeballs on the ring gear and the bearings. Best case: I perform a proper adjustment of the ring gear play and bearing load, and it solves the problem. Another possibility was that the shimming of the ring gear itself would need to be redone, or one or both of the bearings needed to be replaced, both of which would require splitting apart the halves of the transaxle case. The worst case was that one or more of the gears in the transaxle was badly worn. This would be very bad, as the Renault 365 five-speed transaxle were an option only in late Europa Twin Cam Specials like mine, and individual internal parts border on unobtanium.
Now, the older I get, the less comfortable I am jumping into the unknown unless I can see the path all the way to the other side. I posted to one of the forums asking if anyone could recommend a shop in the New England area that could look at the transaxle for me, or if anyone knew of a good working Renault 365 in case mine was terminally messed up. The response was wonderful. It basically said, “We know who you are, you’ve done things with this car that are far worse than this, don’t assume the worst case, suck it up, pull the transaxle, do the measurements, adjust it, it’ll probably be fine, and if it’s not, you’ll deal with it.”
Well, OK then.
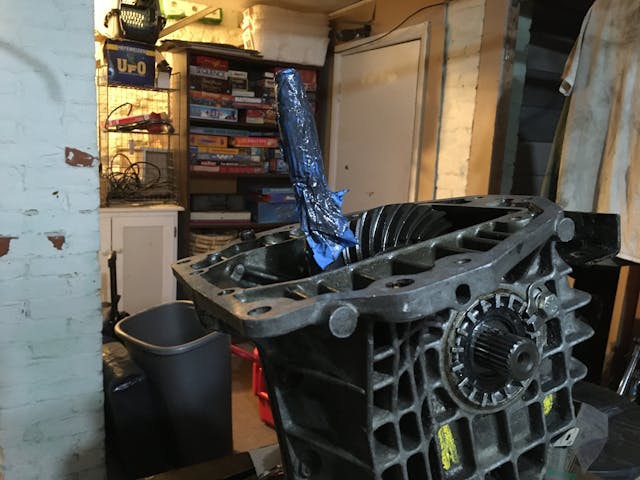
Having the mid-rise lift, the scissors lift table, and several floor jacks, you’d think that dropping the transaxle would’ve been a simple matter, but it was a nightmare. When I rebuilt the car’s Lotus-Ford Twin Cam engine, I elected to replace the water pump that’s integrated with the front timing cover with a removable cartridge-style pump that can be replaced with the engine in the car. Unfortunately, an unintended consequence of this is that the new front timing cover that’s integral with the water pump housing has a protrusion on it that hits the underside of the frame when the engine is tipped back. Because of this, I couldn’t tip the engine far enough back to get the rear of the transaxle to clear its mounting. I got around the problem by loosening the engine mounts and letting the engine sag. I was very careful not to let it crash to the ground, especially while I was under it.
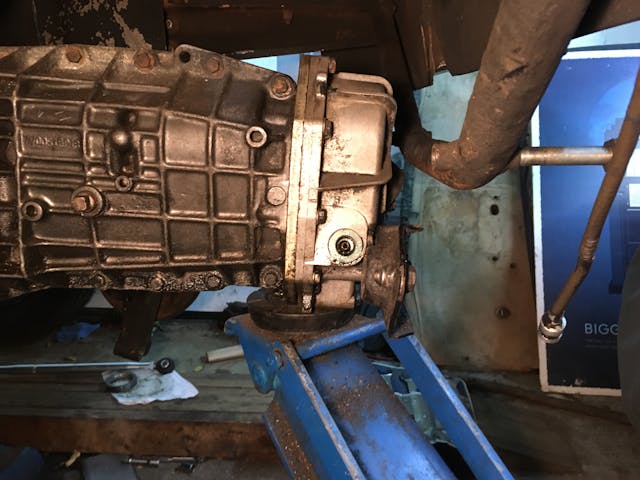
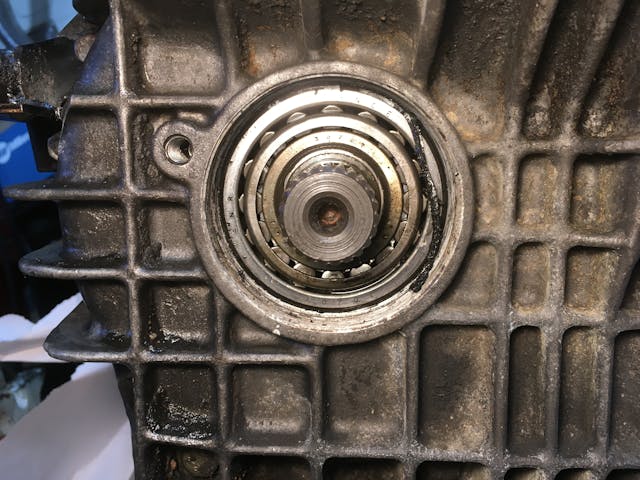
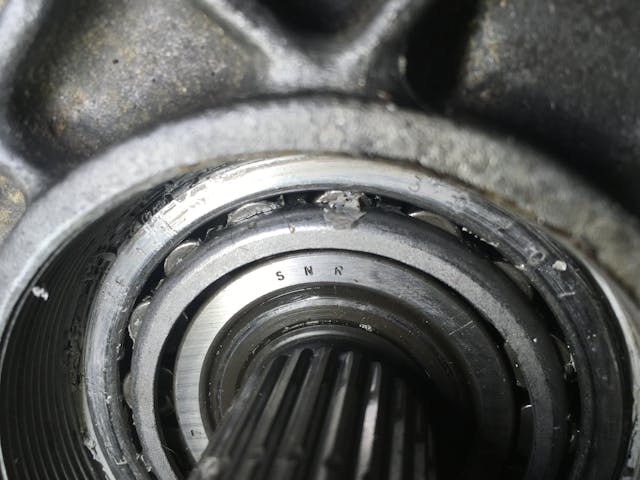
With the transaxle out, I removed the bellhousing, allowing me to see the ring gear and the differential carrier. I shot a careful video of the play as seen from the inside, and a knowledgeable fellow on one of the forums said that it appeared like the bearing wasn’t fully seated. He advised that I take the original cracked finned nut, screw it in the original number of turns to seat the bearing, then replace it with the new nut. I’d actually attempted this before I removed the transaxle, but for some reason, this time it worked. The play went away. I breathed a huge sigh of relief.
With the bellhousing still off, I performed the ring gear backlash measurement, the video of which can be seen here. I’d never done this on a transaxle or differential before, but I have a dial indicator and a magnetic base I’ve used to measure crankshaft end play. I set it up, adjusted both the left and right finned nuts to get the play in the 0.005- to 0.010-inch range, and marked both nuts so I could return to those settings.
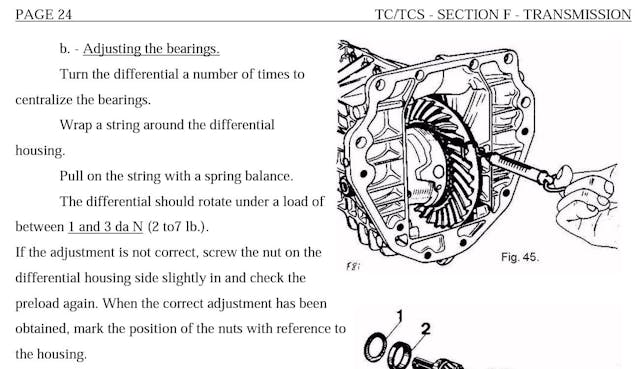
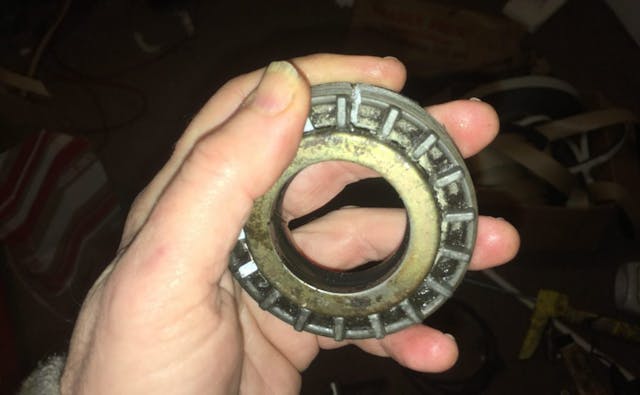
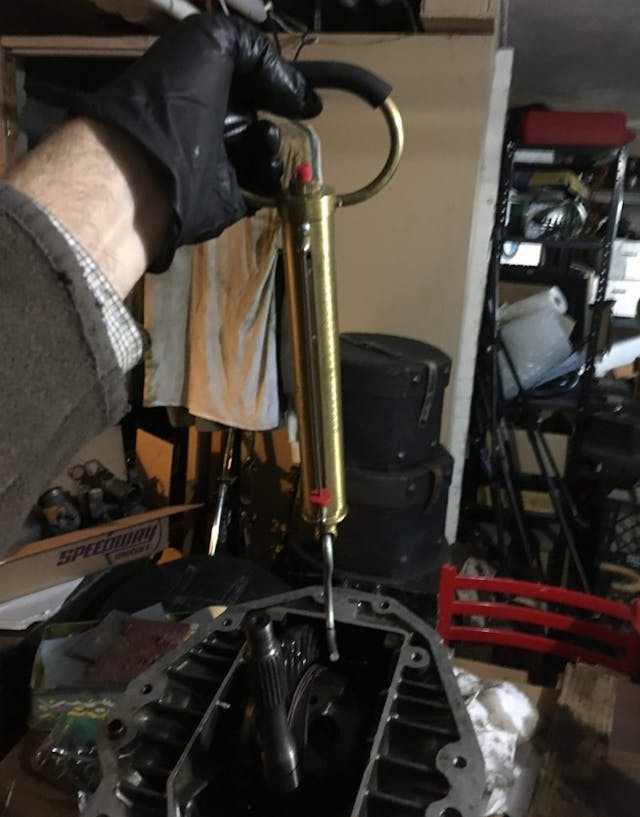
I also performed the bearing pre-load measurement. According to the factory manual, used bearings aren’t supposed to have any pre-load at all—the finned nuts should be touching them but not putting any real tension on them. This is measured by wrapping a string around the ring gear, tying a loop in the end, and pulling on it with a scale as if you’re weighing a yellow perch. The measured tension should be between 2 and 7 pounds, which is quite a range.
That left me to deal with what one would expect to be the simple issue of replacing the seals. After all, the second time around, I knew not to press them the wrong way out of the finned nuts. However, reading up on the forums, I learned that there are actually three parts that need to seal correctly—the inner o-ring seals, the outer pressed-in seals, and the threads on the finned nuts themselves—and you can do everything right and still have them leak. Apparently, like some British / French automotive version of the old parable of the snake biting the frog, it’s just in their nature.
For the outer seals, there isn’t any lower lip or shelf against which they bottom out. Instead, careful measurement along with trial and error was required to get the seals positioned so they sat in about the middle of the spacer against which they need to seal. While trying to fine-tune that position, I bent the metal frame of one of the seals and had to order another set. Eventually I got them right.
The inner o-ring seals were also a challenge. The forums are full of posts describing how difficult it is to get the metal spacers to slide over the o-rings without damaging them. Some folks say to soak the seals in hot water, coat them with oil or a little RTV, install them on the output shafts when the garage is warm, slide the axle yokes over the output shafts, and let the weight of the car itself gently press the spacers over the o-rings. As was the case two years ago, I had no such trouble—the o-rings offered exactly zero resistance to the spacers. I wondered about this, so I posted to one of the forums about it. I read one response saying to not only use a thin coating RTV on the o-rings but also to lay down a thin bead of it on the outer edge of the bearing where it meets the threads so that fluid won’t leak around the outside of the bearing. I examined my bearings and saw that there was, in fact, a ring of black RTV around them. I carefully removed the old RTV with a pick, laid down a thin bead of Yamabond where it had been, coated a new o-ring in Yamabond, slid it on the output shaft, slid the spacer on over it, coated the threads of the finned nut in Permatex Aviation Form-A-Gasket (Yamabond seemed much too thick for these fine threads), screwed it into the mark I’d made, called that side done, and called it a night.
In the morning, I saw that a Europa forum expert had commented on my question on the inner seals. He said that the original o-rings were round and sealed fairly well but were difficult to get the spacers over. In response, some vendors sold square-edged o-rings that were much easier to get the spacers to clear but didn’t seal as well. He strongly advised that I use the round o-rings. Damn. I pulled the right finned nut off, and to my horror, saw that the thin bead of Yamabond I’d put on the seam between the bearing and the threads had squashed its way everywhere, including into the bearing itself. On the one hand, this was soft stuff that would likely just get chewed up, and it’s not like this was an engine with small oil passageways that could get clogged, but still, I spent several hours with a curved pick trying to pull out every flake of it I could get.
With everything cleaned up as best I could, I reassembled the right side, this time using new round o-ring inner seals with a thin coating of Yamabond on them and using the Form-a-Gasket on the threads, but without the bead of Yamabond on the bearing edge. I did the left side the same way. I re-checked the ring gear backlash with the dial indicator and the bearing load with the scale and string, found them both within spec, and buttoned up the rest of the transaxle.
The last assembly challenge had to do with the oil seal in the front of the bellhousing. Pressing the old one out and the new one in was easy enough, but the new seal has to slide over the splines on the input shaft, and the manual calls for the use of a special tool to prevent the splines from cutting the seal. Some forum posts referenced wrapping the splines in electrical tape, but I found that cutting a finger off a nitrile glove and greasing it did the trick.
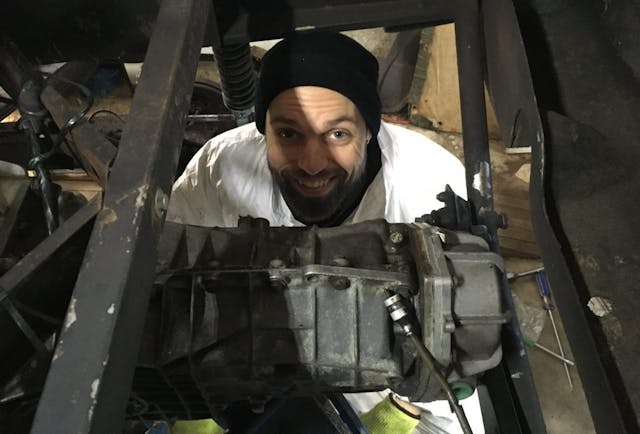
That just left transaxle reinstallation. I pressed my son Ethan into service. I maneuvered the floor jack while he made sure the transaxle didn’t topple off it. As with many other transmission / transaxle installations, I lined the bellhousing and engine block holes up visually, passed metal rods through them to keep them aligned, even used a pair of C-clamps to pull the transaxle toward the block (the threaded rods I use for this on other cars wouldn’t fit), and just when I was at my wits why-won’t-this-thing-go-in end, I twisted the output shafts to rotate the input shafts, the splines aligned with those in the clutch, and the two pieces slid together with a reassuring thock.
Over the next few evenings, I tightened the engine mounts and re-shimmed the half-axle yokes. There’s still a small amount of play when rocking the rear wheels in the 6–12 o’clock position, but I don’t find it alarming. I reattached the clutch cable, shift linkage, and exhaust, and filled the transaxle with fluid, leaving the car ready to rock and roll.
Unfortunately, it will need to sit for a while, as the garage is currently snowed in. It probably won’t be until spring that I deal again with rear alignment, which is what sent me down this rabbit hole in the first place. But hopefully this seal-and-play issue is put to bed. Twice was definitely one time too many. I’m not sure I’d have it in me to do it a third time. I mean, I love the car, but any relationship can reach a breaking point.
***
Rob Siegel’s new book, The Best of the Hack MechanicTM: 35 years of hacks, kluges, and assorted automotive mayhem, is available on Amazon. His other seven books are available here, or you can order personally-inscribed copies through his website, www.robsiegel.com.