Triaging a no-crank condition and testing a starter motor
Whether you’re a hobbyist on a road trip in a precious classic or a parent chauffeuring the kids around in a daily driver, it’s the moment that many of us dread. You stop for gas, hop back into the car, turn the key, and hear nothing … or just that awful “click” … or a click followed by a sluggish RRrrrrr-RRrrrrr.
In previous columns, I’ve gone into a fair amount of detail explaining how to use a multimeter to help identify the source of the problem by testing battery voltage and measuring voltage drop. But I thought I’d put it all together and lead you through both triaging a no-crank condition and testing to see if your starter mode is actually bad.
Fortunately (spoiler alert) the root cause of a no-crank is almost always simple. Most of the time it’s simply due to a low or dead battery, or voltage drop through a corroded connection. Rule those out before you suspect the starter itself. But it could be the starter.
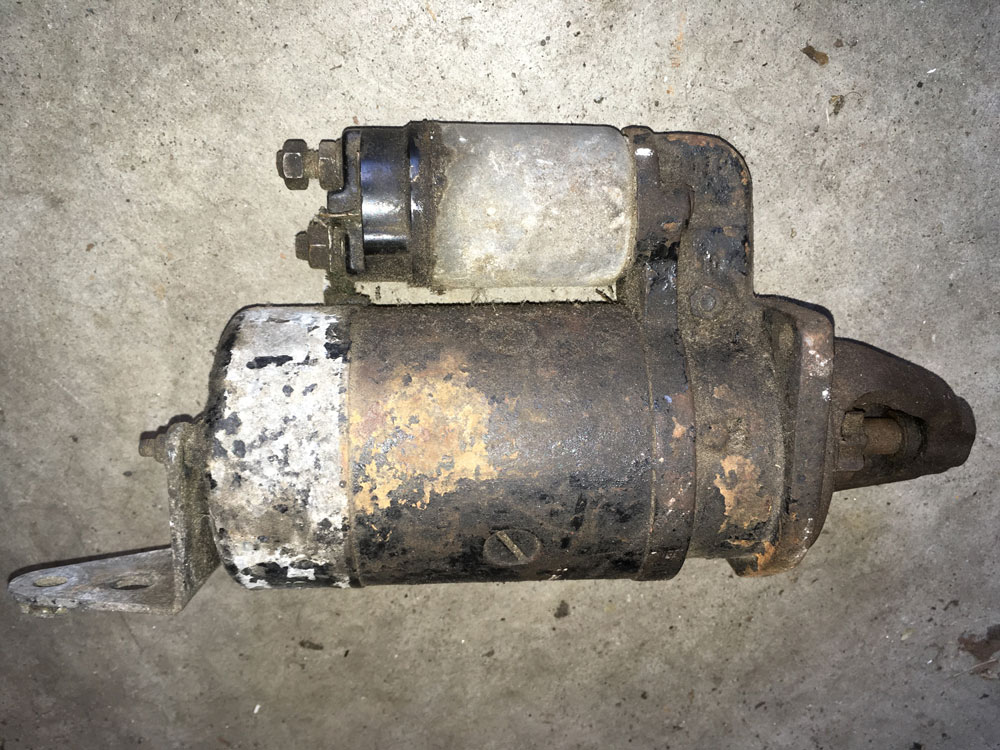
First, let’s get the basics out of the way. The starter and solenoid are a tightly-integrated pair that work together to crank the engine over. On most cars, they’re physically co-located—the starter is the big cylindrical electric motor that’s bolted to the side of the engine block, and the solenoid is the small cylinder that’s attached to it like a lamprey on a big fish.
The starter and solenoid. On most cars, they’re a tightly-coupled unit.

The solenoid serves two purposes. First, it’s essentially a remote-controlled switch—a special type of electrical relay—that allows the starter motor to be cranked without having the hundreds of amps of current it draws flowing through the ignition switch. We’ll cover the general topic of how relays accomplish this magic in another piece. But the other thing the solenoid does is thrust the pinion gear forward. This is what actually allows the spinning starter to engage the teeth on the flywheel and spin the engine.
Here’s a basic electrical diagram. The thick positive battery cable is connected directly to a large threaded post on the solenoid. Another threaded post is connected to the starter motor itself, usually via a braided cable. There is no post for the negative connection because the starter connects to ground by virtue of being bolted to the engine block.
The basic wiring of the starter, showing the battery, ground, ignition switch, and interlock connections.

Another terminal on the solenoid, either a small threaded post or a spade connector, is fed 12V power by the ignition switch. Depending on the age and configuration of the car, the ignition wire may be passed through a clutch or transmission interlock that prevents current from flowing through it unless the clutch is depressed or the automatic transmission is in park. When the key is turned to “start,” 12V should be present at the terminal on the solenoid. This powers the solenoid, which then simultaneously spins the starter motor and thrusts the pinion gear forward so it can engage with the teeth on the flywheel.
Connections to the solenoid, showing the big threaded post for the positive battery cable (top), the spade connector to receive the wire from the ignition switch (middle; wire and connector shown for clarity), and the braided cable connecting the solenoid to the starter (bottom).

With that in mind, when you turn the key and the starter doesn’t spin or spins too slowly, the problem can be: a bad or corroded connection of the fat positive cable, bad grounding through the negative cable to the engine block, no 12V connection to the terminal on the starter from the ignition switch, or mechanical problems in the starter or solenoid.
Here’s how to tell:
- Turn the ignition key to “start.” What do you hear, and what do you see? If you hear RRrrrrr-RRrrrr, or a click and then nothing, and the dashboard lights are dim, the odds are your battery is low or dead. As described in past articles, use a multimeter to measure the voltage between the two battery posts. On a fully charged battery, it should be 12.6 volts. If it’s in the low 12s, the battery is run down. If it’s 12V or below, the battery is dead. Either way, you must address the battery problem by replacing it, recharging it, or (as a short-term solution) jump-starting the car.
- If the battery voltage is fine but you still hear RRrrrrr-RRrrrr, or a click and then nothing, and if the dashboard lights are decently bright and the battery voltage is good, odds are you have a voltage drop between the battery and starter. Begin by thoroughly cleaning the battery posts and battery cable terminals with a post cleaning brush. If the problem persists, perform a voltage drop test on both the positive and negative sides.
- If you turn the key and hear absolutely nothing, but your dashboard lights are nice and bright and the battery voltage is good, the odds are either the connector to the ignition wire has fallen off the starter solenoid or the connector has broken off the end of the wire, or the clutch or transmission interlock is preventing 12V from reaching the starter solenoid terminal. Visual inspection will easily identify the first two.
- If the wire and connector are intact, use a multimeter to verify that, when you turn the key to “start,” there’s voltage present on the wire feeding the small terminal on the starter. If there’s not, you’ve identified the problem, and you have to troubleshoot to determine why voltage isn’t there. It could be the ignition switch or, if the car has one, the interlock. On a car with automatic transmission, sometimes re-setting the shifter in park, or jiggling the shifter slightly, will cause the interlock switch to make contact.
- If no voltage is present, you can verify that, if voltage were to be supplied to this terminal, the starter would spin. Take a length of wire several feet long. We’ll be using it to supply voltage to the low-current terminal on the solenoid, so it doesn’t need to be heavy gauge (16 gauge is fine). Crimp whatever kind of terminal the solenoid uses to the end (it’s usually a spade terminal). Strip the other end of the wire. Pull the ignition wire and its connector off the small solenoid terminal and slide on the connector on the end of the wire you just made. You are about to bypass any clutch or transmission interlock, so verify the car is in park (automatic transmission) or in neutral (manual transmission), and apply the handbrake! Briefly touch the stripped end of the wire to the positive battery terminal. You should hear the starter spin. If you do, there’s nothing wrong with the starter, solenoid, or high-current wiring, and the problem is in the low-current voltage supply to the solenoid (either the ignition switch, the transmission or clutch interlock, or related wiring).
- You may have read about using a screwdriver to jumper the big threaded solenoid post to the small solenoid terminal. I strongly recommend you do not do this. Instead use a wire to the battery as described above. It is far too easy to accidentally touch the screwdriver to some other metal in the engine compartment and cause a dangerous short circuit. Just use the wire.
- If, when jumpering the solenoid to the battery as described above, you hear absolutely nothing, the solenoid is probably bad. Whether the solenoid can be replaced independently of the starter or can be replaced with the starter still in the car depends on the design of the starter and solenoid. You’ll have to look that one up in a repair manual or enthusiast forum.
- If you still hear RRrrrrr-RRrrrr, or a click and then nothing, and you are absolutely certain the battery is good and there’s no voltage drop, then it’s possible that the starter is bad. Try starting the car, then put your hand on the starter. If it is hot to the touch, odds are strong the starter is, in fact, bad.
- If the starter appears bad, remove it. For most cars, disconnect the negative battery terminal, undo the cables from the starter, unbolt the starter from the block, and then remove the two bolts holding it to the transmission bell housing. Obviously the exact procedure varies from car to car. On vintage carbureted cars, it’s pretty easy to get the starter out, but on a fuel-injected car it can be pretty well hidden under the intake manifold.
- Once it’s out, the starter can be bench-tested (or floor-tested) as follows:
- Take a fully charged battery and a pair of jumper cables.
- Attach the red cable between the battery positive terminal and the thick post on the solenoid where the positive battery cable usually goes.
- Attach the black cable between one of the ears on the starter and the negative battery terminal.
- Take that jumper wire you made and attach it to the starter’s small terminal.
- Stand on the starter motor with one foot. Seriously. Stand on it. If you don’t, it’s going to jump around like a hooked bluefish and twist the jumper cables and generate a shower of sparks. I SAID, STAND ON IT! (Don’t make me tell you again.)
- Once you’re certain you’re standing securely on the starter, touch the jumper wire to the positive battery post. Three things should happen: the starter motor should spin, the pinion gear should thrust forward, and the pinion gear should spin. All three are necessary for proper starter functionality.
Testing a starter on the floor. Don’t forget to stand on it or it’ll jump dangerously around.

Note that the starter can function electrically but fail mechanically. That is, the starter can spin, but the pinion gear can fail to engage the teeth on the flywheel. If you turn the key and hear the starter spinning madly but don’t hear the engine cranking, then the pinion gear isn’t thrusting forward. If you turn the key and hear crunching and gnashing, then the teeth on the pinion gear, or the flywheel, or both, are probably damaged. Physical inspection usually reveals the problem.
If you remove the starter and test it as described above, but you don’t find anything wrong with it (e.g., it thrusts and spins), and you’re certain that there are no low battery or voltage drop issues, frankly I’d either have the starter rebuilt or replace it, especially if it was a bear to remove. It certainly is possible for the starter to spin freely and easily when lying on the floor but to behave differently when it has to bear the much heavier electrical and mechanical load of actually spinning the engine.
Lastly, one of the joys of owning a vintage car is that, if the starter dies, you can usually pop-start it by putting the car in neutral, having a few friends push the car to trotting speed, then turning the key to the ignition setting, depressing the clutch, putting the car in first or second gear, and quickly letting out the clutch. The wheels force the engine to turn, as the starter would. Hopefully the engine starts before the engine’s compression causes the car to stop. Plus, invariably your friends slam into the back of the car. So you get to find out who your true friends are. It’s great fun.
Now go and get something started.
***
Rob Siegel has been writing the column The Hack Mechanic™ for BMW CCA Roundel Magazine for 30 years. His new book, Ran When Parked: How I Road-Tripped a Decade-Dead BMW 2002tii a Thousand Miles Back Home, and How You Can, Too, is available here on Amazon. In addition, he is the author of Memoirs of a Hack Mechanic and The Hack Mechanic™ Guide to European Automotive Electrical Systems. Both are available from Bentley Publishers and Amazon. Or you can order personally inscribed copies through Rob’s website: www.robsiegel.com.