Windshield replacement in a vintage car (Part 1)

If you’re driving down the road in a late-model car, and the vehicle in front of you kicks up a rock that cracks your windshield, it’s not really a big deal. The combination of readily-available glass, the good condition of the rest of the car, the likelihood of insurance coverage, and the reasonable cost even if you have to pay for it out of pocket, makes the process relatively painless. These days you probably don’t even have to go anywhere, with many glass companies offering in-driveway windshield replacement.
However, it’s different you buy or own a vintage car with a cracked windshield. While a website like Safelite’s is great at being able to tell me that a windshield for my 2003 BMW 530i, with rain-sensing wipers, is $355 installed, these click-and-estimate tools don’t apply to most vintage cars.
Why not? Several reasons. First, the windshield itself—a high-volume glass company might not be able to procure a boutique product for your vintage ride. Second, the method of installation. Most modern windshields are flat, or nearly, and are held in with adhesive. In contrast, the glass on many pre-1970 cars had a lot more curvature and was typically held in with a rubber gasket, usually with a locking strip.
But the biggest reason that a commercial glass shop probably won’t be able to replace the windshield in your vintage ride is that if the glass hasn’t been replaced in 40 or 50 or 60 years, it probably isn’t coming out without a fight, and the area underneath it may need work that’s outside the wheelhouse of glass replacement.
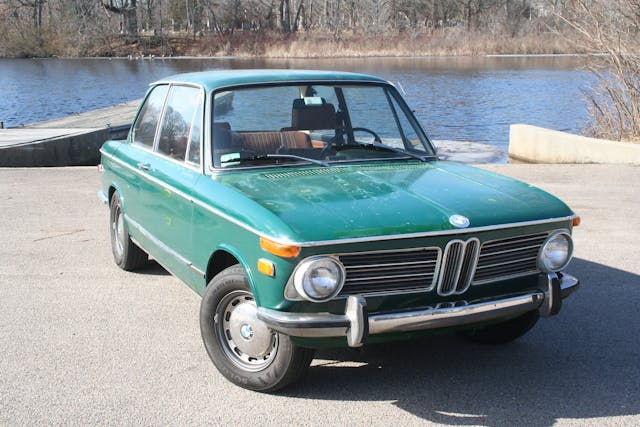
I’ve been through this with two of my BMW 2002s. The first was “Louie,” the decade-dead 1972 2002tii I bought sight-unseen in Louisville in 2017 (you can read about it in my book Ran When Parked).
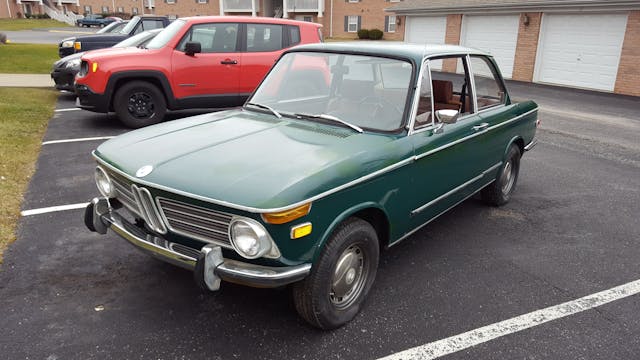
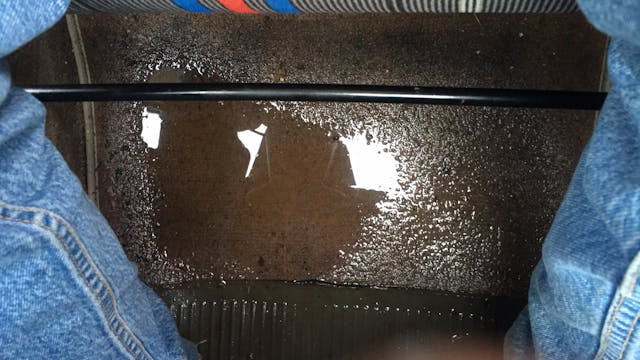
The windshield wasn’t cracked—in fact, it was in remarkably good, un-pitted condition—but the gasket was so shrunken and hardened that it was effectively porous, and when I hit rain on the drive home, enough water pooled on the floorboards to make a family of salamanders very happy.
The gasket proved to be as tough as alligator skin. After removing the plastic lock strip, I tried to cut the gasket out with a utility knife. It was the kind of half-inch-at-a-time work that, if the knife slipped, threatened to sever arteries and tendons. Initially I thought that I needed to cut both down into the gasket where the lock strip had been and then across, but eventually I found that I could simply cut across and lift the cut gasket out of the way. This sped things up quite a bit.
Once I’d cut through the gasket, I was able to press the windshield out from inside. However, the remaining hardened portion of the gasket was attached to the windshield frame. While there were some large chunks that pulled off, many small sections held on like barnacles. It was like removing old grout between tiles. I threw everything at the problem: fingernails, a plastic scraper, acetone, Scotch Brite pads, a Dremel tool, single-edged razor blades, and a metal scraper. Not surprisingly, the metal tools worked the fastest but had the most deleterious effect on the paint. Since Louie had a fair amount of patina on it—the previous owner had treated some rust blisters by sanding them and then spraying Hunter Green hardware store paint—I wasn’t as horrified by this as you might think.

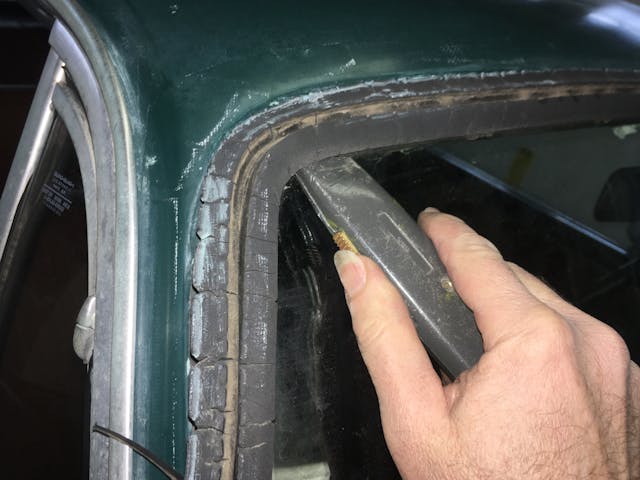
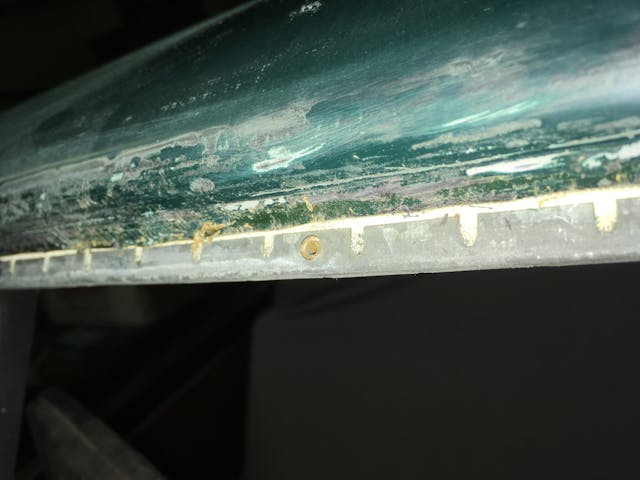
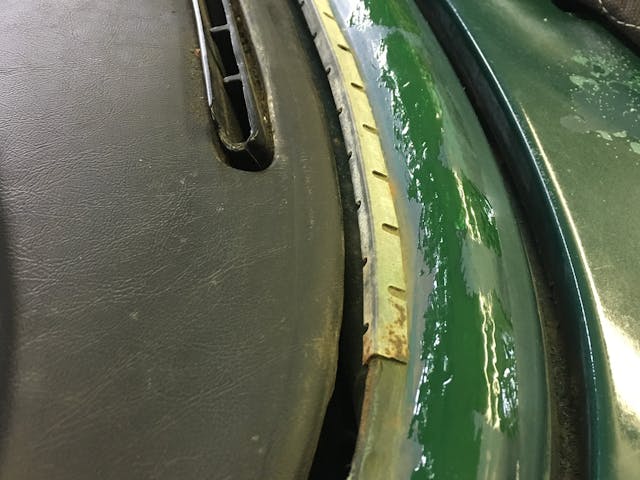
Removing the windshield and gasket exposed two things. The first was an odd, toothed clip that ran around the inside of the windshield frame. This turned out to have been installed by the factory in all BMWs between certain dates as a response to Federal DOT-mandated requirements about keeping the windshield secure in the event of collision.
But the more troubling thing was the presence of rust on the driver’s-side A pillar.
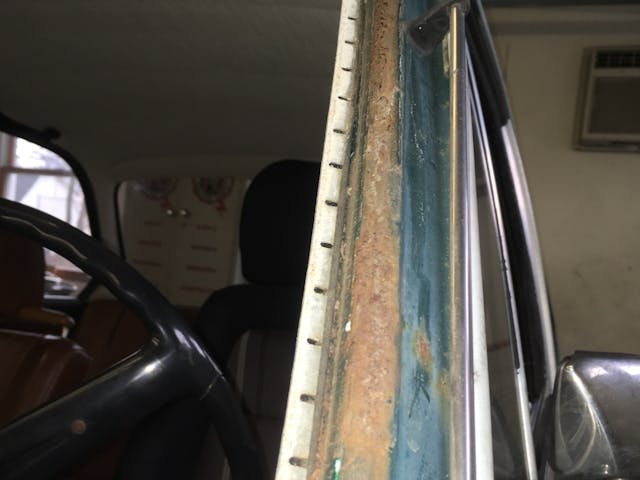
I carefully ground the rust down and found pitting but no actual perforations, so I elected to treat it with Rust-Oleum Rust Reformer, one of several rust conversion / encapsulation products.
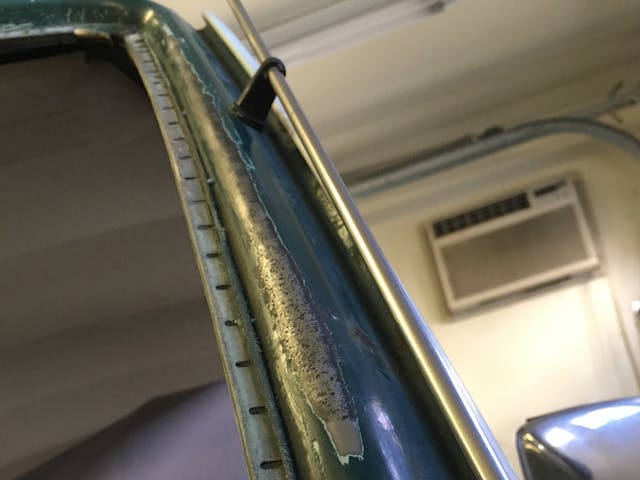

Not wanting a windshield gasket replacement to mission-creep into an outer body restoration, I simply primed this section and anything else I scratched or shipped and painted it with the same color Hunter Green paint that was previously used elsewhere on the car.

The windshield and new gasket were ready to go in. For this, I elicited the help of my friend Lindsey Browne, shop foreman at The Little Foreign Car Garage in Waltham, Massachusetts, and a fellow 2002 aficionado. Lindsey had previously explained to me that they used to use a glass guy who had a lot of experience with vintage cars, but he retired, so now they were doing most of their own glass installations. I said something to him like, “So, you know how to do the rope trick to flip the lip of the gasket, right?” He said yes but cautioned me that this is sort of the “stick the landing” part of windshield replacement—the part that everyone knows to comment about but is usually a relatively small portion of the whole routine. “There’s also a lot of prying, shoving, slapping, and cursing involved,” he said.
What’s meant by doing “the rope trick” to “flip the lip”? Rubber windshield gaskets have an inner groove in which the glass sits, and an outer groove into which the windshield frame needs to seat. The problem is that, like installing a rubber grommet in a hole, the inside-facing lip is larger than the opening in the windshield frame, so to get the frame to seat in the gasket, the inside-facing lip has to be coerced to come inside an opening it’s too big for.
The time-honored method of doing this is to goop up the groove with something slippery but non-permanent like Gojo lanolin hand cleaner, take a length of thin rope, slide it into the groove all the way around the gasket, then begin inserting the windshield and gasket into the frame, and slowly and carefully pull the rope out from the inside so it pulls the inside-facing lip of the gasket over the inside edge of the windshield frame.


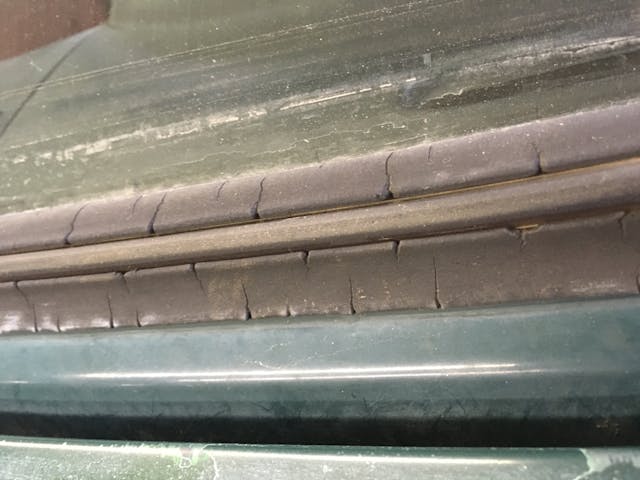
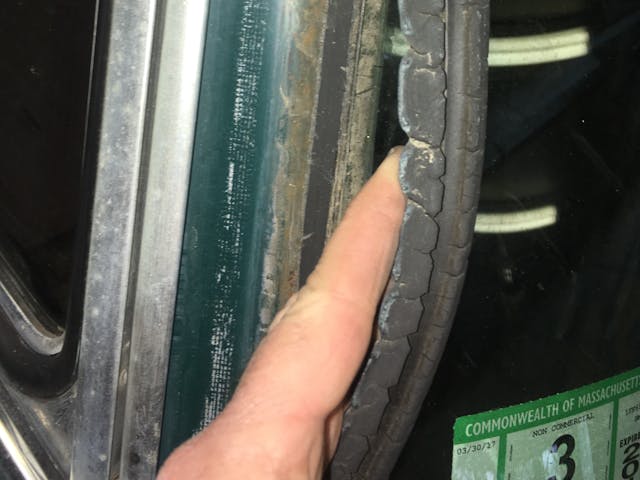
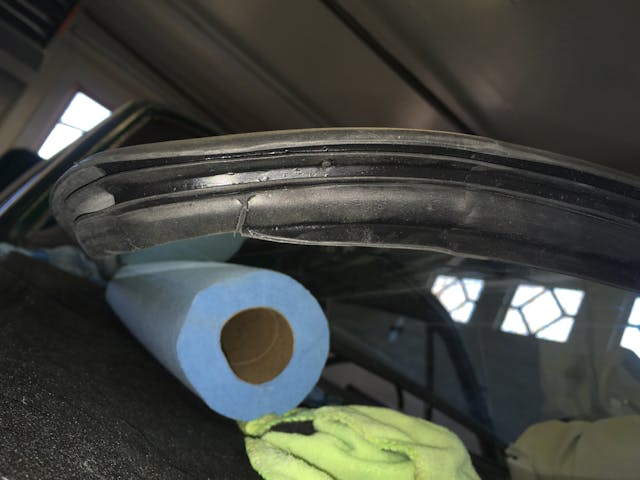
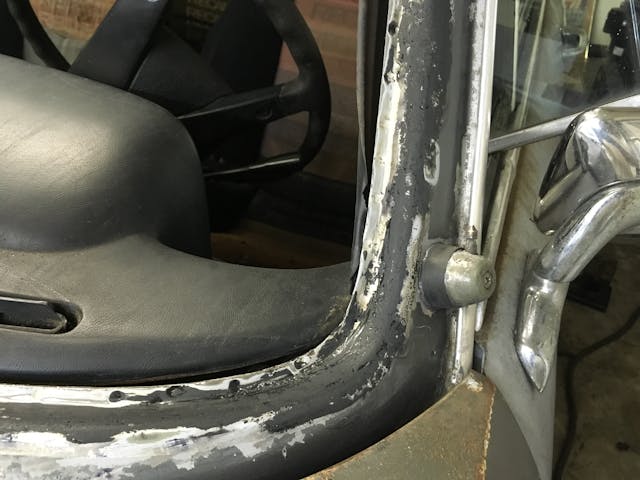
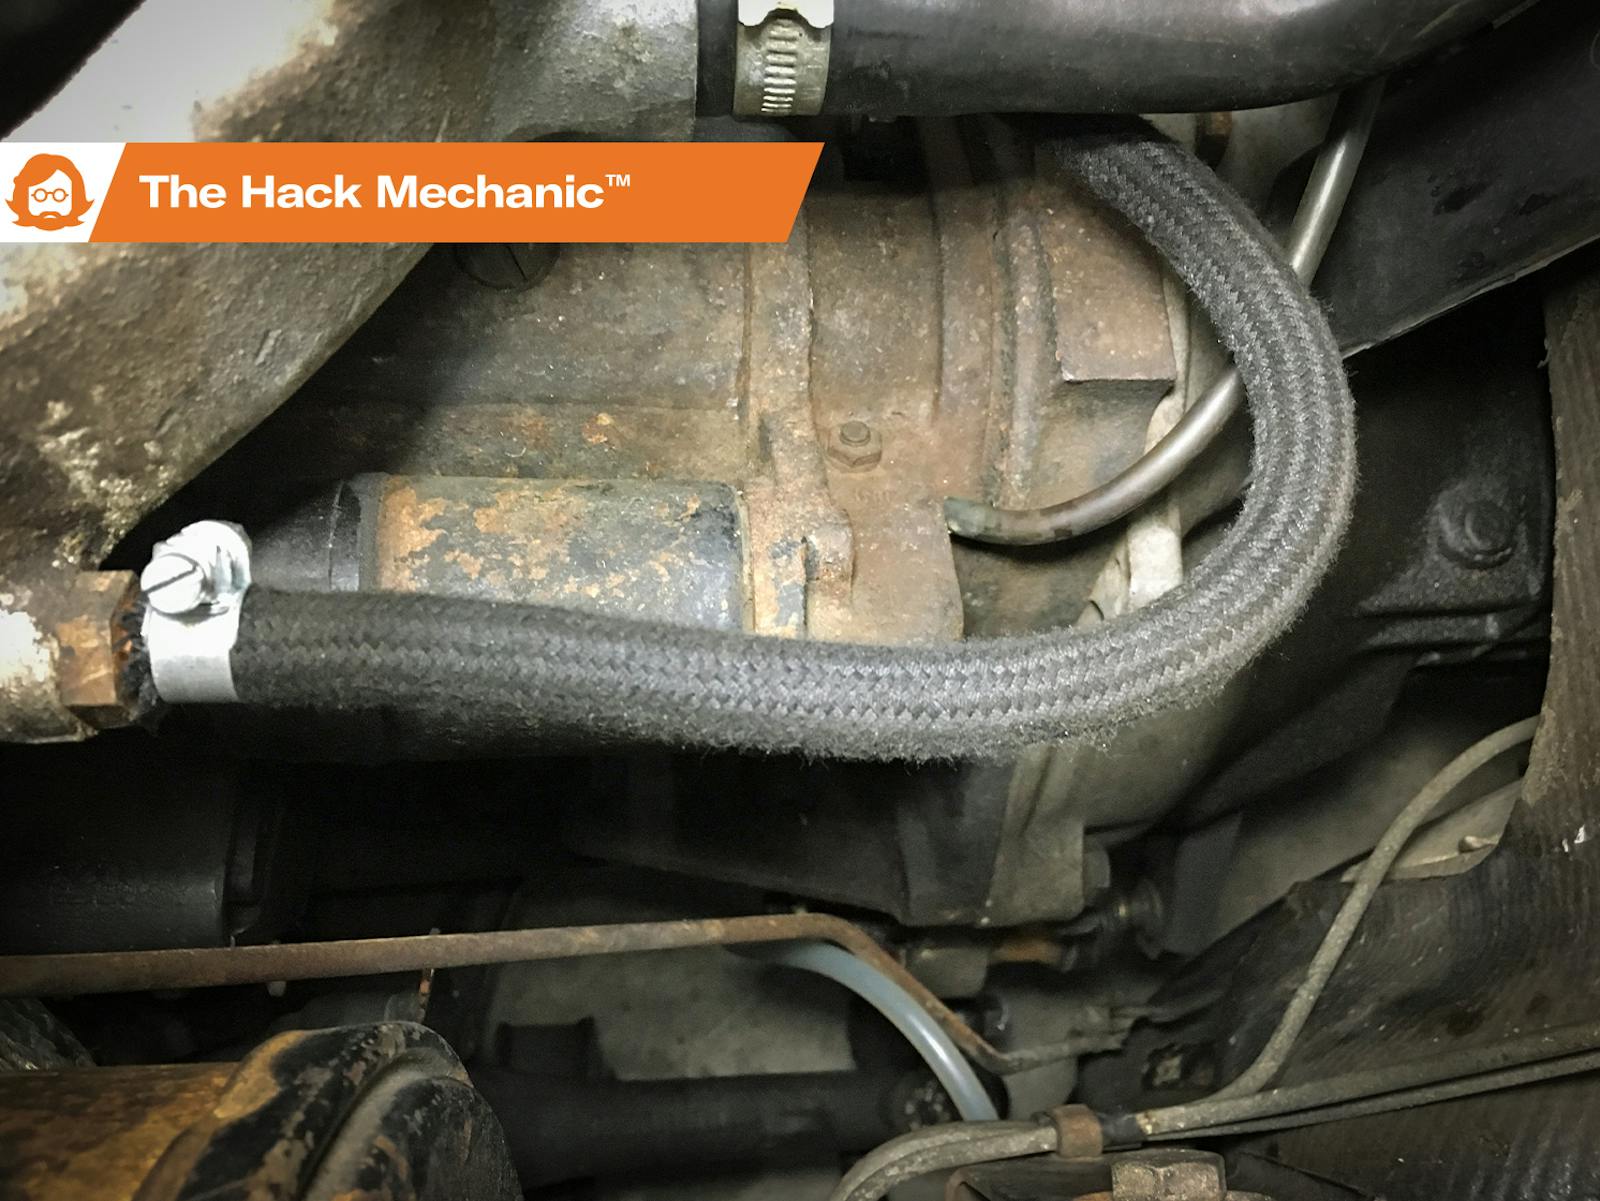
I’d watched a few videos of this, including one of a friend of mine demonstrating it at a vintage BMW event. Mine did not go nearly as easily. There were a few reasons why. One is that, if you look at the photo of the gasket (above), you see not just one groove and two lips, but several of each, so there are actually multiple lips that need to be flipped. Another was that, particularly at the bottom, the presence of the toothed clip exacerbated an almost impossibly narrow space for the thick rubber gasket to pass. A third was that once the gasket began to seat, the degree to which the glass could be slid side-to-side was almost nonexistent, so twice we needed to pull it out and start over.
But the main culprit was that pulling the rope and flipping the lip in no way guarantees that the windshield frame is actually seating in the central groove of the gasket. This issue was greatly exacerbated by the presence of the toothed clip, as it prevented the lip from easily flipping over and made it more difficult for the gasket to seat. In the narrow dashboard gap on the bottom and other areas, I had to manually intervene with a tool jury-rigged with a pair of Vise Grips and an Allen key employed to reach in and pull the inner lips out of the way.

Eventually we got it close except for the left side being high. This was dealt with by the kind of force that Lindsey warned me about.

After we were done, I read that there used to be an OEM gasket made specifically for cars that had the toothed clip, but the part number had been superseded by that of the clipless gasket, and what I should’ve done was drill out the rivets and remove the clip. D’oh!
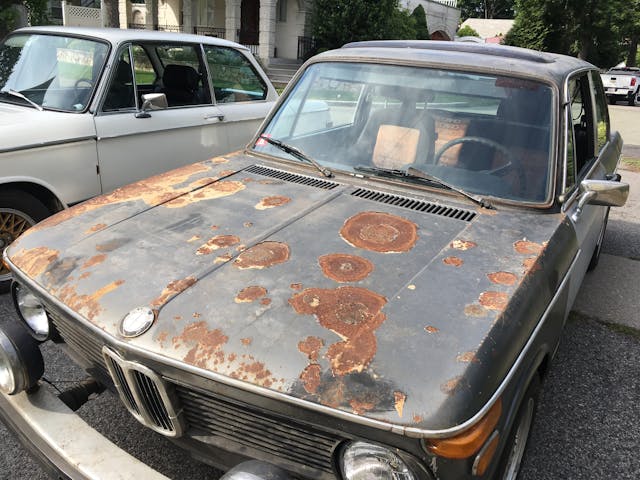
I had the opportunity to do it all again when I bought back “Bertha,” the 1975 2002 my wife and I had driven from our wedding in 1984. It too had sat for decades, had rust blisters the size of dinner plates on the hood, a cracked windshield, and a rock-hard gasket that had to be cut out.
When I removed the windshield and gasket, I found that Bertha did not have the problematic toothed clip but had rust on one of the A-pillars that, when ground down, revealed two actual perforations.

Since Bertha is a car that wears patina with a capital P, I was even less concerned about a do-it-once-do-it-right approach than I had been with Louie. Launching into an A-pillar replacement would’ve been expensive, so I treated the area with naval jelly, painted it with rust reformer, patched the small perforations and filled the divots with POR-15 Patch and Seam Sealer, sanded that down, then primed and painted it.
I sourced an inexpensive, used windshield from someone local, and Lindsey again came over and helped me with the installation. Even without the dreaded clip, it was still a bear, requiring insertion of a hooked pry tool to pull the lip inside the windshield frame.
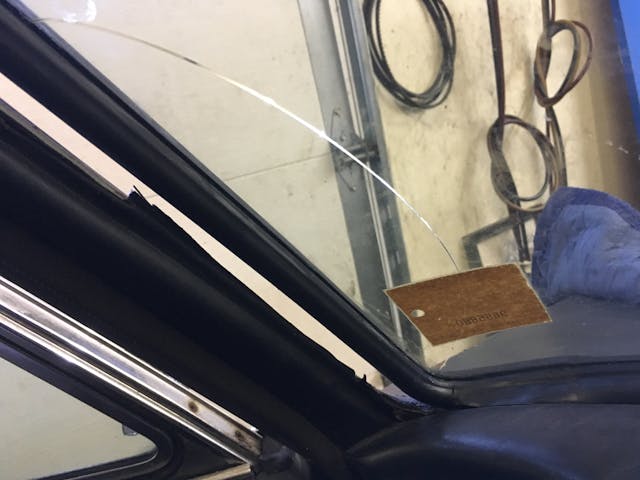
We reached the same point that we did with the windshield on Louie, where the section along the driver’s A pillar wasn’t quite seated. We did the same shoving and slapping as last time, but unfortunately, this time the windshield cracked.
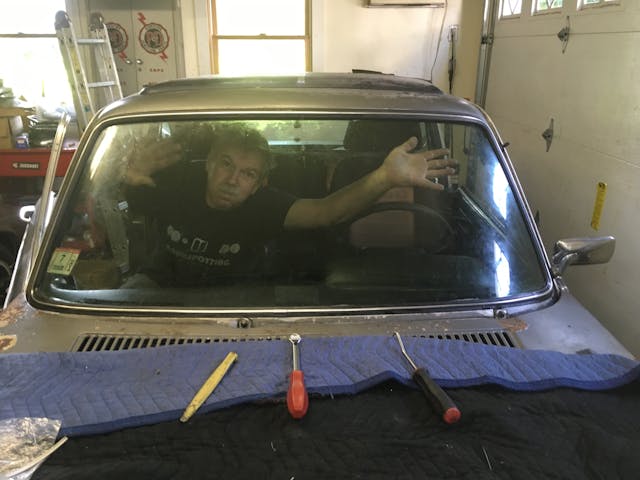
This is part of the advantage of having a friend who is a pro and owns the same car. Lindsey said, “I’m pretty sure I have another windshield at the shop. I’ll be back in an hour.” Sure enough, an hour later, another used windshield rolled into my driveway. For whatever reason, this one went in a bit easier.
The takeaway from all this is several-fold. If you have a car with an old, hardened gasket, odds are the gasket is binding tightly to the windshield frame and the remnants will have to be chipped or scraped off. This alone is likely to rule out a Safelite-like service in favor of a classic car specialty repair shop. If the gasket removal damages the paint, and the car is pretty enough that that matters to you, you’re looking at taking it to a body shop for paint matching and touch up. If you find rust perforations on the windshield frame, it’s more in the purview of outer-body restoration.
For all these reasons, it’s unrealistic to think you can handle windshield or gasket replacement in a classic car in the same way as a late-model car, where it’s done in your driveway, or you drive in and out as if it’s an oil change.
However, I have a high tolerance for imperfection and am quite good at containing mission creep, so I did it myself, preventing a windshield and/or gasket replacement from slippery-sloping its way into what probably would’ve been several thousand dollars of sheet metal work and paint-matching. I was thrilled, with help from a friend, to get this done on two cars for just the cost of the materials.
I not only would do it again, I am doing it again. Next week, we’ll go through all this with my little fiberglass-bodied Lotus Europa, whose cracked windshield is held in not with a gasket, but with adhesive.
***
Rob’s latest book, The Best of the Hack Mechanic™: 35 years of Hacks, Kluges, and Assorted Automotive Mayhem is available on Amazon here. His other seven books are available here on Amazon, or you can order personally inscribed copies from Rob’s website, http://www.robsiegel.com.
Check out the Hagerty Media homepage so you don’t miss a single story, or better yet, bookmark it. To get our best stories delivered right to your inbox, subscribe to our newsletters.
While I don’t have any vintage cars, I still try to avoid driving in situations that might lead to damaged windshields. Such as dump trucks whether gravel or larger rocks or just dirt, flat bed trailers whether empty or loaded. When behind any duallies, I look for large rocks wedged between the tires.