A week in the life of a car-loving do-it-yourselfer

In my weekly stories, I usually focus on one car, one repair, or one theme. This week, however, I thought I’d show you what a fairly average week looks like for me.
First, the daily driver:
2003 BMW 530i
As I’ve said repeatedly, my 2003 E39-chassis 530i stick sport is the best daily driver I’ve ever owned. Of course, in these pandemic times I’m not “daily driving” much of anywhere. Still, the 5 Series chassis, combined with the 230-horsepower inline-six engine, is a Goldilocks-level just-right combination of speed, handling, and comfort. Unfortunately, the deep-treaded but dirt-cheap set of used Toyo Observe GSi-5s snow tires I scored for it last winter were the squirmiest set of winter rubber I’ve ever had on a car—far worse than any set of Blizzaks, Alpins, or Vredesteins. I couldn’t wait to get them off. Of course, by yanking the winter boots in New England before the end of March, you risk angering the weather gods. So as a sign of respect, I left the snows on my wife’s Honda Fit, figuring I’ll change those when the crocuses come up.
I’ve written in detail about the mechanics of swapping winter and summer wheels. I do have a mid-rise lift in my garage, but a project car is frequently on it, and even if it’s not, the best way to pick the 530i up on the mid-rise is to use all four of the car’s jack pads, which uses the full extent of the arms of the lift, which requires that the car be centered to within about an inch. For something quick like a wheel swap, it’s easier to just use the floor jack and pick up the front, then the back.
I really can’t stress jack safety enough. If you’re using a good, wide floor jack on a cement floor and only jacking up one wheel at a time, most folks think it’s OK to quickly swap wheels because you’re not actually putting your body under the car, but it’s simply not worth being wrong about. Don’t even think about doing this with a narrow jack on asphalt or worse, dirt. It’s really worth taking the extra minute to set the car down on jack stands.
It’s great to have the E39 wearing its running shoes again. I may have to go have a look at a car I don’t need just so I can drive the E39 somewhere.

Next up, the three cars that have wintered in the garage:
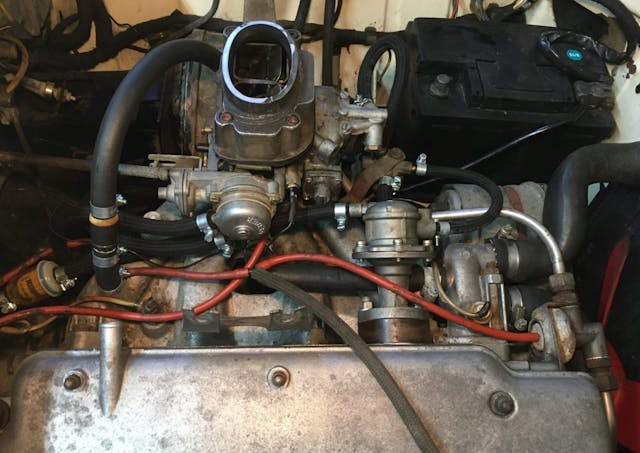
1974 Lotus Europa Twin Cam Special
The Lotus was locked up all winter, with only one burst of exposure during a lull in the snow to go visit an ailing friend who wanted to see it. When I went to take the car out for an official spring jaunt, I was surprised to find a good-sized puddle of antifreeze beneath it. It didn’t take long to trace the source to a leaky heater control valve. The valve screws into the thermostat housing that’s a cast part of the head, and the threads are British Standard Pipe Parallel (BSPP) threads. It can be challenging to tell whether it’s leaking from the valve or the threads, and if it’s the latter, to get the threads to seal.
Careful examination using a mirror positioned underneath showed that the valve itself was at fault. Fortunately, it’s not a rare part, as it cross-references to Triumph TR250, TR4s, and TR6s. I spent about $35 shipped, and the part arrived quickly.

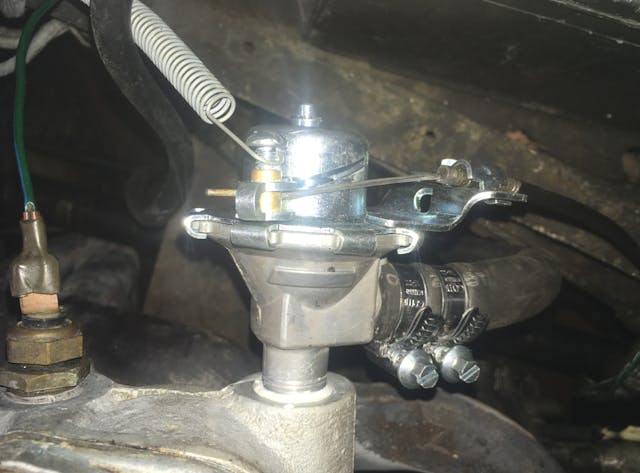
However, even after installing the new valve using Loctite high-temperature sealant on the pipe threads and letting it sit overnight, I still saw antifreeze dripping under the car. The source turned out not to be the threads but instead the heater hose that seats on the neck of the valve. For originality’s sake, I was using one of the weird wire hose clamps, and although it had sealed at the neck before, this time, no matter how much I tightened the screw, it simply wasn’t up to the job, and I’m not sure why. I installed a pair of the high-quality nut-driver hose clamps that I use on the vintage BMWs (see below), and that squelched the leak. Done.
While I was in a leak-squelching frame of mind, I decided to have a look at the oil leak from the back of the head that had plagued the car since I adjusted the valves last winter. It didn’t take long to isolate it to the Europa Twin Cam’s odd configuration, where the intake cam protrudes out the back of the head so you can attach the big pulley that runs the alternator (an odd artifact of this being a mid-engine car and there not being enough room at the front of the engine to put the alternator where it usually goes). There’s a semicircular indentation in both the head and the valve cover, and a round seal pressed onto the back of the intake cam looks almost like a bearing, which sits in the indentations. The cork valve cover gasket needs to be trimmed with a razor blade so that it abuts the seal, and RTV is used at the corners and in the indentation in the valve cover (very low-tech, old-school British). Leaks from this location, and from the cork valve cover in general, are common on the “twink” engine, but it had been tight as a drum before I’d pulled it apart to adjust the valves.
I pulled off the pulley so I could actually watch the seal with the engine running and immediately saw oil weeping between the seal and the semicircular indentation in the valve cover. I looked at it closely and I could visually see a gap. I probed it with a pin and realized the problem was that I appeared to have forgotten to squirt the required bead of RTV above the cam seal when I installed a new gasket and put the valve cover back on last winter.
Hoping that I could stanch the leak, I carefully pulled the valve cover off. It lifted without ripping up the cork gasket, as I’d installed it using Hylomar, a British never-fully-drying adhesive. (In contrast, when I first sealed up the valve cover after the engine rebuild, I used Yamabond 4, which didn’t leak a drop, but required extensive cleaning of both the head and valve cover mating surfaces when I pulled the valve cover off to adjust the valves). Having eyeballed the size of the gap, I didn’t think that Hylomar would close it, so I laid a bead of Yamabond down in the indentation and at the corners of the cork gasket, sealed it up, and let it dry.
In the morning, I ran it in the garage with the pulley off and did not see it leaking, so I put the pulley back on and took the car for a short drive. When I returned, I saw a smaller leak that had been there before, but it was larger than I’d prefer living with. I pulled the pulley back off, ran the engine, and could see it leaking at the corners where the cork gasket meets the cam seal. If I want to eliminate the oil leak, I may need to do the full-on Yamabond 4 assault on a new valve cover gasket. I called one of the Lotus specialists that I order parts from; a gasket is now on the way.
1973 BMW 2002 (a.k.a. “Hampton”)
About 18 months ago, I bought a survivor 1973 BMW 2002 (with 48,000 miles on it) from its original owner in Bridgehampton, Long Island, New York. I’d completed the major sorting-out last fall and was doing a few small things while preparing to put the car on Bring a Trailer. If you’ve read my stories here, you know that I’m not a concours person; I’m someone who prizes functionality and cost containment over originality. But if you’re going to portray a car on BaT as an original un-booged-up survivor, it needs to look the part, and one of the details on Hampton that needed to be addressed was the hose clamps.
On some of the coolant and fuel lines, the car was wearing generic hardware-store hose clamps, the kind with slots cut into them that the worm gear which tightens the clamp bites into. There are two things wrong with these. One is that, over time, the rubber in the hose often extrudes through the little slots, looking like pasta escaping from a strainer, and potentially weakening the hose. But the bigger issue is not only are they not original, they’re glaringly not original, and thus provide an easy target for people to point at and howl like Donald Sutherland does at the end of the remake of Invasion Of The Body Snatchers. (Sort of like people who know nothing about gymnastics complaining that a gymnast didn’t “stick the landing.”) I didn’t think that it would be difficult to set things right, but this is not my area of expertise, and I wound up down a surprising rabbit hole of time and cost.
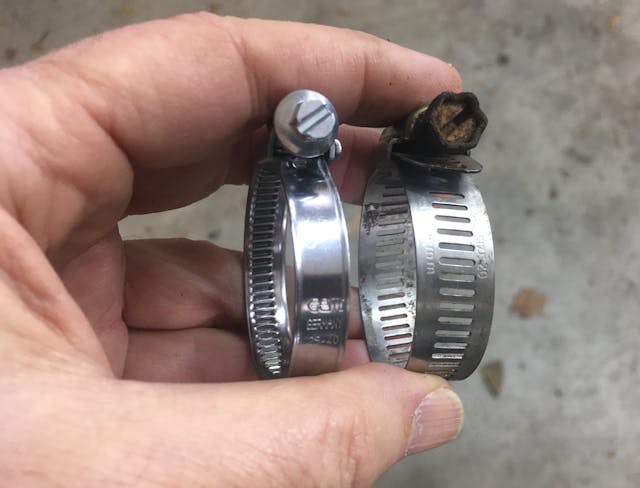
When I work on vintage BMWs, I default to using new German-made (either Gemi or Norma) hose clamps with raised ridges on the bands rather than slots, and 6mm hex heads you can tighten with a flex-nut driver, figuring that these are high-quality and functionally identical to the original BMW clamps other than lacking the BMW logo. For Hampton, though, I thought I’d go the extra mile and order the genuine clamps from a dealer. What arrived, though, were clamps with a 5mm hex head and the letters “BMW” but no logo, an example of the fallacy of thinking that just because you order something at a dealer, they’ll supply exactly what was on the car 48 years ago. So I returned those and ordered Gemi clamps from the fabulous metric fastener supplier BelMetric, only to find that the worm drive was so big and the chrome was so shiny that they stood out in the engine compart like a sore thumb, at least they did to me.
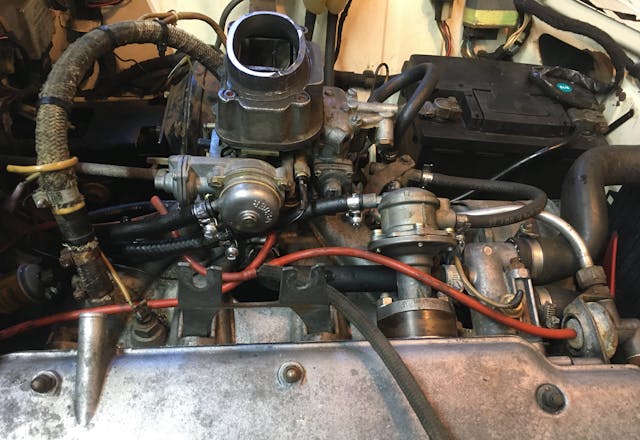
In addition, friends who know this stuff better than I do pointed out to me that the fuel hoses on vintage BMWs didn’t have this worm drive style of clamp; they instead used the banded high-pressure style where a slotted round “cheese-head” machine screw threads into a nut. And, they pointed out, if I was concerned about originality, while I was at it, I should be using the correct cloth braided German fuel hose. And while I was replacing hoses, that frayed cloth brake booster hose, even though it wasn’t leaking, was clearly as old as the car, and didn’t exactly cry out “I am a well-maintained engine compartment.” Another hundred and forty bucks later, I had it pretty much sorted out. The car was submitted to BaT, was accepted, and should be listed in about four weeks. I reminded myself that the ridiculous sum I’d just spent on correct clamps and hoses would be paid for with one bid increment on BaT.
1999 BMW Z3 (a.k.a. “Zelda”)
I wrote several pieces on Zelda last fall and winter, describing how I bought the car back from a good friend after her son ran it into a median strip. Like the Lotus and Hampton, Zelda had been locked in my garage for much of the winter, but as soon as the weather swung toward spring, I was eager to harvest the fruits of my labor.
It took a fair amount of work to replace the bent control arms and other engine components that were damaged or destroyed by the curb strike. It was a huge amount of work pulling the transmission to do the clutch job necessitated by a disintegrating throw-out bearing (which had been a known issue before the curb strike). But as soon as I backed the car out of the garage, donned leather and gloves, dropped the top, and drove it, I realized that this was one of my smarter purchases in recent memory. Mind you, this result wasn’t a slam-dunk; I’d sold Zelda because I ran out of garage space, and my space issues have only become worse.
As an aside, if you’ve never owned a convertible, particularly a snappy little roadster, you have to understand that it’s all about that body relaxation response you get when you drop the top and drive it. Yes, the sun-in-your-face-and-wind-in-your-hair thing may seem like a tired trope, but it’s completely true. Driving a roadster with the top down is like experiencing rolling Xanax. I used to see people driving convertibles with the top down and gloves and jackets on, and I’d think, “What a gadfly. They’re only doing this to show off I have a convertible. I don’t want to give this person the satisfaction of looking at them.” It wasn’t until I owned one that I realized that the person doing that doesn’t give a hoot what you think; they’re doing it because how it makes them feel. And I now do the same thing as often as possible. Viva Zelda!

There’s still work that needs to be done. The front air dam is splintered from the impact. I glued it back together over the winter, but my repair broke on the first frost heave. I need to replace it. I’m trying to work through the logistics of how to buy a new one and paint it myself. But I am so glad I have this car back, and whenever it’s sunny, I look for excuses to drive it. We’re out of cereal? Coffee? Half-and-half? Good. I’ll be right back.
One of the casualties of the curb strike was that the car badly bent its front wheels and blew out three of its four tires. Last winter, I found a straight set of wheels with nearly new tires on them being sold for very short money from someone who’d sold their Z3 with the winter wheels and tires on it, but they’d been sitting in their garage, coated in brake dust. At the time, I just threw them on Zelda and left the old wheels at the end of my driveway. Now it was time to deal with both.

I pressure-washed the replacement wheels but found that, on what had originally been the fronts, the brake dust had etched itself into the finish. I soaked them in wheel cleaner and used a stiff brush, but they laughed at it. An hour spent with a Scotch Brite pad largely did the trick. There’s not much left of the clear coat, but at least they’re presentable.
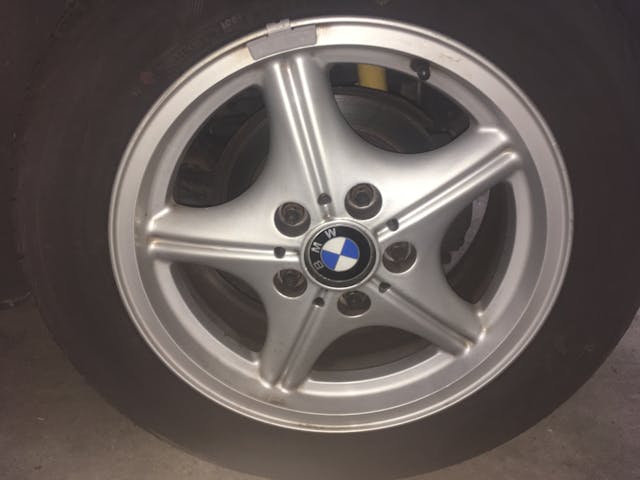
Before deciding on the fate of the original bent wheels, I jacked up Zelda’s rear, set it on stands, mounted bent wheels on the rear hubs two at a time, ran the engine to spin them, and examined them all closely for wobble and run-out. The two that were originally on the front were badly bent, one of the rears was dead straight, and the other was straight enough to be usable. Probably not coincidentally, the dead-straight one was also the only one whose tire still held air. Perfect, I thought; I’ll keep that one as a spare in case I hit a pothole (or, heaven forbit, a median strip). I offered the two badly bent ones on Facebook Marketplace for free and the nearly straight one for best offer. The first person who responded owned a nearby wheel-straightening business and was thrilled to grab all three. He said he felt he was stealing them from me and pressed 60 bucks into my hand, which funded that evening’s take-out sushi and, in turn, made my wife very happy.
As I put the cars away at the end of a few very productive days, I turned around and looked in the garage, and thought, “Damn, this is a happy place. Soon, things will change up—Hampton will get sold, Zelda and the Lotus may get swapped for some of the other cars I have in an outlying storage area—but this has been a good set to have here over the winter.”

Here’s hoping your do-it-yourself week was as good as mine.
***
Rob Siegel has been writing a column (The Hack Mechanic™) for BMW CCA Roundel magazine for 34 years and is the author of seven automotive books. His new book, The Lotus Chronicles: One man’s sordid tale of passion and madness resurrecting a 40-year-dead Lotus Europa Twin Cam Special, is now available on Amazon (as are his other books), or you can order personally-inscribed copies from Rob’s website, robsiegel.com.