How to start a vintage car using only 4 wires
I’ve written at length about the steps required to start a long-dormant car—lubricating the cylinder walls, changing the oil and filter, cleaning the fuel system, making sure there are no acorns or mice nests (or whole mice) in the air cleaner housing that might get sucked into the engine, etc. Here’s another helpful hint that may come in handy when you’re dealing with a long-dead car: How to bypass a car’s electrical system (or a portion of it) to start and run a car using only four wires.
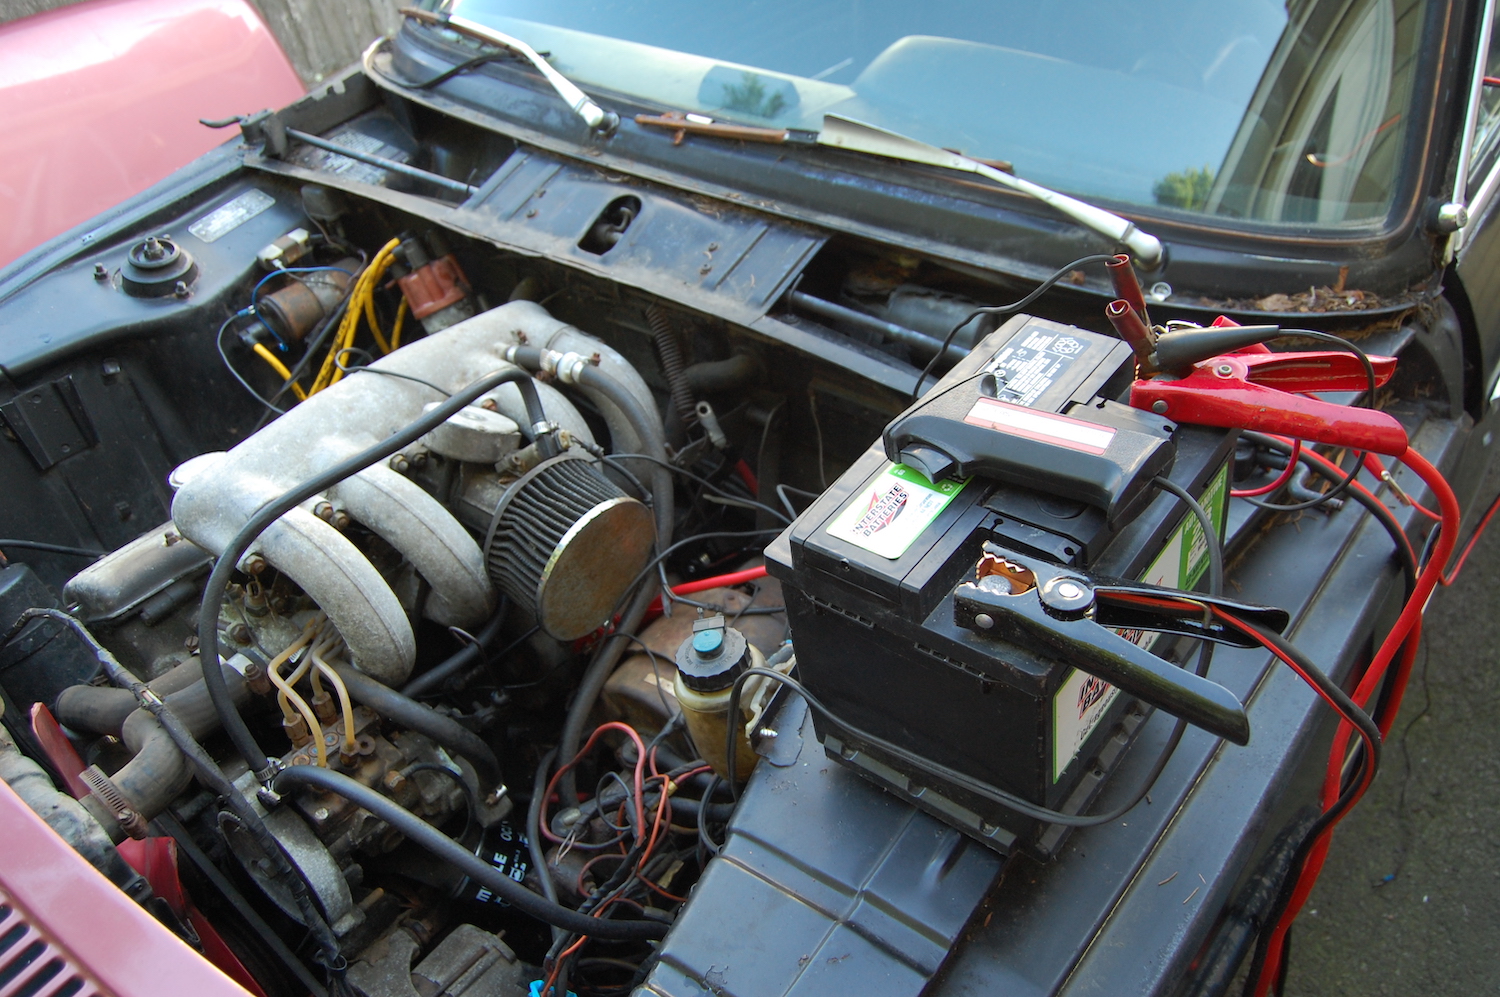
First question: Why would you want to do this? Perhaps the car has had an electrical fire. Or perhaps you’ve taken on a project car and the wiring is so booged up you’re concerned that if you toss in a battery and crank the key, you’ll ignite an electrical fire. In my case, I was given a free 1973 BMW faux-2002tii (a 2002 into which someone had transplanted a fuel-injected tii engine). It’s basically a parts car, but I wanted to ascertain the health of the injected engine, and to do that I needed to start and run it. But when I looked at the wiring, I found that someone had begun moving the battery from the engine compartment to the trunk and had abandoned the job part way through, leaving wires hanging, insulation frayed, and the fuse box unsecured. Plus, the battery tray had been removed, so there wasn’t even a place to put the battery, and the cables weren’t long enough to sit it on the fender. It was enough to make me want to play it safe and bypass the entire mess.
First, let me be clear that this method applies only to vintage cars, by which I mean cars that are primitive enough that there are no electronic control units, sensors, or ancillary devices that need power. That being said, this should work on just about any non-smog-laden carbureted car with a mechanical fuel pump. It’ll also work on oddball mechanically fuel-injected cars like the BMW 2002tii, provided you power the electric fuel pump.
The big picture
It’s often said that all a car needs to start is fuel and spark. Well, it’s a little more complicated than that. It needs the starter motor to spin the engine, the spinning of the engine to create a vacuum that draws mixed air and fuel into the cylinders, and the ignition to send correctly-timed spark to the plugs as the distributor spins around. For this discussion, let’s assume that the engine has compression, the valves are well adjusted, the fuel system is clean and functional, and a correctly-timed spark is present.
I’m going to step through the wiring needs of the starter and coil separately, then pull it all together.
Spinning the starter
Like any electrical device, the starter motor requires a positive and a negative connection to the battery. On nearly all cars, the starter has an integrated solenoid, which is just a relay that turns the starter on and off. The electrical connections are to the relay, not to the body of the starter. The positive connection is a thick, red wire that runs from the positive battery terminal to the big threaded post on the solenoid. There is no corresponding wire for the starter’s negative connection because the starter is grounded to the engine block, which in turn is connected to the negative battery terminal via a thick, black cable.
But there is a third connection—a thin wire connected to a small terminal on the solenoid via either a spade or a ring connector. When this terminal is fed 12 volts—as it should when you twist the ignition key to the “start” position—it engages the solenoid, which completes the positive connection to the starter and causes it to spin while also thrusting the pinion gear forward.

So, if there is already a good battery in place with good positive and negative cables whose connectors aren’t corroded, you can spin the starter by taking a wire, connecting it to the small ignition terminal on the solenoid, and momentarily touching the other end to the positive battery terminal. It is imperative that, before you do this you first make sure the car is in neutral, because when you do this, you are bypassing the neutral safety switch and can cause the car to lurch forward if it is in gear. Because the wire is just powering the solenoid and not actually carrying current to spin the starter, it can be a thin wire, not a thick one like the battery cables.
Instead of touching a wire to battery positive, you can buy a remote start switch that has a small alligator clamp at both ends. That makes it easier, as you can connect both ends and then squeeze the switch. I prefer to cut off one of the alligators and crimp on a spade connector instead, as it makes the connection to the solenoid more secure and less likely to short against the body of the starter.

So, now that you know how the connections to the starter work, if the battery cables are a mess—or, as was the case with my 2002tii parts car, the wiring is so messed up that you wish to bypass all of it—you can simply connect the battery to the starter with jumper cables as follows.
- Disconnect the positive cable from the battery. Since all connections to the alternator and fuse box have to go through the positive battery cable, when you disconnect it, you’re disconnecting the car’s entire electrical system. Wrap the end in a rubber glove so it can’t accidentally short out on anything.

- Clamp one end of red jumper cable to the thick, threaded post on the solenoid, being very careful that it contacts only the threaded post. Clamp the other end to the positive post on the battery.

- Clamp the black jumper cable to the body of the solenoid or other convenient clean ear on the engine block, and the other end to the negative battery post. By connecting both jumper cables, you’ve connected the starter but haven’t turned it on.

- Now connect a wire to the ignition terminal on the solenoid, as shown two photos above. Verify that the car is in neutral, then touch the other end of the wire to battery positive. (Or, if you’re using a remote start switch, connect it between the solenoid and battery positive, and hit the switch.) The starter should spin.
Note that clamp-on jumper-cable connections like this are extremely insecure and can fall off easily. If you need to move the car, it’s much better to buy a pair of long battery cables and screw them in place to the battery, starter, and block instead.
Firing the coil
Now that we’ve covered the starter, the next step is firing the coil. Every standard ignition coil has two connections. They’re labeled either “+” and “-” or “15” and “1.” The “+/15” terminal, commonly called the “hot side” of the coil, receives 12V from the battery. The other terminal (“-/1”) is connected via a wire to the condenser on the side of the distributor and receives the triggering signal from the points opening and closing. It also usually runs the tachometer.
So, to bypass the car’s wiring and fire the coil, assuming that the ignition is intact (coil, points, condenser, cap and rotor, plugs and wires all good, and points opening as the distributor spins) and that the distributor timed so that the rotor is pointing at cylinder #1 when #1 is at top dead center, all you need to do is take a wire with an alligator clip at one end and a spade connector at the other, disconnect any wires to the “+/15” side of the coil, connect the spade connector there instead, and connect the alligator clip to the positive battery terminal. If the ignition is equipped with a ballast resistor, technically you should wire 12V to the input of the resistor, then wire the output of the resistor to the “+/15” side of the coil, but it’s not really going to matter unless you’re running the engine for a long time.

If you want to be extra certain you’re not using any of the car’s existing wiring, take a fifth wire with spade connectors at both ends, and connect it from the coil’s “-/1” terminal to the condenser terminal on the distributor. This eliminates the possibility that something in the path to the tachometer has fried and is grounding out the ignition.

Pulling it all together
So that’s it. To start and run a vintage car, you need only four wires—three for the starter and one for the coil. To recap:
- Thick, red wire from battery positive to threaded post on the starter motor. It can be a jumper cable, but if you need to move the car, a secured battery cable is much better.
- Thick, black wire from battery negative to the engine block. Same caveat about securing the cable.
- Thin wire from coil “+/15” to battery positive. If you’re concerned about the integrity of the connection to the distributor, run an additional separate wire from coil “-/1” to the condenser.
- Thin wire (or remote start switch) from solenoid, momentarily touched to battery positive.
Note that I did not say there needs to be a wire from the battery to the chassis of the car. That’s because the starter grounds through the engine block, as do both the high-voltage side of the ignition (the spark plugs) and the low-voltage side (the condenser). If, however, you want to begin connecting other devices, it’s certainly easier if the chassis is grounded, since that way you can use the existing grounding wire on the devices and run only a single positive wire. In my case, because I was starting a fuel-injected car, I also had to power the electric fuel pump. And, because the injection has a cold-start valve that I needed to fire temporarily, I had to momentarily touch its wire to the positive terminal too. Thus, there were two extra wires that needed to be run to the positive battery terminal.

The two-wire variant for pop-starting
If the car has a manual transmission and is located on a hill, or if you can push it at a good pace, then you don’t even need the starter motor to spin the engine. All you need is two wires:
- Thick, black ground wire from battery negative to the engine block.
- Thin wire from coil “+/15” to battery positive.
Provided the fuel and ignition systems are functional, this is all you need to get the car rolling: put it into second gear and let out the clutch, which spins the engine just like the starter motor would, and fire the coil.
That having been said, I can’t really imagine why you’d do this unless the wiring and the starter motor were fried. Even so, I’d want the car in my driveway, as starting a long-dead car is always an iterative process. But it’s cool to know that you could.
The big caveat
It’s important to note that I’m not advising that you wire a car this way and drive it! First, as I said, having wires temporarily secured with alligator clips is flimsy and potentially dangerous. Second, this technique bypasses the alternator, so there’s nothing keeping the battery charged, and the battery will eventually run down. Third, it bypasses important indicators like the oil pressure sensor and light and the temperature and gas gauges. Lastly, it bypasses the fuse box, so if any of your jury-rigged positive wires touch to ground, things are going to burn.
But if you simply need to spin and start a long-dead engine in a car with booged-up wiring or get a car that just fried its wiring harness a few miles down the road to a safe location, this technique can be helpful.
And let’s face it—the real joy here is knowing that you understand the car’s electrical system well enough to be able to do it.
***
Rob Siegel has been writing the column The Hack Mechanic™ for BMW CCA Roundel magazine for 33 years and is the author of five automotive books, including Just Needs a Recharge: The Hack Mechanic™ Guide to Vintage Air Conditioning. All of his books are available on Amazon. You can also order personally inscribed copies here. Siegel’s new book, Resurrecting Bertha: Buying Back the Car My Wife and I Drove Off From Our Wedding, will be released later this year.

You should also disconnect the alternator if you are worried about the wiring harness condition.
If you follow these steps and start the car and the charging harness is damaged, the alternator is going to start pumping 12v into everything leading up to where you disconnected the harness from the starter/battery. Since the charging circuit is one of the places cars fry out, that’s no good!
I need it help u no what up doing please I need my car fixed and don’t no what to do