Repairing, not replacing, a fuel level sender saved me $200
When I pulled my 1972 BMW 2002tii out of winter storage a few weeks ago and began driving it around, I was surprised to find that the gas gauge didn’t work. This was very surprising, as I’d last used the car for a near-thousand-mile trip back home from where it had been sitting in a friend’s warehouse in Cincinnati for six months. I’m sure that if the gas gauge hadn’t been working on the drive home, I would’ve noticed and remembered it. But surprises are, by definition, things that you don’t expect. So I set about testing whether the problem was the level sensor/sender or the gauge itself.
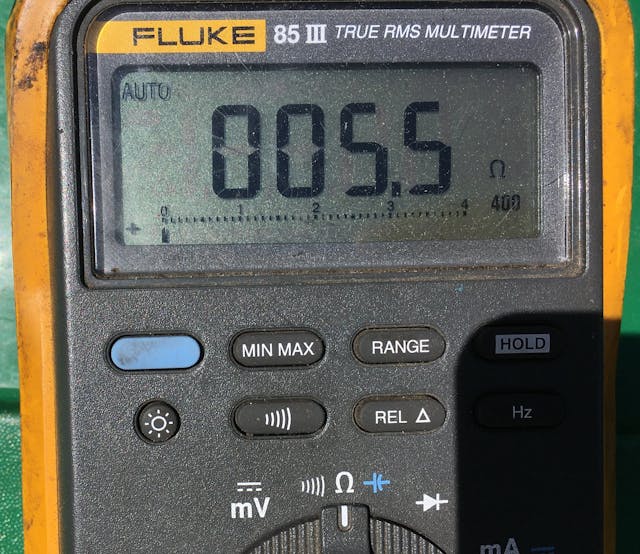
On this and most other cars, the sender offers a variable resistance depending on the fuel level. Simply taking a multimeter, setting it to measure resistance, and putting the probes across the two terminals on the sender can quickly reveal if the sender is working. If the resistance is infinite (usually represented as a reading of “0L” on the multimeter), then it’s broken. If it has some reasonable resistance, typically in the tens of ohms, then it’s possible the fault is likely either in the wiring or gauge. In my case, the sender had infinite resistance, so it clearly had failed.
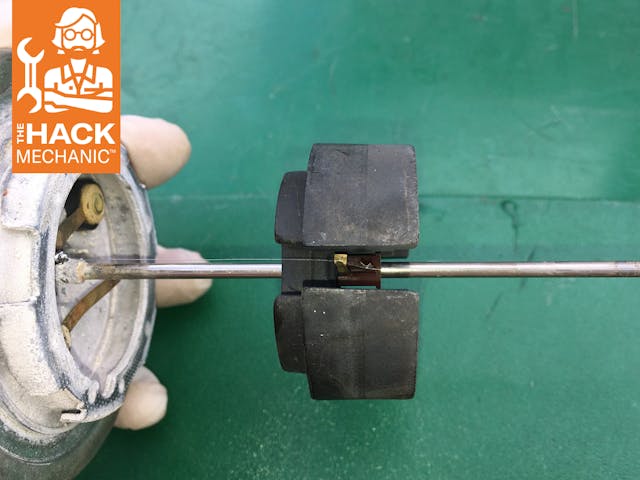
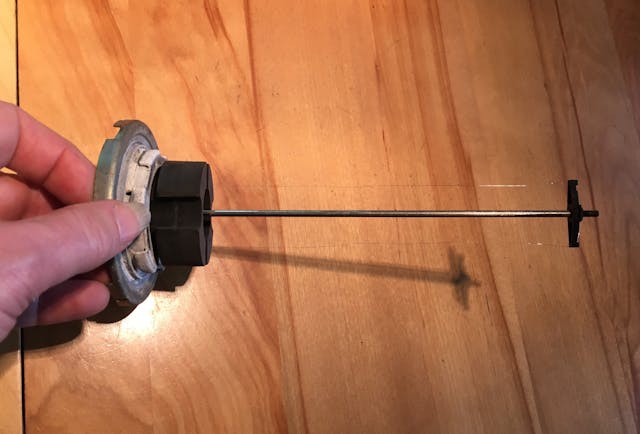
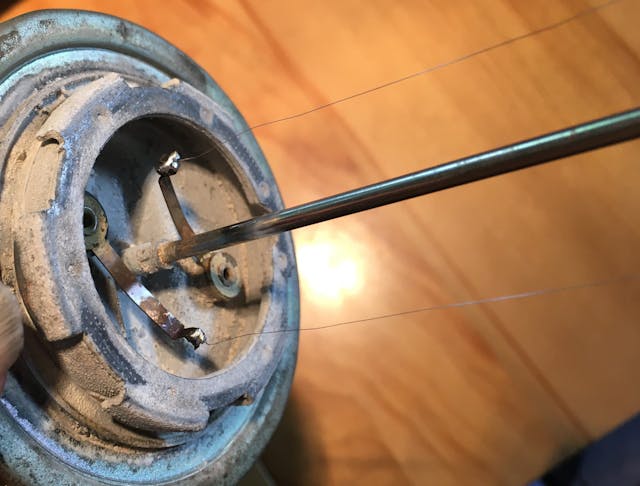
The level sender typically has one of two formats. Some are like a toilet float, with a buoyant body at the end of an arm that pivots on a resistance track, but many if not most are a cylinder inside of which is a float that slides up and down on a rod as the fuel level rises and falls. The rod is typically in the center of an assembly where the top has the terminals for the connectors. The undersides of those terminals connect to a very fine piece of non-insulated “resistance wire,” not unlike the heater wire in your rear windshield. The resistance wire forms a tall thin “U,” going from the positive terminal, wrapping around the bottom of the assembly, and connecting back to the ground terminal. It’s held rigid by its own tension.
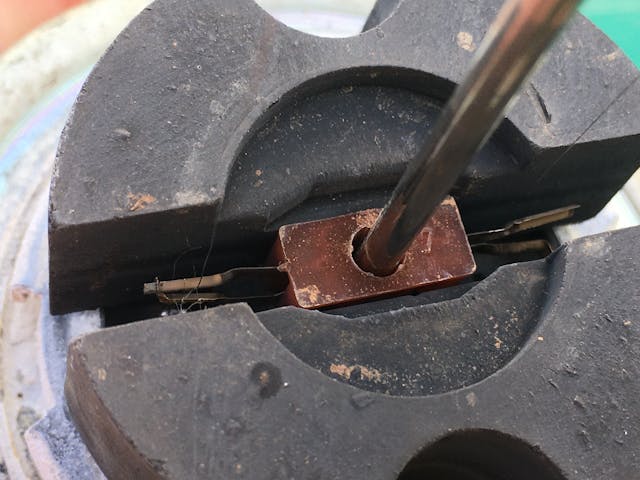
The key to the level sensor working is that the float has a pair of small electrical contacts that touch both legs of the U-shaped resistance wire. The left and right contacts are connected to each other, so they essentially short across the resistance wire at a height dependent on the fuel level. So if the tank is nearly empty, then the float is near the bottom, it isn’t bypassing much of the wire, and thus the resistance is that of nearly the full length of the wire. But if the tank is full, the float is near the top, and thus the float shorts across the wire right near the terminals, and the resistance reading is much lower.
Now that you see how the thing works, you can understand that the higher the fuel level, the lower the resistance, and the lower the fuel level, the higher the resistance. Thus, a full tank puts the sender in the position where it has the lowest resistance. Thus, with this configuration, another way to check whether the problem is in the sensor or the gauge/wiring is to pull off the positive wire to the sender, temporarily connect it to body ground, and turn the key to the ignition. If the gas gauge then reads full but drops back to zero when you reconnect the wire to the sender, the problem is in the sender. I would’ve said that at the beginning, but it makes more sense when you understand that when the float is all the way up, the sender has the lowest resistance, and that the only thing lower is directly grounding the input wire.
In any case, if you find that the resistance is infinite, what you need to do is pull out the sender and inspect the resistance wire. The first thing you need to know is there’s almost certainly a rubber o-ring or gasket between the sender and the gas tank, and if it’s been in there for 40 years, it’s brittle and hard, and once you take it off, it’s never going to seal again, so before you undo the level sender, order a replacement o-ring and have it in your hot little hands. If you don’t, when you’re done with the repair, button it up, drive the car, fill up the tank, and round a corner, the trunk will flood with gas. (Can you tell that I’ve made this mistake?)
The second thing is that, regardless of the o-ring, you’re going to be opening up the tank, and that always carries with it the risk of gas spillage and fumes, so have a fire extinguisher at the ready, and don’t do anything that creates any spark. The sender tube typically has small holes in it for gas to get in (it has to be full of gas or else it won’t work), so when you draw it up and out, you need to do it slowly so the gas can drain out. Have a small container you can put the thing in to catch the last of the drips and paper towels ready.
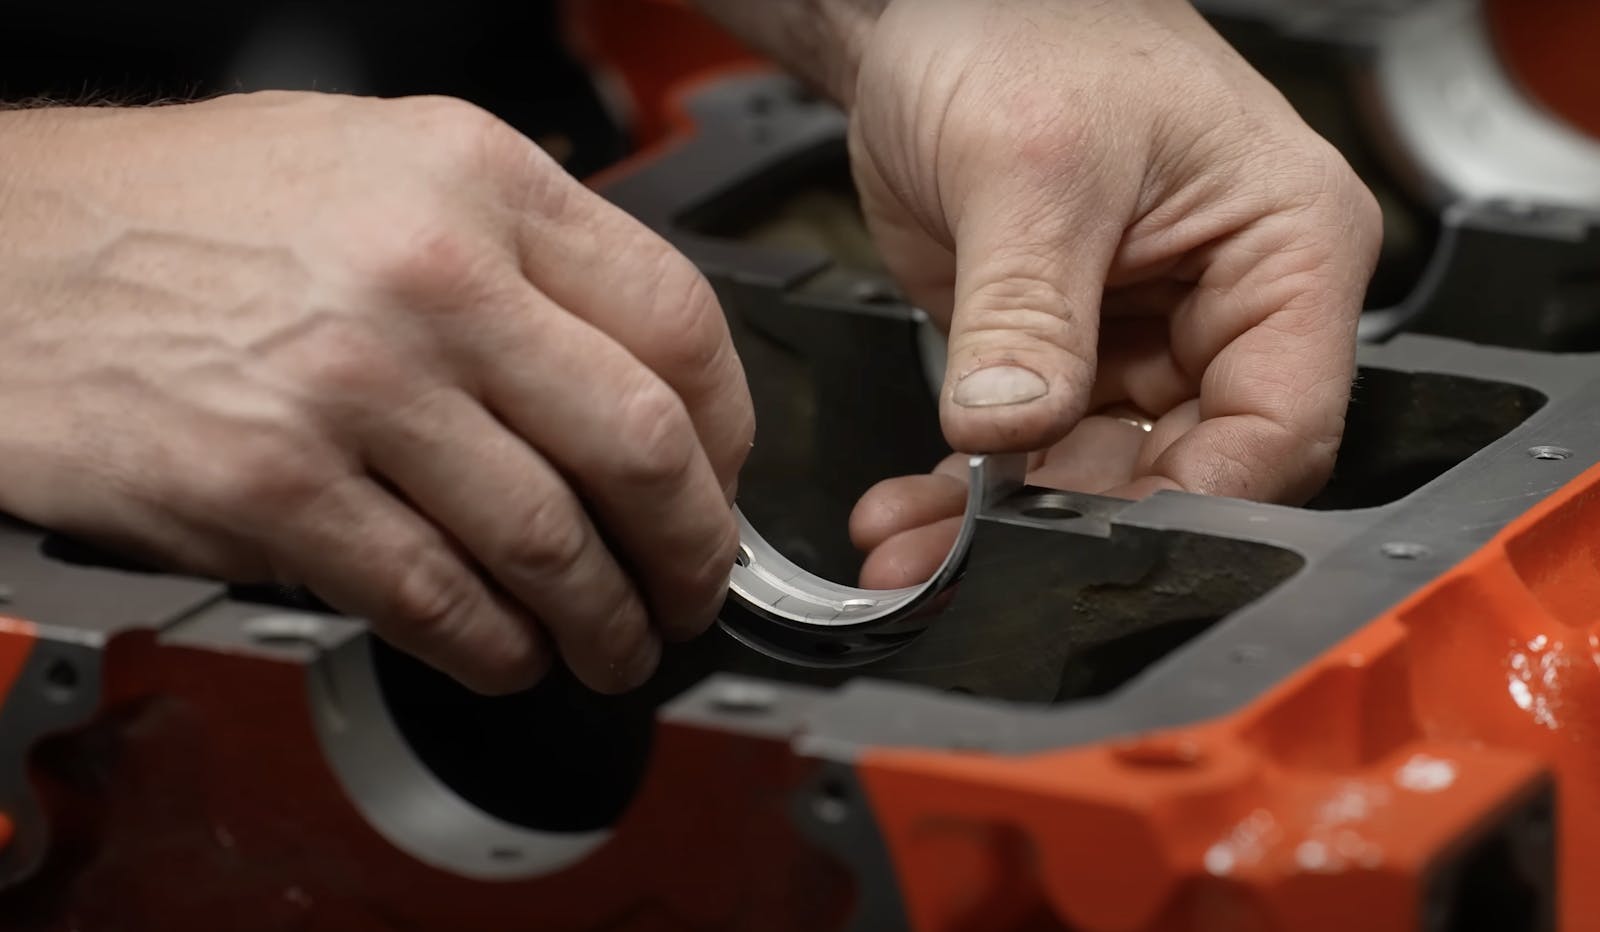
In my BMW 2002, the float and the resistance wire are inside of a metal housing. It’s held on with crimps at the top and a little nut at the bottom. The crimps were all missing, so clearly someone in the distant past had been inside before me. I undid the nut at the bottom, slid off the housing, and immediately saw a tangled mess of broken resistance wire, so clearly I had called it correctly.
You may read that if the resistance wire has broken off one of the terminals, you can simply re-attach it—solder it back on—but in truth, this is difficult to do because it requires stretching the wire, holding it in place, and soldering the end of it, which makes it so there’s only the blob of solder on the top face securing it. It’s far better to run a new length of wire that can be wrapped around each terminal, thus having the solder securing it 360 degrees around.
Next, you need to determine the spec of the resistance wire you need to order. If you’re lucky, someone else with your make and model car has already solved this problem, and a search on an enthusiast forum will yield a spec for the correct number of ohms per unit length and a source for the wire with that spec. In my case, folks who’d already trod this path before had identified that the proper resistance is about 6 ohms per inch, and that there are several sources for nickel chromium resistance wire with this measurement. (And yes, you have to swallow your fears and ignore the fact that this same stuff is also used for heaters, model rocket fuses, and other pyrotechnics). My wire was less than four bucks for a 33-foot spool.
If there’s no documentation on the resistance of the wire, you’ll need to measure it yourself using a multimeter. Be certain to take the longest piece of wire, measure its length with a ruler, then measure its resistance end-to-end with a multimeter, preferably clamping one end with an alligator clip rather than holding both ends with your fingers to be certain the resistance of your body isn’t coupling into the measurement.
While you’re waiting for the resistance wire to arrive, you can clean the electrical contacts. That includes not only the terminals in the top of the sender where the wire has to be soldered on, but the fragile little sprung clips in the float that make contact with the resistor wire as the float slides up and down. Use some very fine emery cloth pulled between the clips. Be sure not to damage them.
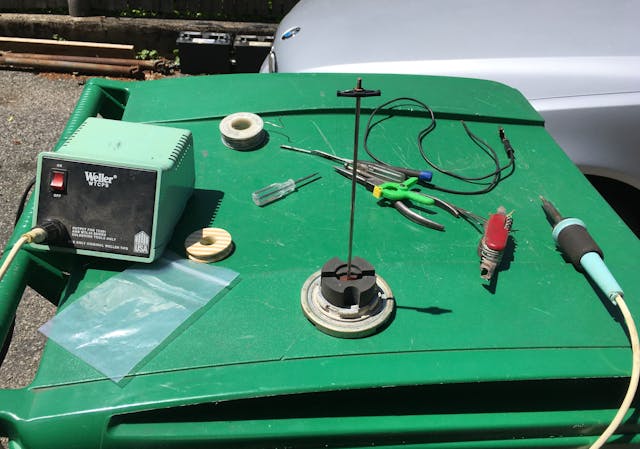
When the wire arrives, cut a piece that’s a foot longer than you need so you can easily wrap one end around one of the terminals, knot it in place, then solder it. Whether you thread the other end through the contacts on the float and then solder it to the terminal or do it in the other order depends on the design. On my sender, each side of the float has two very small spring contacts that need to be pulled from their relaxed position into their under-tension position contacting the wire, and it was very difficult to pass the flaccid wire between them; it was easier to pull the wire tight, wrap it and tie the knot on the second terminal, solder it, and then, using a very small screwdriver, lift the float contacts and pull them onto the correct sides of the wires.
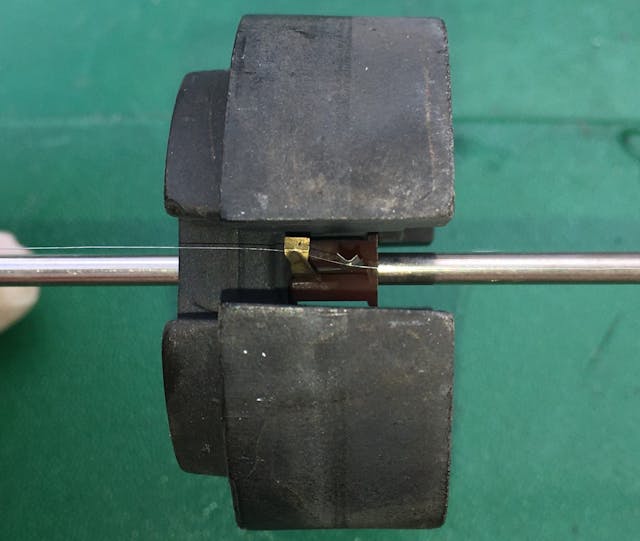
Fortunately, your repair can be tested before you put it back in the fuel tank—you simply connect the multimeter to both terminals of the sender, turn it upside down, then right-side up, and verify that the reading changes.
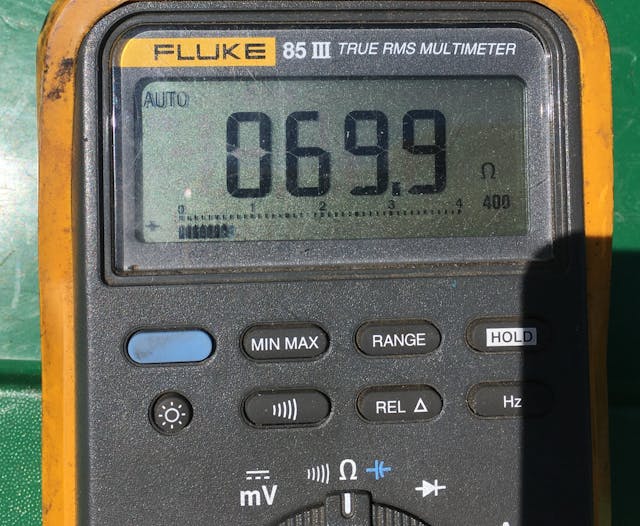
Clean the surfaces on the tank and sender that contact the o-ring, install the new ring, reinstall the sender, and you should be good. In my case, the resistance of the new wire was a little off from that of the original one; the tank is now fairly empty when the gauge is reading one-quarter full. But this is the kind of thing the eyeball and brain readily compensate for. Especially when the repair only costs four bucks instead of over $200 for a new sensor.
***
Rob Siegel has been writing the column The Hack Mechanic™ for BMW CCA Roundel magazine for 34 years and is the author of five automotive books. His new book, Resurrecting Bertha: Buying back our wedding car after 26 years in storage, is available on Amazon, as are his other books, like Ran When Parked. You can order personally inscribed copies here.

awesome this is going to save me so much! the price for these are now around 400$!!
do you know what size the NiChrome wire should be?
Thanks for this article. I own a 1969 Corvette and aftermarket replacement parts are generally crap. I have a “new” fuel sender and it has failed. I’m determined to fix the original and be done with it.
Any sources on that resistance wire?