Make your Porsche shifter feel like new in one weekend
Have a Porsche 911 or 912 and need an easy weekend project? Here’s a job I just completed on my 1987 911—and believe me, if I can do it, anybody can.
We’re dealing with the bushings inside the shifter assembly. Is your shifter sort of loosey-goosey, with throws that threaten to knock your knuckles on the lower dash? Is there a grinding feeling as you move between gears, but the transmission itself seems good? My money is on the bushings, components that become more vulnerable over time due to friction and the fact that they are made of plastic.
Before we grab the tools, a word of context: While the work being described here is directly related to 1987-and-newer models equipped with the G50, most of the details here apply to the earlier cars, too. As a matter of fact, this project is even easier on models with a type 901 or 915 gearbox. I’ll point out the differences as we dive in.

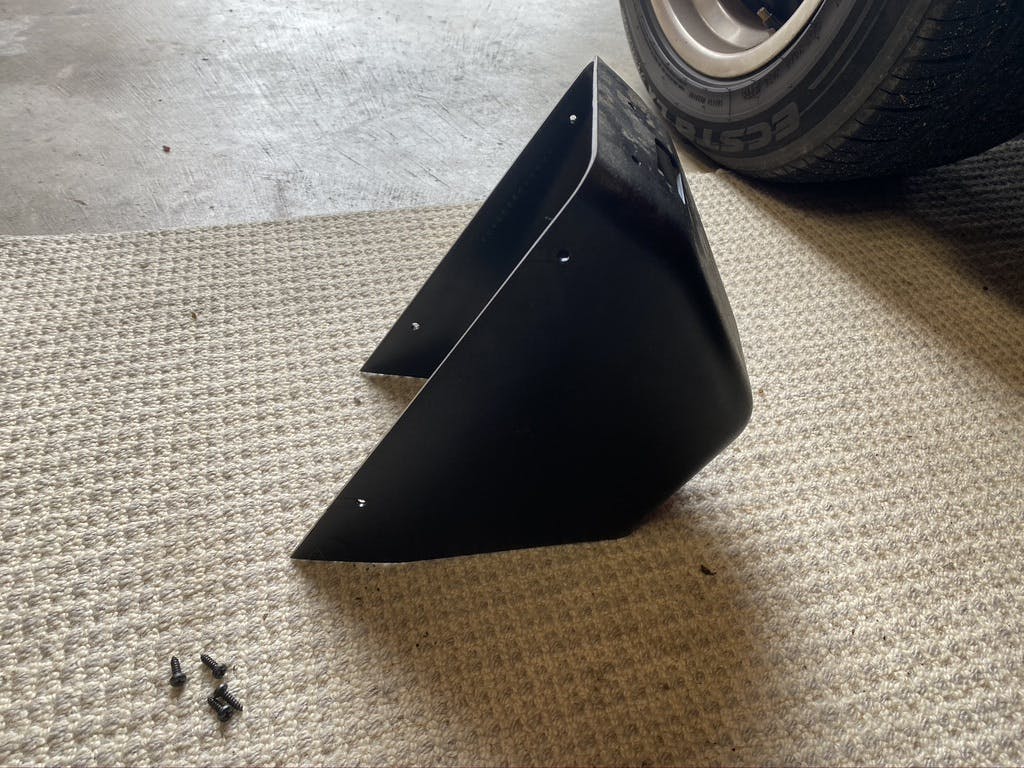
Round up these basic hand tools: A Phillips-head screwdriver, a small flat-head screwdriver, a 17-mm wrench (ratcheting makes it even easier), a 13-mm socket … and that’s about it. Plus, an afternoon and a cold Dale’s Pale Ale, if you are so inclined.
On my ’87, there’s the console to tackle first, and you sort of need to work from the back of it towards the driver and passenger seats. On each side are two Phillips-head screws. Get ’em out and move that plastic piece out of the way.
With that piece out of the way, now you’ll see two more Phillips-head screws. These attach the rear of the console to the floor of the car. Easy out. Put them aside in their own little pile so you don’t mix them up with the others.
Now go to the front of the console—the section that’s closest to the seats, under the emergency brake handle. Move the handle UP. Move the levers UP. Push the seats BACK. Giving yourself as much room as you can to work—this is a critical part of the process that wasn’t detailed very well anywhere that I could find.
We now proceed to the removal of The Elusive Third Screw.
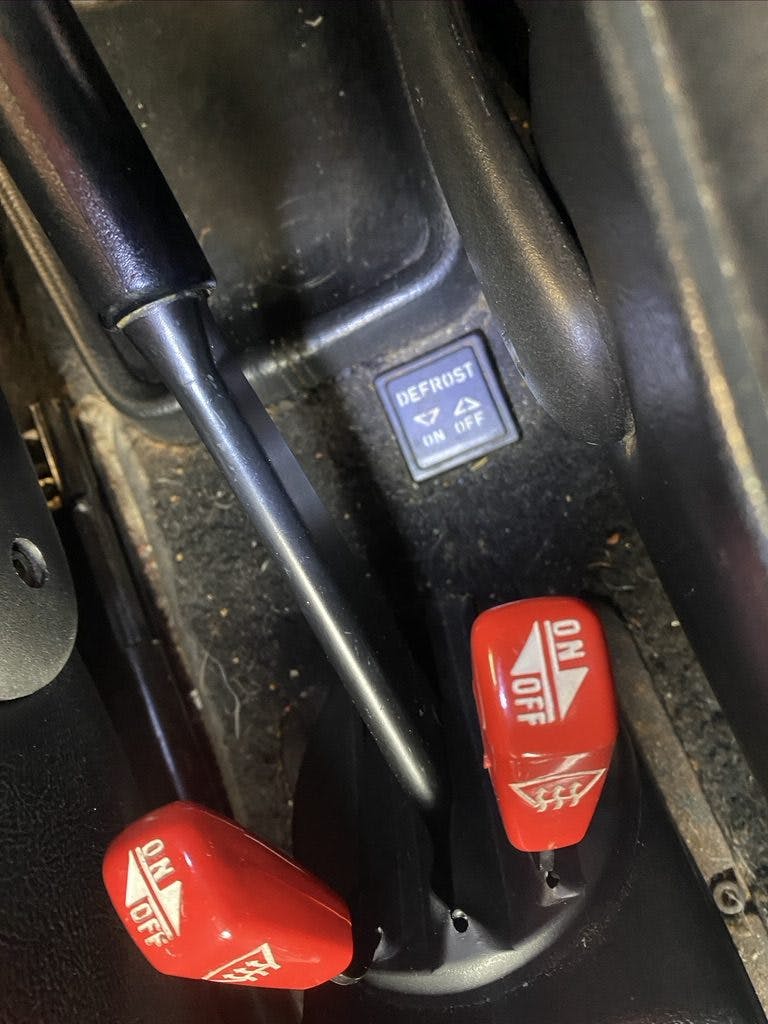
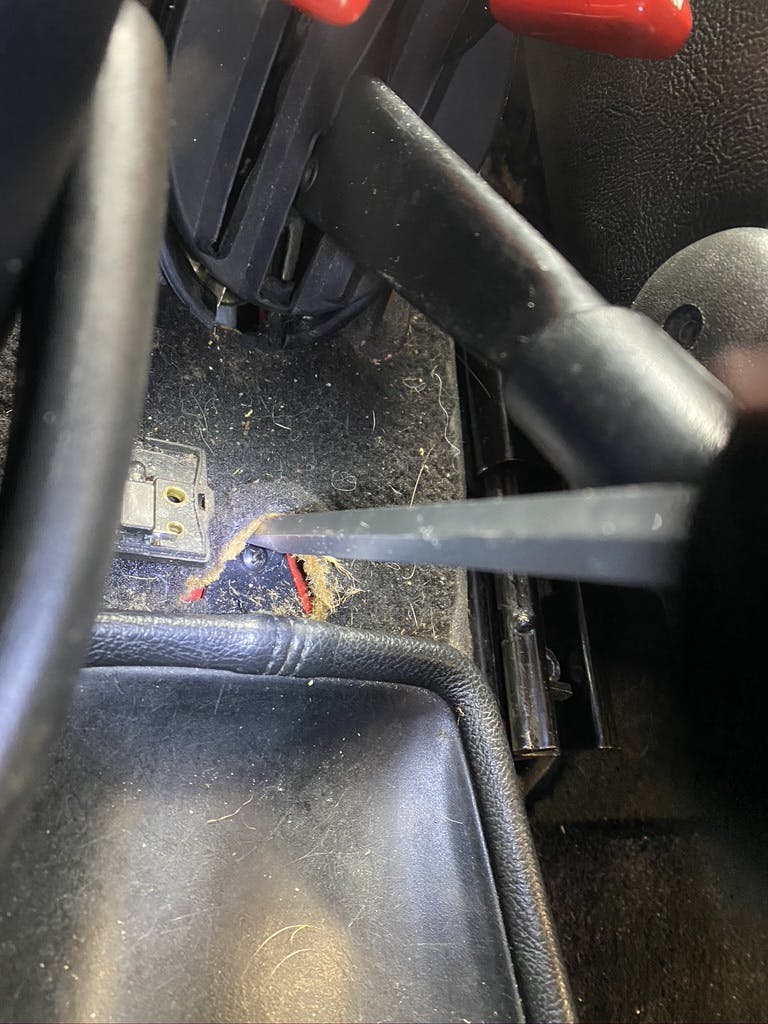
Take the small flat-head screwdriver and sort of fish around the edge where the carpet meets the middle of the front of the console. This will feel a little invasive, but it has to be done. You have to expose the head of the third screw so you can remove it. I also removed the cover from the little “defrost” indicator box, which freed up the carpet attached to the floor. Carefully pry the carpet back and you’ll be able to see that screw. (My carpet is original, and it made more crunching noises than what I wanted to hear, but it seems OK.) Just go slow. When you get that third screw out, it gets easier again.
I then went back to the rear of the console and took out the small Phillips-head screws that held the panels in the console for the air conditioning controls and the rear defrost and hazard buttons. The power lock control is also attached to all this. When you remove the small screws, it gives you a little more slack in the wiring for the part that comes next. Put the screws aside, don’t lose ’em. My car also had an extra screw in this area for a small plastic piece, accessed on the driver’s side of the console. When you take that one out, put the plastic piece aside as well, it seems to just be a spacer below the door lock control.

Alright, all the screws are out. Make sure all the controls are a little loose in the console. You do not need to remove them, and just remember that this plastic is 30+ years old and you do NOT want to break anything. Move everything carefully.

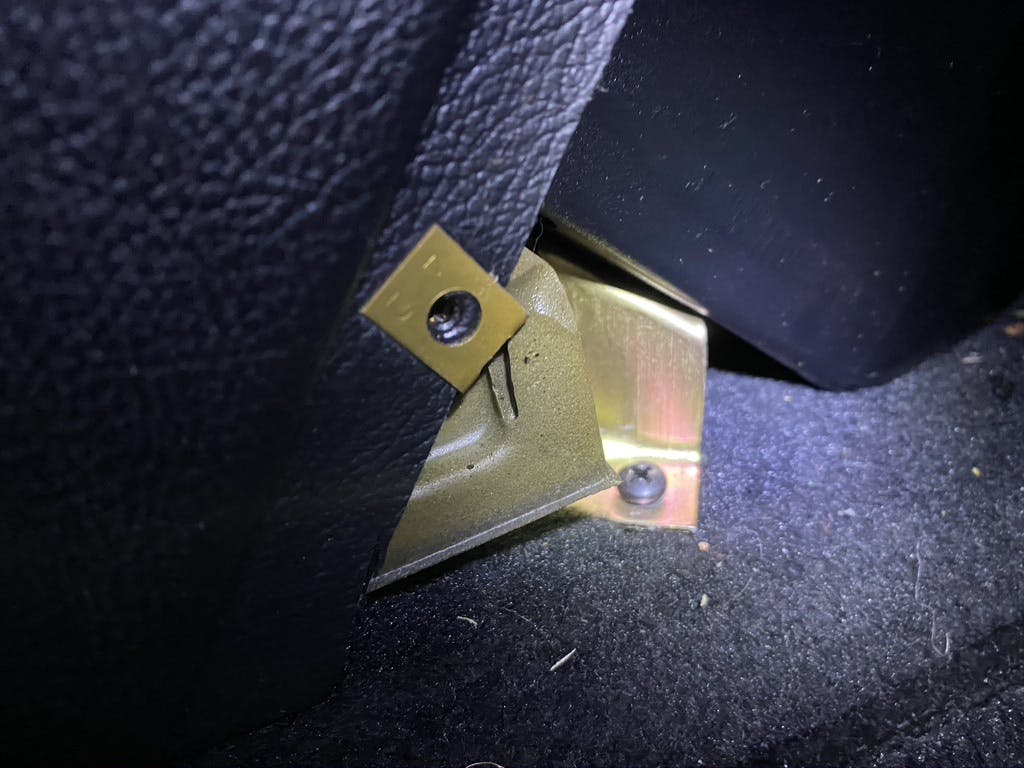
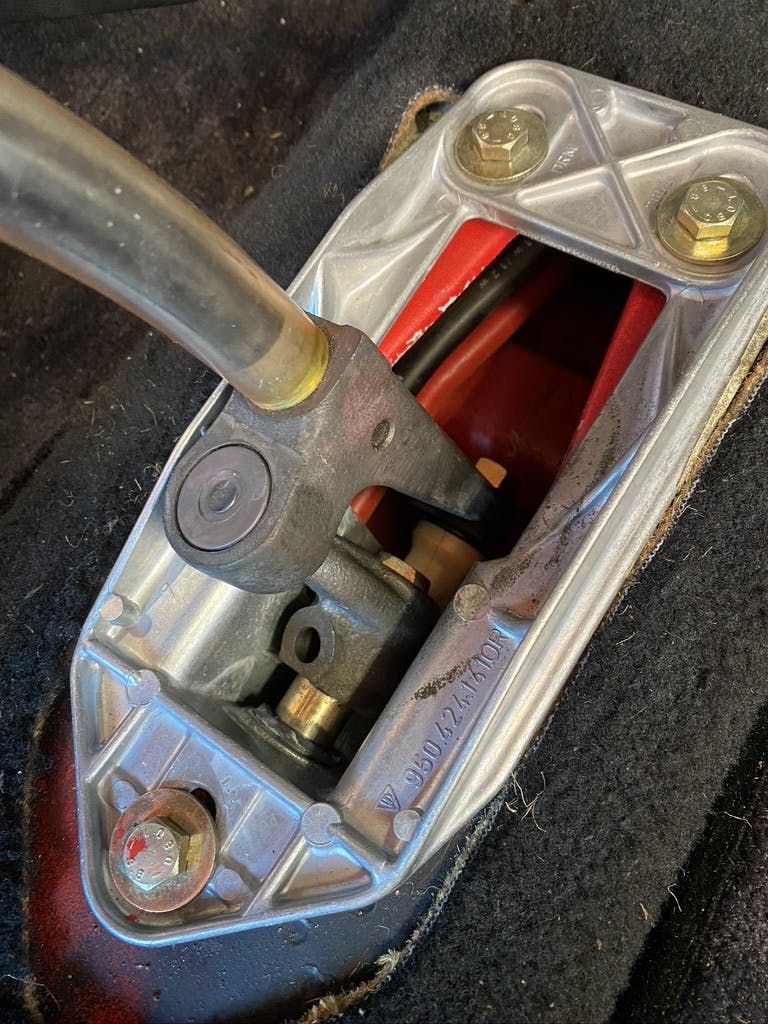
Now is a good time to just sort of start to lift everything up, wiggling a little where you need to. You’ll twist the lower part around the emergency brake handle to get it over it—not a big deal—and then you’ll expose the bottom of the shift boot and the rubber that isolates it all from the tunnel between the seats. If your car hasn’t been messed with, it should like the photo below.

It was obvious my car had not ever been apart in this area, or certainly not in a very long time. When I pulled the rubber pad up off the shift base, everything was covered in powdered rubber and dirt. Get your vacuum out for this, clean it up before you take the rest apart if you can.

Now that’s all clean, pull the boot up the rest of the way and you can actually see the bits of the mechanism you’re replacing. The shift boot just pulls up and away to see this better.

On a G50, the shift knob needs to now come off, so grab an Allen-headed socket or key; I’m not sure the size exactly, but it was one I had in a common kit. Pry the edge of the center of the shift knob up and you can get it out pretty easily. Use a tool that won’t mar the leather—the factory knob is over $200 to replace! I already needed to do mine, but you may want to be extra careful with yours.

Alright, we’re getting there. See down inside? You’re only a 13mm bolt and a 17mm wrench away from having that bushing out. The top bolt holds the shift assembly to the shift rod coming from the transmission, and this is great because it means you can’t screw it up on reassembly, as the adjustment is factory set. Remove the screw and also take the large 17mm nut off the back of the shifter. Try not to drop it (although it’s not the end of the world if you do). This lets you take the shifter out of the car; how about that?
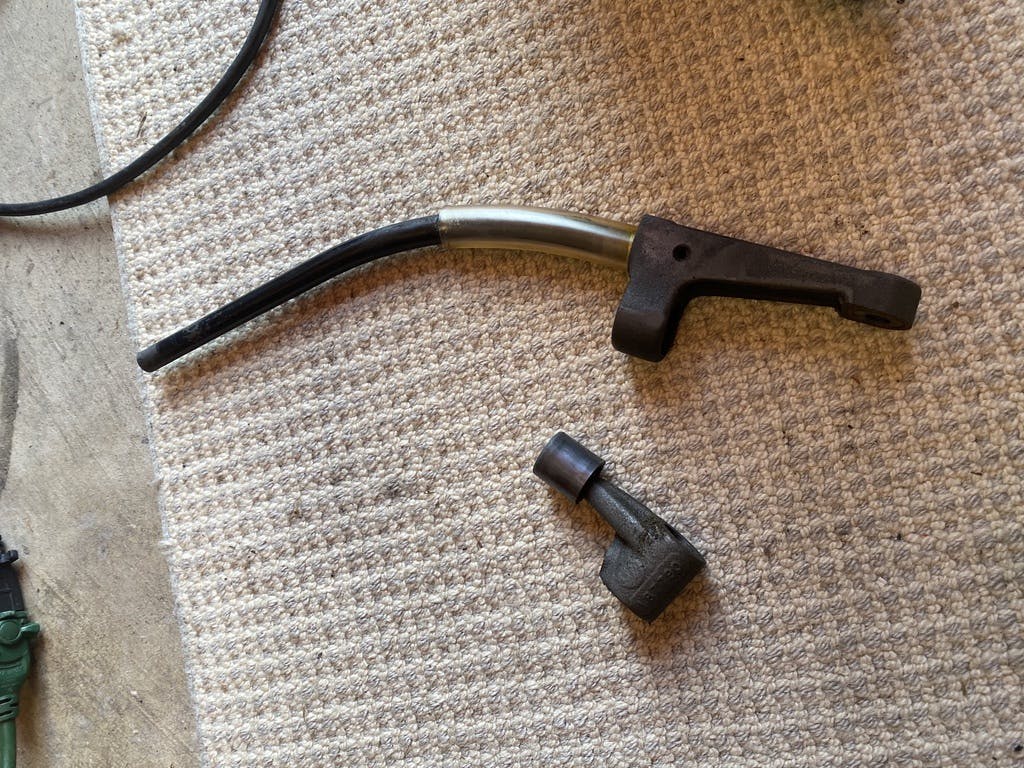
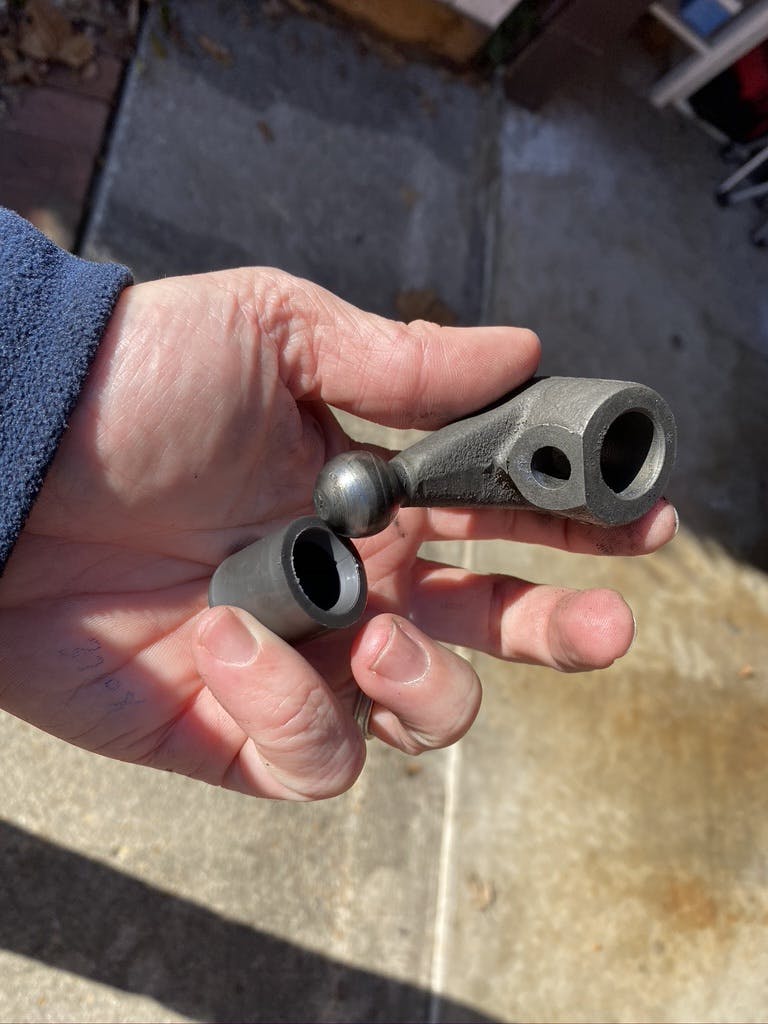
With all that out of the way, you’ve got three 13mm bolts holding the housing to the inside of the car. Remove the bolts and you can shimmy the housing out. This is where I was first able to see the bushing that had to be replaced; it goes inside this housing and around the shift rod from the transmission. When it’s gone or broken, it allows a lot of play in the assembly, which means longer, less accurate shifting.
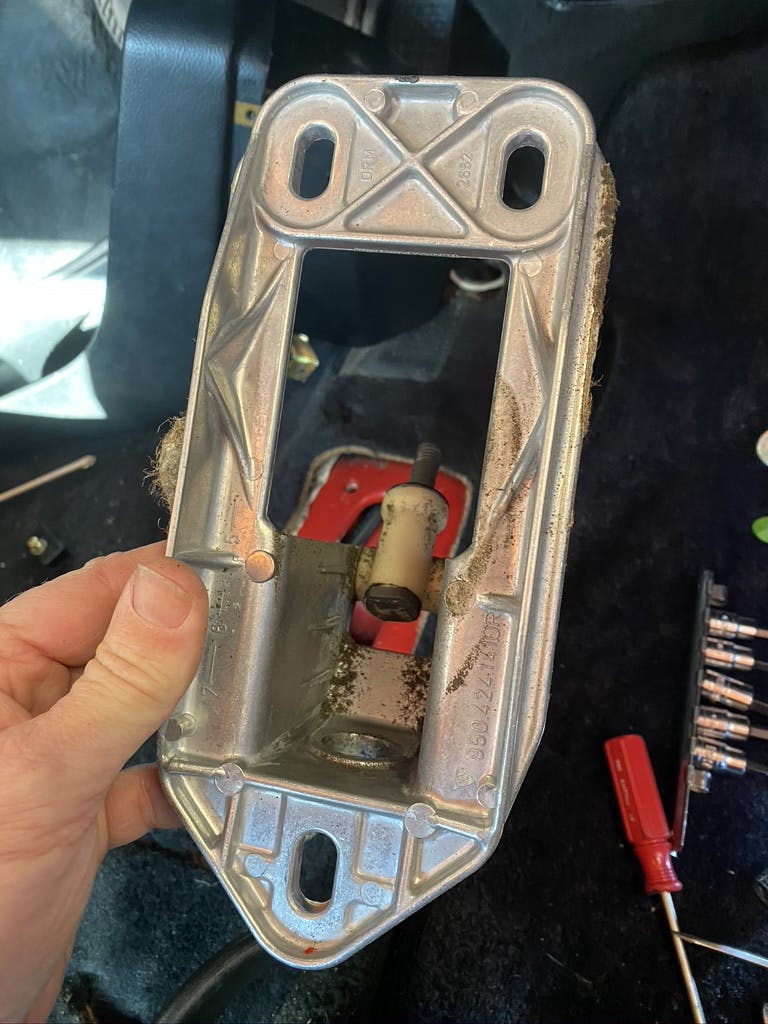
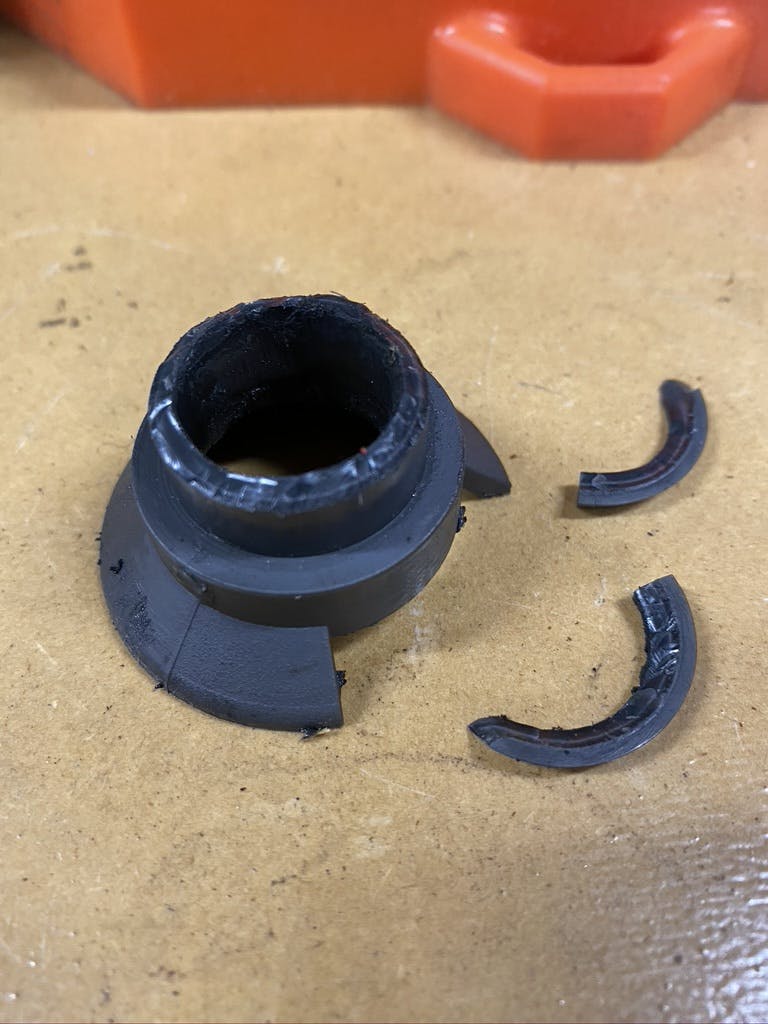
And here it is, the broken pieces of the original bushing were right there in my hand. I just love a good physical examination, and it’s nice to be right about the source of a problem for once. The smaller edges go on one side of the housing, the larger end goes around the shift rod. You can see how this was just done for; I believe it was the original one. There is also a plastic cap that goes in there that rides up and down in the assembly that wears over time. Between these two items, you’ve got slop.
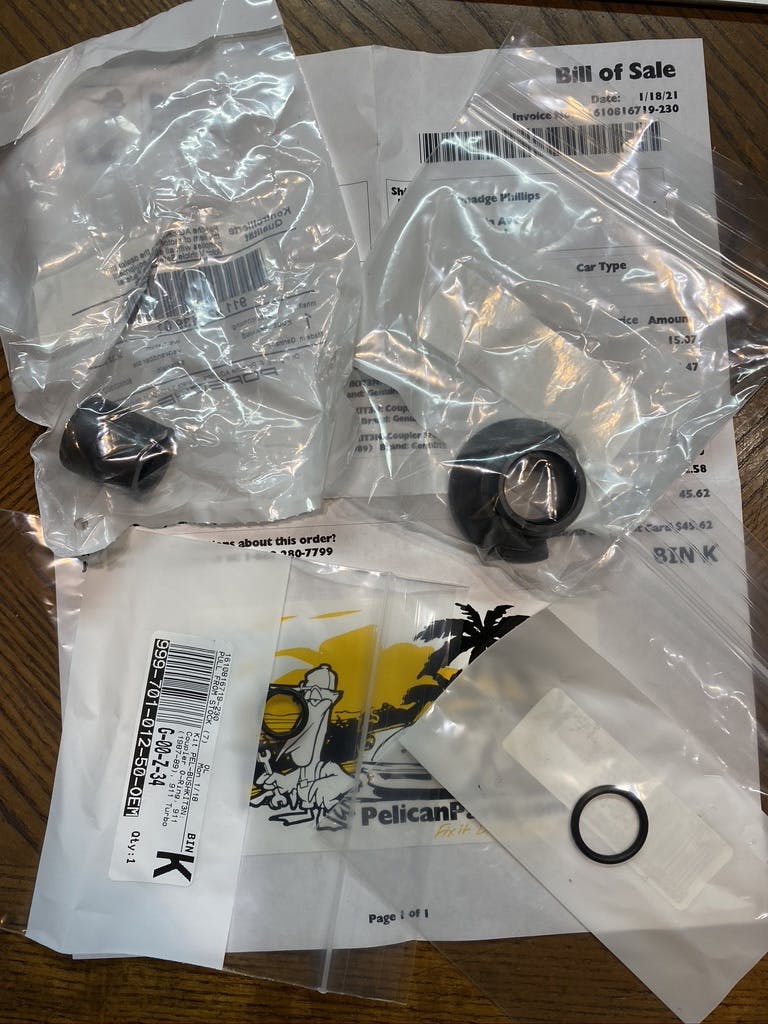
If you already have your parts, reassembly is super easy. I went whole hog and got the kit that had two O-rings, plus the cap and lower bushing. I got everything in one kit from Pelican Parts for about $35.
Ready? This is easy. Grab your parts and a can of lubricant. I used some graphite-based stuff because I didn’t want anything getting super gooey. Swapping the little “caps” was easy enough; I just used a dull screwdriver to help pop off the old one.
Now, here’s a tip I did not find mentioned anywhere. Do you have a heat gun? Maybe a hair dryer? I took the shift housing and clamped it on the bench and heated up the area where the large lower bushing needed to go. After a minute I heated up the bushing itself—I didn’t want to melt it, but I sure wanted to get it nice and pliable so it would fit through the housing. Worked like a charm—try it for yourself! The other little O rings simply replace the old ones on either end of the bolt that ends up at that 17mm nut. Takes two seconds to replace them with the assembly in your hand or on the bench.

The only fiddly part of the rest of the project is getting the housing with the new bushing back in the tunnel with the shift rod through it. Make sure the rod is pushed back, like you were in second gear on the G50, so you’ve got the most room. You can do this with a screwdriver in the hole in the rod, no problem. Keep it lubed up, wiggle wiggle, and if you have to, use a couple of screwdrivers to center the rod upwards so get it through the bushing. Have the more open part of the bushing down or it’s a bear to get that rod started.
Things just go backwards from here. Put on the 17mm nut, then move the shifter up and into where Reverse would be so you can work the console CAREFULLY back over the shift lever. Once the console is over it, you can fiddle with putting the bolt back in there to connect it all, as well as bolt in the housing to the car again, and so forth. Just work backwards through the process and you’re all set.

I got it buttoned back up, and there was an immediate and positive difference in the throw of the shifter between gears and the smoothness of the action, even just sitting in place. I immediately pulled it out of the garage and took it out on some of the back roads nearby—what a difference! The shift pattern is so much tighter, it’s actually something I needed to get used to. I’m guilty of sort of absentmindedly bapping the shifter side to side sitting in neutral while waiting for a light, but not anymore. The play there is completely gone, and it feels like no more than a couple of inches of travel between the gears. Who needs a “short shifter?” Just fix the stock one and drive it like the engineers designed it, you’re going to love it.
Good luck with your weekend project if you have one to tackle—I have a 911 that needs some exercise!

Thanks Brad for the really useful article! I’m about to do the same process on my ’87 and am much more confident I can do it thanks to your writeup.
Todd in Arlington VA
Thanks I have an 88 carrera that needs this