How to repair broken plastic trim in the comfort of your home

Times are tough for enthusiasts looking to replace plastic parts, even with newer vehicles. Whether you’re talking large bumpers or tiny dashboard trim clips, replacing plastic can be one of the more difficult jobs on a classic, a modern classic, or even a “new” car just out of warranty.
That said, even when your car’s polymer parts are still available new, is replacement always necessary?
Every vehicle owner should at least consider restoring an original plastic part, whether that part is cracked, split, or missing chunks. Because there’s real hope for broken polymers, and it comes in the form of an electric plastic welder.

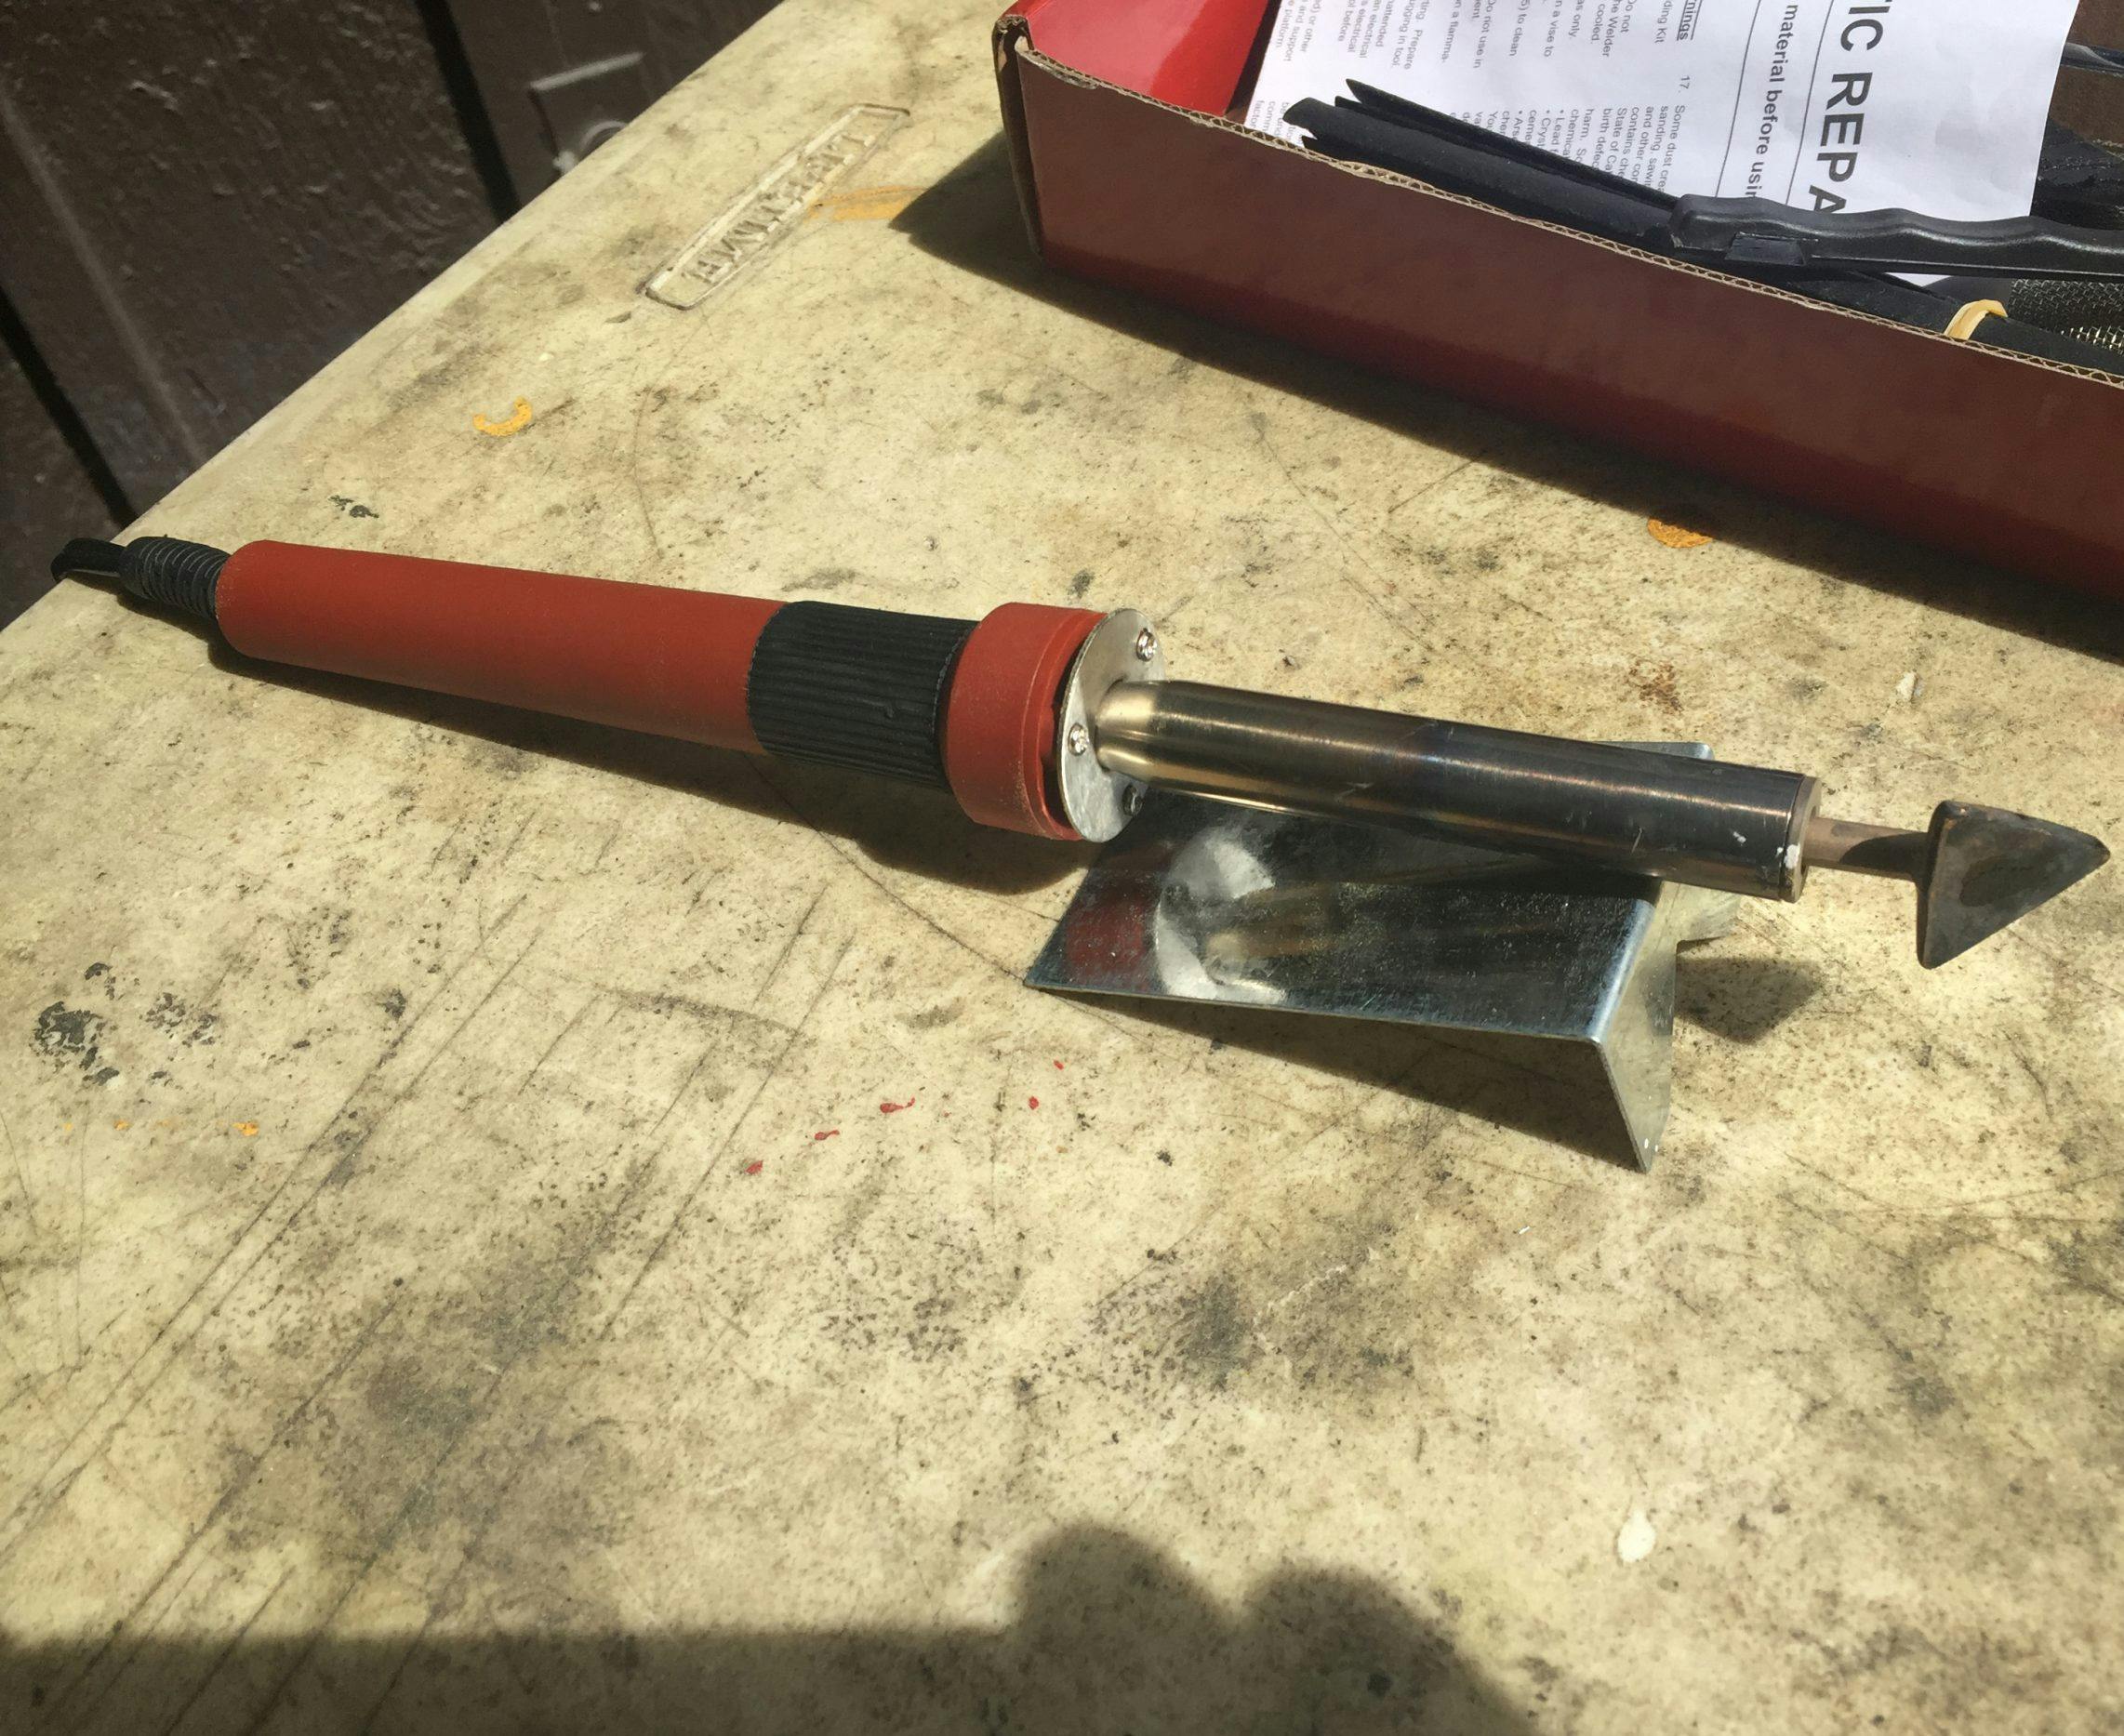
These welding tools are available online as a kit, usually for $50 or less. Most possess everything you need to restore automotive plastics with ease. The basic concept here is melting: You soften the part in question with a pie-shaped heating tool in order to flood over its flaws, reflowing cracks or other blemishes. All it takes is a little practice and some time spent learning how these tools operate—they’re basically oversized soldering irons. More to the point, it only takes a few test welds to be a pro at this, so let’s get into it.
Most plastic-weld kits include extra accessories like a metal stand (shown here used incorrectly), extra plastic welding rod, and a section of metal reinforcing mesh for repairs that require extra strength. The metal stand supports the dangerously hot end of the welding tool, but it also serves as a useful reminder that reading the instruction manual isn’t a bad idea with a product that can really hurt you.

Let’s walk through a recent job for two of my cars: After plugging in the welding tool, I prepped everything (donor parts, plastics cleaned and ready) while waiting for the tool to heat. The tool warmup takes about five minutes, enough time for me to dig up and prepare my 1988 Cougar’s plastic shifter plate (above, left) and speaker grilles (right) from my Lincoln Continental unobtainum junkyard story.
I highly recommend wearing a respirator for work like this, as melting plastic releases toxic fumes. Even if you work outdoors, the up-close-and-personal nature of plastic welding ensures that your nose will be in the way of the smoke’s trail.
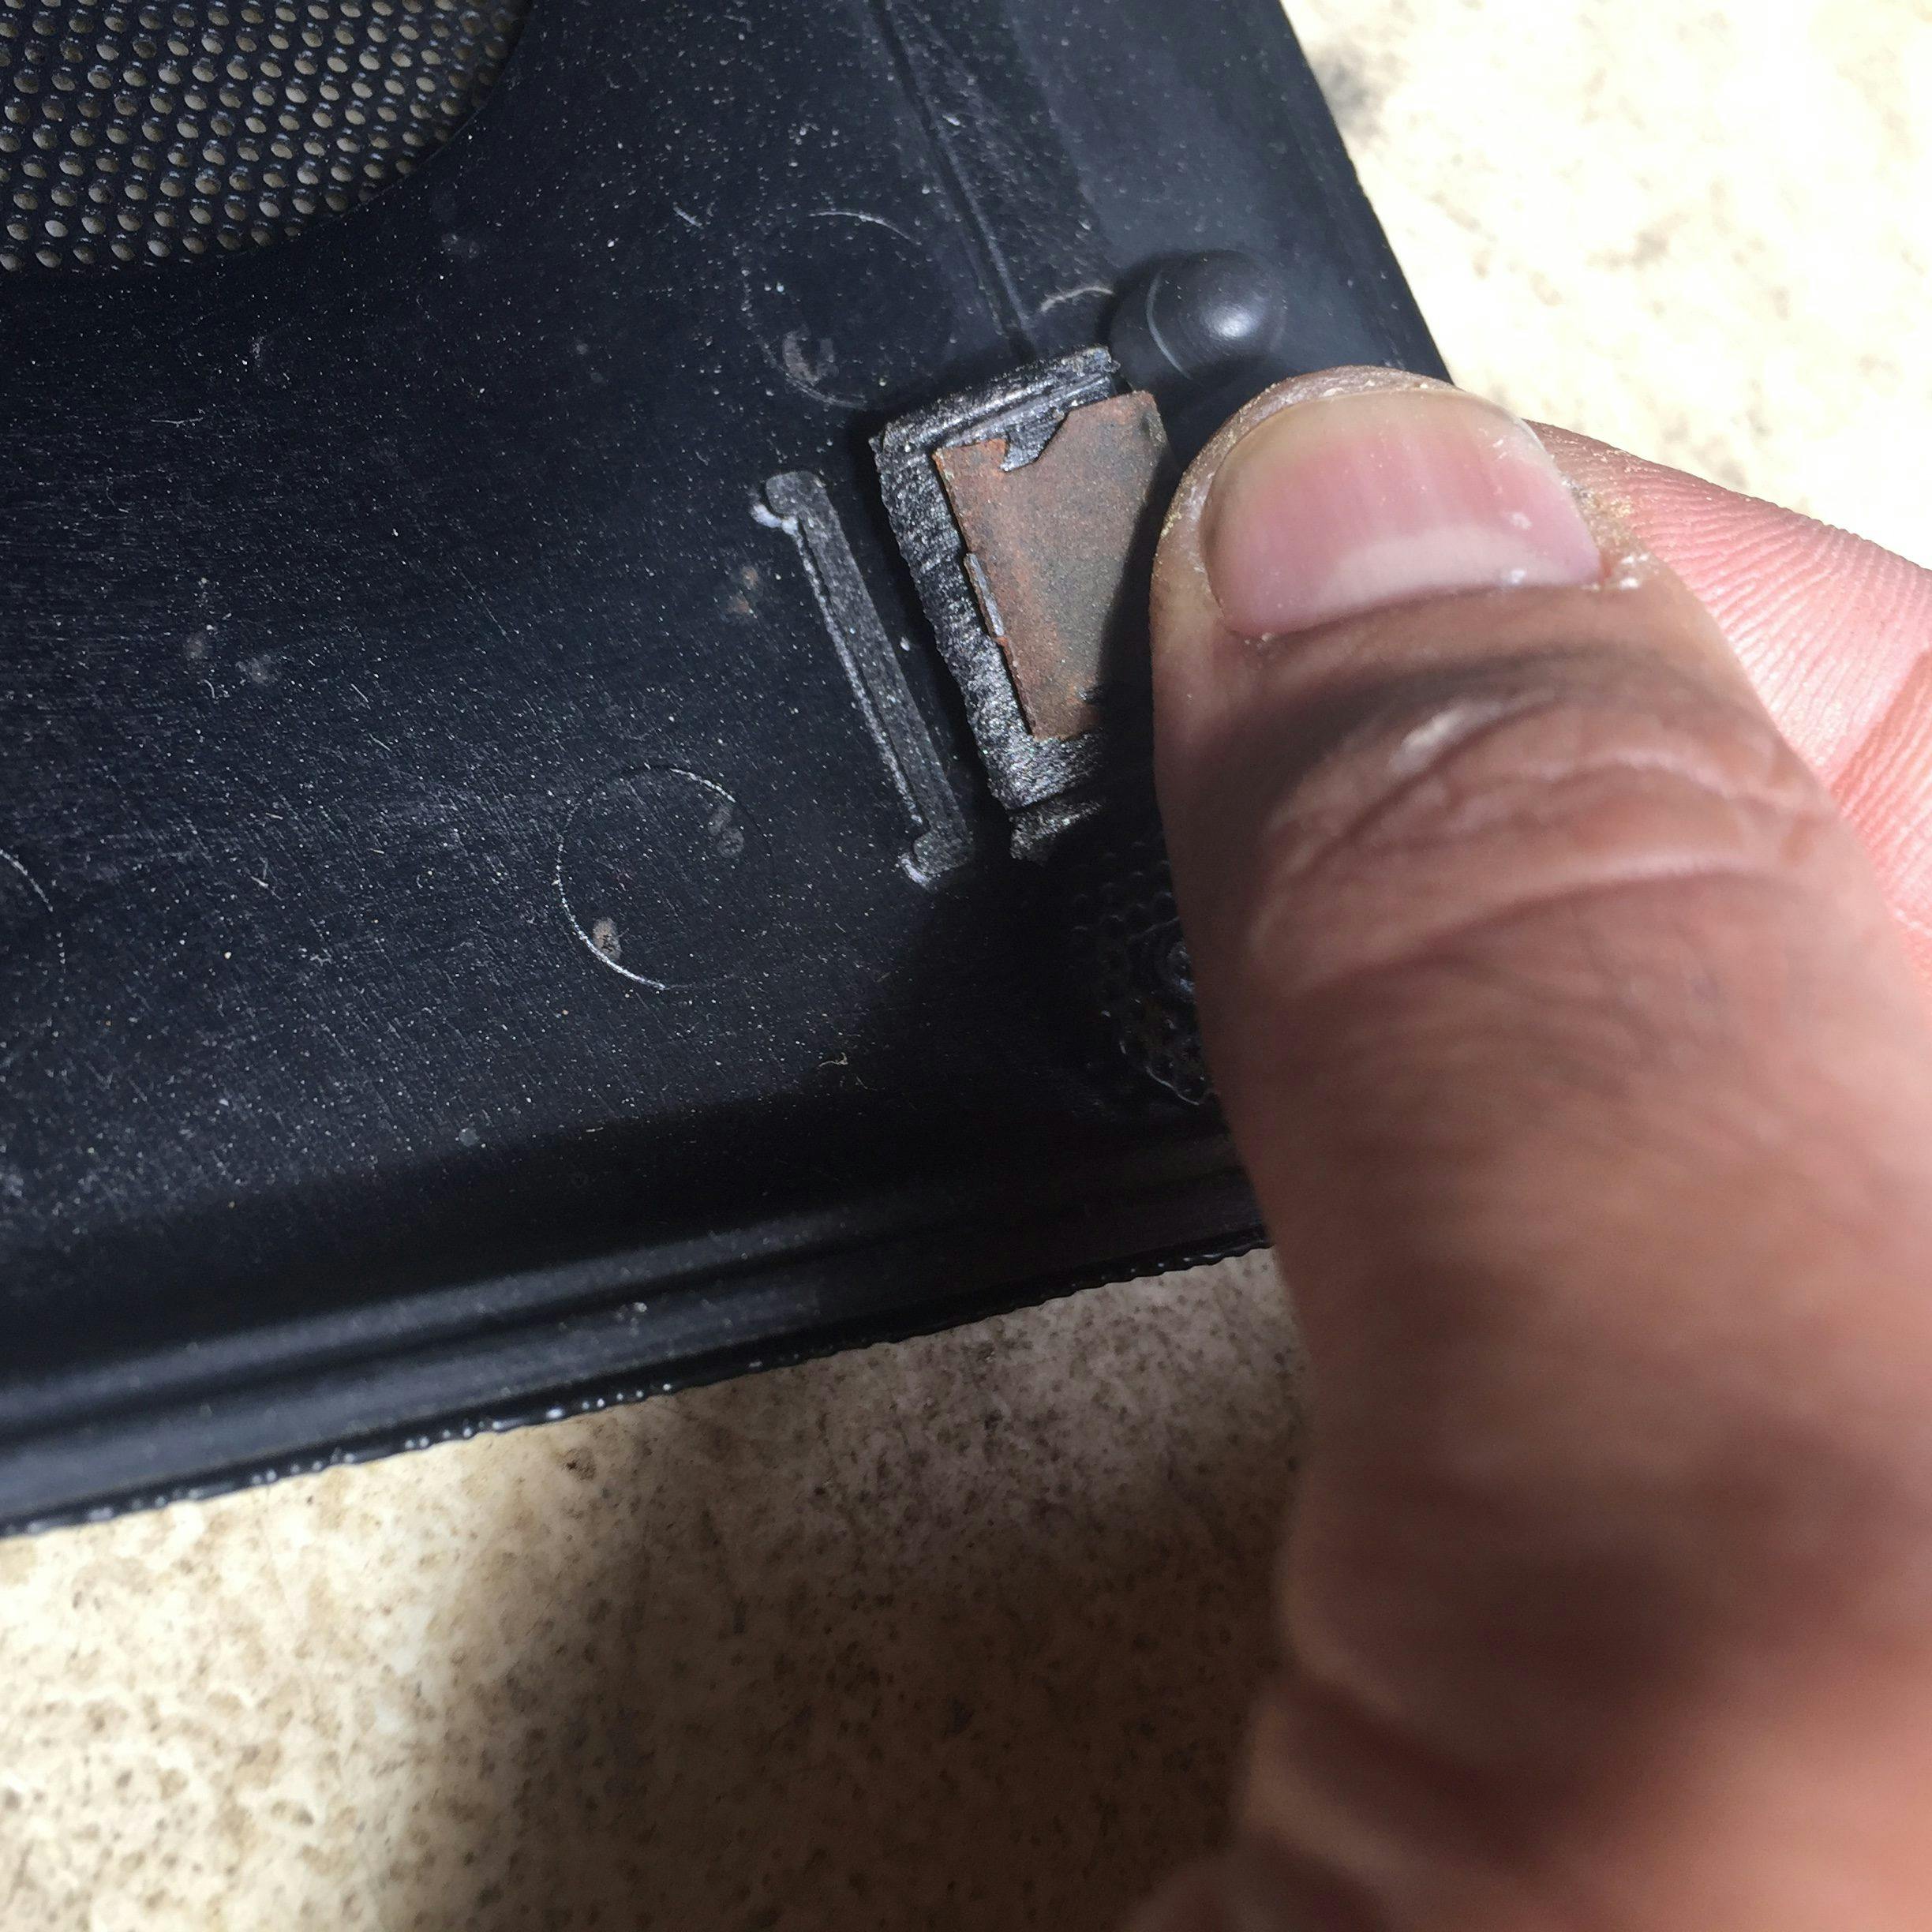
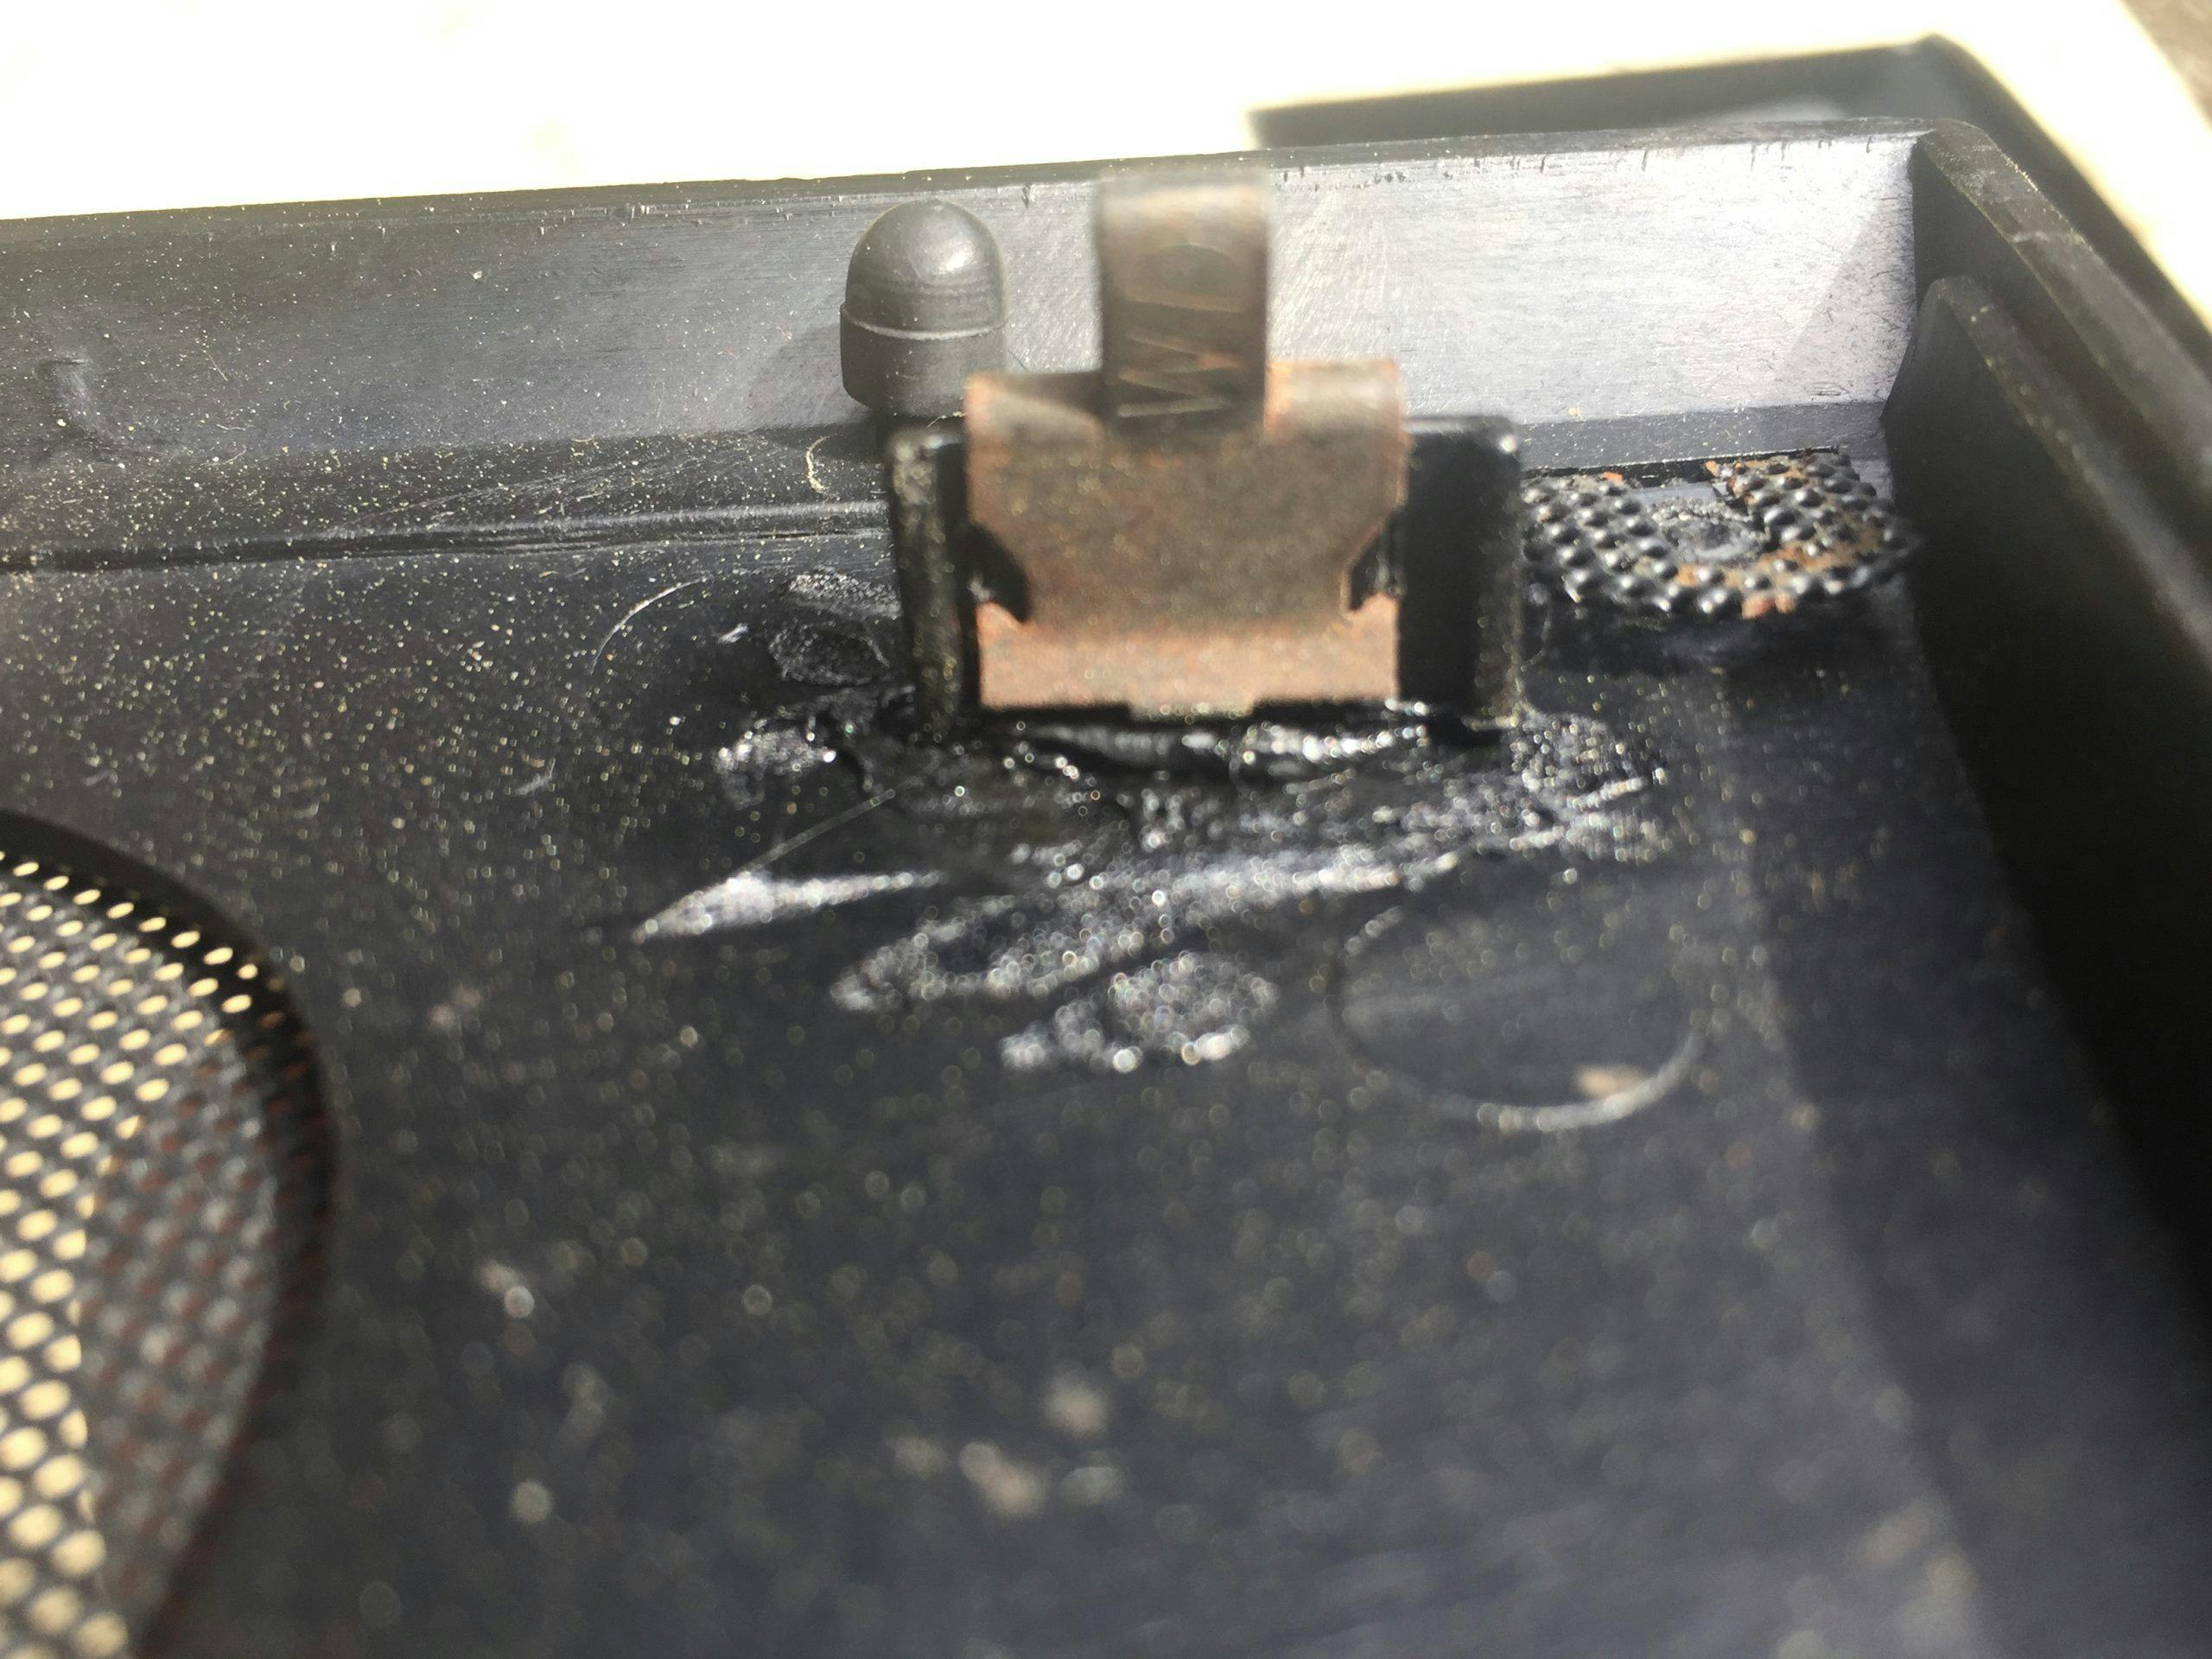
My first task was the Continental’s speaker grille. When I pulled it from a parts car in a local junkyard, two of the mounting tabs broke off. I used my car’s original grille as a donor, snapping off and storing its remaining tabs for use as spares. One of the broken tabs only needed a few seconds of heat to get both the base and the tab sufficiently melty (that’s a technical term) to stick together. It’s important to keep a watchful eye on the plastic while doing this, to ensure that you aren’t over-melting your parts, or that you aren’t melting something else that needs to remain intact. It also helps to remember that you’re not going crazy here—consider this part of the process the plastic equivalent of a tack weld.
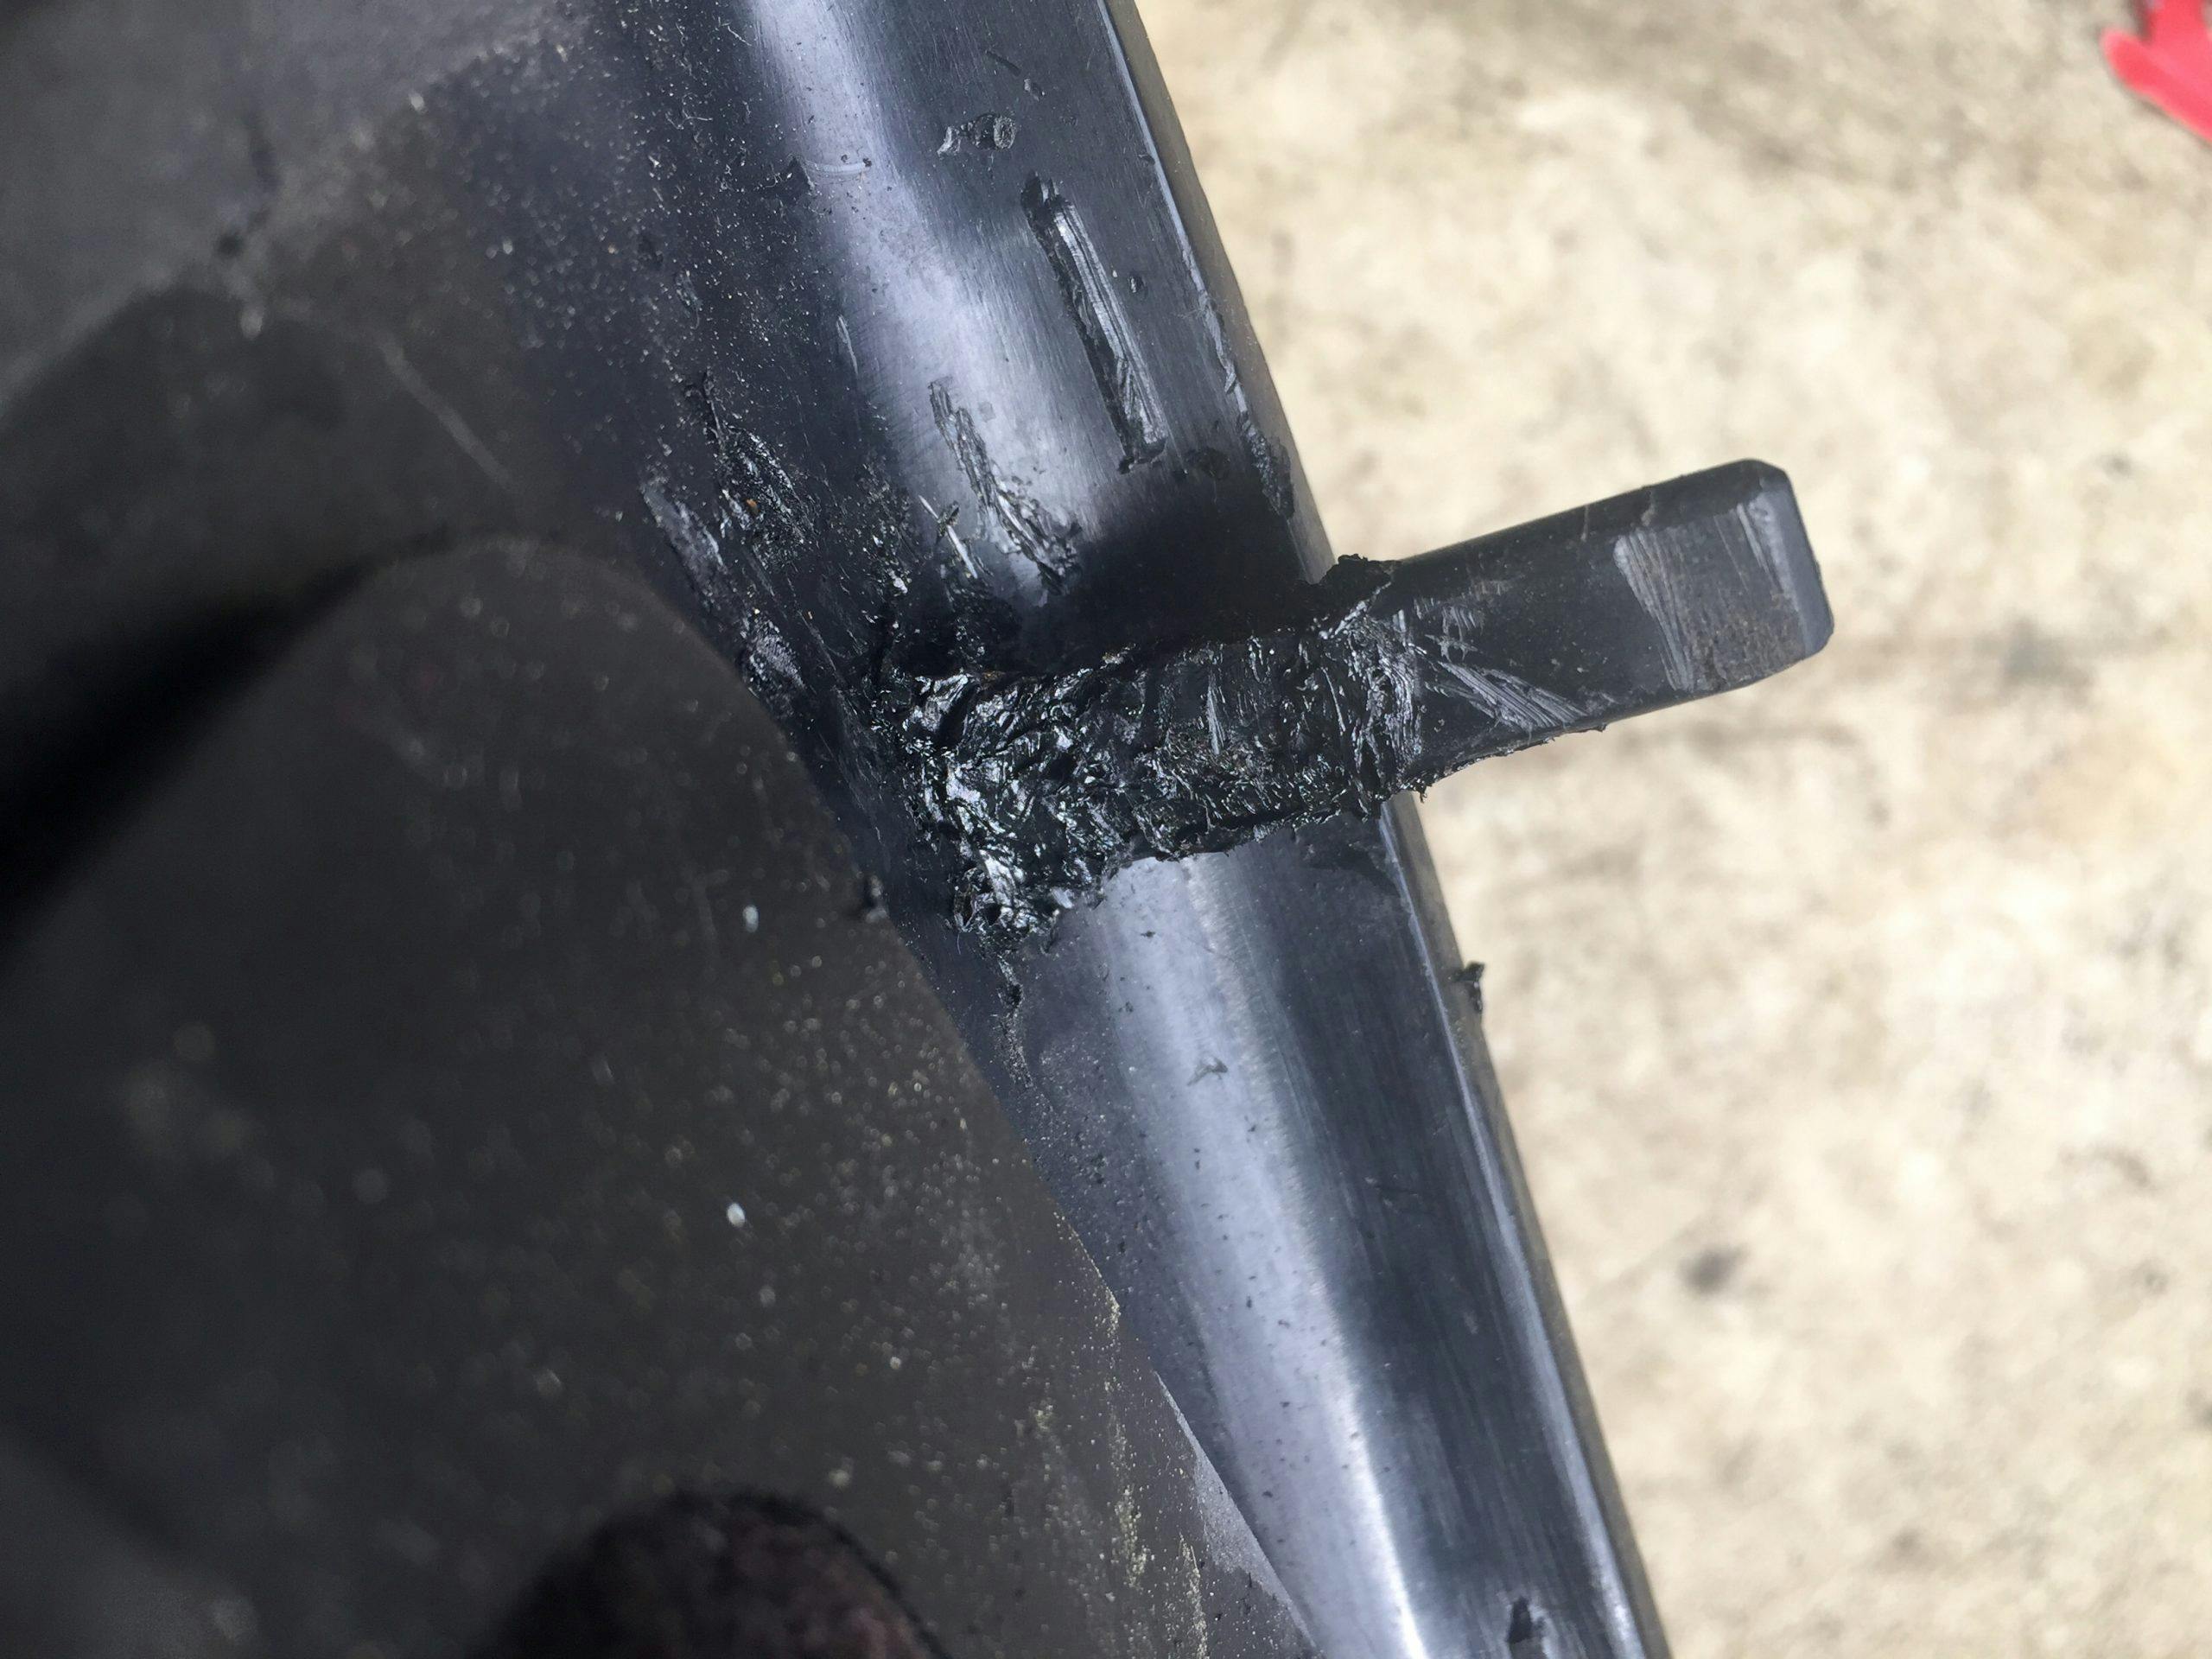
After the initial weld had cooled and the clip was tacked to the speaker grille, I added a dab of the kit’s welding rod as reinforcement. It’s a good idea to use the plastic rod whenever you can, as the reflowed factory part may not be as strong as it was originally. You press the tool firmly against the cold rod, melting it into a thick liquid that’s easily “spreadable” along both sides of the joint you’ve chosen to repair. The rod melts quickly, and it doesn’t take much to make enough liquid sufficient to reinforce or fill a joint—less is indeed more here.

It also helps to remember that this isn’t the perfect answer for every break. While the second clip on the speaker grille could have been welded, it broke off so perfectly that I decided two-part epoxy was a far better option. So I put the welder back on its stand, let the epoxy cure, and prepped my next piece, the Cougar’s broken shifter plate.
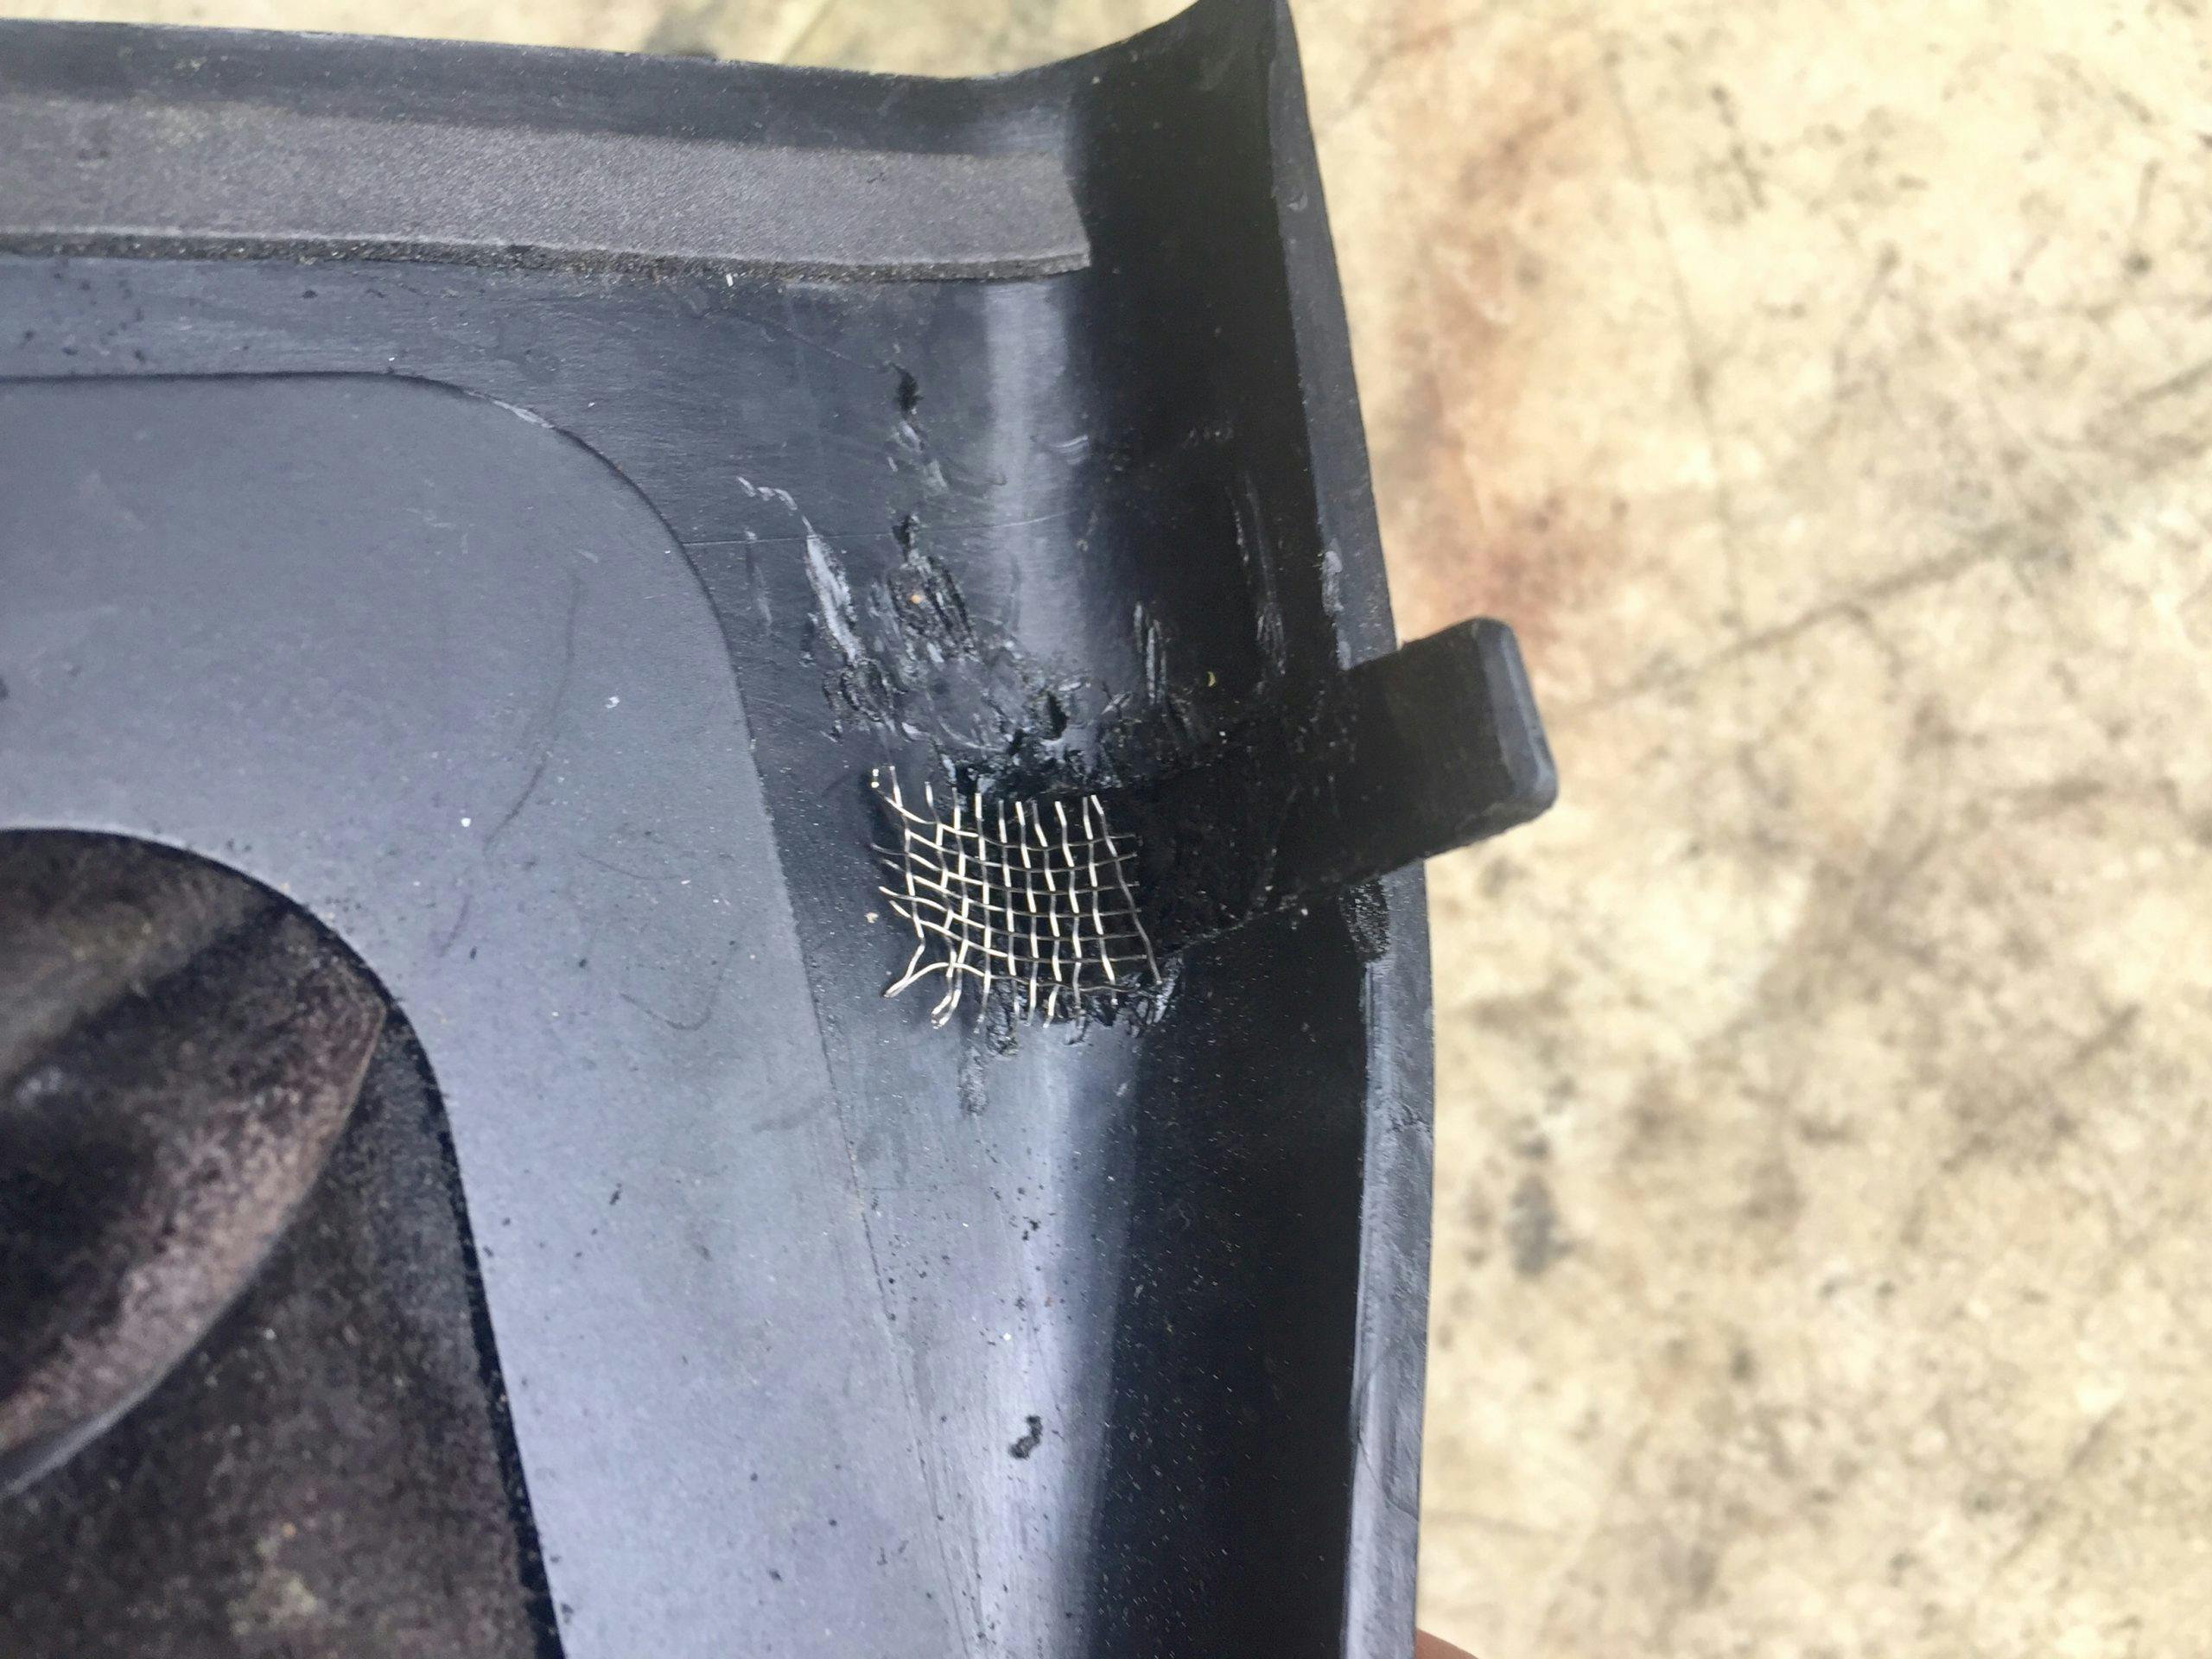
This panel was more challenging, as its sheared mounting clip had to be reconstructed from donor plastic stock. I used two donor clips to get the appropriate length, welding them together by heating one end of each clip and using the melted areas to “glue” the two bits together. After a brief cooling period, the “new” clip was welded to the trim panel using a small pool of melted plastic from the rod stock.
Since this part endures a bit of stress (the car has an aftermarket shifter, and those are both a bit bulkier and pull on the boot), I used the supplied metal mesh as a reinforcement. The first step was cutting out an appropriate size and bending it to fit the contours around the clip. Next, I melted a modest amount of rod stock, enough to completely encase the mesh in fresh plastic.

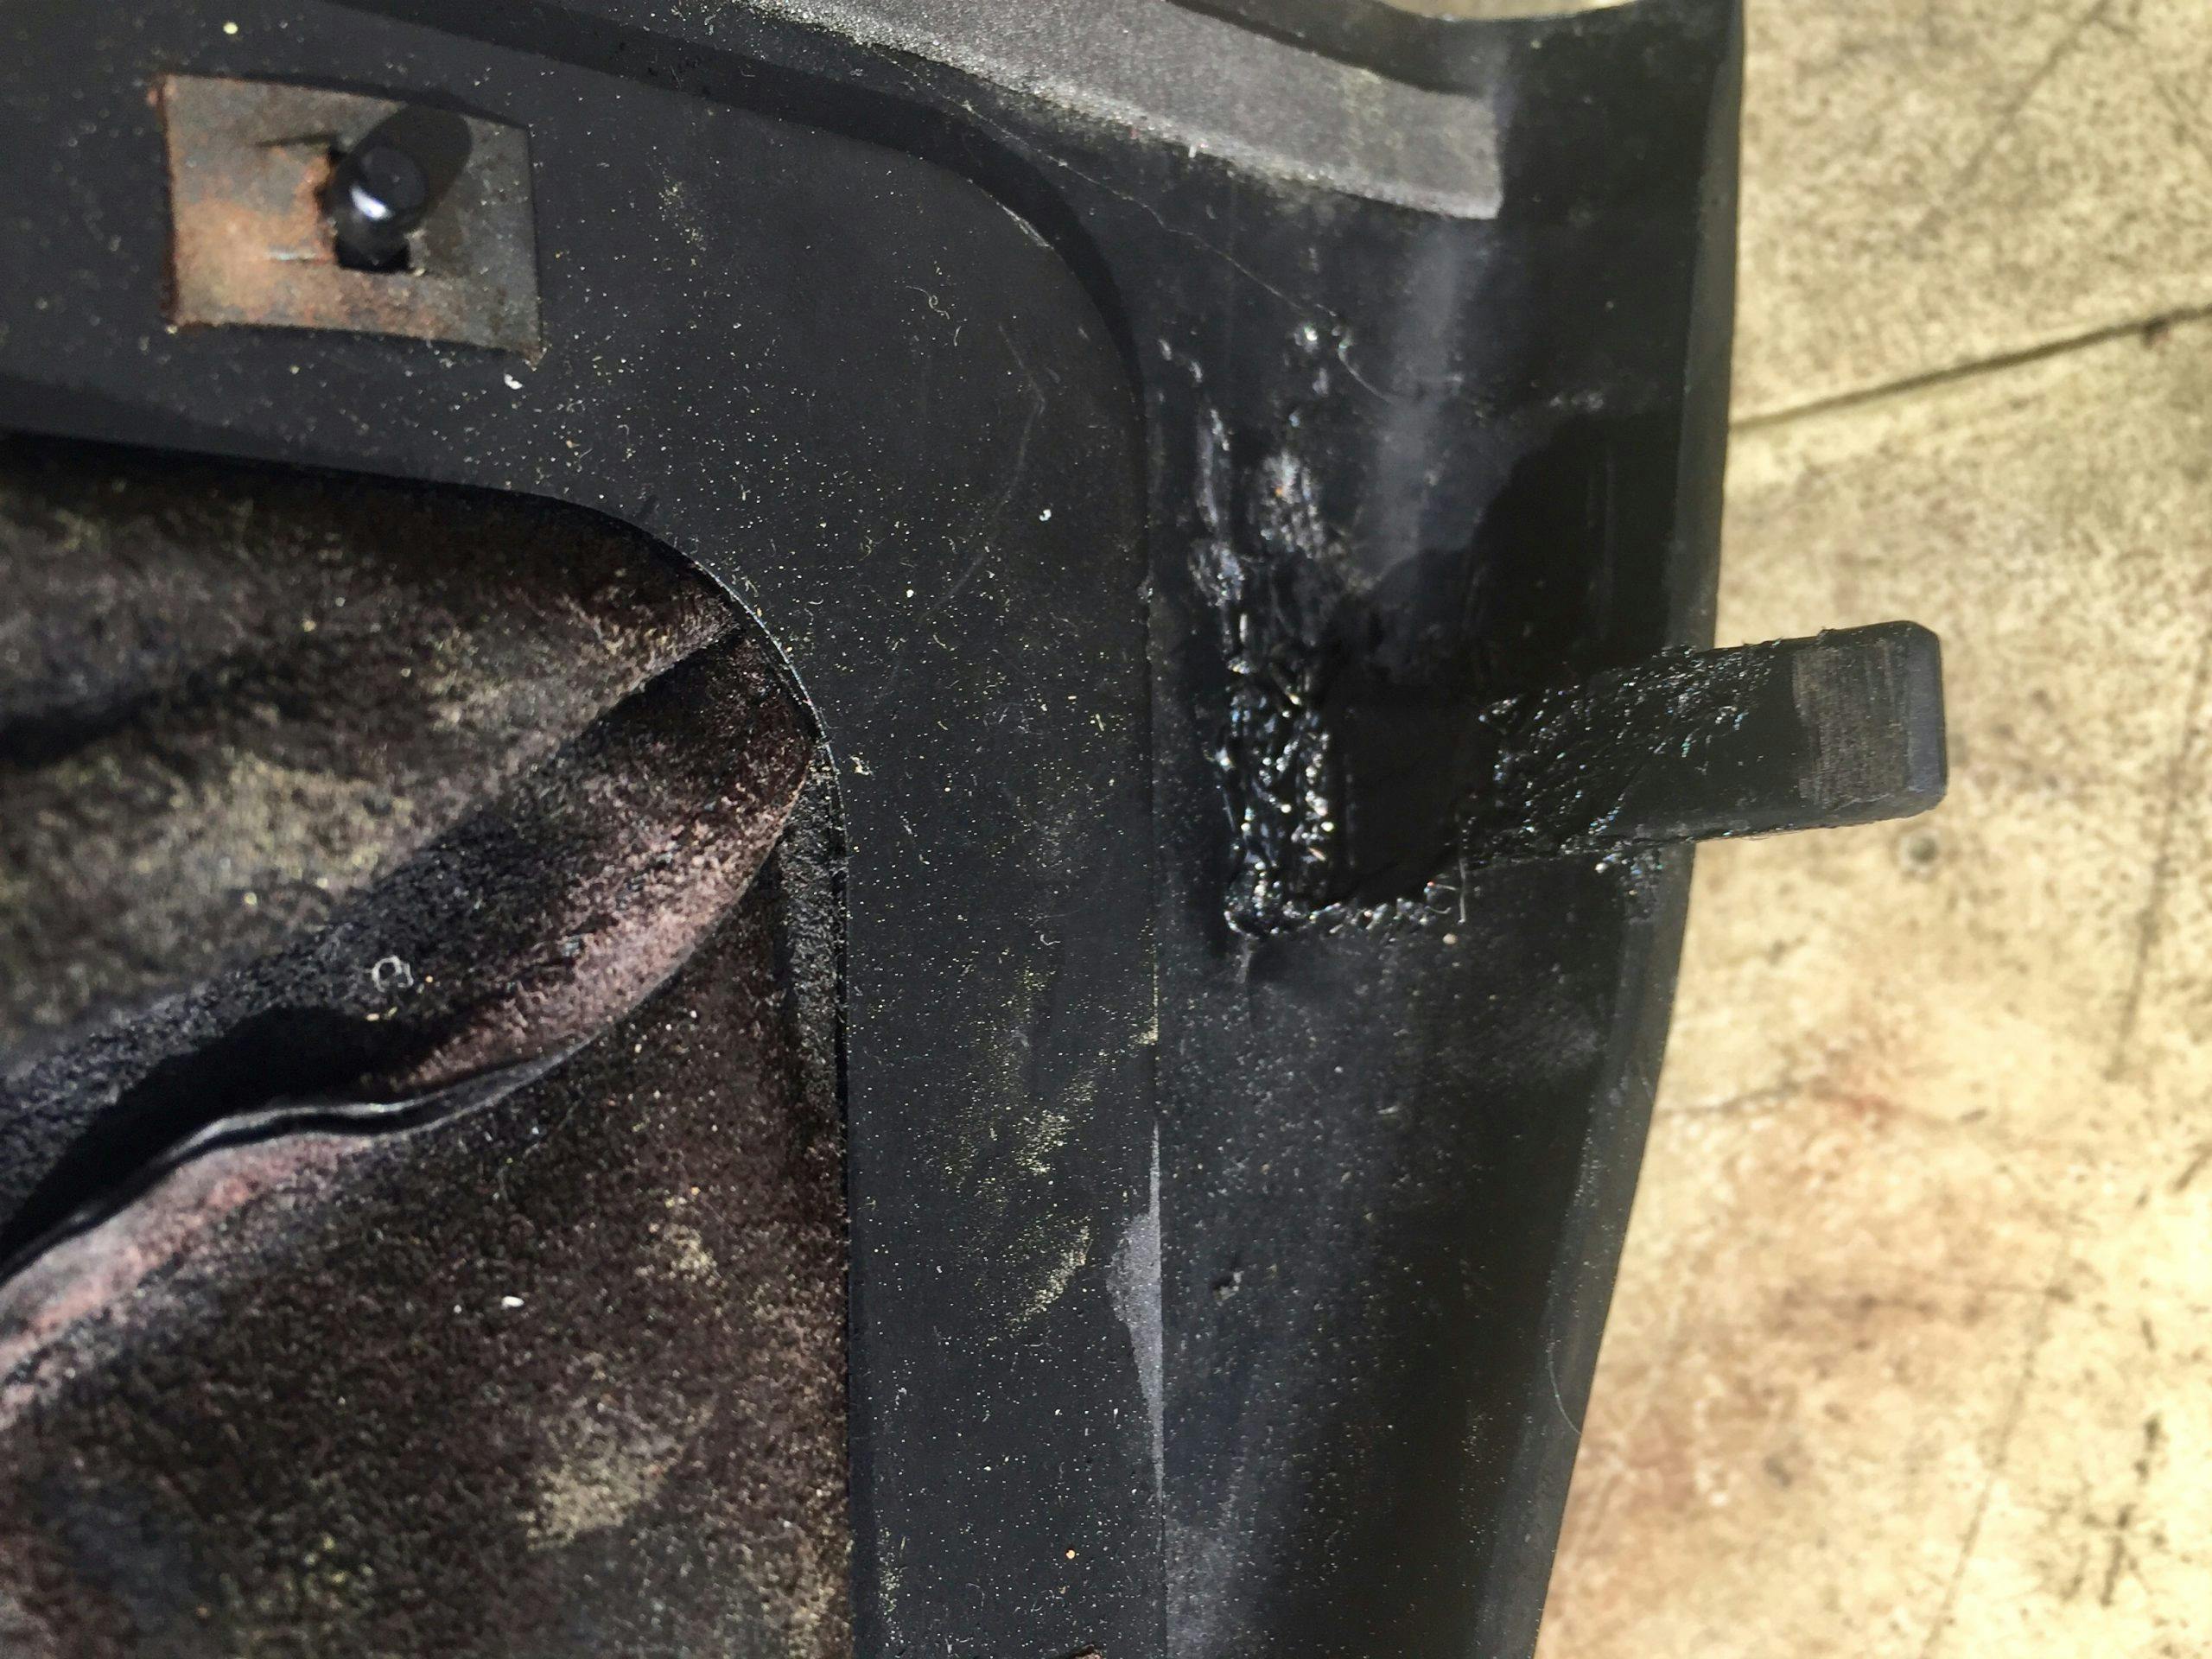
The end result (top) isn’t pretty, and it still needs shaping to replicate the pointed end of the original clip (bottom) that survived the test of time. That said, I added some plastic welding rod to the original clip’s base, for good measure.
I’ll use a rotary tool to properly shape the new clip. I’ll also clean all the booger welds that are an unfortunate byproduct from the space constraints of this particular part. At that point, reassembly will be the only thing left. But that’s another post for another day.
Remember that this tool and process are the affordable answer. The market currently offers better welder designs than the cheap, pie-shaped tool I bought, but I reckon this choice was ideal considering my limited free time, limited budget, and lack of expertise. More to the point, a $50 tool is the ideal starting point for automotive hobbyists looking to avoid expensive dealership purchases, time-wasting with online vendors, or dirty journeys to a local junkyard.
If you feel the same way, add one of these kits in your toolbox. I assure you that it’ll be worth the time and money.