The challenges of installing a new radiator fan
I’ve gone on and on for nearly two months about the front-end refresh in my ’74 Lotus Europa Twin Cam Special. It’s time to move on to something else, a completely new topic… about 14 inches away.
One of the other issues I had with the Lotus when I was driving it last summer was inadequate cooling. After I’d finished rebuilding the engine last spring, I reinstalled the original radiator and electric fan, as there didn’t appear to be anything obviously wrong with either of them (the radiator appeared free of obvious corrosion when I peered inside, and the cooling fan, though it looked like it originally powered Churchill across the English Channel, spun smoothly when tested). However, as spring turned to summer, I found that the car’s temperature gauge would drift into the red if I got caught in hot traffic, and if unchecked, the car would puke coolant out from under the radiator cap. I replaced the car’s original low-blow 7-psi cap with a new one of the same pressure, but it made no difference, so it clearly wasn’t just a gauge issue.

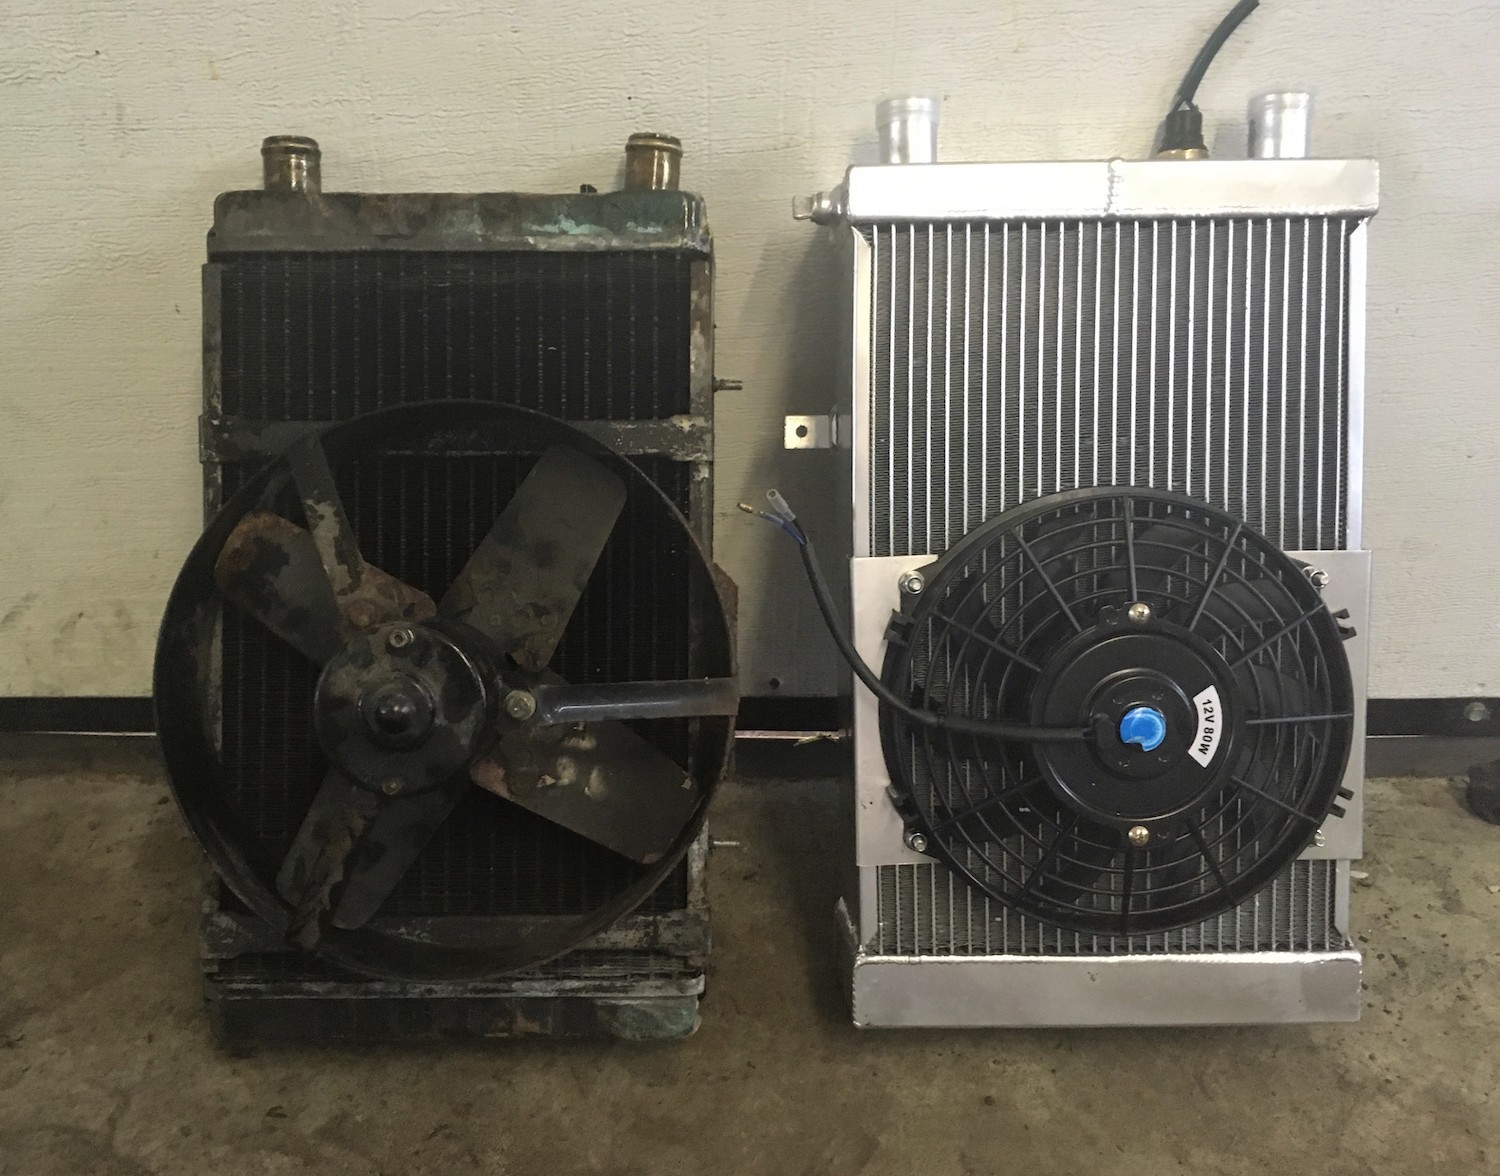
I bought a new Chinese-made triple-core aluminum radiator and fan off eBay, hoping that they’d solve the problem. Normally I’d buy just the radiator and then spec and order a proper Italian-made Spal fan myself. When a Spal fan has a spec that says it delivers a certain amount of cubic feet of air per minute (CFM), you can believe it, whereas with an el-cheapo eBay fan, who knows. Unfortunately, the design of these aluminum radiators are such that they either have no fan brackets on them, or brackets are made specifically for the fans they’re sold with and typically no drawings are available online to see if the holes line up with a Spal fan. So, I took the chance and bought the radiator with the installed fan.
Bad idea.
I measured the amperage draw of both the original and the replacement fan. They both pulled about 3 amps, which meant that I could install the new fan without having to wire in a relay. However, when I drove the car to the Lotus Owner’s Gathering (LOG) in August, despite my having installed a switch to directly turn on the fan and not rely on the temperature sensor, the car overheated in dramatic fashion while I was waiting in the queue to get into the concour, held at Thompson Motor Speedway in Connecticut.
Fortunately, I was surrounded by experts. Folks quizzed me on what I’d done with the engine and cooling system. I explained that every cooling system component was new, and that the system had been bled multiple times. We checked to be certain the front-mounted radiator fan was spinning the right way. The most reasonable explanation was that the fan that came mounted on the radiator simply was inadequate to the task of pushing enough air through it.
Now, I do a lot of work rejuvenating air conditioning systems in vintage cars, and as part of that, it’s common to replace the condenser and its fan with the biggest ones that’ll fit. I’ve bought dozens of Spal fans and learned that Spal has a few different product lines. There are relatively lightweight low-profile fans, and thicker, heavier high-performance fans. I have no hesitation attaching the lighter fans directly to the radiator or condenser with pull-through zip ties and rubber pads, but for the heavier higher-output fans, I’m concerned about the stress placed on the tubing and fins, so I mount them instead with brackets, which is a lot more work.
In addition to mounting, there’s the issue of increased amperage. That air doesn’t come for free. In general, a fan’s CFM is proportional to the amperage that it draws, so while it’s easy to say that you want the biggest, hardest-blowing fan you can buy, there are electrical consequences to it—you need to be certain that the alternator can handle it, and it’s likely that you’ll need to install a relay and thick cabling from it to the fan so the extra current isn’t running through the car’s existing thin wiring.
When I got back from the Lotus event, I ordered the most powerful 10-inch fan Spal offers, model #30102058. The specs say it’s rated at 1115 CFM and may draw as much as 15 amps. Clearly, this time a relay was required. Plus, weighing five pounds, it needed to be mounted on brackets, not zip-tied through the radiator’s tubes and fins.
I removed the radiator and yanked off the anemic fan. I test-fit the Spal fan on the bracket, but the holes didn’t line up with the existing studs. And with the brackets already welded to the top and bottom of the radiator, there wasn’t an easy way to drill holes and insert new bolts through the back. Plus, the old brackets stood off a fair amount from the radiator. To maximize the air flow, I wanted the new fan mounted as close to flush as possible. So I cut the old brackets off with a Dremel tool. I then had to figure out how to fabricate and mount new brackets.
I do have a MIG welder, but I don’t have the attachments to weld aluminum. I thought about using J-B Weld to attach basic right-angle shelf brackets to the top and bottom (after all, I used it to fix a cracked cylinder head), but in the end, I made myself a set of what are essentially rectangular band clamps. I ordered some 24-inch-long, 3/4-inch-wide, 3/32-inch-thick aluminum from McMaster-Carr, heated the bend points with a torch, bent them into shape, drilled holes, and inserted some elevator bolts with very flat backs to act as mounting studs. I wrapped some thin foam rubber tape around the insides of the top and bottom of the straps to prevent them from rattling. I was very happy with the result. It looked good and felt to me like it was spreading the load.


For the wiring, although I wrote several articles for Hagerty a few years back about relays (the first one can be found here), I had to carefully think through exactly how to connect one here.
A quick relay primer: A relay is simply a remote-controlled switch. Most relays have four terminals, labeled 30, 87, 86, and 85. They’re function is simple if you just keep repeating to yourself that sending power to 86 and grounding 85 connects 30 to 87. In most cases, a fat wire carrying high-amperage current from the battery or alternator is connected to 30, and a fat wire sending that current to your device is connected to 87. Then a thin wire carrying low-amperage current from a switch or sensor is connected to 86, and 85 is connected to ground. When voltage is applied to 86 and current flows to 85 to ground, it energizes a little electromagnet inside the relay that pulls a switch closed and connects 30 to 87, sending power to your device. Like a said, a remote-controlled switch.
However, sometimes the relay goes not on the positive side of a circuit, but on the ground side. That is, instead of power going into 30 and out 87 to the device, it’s a ground wire that goes from the device into 87, out 30, and to ground. With my Lotus, it made sense for the relay to be wired that way—on the ground side—because the existing wiring has the temperature sensor completing the ground path. That is, voltage is sent to the fan whenever the car is running, but it’s only when the coolant temperature rises above a certain level that the internal contact inside the temperature sensor closes and connects the path to ground.
I also needed to preserve the manual override switch I’d installed. I needed to diagram it all on paper first to make sure I had it right. As you can see below, either the temperature sensor going above threshold and closing, or the manual override switch being thrown, connects terminal 85 to ground, energizing the relay, and connecting 30 to 87, which grounds the fan motor, turning it on.


So, it’s installed and tested. It appears to draw not 15 amps, but closer to 10, and the car’s original 35-amp alternator seems to keep up with it. Unfortunately, it’s February, and even if I drove the car, I certainly wouldn’t be able to tell if I’ve improved the hot-weather cooling system performance. That’ll have to wait until hot weather.
Still, that’s why we do these winter projects, right? To get things ready for the driving season. Taking a big step back, when the cars got sardined away in the garage after Thanksgiving, I had four winter projects in mind for the Lotus. They were:
- Rebuild the front end
- Upgrade the cooling fan
- Replace the leaky seals in the transaxle
- Replace the cracked windshield
We’re about halfway through winter, and I’m now halfway through the list. I think I’m doing pretty well.
***
Rob Siegel has been writing the column The Hack Mechanic™ for BMW CCA Roundel magazine for 33 years and is the author of five automotive books. His new book, Resurrecting Bertha: Buying back our wedding car after 26 years in storage, is available on Amazon, as are his other books, like Ran When Parked. You can order personally inscribed copies here.