What you need to know before you pull that head off

A few weeks ago, I wrote about buying a 1987 BMW 535i sight-unseen in Tampa, and how, when it arrived, the combination of valvetrain noise and rough running led to the discovery of a broken rocker arm. The action required was straightforward enough—pull the head, replace the rocker, reinstall the head—but the question soon became, “While the head is off should I take it to a machine shop for a proper valve job?”
My situation may have been specific—broken rocker arms are not terribly common—but the question is a general one. Maybe the head is coming off because the head gasket blew. Or maybe the car overheated, the head cracked, and a replacement was procured. Can you simply drop the head back on? The answer is: It depends.
First, I can’t stress enough how important it is to get data while the head is still on the car:
- Is there always visible blue oil smoke in the exhaust? If so, it’s likely due to worn rings, piston lands, and cylinder walls, and a valve job is unlikely to cure it.
- If instead there’s blue smoke only at startup or at trailing throttle (when you wind up the engine and then take your foot off the gas), it could be due to bad seals at the tops of the valve guides, or the guides themselves being worn. The seals can be easily replaced if the head is off and disassembled.
- If there’s sweet-smelling white smoke in the exhaust, or bubbles in the coolant, that’s the textbook symptom of a cracked head. Be sure to perform both a compression test and a leak-down test before pulling the head.
- Air hissing out the intake or exhaust is clear indication of bent or burned valves.
Of course, if you’re buying a used head with zero provenance, you don’t know any of these things, but if the head is still on your own car, you’d be advised to take the time to acquire these pieces of information before yanking it off.

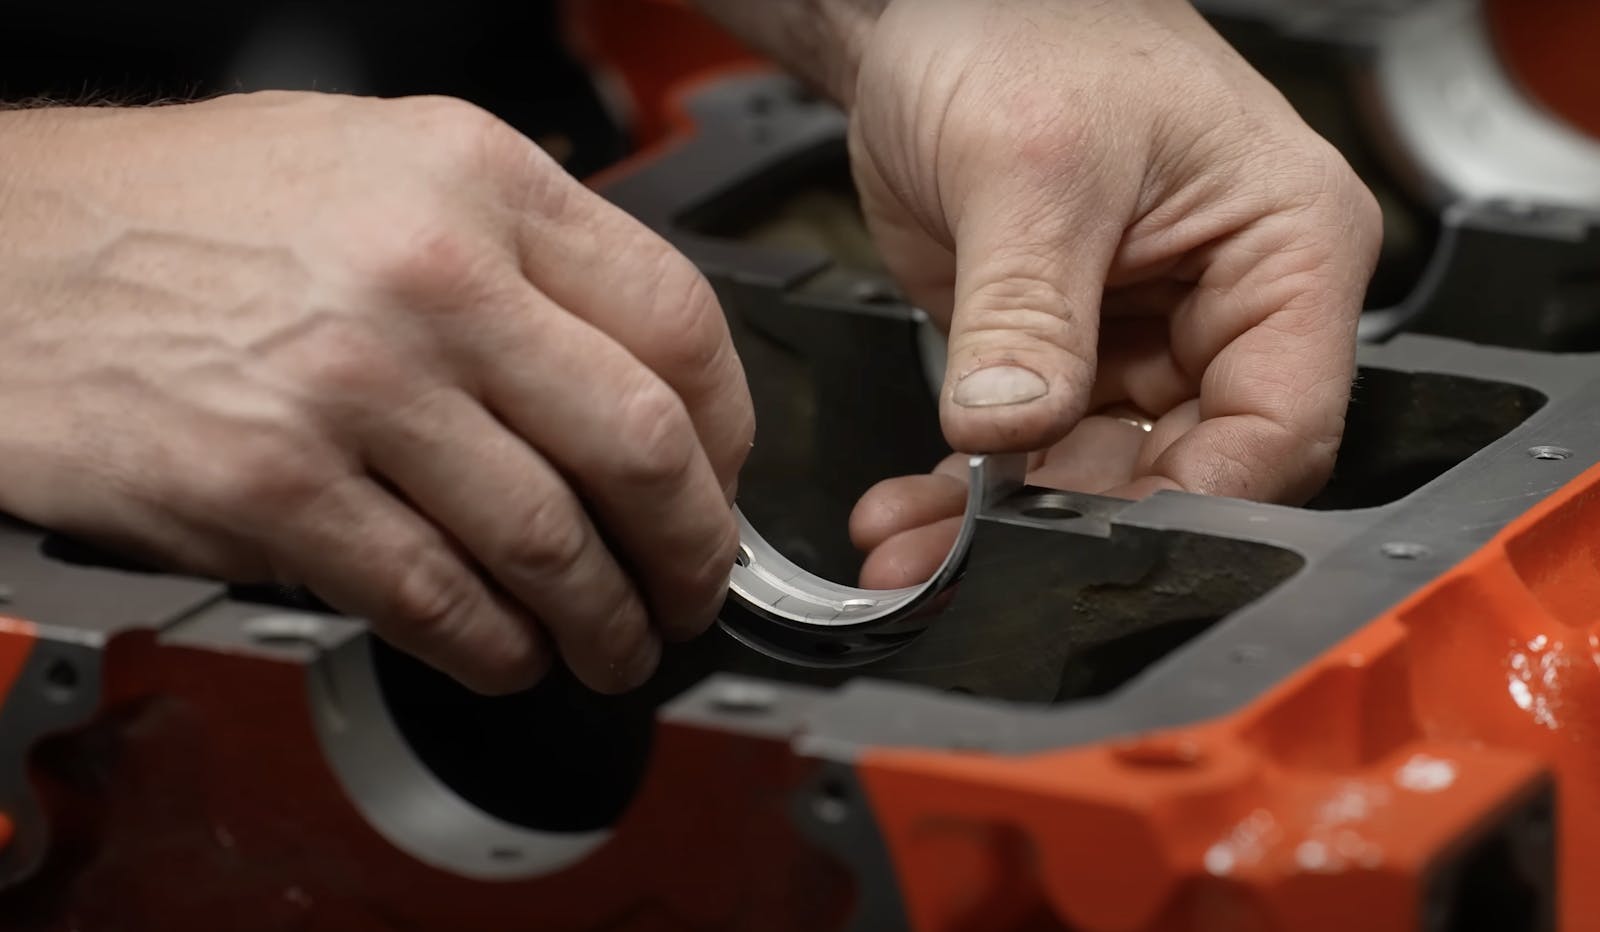
Basically, there are five things you want to look for before dropping a head back on: straightness, cracks, corrosion on the head’s seating surface, damage to the valvetrain components, and leak-free valve seats.
You can try to check for straightness using a metal ruler and a flashlight, laying the straightedge along the sealing surface of the head, shining the flashlight at the interface, and looking for light. If you see a bow and a resulting gap, check it with a feeler gauge. The straightness spec on a head is typically only a few thousandths of an inch. If you know that the head was overheated, the odds of it being warped are high. I’ve seen heads so warped that, when you disassemble them, you can’t even fit the camshaft back in because the journals no longer line up.
Next, clean the head’s underside with brake cleaner, then look for corrosion or other damage where it needs to seat against a new head gasket. With aluminum heads, it’s particularly important that the mating surface is extremely clean. If you have any doubt, it’s best to have a machine shop mill the head.

Once the head has been made clean, visible inspection for cracking is usually effective. One of the advantages to bringing a head to a machine shop for a valve job is that they’ll hot-tank it and glass-bead it. When the head is spotless, small cracks in commonly-cracked areas, such as between the valve seats, become visually apparent.

Like cracking, damage to valvetrain components is visually apparent, though you may need to disassemble things to find all of it. There are three major valvetrain designs: Pushrod (with the cam in the block), single overhead cam with rocker arms and shafts, and double overhead cam with buckets and shims.
If the cam is in the head, spin it to cycle it around, and inspect all of the cam lobes for wear and pitting. On a single overhead cam engine, you can’t really tell how much wear is on the rockers and shafts without disassembling them, but if you do a quick valve adjustment and find that the adjusters are at the end of their extent, that’s a pretty sure sign that the valvetrain components are badly worn. If you see any damage, disassembly and thorough inspection are warranted, as it’s possible that broken pieces damaged other components when they flew off.

If you did a leak-down test, it should’ve caught the most egregious leakage due to bent or burned valves, but if the head is already off, there are several methods for checking the integrity of the valve seats. Some are worse than the leak-down test, but one may actually be better. You can test with light, liquid, air, or a combination. Note that, for all of these, the valves need to be in the closed position, so you either need to remove the camshaft and the valve train, in which case all of the valves are closed at the same time, or you need to rotate the cam to close the valve you’re testing. By judiciously rotating the cam to place the rocker arms near the flat spots on the backs of the cam lobes, you can usually get two valves closed at a time.
If the manifolds have already been removed, you can turn off the lights in the room, shine a flashlight at the valve seats, and look for light getting through to the intake and exhaust ports, or vice versa. Note, though, that this only catches the grossest of leaks (e.g., a valve seat is really bad if you’re seeing light).
The liquid test is better. Turn the head over and tip it so that the valve being tested is level, then pour liquid into the combustion chamber until it covers the valve and the seat. Water will work, but a solvent like acetone, gasoline, or brake cleaner is better (obviously, wear gloves and have adequate ventilation). You’ll probably need to thread a spark plug back in so the liquid doesn’t run out the plug hole. Then watch and wait. If a valve is bent, the fluid will drain out immediately. On a valve that’s burned or has an otherwise pitted seat, the fluid will seep out slowly.

A better way to do the liquid test is with the manifolds removed. That way, you can prop the head up on wooden blocks, fill the intake and exhaust ports with liquid, and use a mirror or a smartphone to look for fluid getting past the valve seats. Really, there should be zero leakage. Fluid certainly shouldn’t be dripping, but folks working on a budget are sometimes willing to accept a little weeping.
The third and best DIY valve seat test involves combining fluid and compressed air. The manifolds need to be removed from the head to do this correctly. Turn the head upside down, fill a chamber with fluid, angle the head to completely immerse one of the valves, then take an air gun, stick its wand into the intake or exhaust port, and shoot compressed air at the valve seat and look for bubbles in the fluid. As with the drip test, ideally you should see no bubbles at all. If you only see the faintest stream of tiny bubbles when the wand is aimed directly at the seat, the seal is pretty tight but not perfect. But if it looks like a kid blowing bubbles into his ginger ale, that valve seat is leaking. I’ve seen this happen even when the leak-down test didn’t reveal any air hissing past the valves.

If these tests reveal a leaky valve, what do you do about it? You can try lapping the valve—pulling it out, smearing valve grinding paste around the edge, and using the wooden valve lapping tool (a stick with the suction cup at the end to) to twist the valve back and forth to help bed it in. If the head is from a pushrod motor, or if it’s a twin-cam head where the camshafts and buckets simply unbolt, this is fairly easy to do; you just use a valve spring compressor to take the tension off the valve, undo the little collets at the top holding it in place, and withdraw it. Then you lap the valve in, thoroughly clean off the paste, replace the spring and re-test the valve for leaks.


However, if the head has a single overhead cam and a rocker-shaft-and-arm configuration where the rocker shafts need to be driven in and out of the head, you probably need to remove the rockers and shafts in order to get the valve spring compressor onto the valve to remove and lap it. Because banging the rockers in and out is a lot of work, by the time you have them out, you’re probably well-advised to take it in for a proper valve job where the seats are re-cut instead of merely lapped.
So, just to nutshell all of it, if you can convince yourself that the head is straight and un-cracked, that the surface is free of corrosion or other scars, that there’s no visible damage on the valvetrain components, that the valve seats aren’t leaking, and that you’re not exhibiting the kind of start-up or trailing throttle oil burning that’s attributable to valve stem seals, and if you’re trying to keep expenses to a minimum, you can try putting the head back on, but there’s always some risk.
If you’re not sure about any one of these things, and if you’re keeping the car, err on the side of the machine shop. Rough round numbers, not including replacing damaged parts, when I haul a bare head into my local machine shop, I’m usually charged about $300 for a tank / bead blast / mill / valve job for a four-cylinder head, and about $400 for a six-cylinder head. It’s not cheap, but I weigh it against the potential frustration of reinstalling the head to find that I’d called it wrong.
In my case, with my aforementioned BMW 535i, when I pulled the head to replace the broken rocker, I slid all the way down the slippery slope. I found that, when the rocker arm broke, it chipped one of the cam lobes, and that eight of the 12 valves failed the bubble test. Lapping the worst of the valves did not get them to fully seal. There was no choice but to fully disassemble the head and bring it in.

May your luck be better than mine!
***
Rob Siegel has been writing the column The Hack Mechanic™ for BMW CCA Roundel magazine for 30 years. His new book, Just Needs a Recharge: The Hack Mechanic™ Guide to Vintage Air Conditioning, is now available on Amazon. You can also order a personally inscribed copy here.