8 oil change dos and don’ts

It’s a small job that somehow became a rite of passage for gearheads: Oil changes. The draining and refilling of engine oil is the first task that many budding wrench-turners undertake, and its certainly an important one. Like any other task in the automotive world, there are some pieces of institutional knowledge that comprise the key dos and don’ts for a smooth oil change. So let’s put these lessons learned out in the open, with the mission of shortening the process for newbies. And perhaps to reinforce some best practices for you veteran mechanics?
Don’t go crazy with warm-up
Modern oils are pretty amazing at suspending particles and contaminants, but there is still some junk that sinks down to the bottom of the pan. It needs to be stirred up to ensure it escapes when you pull the drain plug. Starting the engine and letting it idle for a minute or two is perfect for that final circulation. Run it any longer and you’re rewarded with nothing more than scalding hot oil that does nothing more than burn you. Before you pull that (drain) plug, give the engine a minute after shutting down, allowing the oil to drain to the pan from the nooks and crannies higher in the engine. But before you get underneath the vehicle to do the deed, remember you must…
Wear disposable gloves
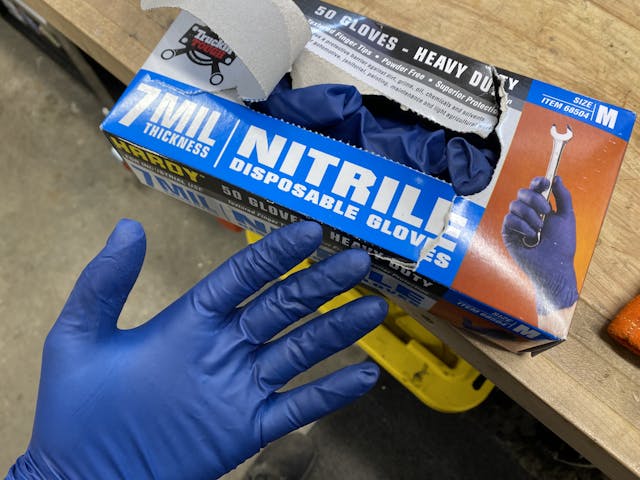
We all know the guy at the auto parts counter who has seriously gnarly hands from all the years being soaked in oil over decades of engine builds. That’s the visible damage. The invisible damage is sitting in your internal organs. All the hydrocarbons that get absorbed through the skin and are processed in our gut where they can’t be broken down. They end up accumulating in our body, which can cause serious health complications after years and years of chemical exposure. Preventing those issues is easy as putting on a pair of nitrile gloves. Use them even if it’s only for pulling the filter and drain plug, which you can do efficiently with…
The drain plug trick

It’s not groundbreaking, but nothing feels better than the perfect pull on a drain plug to ensure you don’t get any oil on your hand. The trick is pressure, not pulling. As you unthread the plug by hand, push in–against the bolt as in comes out–so the threads act as a seal with the outer edge. With a little practice you can get the pressure right (while not rocking the plug in the threads) and can spin the plug a full turn to feel for the “click.” That click means the bolt overlapped the last thread. With a swift motion away from the direction of oil flow, remove that now-loose plug. Presto! This can make thin viscosity oil changes much cleaner, and thick stuff like 20-50 can sometimes be spotless. In your excitement of not having a mess to clean up after draining, make sure you…
Don’t over tighten the drain plug or filter
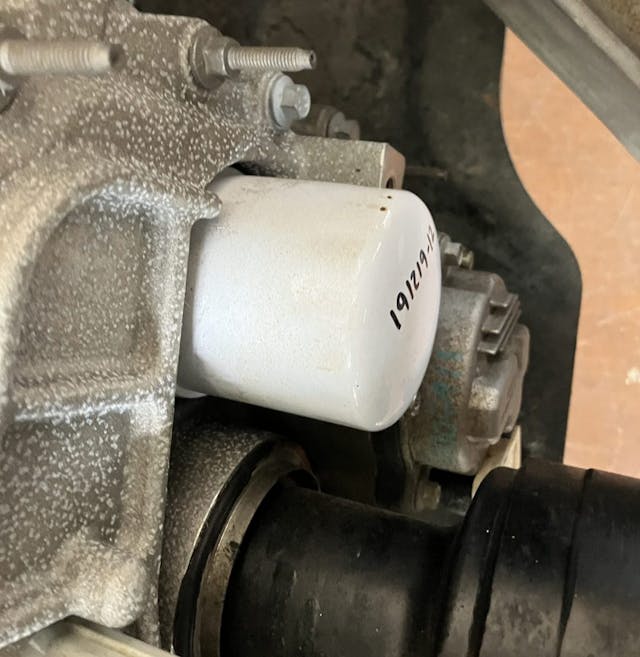
It’s come to the point where stuck filters and stripped drain plugs are no longer a joke. Neither the filter nor plug require any real torque when installed properly. Use a small amount of oil to lube the filter’s rubber seal, then spin it into place. After the gasket seats on the housing, turn it only about three-quarter of an additional turn. Some applications might call for a full turn, but that is usually reserved for heavy duty equipment. Any tighter than what the filter manufacturers call for and you run the risk of deforming that rubber seal, which could cause oil to leak past the seal. That’s bad news. Any oil spillage is bad, so when you are filling…
Just use a funnel
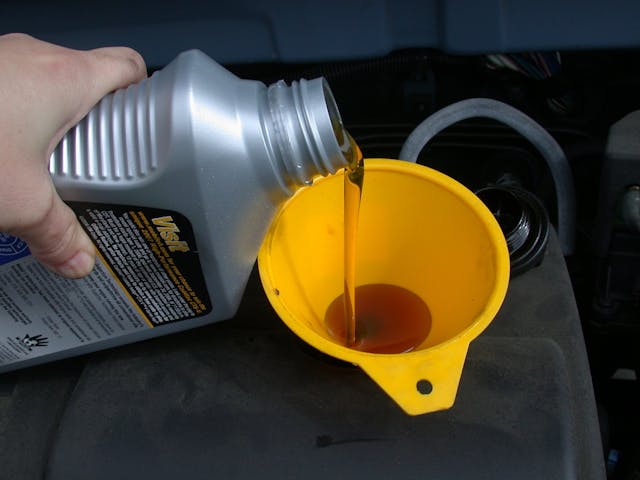
The oil fill port on most engines is in that perfect spot where it looks like you could pour directly into it, except that’s a lie. They seem to be ideally located, but cleaning up if you miss (by even the smallest margin) can be a major pain. Are we really going to work so hard to spot and address leaks, to keep our engines clean, and just ruin it while doing routine maintenance?
I’m not. A funnel all but guarantees I won’t have to do any clean up after filling, even if I’m distracted or letting my 7 year-old niece do the filling. Putting in that fresh oil feels good, but be careful and…
Don’t overfill
Too much oil is just as bad as not enough. Seriously. The oil level in a wet-sump engine is carefully calculated to keep the rotating assembly from whipping through the oil. That action causes foaming, and oil foam pushed through the oiling system is the same as not having oil at all. I don’t need to tell you how bad that can be, so check the service or owners manual for the proper fill level. When done, look at the dipstick as a double check. Luckily, the empty oil containers you now have at this point are are perfect to…
Recycle your used oil

It’s never been easier to properly recycle used oil, so there is no excuse to do otherwise. Just about any auto parts store takes it, so they should be your first trip in your freshly serviced vehicle to “return” your oil. Be sure to capture oil in a non-contaminated pan so that the oil can actually be recycled. Coolant is the main enemy here, so be sure to flush your drain pan before the oil change. Luckily you don’t have to worry about how dusty or dirty the pan is, but other fluids can defeat the purpose of recycling. But before you make the trip to recycle the oil, be sure to…
Reset the computer (or write down your service date)

Modern cars have an oil life monitoring system. Whether you trust it is a personal preference, but for the sake of eliminating confusion, go ahead and reset it now. Most reset procedures involves cycling the ignition key and pressing the throttle pedal a certain number of times. The service manual will outline it, or a quick search to an online make/model specific forum will have the instructions. If your vehicles are of the manual variety, write down the oil change date in a log book. Or consider service tracker kept in the car or garage, as it keeps you from forgetting what’s been done. Not to mention thisa paper trail shows good stewardship to a potential next owner, which can mean an easier sale for more money.
In all, oil changes can be simple and rewarding for newbies and DIY enthusiasts alike. Following these best practices will not only keep your vehicle happy, but also make the experience better for you each time. Do you have something specific you add to this process? Let us know about it in the comments below.
I still miss a piece about the right type of oil. Certainly for modern cars, the classification of the oil is just as important as the viscosity. Alloys are used in which not all types of additives in the metal can withstand all dopes in the oil.
Therefore, not only is important 10W40 or 5W30 and so on, but also classification C1, C2 for example. I live in the Netherlands, maybe classifications are indicated differently in the US.
And if you’re going to change anyway …. don’t forget the coolant and brake fluid. Brake fluid is hygroscopic and therefore attracts water, which is bad for various parts in the braking system.
Outside the topic, but I still want to report this: There is coolant especially for old-timers. Be careful with this, the products for sale are often highly flammable. I have identified a fire damage to a Healy caused by this. A hose clamp that was too loose caused a mist (so richly surrounded by oxygen) that then ended up on the hot exhaust manifold and caught fire. The damage amounted to approximately 15000 euros!!
Forgive me if everyone already know this, but I recently found that on modern fuel injected engines the oil system can be primed by cranking with the gas pedal floored (car doesn’t start). This will get the air out of the system and should avoid the dry start wear.
If I am changing the oil on a vehicle that has an oil filter that you offer up vertically, apart smearing clean oil on the rubber gasket, I also fill the filter with clean oil and then screw it on carefully. I’ve always found that once you get to starting the engine, the oil warning light goes out quicker and that you aren’t topping up quite so much when checking on the dipstick because none of the fresh oil has been used in filling the oil filter on the initial start up.
ok. read all posts, i didn’t see this one. wipe the top of oil bottle off before opening to avoid pouring dirt/dust into the motor with the new oil.
I learned a little trick that helps that seemed to be overlooked. Pull out the dipstick before draining and while adding. Some new engines are so well sealed I have seen the oil almost fail to fill and or backs up in the valve cover and spills all over the place. My 2c
One more tip that I learned the hard way for those of you with BMWs. I used to always do my own oil changes in my younger days, but over the last 15 to 20 years would just take them to the dealer. Recently decided I would save some money and do it myself on my X5. Bought the OEM branded oil and filter.
Drained the oil. Filter cartridge is on top of the engine which made things easy. Replaced the filter and put the supplied “O” ring around the filter cannister, added oil to the housing, screwed on the cannister and hand tightened it. Replaced the crush washer on the drain plug and tightened that up. Added all the oil per specs and all was good.
Took a 15 mile drive, parked the vehicle in the garage. Next morning when I went in the garage, to my horror there was a huge puddle of oil under the car all the way to the garage door (I back into the garage).
“WTF could it be?” The drain plug was tight, but there was oil everywhere on the underside of the car and dripping heavily from the shields. “This isn’t rocket science” I again thought to myself.
Open the hood and there is oil splatter visible within the engine compartment. Finally dawned on me to check the O ring around the filter cannister. There are a couple of grooves on the cannister and apparently I failed to note which groove the O ring was on originally and I put it on the wrong one. Went and bought a new O ring in case the old one got deformed. Installed it on the right groove this time and hand tightened it.
As others have mentioned, BMWs don’t have dipsticks. You have to start the car and wait for it to warm up and check the level on the infotainment display.
I started the car ready to turn it off if I saw the oil pressure light. No light, so I waited patiently for the car to do the measurement and to my surprise it still registered as full.
I’ve heard it said before that oil leaks always look worse than they are, but just to be safe I added about a quarter of a quart as there was at least that much on the ground.
Wiped up the underside and the compartment as best I could and it was fine after that.
Lesson learned to pay more attention in the future.
Gloves aren’t for sissies, smart people like to save their skin. Always use the right tools, sockets for the plug and the right filter wrench. I like the cup type ones that fit over the end of the filter.
I’ve welded up a set of 12″ tall ramps so I can just drive the cars up on them. No jacks or stands needed.
100% agree with the oil not being too hot, just warm. If I change the oil on my 83 Hi-lux hot it comes flying out, hits the front differential and sprays every where.
If equipped a new drain plug gasket.
Oil change intervals are the manufacturers recommended interval to maintain your warranty, not to give long engine life. These are the words of a dealership mechanic. Nothing I own goes more then 5000km’s (3000 miles) or 6 months on an oil change. The fore mentioned 83 Hi-Lux uses about 1/4 liter, mostly through valve stems. My daily driver pickup has 675000km (420000 miles) and doesn’t burn more then 1/8 liter.
Here in Ontario most municipalities have “hazardous waste” days or accept oil and the other nasties at the landfills/transfer stations…free!
Great infos. Remember the GOODWRENCH oil change with 15 points inspection. Car is on jack stands, check under car steering and suspension, while oil drains, check all lights (how many times do you see a car at night with a burned taillight or front beam!) walk around the vehicle, check air cleaner and belts and go from there to install plug and fill oil while checking all fluids (brake, power steering etc.). I like the comment about the oil drain valve, thanks.
In 1938, the U. S. Government published a finding that oil does not wear out! In the 1940s/50s we used 100% re-refined oil in all of our farm and construction equipment. Even at 45 cents a quart, the cost of not changing every 100 hours in dozers, etc., saved a considerable amount to our costs. What did we do…….at the advice of the refiner we changed the filters at 100 hours and 1000 miles in trucks…….and……in the company aircraft! That is the secret! Here is why it works. All the additives added to oil is for a reason! Additives are cheaper than refining the “bad” out the oil, mainly carbon and sulphur. What do you have when you heat water (from condensation) and sulphur…its called sulphuric acid. Additive will fix that. Is your oil black when you buy it? Sure is when you drain it. Simple, the heat and friction in an engine breaks down the carbon in the oil and it results in engine wear. Again, cheaper to add an additive. The oil company killed the re-refiners by many means, Oklahoma required that RE-REFINED OIL, IN 1″ high letters be printed across the face of any re-refined product sold. They sent government goons into every refinery and created pages of violations, etc., that were absurd and not even included in government regulations! My 1955 Buick Roadmaster had 85,000 miles when I sold it and the new owner continued using re-refined oil, 500 mile filter change up to 187,500 miles when he sold it and lost track of the car. I would surmise the new owner continued the process as two boxes of 30 filters was included. OIL DOES NOT WEAR OUT! Some of the oil companies are including a portion per quart….(with a very small print advising you of same.!
jschofld@aol.com
Like most people who go on this site for some interesting reads I too have been changing my own oil and filters since turning 15. I did a nut bolt frame off rotisserie restoration on my Chevelle finishing it off in 2016. I put way too much money into the original L-34 engine so I overcompensate by doing 2 changes annually. I started buying K & N filters for this vehicle’s engine. I thought I had a good ‘feel’ tightening oil filters by hand without ever having had leaks in the past. On Spring startup I had a gusher of motor leak out all over my garage and driveway from the filter base. I’m at fault for not paying attention to K & N’s tightening instructions on the box. I’m shocked at how much rotational force is required to ensure this area remains leak free. No way in hell can I tighten this brand’s filter ‘by hand’ alone. I’ve used many quality filters over my lifetime and none of them have ever needed this much-applied torque to deliver leak-free performance. What point am I missing? Any input from reader’s would be appreciated.
I’m learning how to drive and keep a car in good condition, so I’m eager to read everything about a vehicle’s upkeeping. That’s why I’m grateful for your information about the importance of reaching the right level of oil when changing it. I’ll remember to ask about avoiding using too much or too little oil when taking my car to a repair shop. https://owensautorepairs.com/oil-change
I cut the top off one of the 1 quart oil bottles. Makes an awesome funnel for filling.
Am I the only one who thought that picture in the “drain plug trick” makes it look like oil is spilling all over the guy’s face?
Did anyone mention filling the filter before installation?