5 ways to bleed your brakes
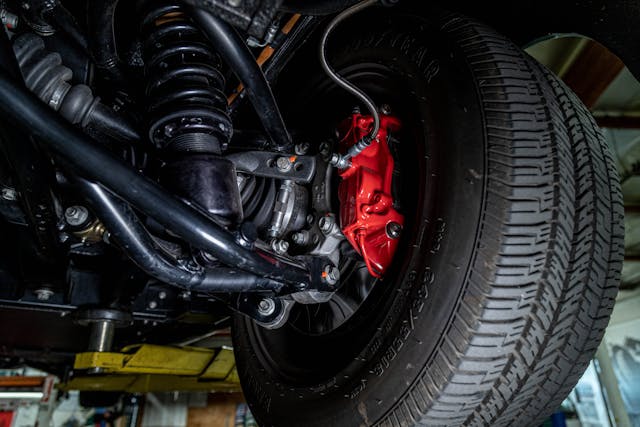
Releasing the air trapped in your car’s hydraulic brake system is crucial. Brake systems rely on a master cylinder to push fluid through the lines, and the fluid then imparts force on the piston (or pistons) in an individual wheel’s brake cylinders or calipers. The piston squeezes the brake drum or rotor, using friction to turn speed into heat and bringing the vehicle to a halt. The fluid is very efficient at activating the cylinder/caliper because it is nearly incompressible.
On the other hand, air is compressible; when it’s trapped in your brake lines, air can result in a spongy pedal and an ineffective stopping system. (Modern braking systems also use an electronically controlled distribution block for antilock- and traction-control systems, and the blocks are sensitive to air and to degraded fluid.)
So we agree that you want to keep air out of the system, but on the off chance that a few bubbles sneak in during a project, how remove you do them from the vehicle’s brake lines? There are multiple ways to bleed a brake system, and understanding each method is important so that you can decide the best approach for your project.
Gravity
Let’s start with the easiest of all the options: Doing nothing. Well, almost nothing. The concept here is simple. By filling the master cylinder and opening the bleeder screws at each wheel, gravity will gradually force the fluid through the lines and push out the air bubbles.
This method requires the appropriate tools to catch the fluid as it drips out of the bleeders. In addition, you must ensure the reservoir for the master cylinder never runs dry. Letting it run dry reintroduces air into the system, and you’ll have to drain all the fluid and start from scratch.
What sounds like the simplest method is actually one that’s very situationally dependent. Simple brake systems like those found on early hydraulic-brake-equipped cars can possibly be finished after a gravity bleed, but more often than not, the gravity approach is just the first step of bleeding a system. One of the following processes is usually needed to finish the job.
Pump and pass

Rather than leave the dirty work to gravity alone, sometimes it’s best to make the system work for you. That means using brake pressure to push fluid through the lines. You’ve likely performed this method before: Use a friend to pump the brake pedal three to four times to build up pressure, and then tell them to hold their foot on the pedal while you open the bleeder screw at one wheel. This allows the system to burp fluid—and, hopefully, air bubbles. Close the bleeder before your helper releases the brake pedal and repeat the process until no more air bubbles exit when the bleeder screw is opened.
There are a couple of things that make this pumping method more effective than gravity bleeding. For one, the fluid moves faster, making it more likely to force out any trapped air. Then there’s the fact that building pressure in the system shrinks the air bubbles—because the air compresses—so it condenses large bubbles and speeds their evacuation.
The pump-and-pass method can help when your brake lines have multiple unions, bends, or valves. Each of those tends to allow air pockets to hang around, causing frustration if you stick with just gravity bleeding.
Check valve
The pump-and-pass method is the most popular, but it can be tiring or annoying for the person helping inside the vehicle. Luckily there is a way to eliminate the need for a helper, and it doesn’t require fancy tools.
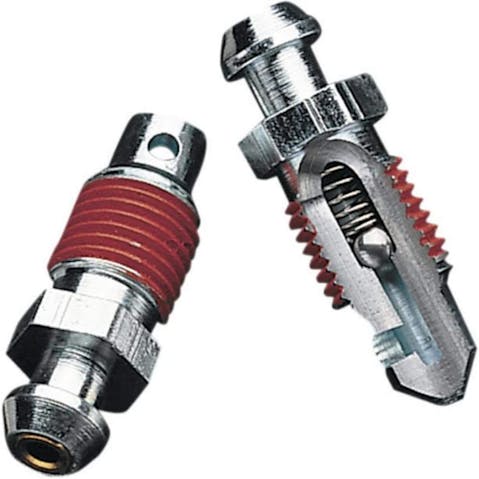
The first option is Speed Bleeders. These replace the bleeder screw at each wheel with one equipped with a small check ball and spring, making the screw a one-way valve when the check ball is loosened. Connect a hose to the bleeder, open the screw, pump the pedal until no more air is being pushed out, then tighten the bleeder and move to the next wheel. The method is pretty simple, but it does require changing out the bleeder screws.
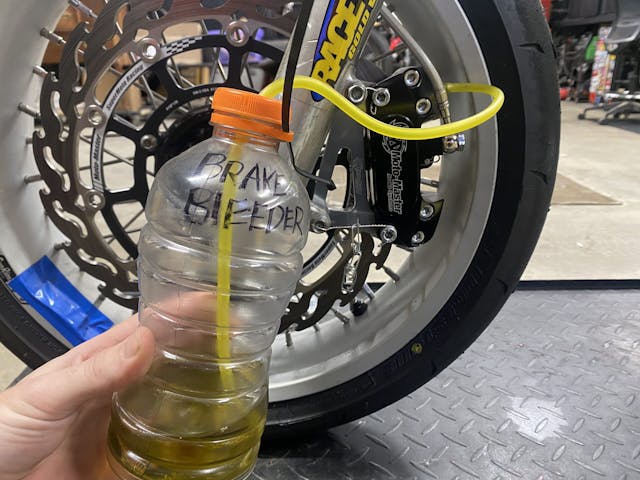
If you want to accomplish the same task without buying bleeder screws, use a simple bottle and a hose. An empty brake-fluid bottle is often best, but you can create these devices with any number of containers.
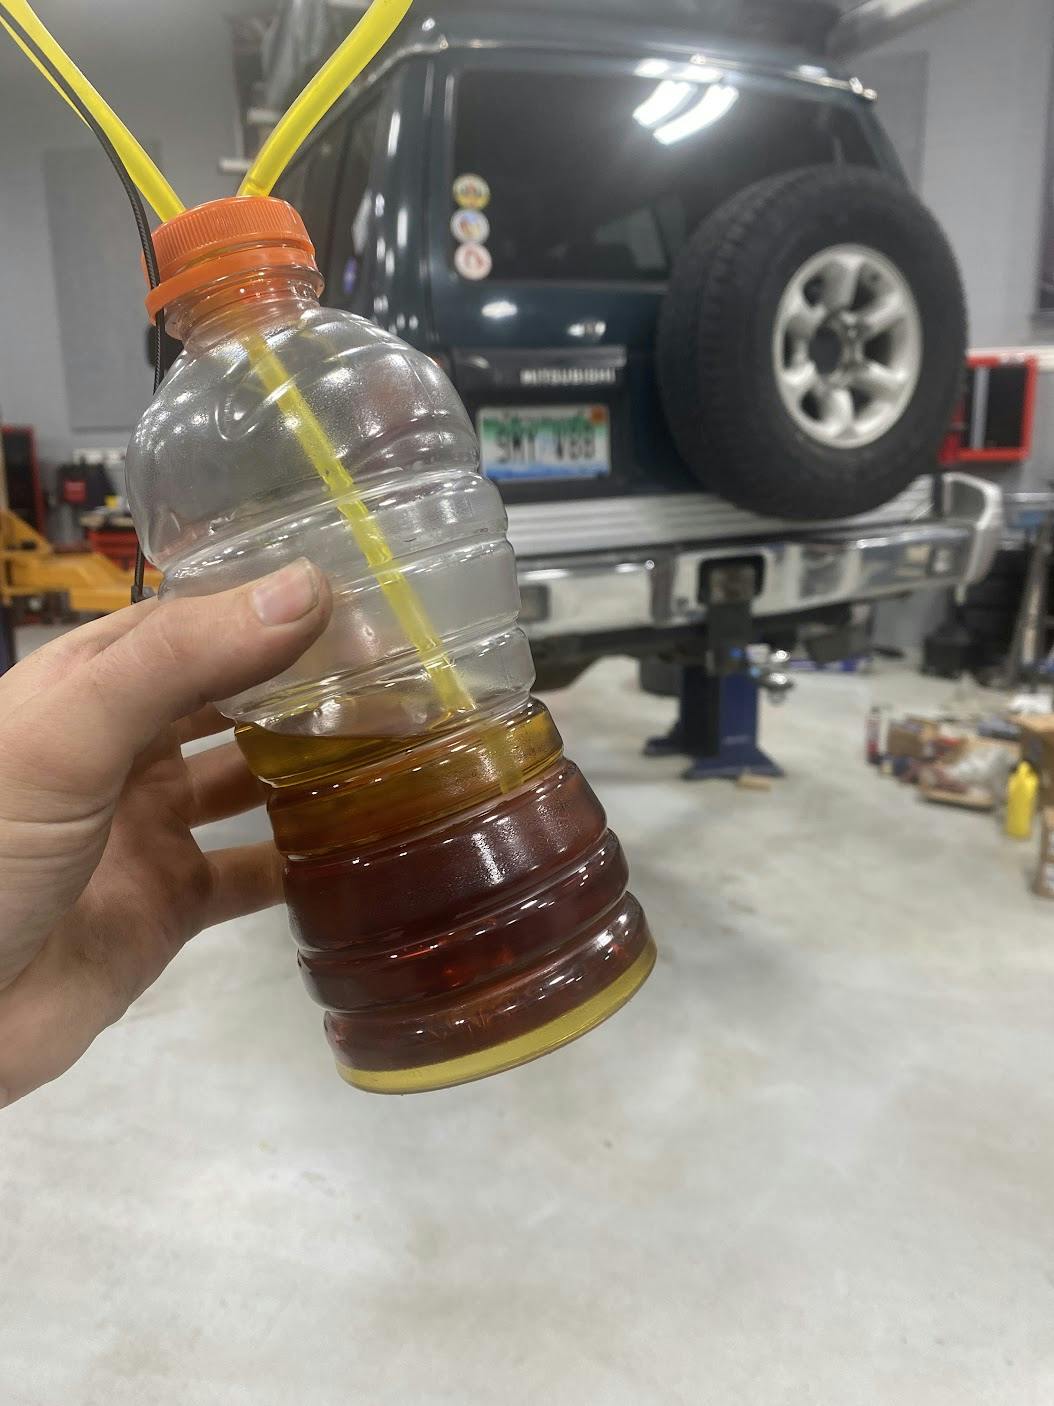
Start by pouring a small amount of clean brake fluid into the bottle, then insert a hose, making sure the end will stay submerged in the clean fluid. Then connect the loose end of the hose to the bleeder screw. Open the bleeder screw and pump the pedal slowly to push the fluid and those pesky air bubbles through the system. The bottle will slowly fill as the fluid is pushed out, and since the end of the hose is submerged, it will prevent any air from being pulled back into the brake system.
To make the process even easier, add a zip tie or piece of string to hold your new bleeding apparatus above the brake caliper or wheel cylinder, an orientation which encourages the trapped air to rise up the hose. Cut a hole in the upper part of the bottle so that air you’ve expelled from the system can also escape the bottle and not cause unwanted pressure inside that as well.
Pressure

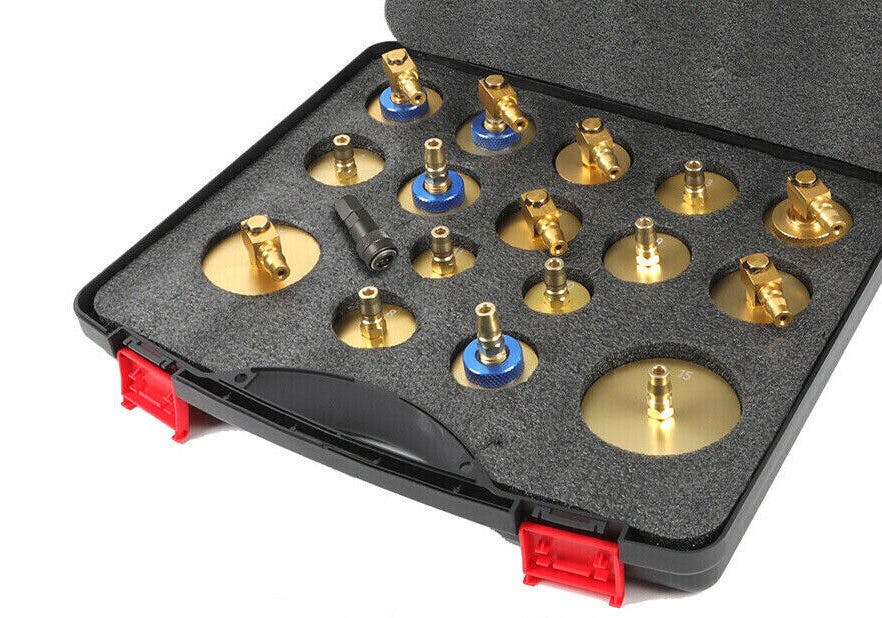
Sure, the options above are various ways to apply pressure, but they all use the brake system to create the fluid’s push. Another method uses an external tool to place pressure on the brake master cylinder without someone operating the pedal.
The system of tools pictured above creates a steady pressure that keeps air bubbles moving, preventing them from getting stuck in little pockets like proportioning valves or distribution blocks.
Using one of these makes the bleeding process easier, but it also requires extra care when setting up and when topping off the fluid during the bleeding process. Since the master-cylinder reservoir is under pressure while this system is in use, there’s a risk that the outer gasket of the tool leaks while you’re forcing pressure through the brake lines or when you take the tool off to top up the reservoir. Since most brake fluids easily strip paint, don’t take this risk lightly.
Vacuum
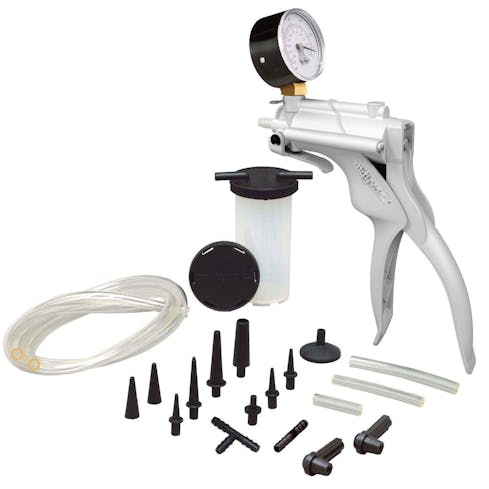
Maybe those methods are too pressurizing for you. Luckily, this option is the opposite. We are talking about negative pressure—vacuum, to be precise.
Rather than using the master cylinder to push fluid through, this vacuum tool pulls fluid through the system from the bleeder screw. Vacuum tools make quick work of bleeding a brake system that is dry, or one in which many parts have been replaced (in such a situation, you’ll need to draw fluid over a larger distance).
Products like the MityVac use a hand pump to create the vacuum, but other options are connected to a compressed-air source to pull a vacuum without the need for manual labor.
These tools can be a decent investment if you are bleeding brakes regularly, but if you’re only doing this once or twice a year, the extra effort needed for the other tool-less methods might be worth the savings.
No matter how you decide to bleed your brakes, use the proper fluid and follow the process to ensure you have safe and predictable stoppers. Have a tip? Leave a comment below.
Check out the Hagerty Media homepage so you don’t miss a single story, or better yet, bookmark it.

Try bleeding front brakes on a 1981 Yamaha Seca 750, lots of fun. Cable actuated remote mounted master cylinder on front of steering head. Hard to find quality rebuild kit and (almost)impossible to bleed all those stuck air bubbles. Pressure bled, reverse bled, etc, three friends with everything we could think of… bled and firm lever finally. Told my son to sell it if it ever needs bled again…or change to a normal handlebar mounted master cylinder.
2 items: 1. DOT 5 silicone fluid in non-ABS brakes eliminates the need ever to change brake fluid, barring leaks or hydraulic seal failures. I have had it in some (older) vehicles for decades and it does not absorb water, hurt paint, nor deteriorate like glycol-based fluids. If replacing glycol fluid, drain, then pump alcohol through the system to remove all glycol, then air dry before adding DOT 5. The two types are NOT compatible.
2. The article leaves out the best of all methods, that used routinely by aviation mechanics: fill the brake system from the bleeder valve. This pushes the bubbles up, where they want to go anyway. Start with the longest brake line, end at the shortest. You do have to first empty, then monitor the master cylinder to see that it does not overflow. A large-volume syringe (50cc) holds enough fluid and can be purchased at pharmacies. Find a transparent hose that fits over the syringe’s nipple and over the bleeder nipple.
Great information! Thanks!
I was taught to start with the furthest wheel from the master cylinder using the pump and hold method, and to do the whole system at least twice. About 50 years ago my father bought a pressure bleeder and now that is what I use. Once finished and before removing the pressure bleeder I bleed off the pressure by slightly opening fill cap on the pressure bleeder. By doing this the master cylinder is no longer under pressure and the quick disconnect can be removed without blowing brake fluid out of the master cylinder and all over everything. Before removing the quick disconnect from the master cylinder adapter wrap a rag around the hose to catch any brake fluid. I found out this after the first time of blowing brake fluid all over the place.
Per their website, no Speed Bleeders for ’79 Mercedes Benz 280SL
I concur with Roger – for older cars w/o ABS etc experience recently bleeding with a longer clearhose on the bleed screw & catch bottle up higher on a nearby step ladder this worked like a charm – without a helper. Any air bubbles continued to rise in the clear tube. If there was a small drip at the bleeder screw the setup did not allow air to sneak back into the caliper.
If it’s a new system it’s best to bench bleed the master cylinder first. Put it in a vice, connect (usually furnished soft lines to the outlets and run them into the M/C chambers beneath the fluid level and pump the M/C slowly using a screw driver placed in the plunger and slowly pump it until the bubbles clear. Then plug the ports and install the M/C on the car. Connect the lines and bleed the rest of the system starting with the farthest wheel cylinder from the M/C. If you have disc brakes don’t forget to bleed both halves of the calipers.
Using a buddy and pumping the break pedal has been my go to method but I’ve seen the vacuum methods in place and I like them a lot.
Lucky for me most of my brake work involves motorcycles with just one master cylinder and one caliper. The pump method only involves my two hands for bleeding.
However, it takes a bit more time and effort when a component is replaced. The last time I replaced a master cylinder I used a vacuum pump to start bleeding. Then I pumped the lever and zip tied it to the handlebar over night. Sort of the reverse gravity method, this allows all those hidden air pockets to migrate up and out.
One thing people aren’t told is fluid should be changed on older cars. I was descending a winding mountain road in Bryce canyon, Utah, with a small vacation trailer in tow. When I pumped the brakes on the vintage Olds 88 they went to the floor. Old E brakes are a joke. I shifted in to low and prayed no one would be in front. Brake fluid has an affinity for water. The wheel cylinders were pitted from the moisture accrued over time. They chose that time to become empty. Topping up the fluid in a humid clime, over decades, can allow the moisture to become one with the fluid. I learned the hard way.
If the man power is available, I like the pump and bleed method best but if there’s no help, a pressure bleed works nicely, then follow up with the pump, hold, bleed. Gravity works but it’s just too slow. The check valves are nice but never used them. Worth a look though. Vacuum bleed sucks some air through the loose bleeder threads and makes it appear that the air is never removed – pass, but it does work on some units where the bleeder is on the bottom of the slave/caliper (motorcycles). Assuming you have a cap for the master, a pressure bleeder can be home made for about 15 bucks using a 1/2 gallon garden sprayer and a couple fittings. If you need to see the pressure just use a T-fitting on the hose and stick your old fuel pressure gauge on it. I don’t feed the fluid from the pressure tank, I ‘d rather fill it manually.
“…how remove you do them…”??? I’m glad I’m not the only who types humanly.
Also, I was taught to start with furthest away from M/C and work towards the the M/C to make sure you get the dirt and water out of lines. BUT you MUST keep the reservoir filled. If it empties at all during the process, you introduce air into the system. If you get any air into it, you have to the furthest away again. If you just need to be concerned with air, and not dirt and water, then work closest-to-furthest. But always make sure the reservoir doesn’t completely drain.
Good article!
I use a pen size brake fluid tester to test conductivity. It shows 0-5% water. A handy tool. The fluid in reservoirs always seem to be worse.
I use a non-return brake bleeder on each nipple farthest corner first. I start by emptying the reservoir of old fluid.
After a bad experience- finding the 5L can of Comma DOT4 that I’d just bought from Halfords was bad (over 5% water), I always test the new fluid before refilling the reservoir.
The important thing is to visually inspect all the pipes afterwards. Working the pedal or any method can provoke a split in an old line and it is better you see it before you feel it.
Some good comments. I’ve tried all the processes. They ALL have limitations and require some common sense. If a brake system is all new (during a restoration) then you have to get most of the air out, or the “pedal pump and bleed” won’t work as too much air compresses and little fluid is moved. If most of the lines run down hill from the master cylinder, then using gravity can get most of the air out, but often there is an up and down bend that causes that not to work.
Pressure pump on the master cylinder — too often the tops leak, or even worse fluid goes out the back of the master cylinder rear seal and INTO THE INTERIOR of the car if the pressure is too great.
Vacuum at the wheel cylinders – Air is pulled around the bleeder valve threads so it is difficult to tell when all the air is out of the system. A resupply bottle at the master cylinder is a good idea so you don’t run the system dry by accident.
Speed bleeders —- These work IF the sealant on the bleeder threads is good, other wise they let air back in. New speed bleeders AND a vacuum pull at the wheel cylinders is a good combo. If the system is dry, then a hand pump vacuum unit won’t work well. Once you stop any air in the system migrates back up to the highest point in the line. Keep a constant vacuum going until the fluid is without bubbles (power vacuum bleeders are sold).
Bench bleeding the master cylinder —- If a master cylinder goes dry (or is new) and because some master cylinders are mounted at angle, air gets trapped in them past the ports. No amount of fluid through them will get the trapped air out unless you level the MC. Mount the MC on the bench and use a kit made to route fluid from the outlet(s) to the reservoir while you push the plunger in with the master cylinder mounted on the bench. I usually start level, then with one, then the other end elevated some. NOTE: DO NOT PUSH THE PLUNGER IN TOO FAR OR YOU WILL DAMAGE THE SEAL! This is why some manufactures state “DO NOT BENCH BLEED”.
After bleeding the brakes on our Anson Formula Super Vee, my wife and I headed for the track.
First session, the brakes were spongy, so time to bleed again, opening fresh cans of fluid, and my usual method….still spongy, with nothing done that might have caused it…no leaks. So, during the third, and final bleed before the race, I happened to look up at my wife, as she came out of the trailer with a new can….shaking it violently!…a great way to install tiny bubbles (Don Ho “tiny bubbles, in the line…).
my least favorite job !!