5 sure-fire tips to improve your motorsport photography
Like that first time driving on a road course with three pedals and a shifter, operating a camera on fully manual settings is often highly intimidating for the novice. That’s doubly true at the race track, where fast-moving action can be overwhelming. Standing trackside means maintaining control over the sensory overload of noise, vibrations, and puffs of dust or tire smoke.
For starters, you’re wrestling with fatigue before you even flip the switch on your camera. There’s travel, credentials, safety gear, the disparity in permitted shooting locations from track to track—it’s a lot of energy to invest in opportunities that zip by your lens at speed. It might be tempting to simply rely on an automatic setting, but I’d encourage you to resist that urge. While the manual setting requires a bit of extra care, the ceiling for great results is much higher. Knowing how to individually adjust ISO, shutter speed, and aperture on the fly means you can quickly react to changing demands in the field. It’s a lot of dials and buttons, but knowing how settings affect one another and contribute to the final image is the real trick.
There’s nothing quite like capturing the power of a racing moment in a photo, but it takes a lot of work to line up that perfect moment. I’ve prepared a list of five action shots that you can add to your arsenal—ranked from beginner to most difficult. Think of it as a creative safety net for when you get flustered.
Once you get familiar with the mental and physical demands for these types of shots, it will become an unconscious part of your cognitive process—much like a guitar player can belt a tune while simultaneously strumming. When you know how to make your camera do what you want it to, there’s a lot more mental real estate for dialing in composition, lighting, and other variables.
For the sake of this tutorial make sure you are in your camera’s manual mode, with your preferred auto-focus setting. (I prefer AI Servo on my Canon 1DX as it continuously works to focus on the car as it moves.) Also, make sure your camera’s frames-per-second (FPS) setting is at its highest velocity. This will allow you to take a machine-gun style burst and hopefully catch your subject at its most dramatic. (The only drawback is the amount wading required to get through all the duds.)
Let’s begin.
Head-On
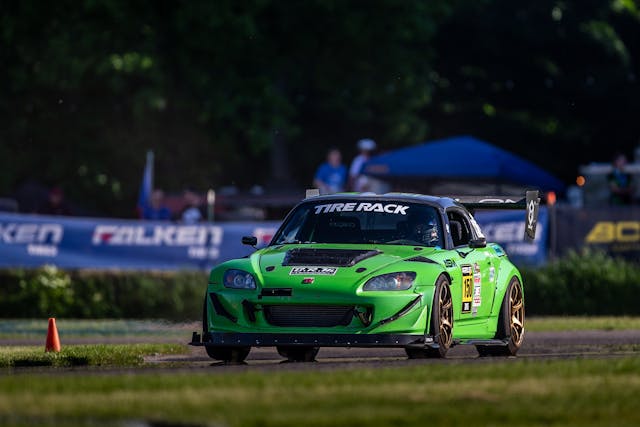
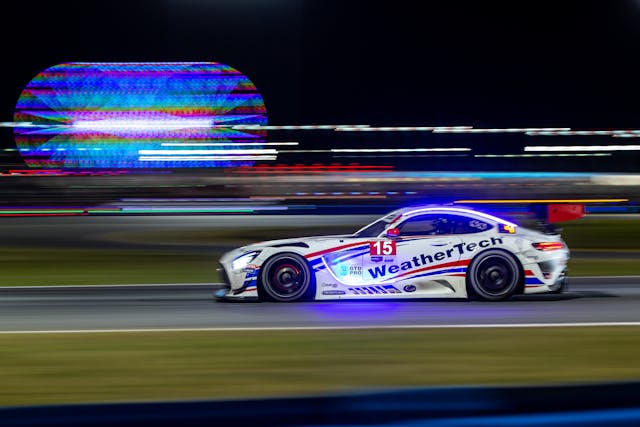
The head-on shot is arguably the easiest out there. Find a corner or straight where the car is coming right at you and fire away. (Whether you chose to backlight the car with sun or have the sun at your back is a matter of personal preference.) To capture the car, crisp and clear, use a shutter of 1/1000 or quicker. Since the car’s wheels are barely visible, the fact that they appear motionless is less important. If it’s bright outside, make your shutter quicker to decrease exposure. Leave your aperture wide open—the smallest-number f-stop.
The key here is to be using a longer lens, preferably a telephoto, with a fast (big) aperture so that we can separate the car from the background. Motorsport photography’s do-all lens, the 70-200 mm F2.8, works well in this instance.
With the 2.8 aperture, we can even shoot through catch fences and other obstructions. At the Rolex 24, for example, I’ve seen plenty of fans achieve the same image as a credentialed photographer because they shot “through the fence.”
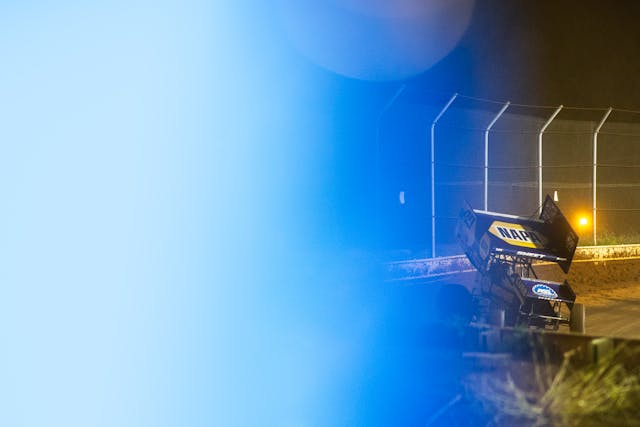
Once you get the hang of this head-on shot, experiment by putting different objects in the foreground or by changing where the car is in frame. For the shot above, I shot through the wire fence with an 85mm lens at F1.8. The blue fade is the edge of an energy drink sign that was attached the fence. If you look closely, you’ll see a bit of grain in the image. Since I was shooting in low light, I increased my ISO (which affects the image texture) so that I could still use a fairly quick shutter to capture the car head-on.
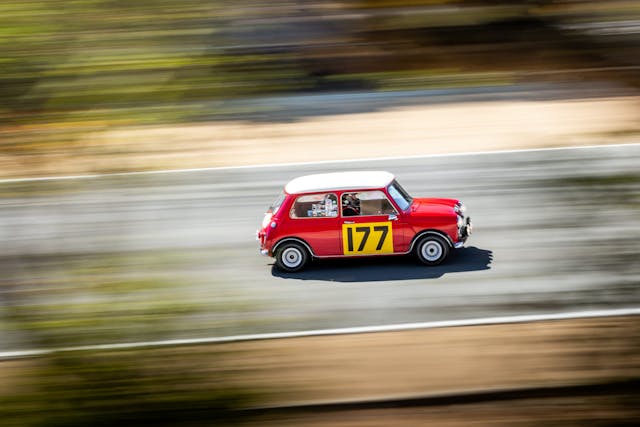
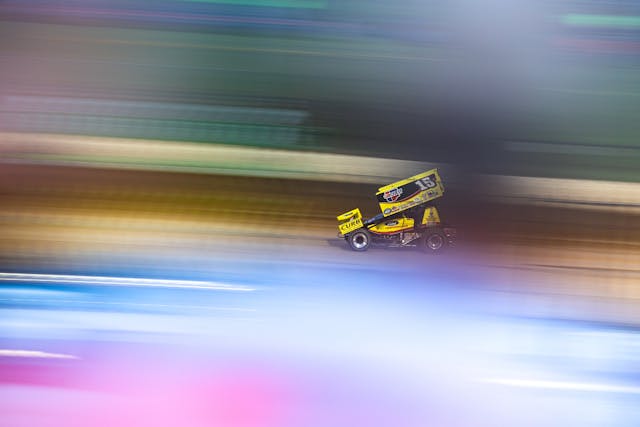
Panning
Panning seems simple on paper, but in reality it’s a technique packed with nuance. First, pick a shutter speed of 1/125 second or slower. Then, increase aperture until the image is properly exposed. (Keep ISO at 100, unless you’re shooting in low light.)
The most critical element of panning has nothing to do with the camera and everything to do with your feet. Where you stand is essential. The farther back that you can be from your speedy subject, the better (providing you want to achieve a shot that’s crisp bumper-to-bumper). By standing further away, you can properly swing your camera with the car as it travels. Smooth and slow. If you get too close your swing will be too quick and highly inaccurate. Also, for beginners, try to pick a spot inside the apex of a corner, at least 20 yards away. There, the car better matches the trajectory of your lens as you rotate.
Now that you have your spot, get comfortable and take a couple practice swings. Did that feel natural? Do you have a firm footing? I prefer to keep my feet at least a foot-and-a-half apart with my toes slightly pointing to where the car is going. This allows me to unwind as I move with the car.
In my experience, it’s best to choose a singular focus point for this exercise, rather than brackets or whole frame. When the car enters the frame, settle on a spot, whether it be the door or the front wheel, and try to keep the focus point consistent. (I prefer the A-pillar, for whatever reason.) Then fire away.
With each repetition, preview your image in the camera. If you didn’t get any “keepers,” either try again or go a little bit quicker with the shutter. If you’re getting plenty of crisp shots, I encourage you to go lower on the shutter speed (remember to increase your aperture to compensate for the longer shutter).
It’s also a wise idea to use in-camera or lens stabilization. This will help compensate—albeit nominally—for any small irregular movements in your panning motion.
Remember to play with different lenses, too. Panning with wider lens—or even on the outside of a corner—will yield drastically different results.
A fun challenge: try connecting the tire’s sidewall lettering in your pans. The shutter speed at which you’re able to achieve this will depend on the car’s actual speed. For example, in sprint cars, its consistently a 1/50-second shutter that turns Hoosier into a solid, white ring.
Panning through objects
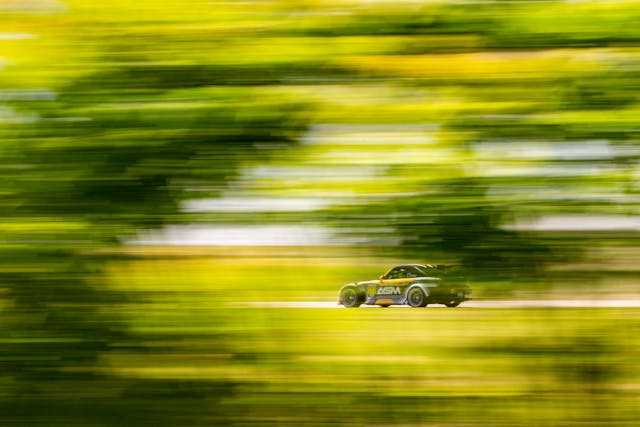
Once you have your panning shots dialed, you can start placing objects between you and your subject. As you swing your lens, the static foreground components will turn into long trails.
While you can use your autofocus to pick up the car through the obstructions (some newer cameras are really good at this), I prefer the old-school manual focus method.
First, find your position behind something where you can see the car intermittently. Greenery, fans, and fences work quite well. The big difference between this technique and straightforward panning, is the shutter speed. I’ve had the best luck with anything slower than 1/15 second shutter. This allows the obscuring object to better “break apart” into something unrecognizable. These pans take time. Stick with it, and experiment with autofocus and manual focus.
Life hack: try this type of shot at the beginning of the race or session. As cars tootle around during the pace laps, use auto-focus to “pre-focus” your lens to the correct focal point. Then, switch your lens to manual. Next time the cars come around at full honk, they will be in focus.
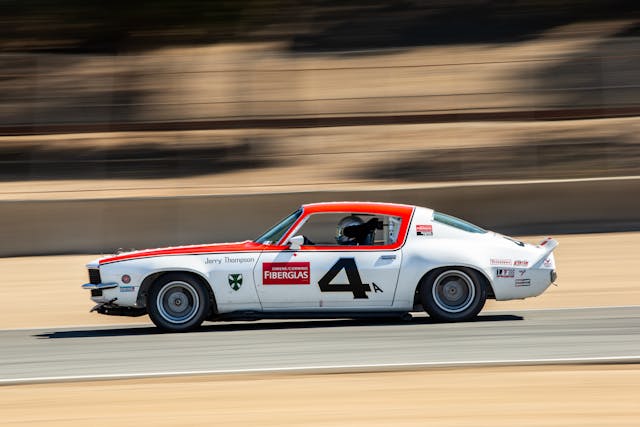
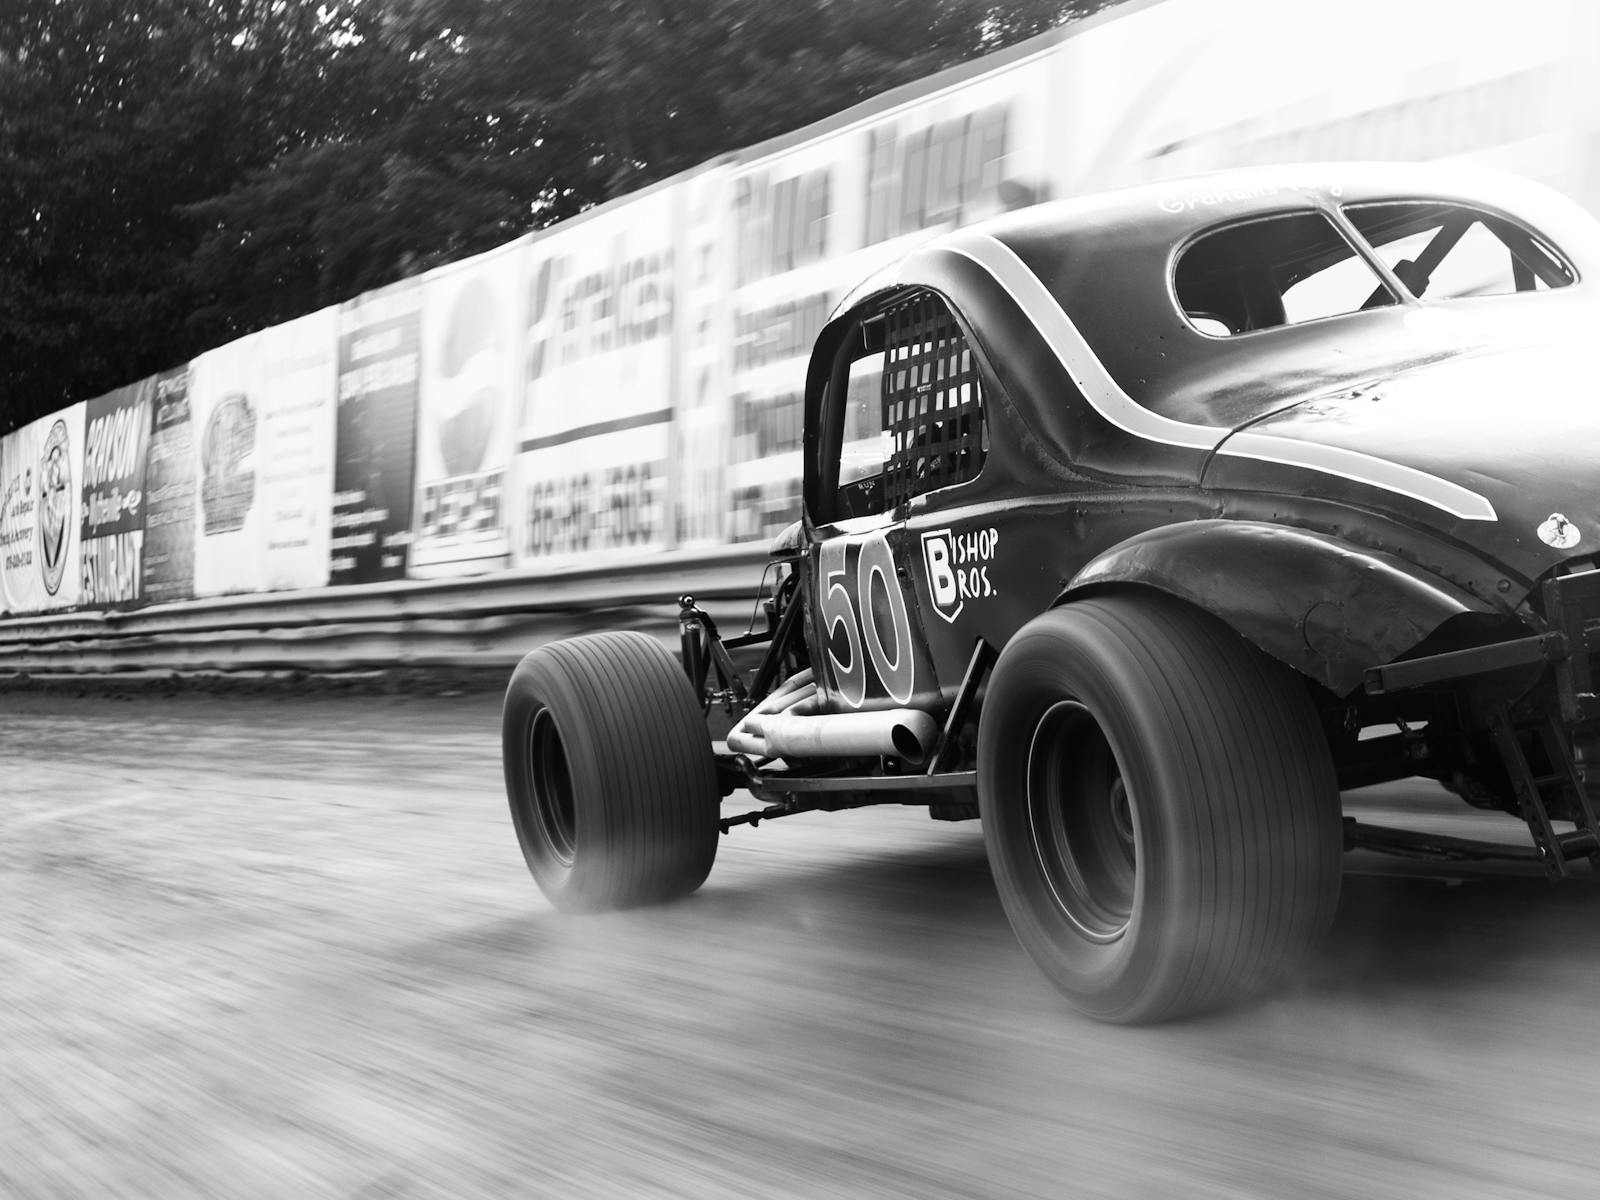
Twist Pan
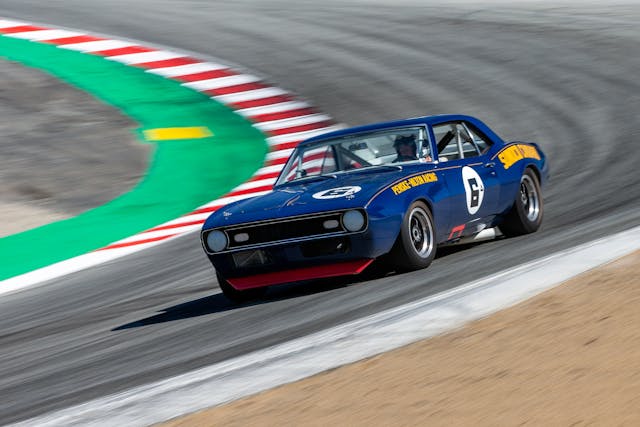
Once you’ve graduated from basic panning, you are ready to try the twist pan. (I’m not even sure that’s the official name, but that’s what I call it.) You’ll need a zoom lens for this type of shot.
Basically, you stand where you would for a pan. Rather than waiting for the car to pass you, start shooting while it’s approaching you.
At this a diagonal angle, you will twist the zoom from its longest reach to its shortest. For the shot above, I started at 200 mm and twisted as the car approached me to 70 mm. While I’m twisting the lens, I’m also panning with the car and trying to keep a singular focus point on the same part of the vehicle. For these shots, I try to remain focused on the closest headlight.
As far as shutter speeds, I’ve had the most success between 1/40 and 1/15 second.
This is one of my favorite shots because the streaks in pavement have a vanishing point.
Twist Pan (Away)
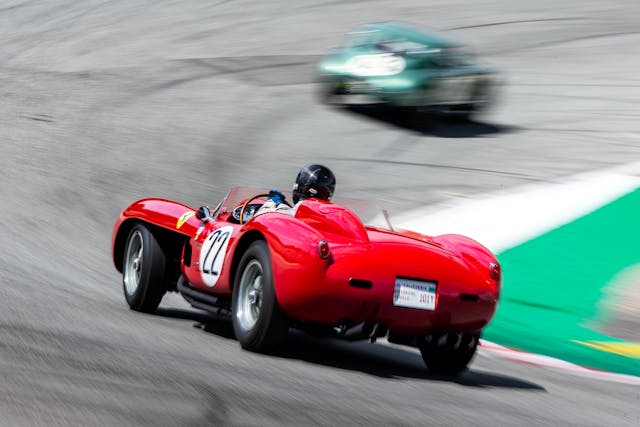
The inverse of the twist pan is arguably the most difficult action shot because it’s a truly awkward maneuver to zoom in on the car as it darts away. Use a similar shutter speed and position as the other twist pan method.
The best thing with this shot—and every other one listed—is practice. Repetition is key. Seeing yourself improve with each attempt is truly rewarding.
Check out the Hagerty Media homepage so you don’t miss a single story, or better yet, bookmark it.
Phenomenal stuff. I will have to give twist-pans a try!
Great Article!
Good slow-shutter pan is SO HARD to get right. Huge admiration for photogs who produce high quality images like Cameron. Been there, biffed about 98% of my images.
Twist pan!!! Cameron, when (if) I grow up, I want to be just like you!!!
I love your pictures, but don’t tell people to go full manual than suggest which auto focus and multi-exposure drive speed to use. Full manual is full manual.
The rest of the advice is great but to simplify things for novices, I typically tell them to shoot on aperture priority or shutter speed priority and let the camera set the rest. Shooting action with manual shutter speed set slow is counter-intuitive, but makes for a much better sense of speed. I usually suggest someone pan to blur the background, then the next lap shoot locked onto one spot to blur the car.
I am in awe of your ability to zoom pan and get crisp shots. That takes a lot of practice.
Take a ton of pictures. Only way to improve on the tips and techniques you learn.